|
|
PBP Commentary |
Coming up we have a light heavyweight MMA rules bout between Jerome Browning (ranked 88 p4p, 828 weight class) and Orville Dudpops (ranked 12 p4p, 107 weight class). Both fighters will be looking to make this an exciting fight for the fans, I'm sure!
 |
|
 |
| 190 cm
26
211
13 - 3 - 0 |
|
184 cm
20
218
7 - 4 - 0 |
Good wrestling
Basic striking
Very strong |
|
Decent wrestler
Excellent boxer
Good gas tank |
|
| |
|
Ladies and gentlemen. This fight is 5 rounds, for the light heavyweight championship of the world!
Introducing the champion to my left, fighting out of the red corner.
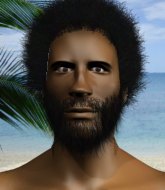
With a record of 13 - 3 - 0, fighting out of The Island, Jerome Browning!
And introducing the challenger to my right, fighting out of the blue corner.
With a record of 7 - 4 - 0, fighting out of The Island, Orville Dudpops!
The judges for this bout are Michael Johnstone, David Hoff and Santiago Holmes.

The bell rings for round one and we are underway!
Browning slips a straight right by Dudpops.
Browning on the wrong end of a vicious looking body shot.
Browning with a poor takedown
and Dudpops counters with a nice body shot.

Dudpops has managed to clinch.
Dudpops gets through Browning's defenses to land a nice punch to the side of the head.
Browning fails to land with a short punch on the inside.
Dudpops lands a body shot in the clinch.

Dudpops escapes the clinch and we're back to striking.
Browning shoots in for a takedown. He's persisting with it as Dudpops sprawls well. Dudpops wins this battle and keeps the fight standing. Browning gets slowly back to his feet.
We've had a slow start to the round here - hopefully the action picks up.
Dudpops thuds a left hand into Browning's body.
Nice sprawl there from Dudpops as Browning shoots in.
That's three failed takedown attempts in the round for Jerome Browning. That's going to take a lot out of him.
Nice shot by Dudpops.

That's one minute gone in the round.
Browning tries for a takedown but Dudpops circles away easily
and Dudpops counters into the clinch. Nicely done.
Browning is looking to take this one to the mat.
Dudpops looks more muscular than last time we saw him. He must have been on the weights.
Dudpops manages to break the clinch.
Browning shoots in looking for a double leg takedown. Dudpops defends it nicely.
Browning uses good head movement to avoid the hook from Dudpops.
Dudpops throws a right hand that misses

so Browning counters with a double leg into guard. Good agility.
The ref warns both fighters not to hold the cage as they work up against the meshing.
A big thud reverberates around the arena there as Browning accidentally thumps the mat. Hopefully he's not broken his hand.
Dudpops utilising some decent striking defenses from the guard, preventing the ground and pound.
Browning has been looking to land a fair amount of strikes on the ground. He might be looking to soften his opponent up in order to work for a submission.
Browning is looking to work some ground and pound but Dudpops has wrist control.
Browning stays in close to Dudpops's body and controls the position.
Browning working from the guard for now, landing some ground and pound.
Browning wants to control from the top but Dudpops keeps moving.

That's two minutes gone in the round.
Browning is working Dudpops over from the guard. He should look to pass the guard and do a little more damage with these strikes.
Browning looks to be in better condition than last time we saw him fight. Obviously he's been working hard on his cardio.
Browning throwing elbows and punches but not connecting, as Dudpops works some decent striking defense from the bottom.
Dudpops is trying to stand up but he's not managed so far.
Browning landing some decent shots from guard.
Dudpops utilising some decent striking defenses from the guard, preventing the ground and pound.
Dudpops keeping moving, preventing Browning from controlling successfully.
The fighters are pressed up against the cage, both looking to find a bit of space to work.
Browning loading up with the ground and pound but he's missing more than he's landing in this flurry.
Browning loading up with the ground and pound but he's missing more than he's landing in this flurry.
The crowd cheering loudly, showing their appreciation for the quality fight we're seeing here.
Dudpops keeping moving, preventing Browning from controlling successfully.
Browning with a flurry of punches that miss.

That's three minutes gone in the round.
Browning controls the pace of the fight for a moment.
A big thud reverberates around the arena there as Browning accidentally thumps the mat. Hopefully he's not broken his hand.
Browning trying to land body shots but he keeps hitting the mat.
Browning trying to control but Dudpops is working from the bottom.
Dudpops wants to stand and escape but Browning is having none of it.

The referee has decided to stand the fighters back up, so we'll restart on the feet.
A jab from Dudpops misses.
Browning shoots in for a takedown. He's persisting with it as Dudpops sprawls well. Dudpops wins this battle and keeps the fight standing. Browning gets slowly back to his feet.
Dudpops now looks to counter with a shot at the body.
Jerome Browning seems to be the more aggressive standup fighter in this bout.
Browning avoids the body shot from Dudpops.
Dudpops throws a hook to the side of Browning's head but Browning sees it coming and ducks under it beautifully.
Browning shoots in looking for a takedown. Dudpops tries to sprawl out of it but Browning keeps driving through. The fighters are pinned against the cage. Dudpops manages to get underhooks and after a bit of a struggle, circles away and we're back to standing.

That's four minutes gone in the round.
Browning is trying hard to land a takedown here. Dudpops sprawls well and keeps this one on the feet.
Dudpops lunges at Browning with a hook that half lands and is half blocked by Browning's hand.
Browning looks shocked there as he takes a right hand to the temple.
Dudpops scores to the head and body with a nice combination!
Browning shoots in for a takedown but Dudpops shows good takedown defense.
Dudpops waving his hands out in front of him, looking to distract Browning.
Dudpops misses with a body shot.
Dudpops keeps the fight standing with a nice sprawl.
Fantastic stuff here - a very entertaining period of action, which has drawn cheers from the crowd.
Dudpops with a hook.
Browning fails with the takedown.
A slow jab from Dudpops misses its intended target.
And that is the end of the round. The fighters go back to their corners.
Orville Dudpops dominated that round.
That's time! Back to the action!

No luck with that takedown attempt from Browning.
Browning fails with a takedown attempt.
Browning closes the distance, clinches up and gets a nice trip takedown into side control. Very smooth.
Dudpops dodges the ground and pound from Browning.
We get told so often about how wrestlers don't like to be on their backs. Let's see if Dudpops can do anything to dispel that myth.
Dudpops wants to get back to his feet but Browning drags him back down.
Browning with the ground and pound but Dudpops regains half guard under the barage of strikes.
Browning wants to lay and pray for a moment but Dudpops keeps working.
We've had a slow start to the round here - hopefully the action picks up.
Dudpops is looking to escape.
Nice strikes from Browning there.
Browning missing with the ground and pound from half guard.
Dudpops blocking the ground and pound attempt from Browning.
That's one minute gone in the round.
Browning sitting in half guard, looking to land shots. Dudpops defending well though.
Dudpops really doesn't want to stay on the ground with Browning. If he can't get it back to his feet, it's only a matter of time before he'll be tapping out.
Browning prevents Dudpops from standing back up.
Browning not throwing his punches with enough precision this time.
Nice strikes from Browning there.
Dudpops is trying to stand.
Browning throwing shots but they're hitting the canvas more than the man.
Browning working the head and body with strikes.
Browning thumps the canvas. Not on purpose obviously - he just missed Dudpops's head.
Browning sitting in half guard, looking to land shots. Dudpops defending well though.
Browning is nestled in close to Dudpops, controlling him well. He's worked in a nice elbow to the side of the head as well, for good measure.
Browning is trying to control. Dudpops wants to improve his position but can't escape this time.
Browning misses with a head shot. Dudpops uses the momentum to regain guard.
Browning in full guard, throwing the ground and pound. No damage this time.
That's two minutes gone in the round.
Browning won't allow Dudpops to get back to his feet.
Dudpops avoiding any damage from the ground and pound.
Dudpops avoiding any damage from the ground and pound.
Browning with a couple of shots to the head there. Not particularly brutal.
Browning wants to pass the guard but Dudpops is keeping the position.
Browning postures up to throw the ground and pound strikes but they don't connect.
Browning trying to control but Dudpops is working from the bottom.
Dudpops is looking to stand up but Browning isn't so interested in that idea.
The referee must be thinking about standing these guys back up.
That's three minutes gone in the round.
Browning postures up to throw the ground and pound strikes but they don't connect.
Browning works over Dudpops with some ground and pound from guard.
Dudpops is looking to stand up but Browning isn't so interested in that idea.
Browning postures up in Dudpops's guard and throws a big left but Dudpops blocks it.
Browning loading up with the ground and pound but he's missing more than he's landing in this flurry.
Browning throwing elbows and punches but not connecting, as Dudpops works some decent striking defense from the bottom.
Browning throws a big elbow that misses.
Dudpops is trying to stand up but he's not managed so far.
The referee has motioned to the fighters to stand back up.
Browning shoots in for a double leg but Dudpops sprawls well. That's going to sap some energy.
Dudpops is clearly trying to counter these attacks from Browning with a body shot.
That's three failed takedown attempts in the round for Jerome Browning. That's going to take a lot out of him.
Browning goes for a double leg but Dudpops avoids the attempt and the two fighters end up clinched against the cage as Dudpops continues to drive forward.
Browning wants a takedown but no success here.
Dudpops pushes Browning back against the cage and lands a hook to the side of the head.
Dudpops breaks the clinch and we're back to striking at distance.
Browning avoids the body shot from Dudpops.
That's four minutes gone in the round.
Browning shoots in for a takedown. He's persisting with it as Dudpops sprawls well. Dudpops wins this battle and keeps the fight standing. Browning gets slowly back to his feet.
Nice sprawl there from Dudpops as Browning shoots in.
Browning fakes high and shoots in for a takedown but Dudpops avoids it really well and circles away.
Dudpops throws a body shot but no joy.
Browning drops down looking for a counter takedown but Dudpops sprawls and moves away.
Dudpops missing with a left hand there. Browning was out of range so wasted energy throwing that one.
Dudpops stuffs a takedown. It's all about dictating where the fight takes place and Dudpops wants it to stay on the feet.
The crowd thankful this round is nearly over.
A telegraphed right hand from Dudpops misses the target.
Browning drops down looking for a counter takedown but Dudpops sprawls and moves away.
Browning tries for a takedown but Dudpops sees it coming a mile off and avoids it easily.
Browning shoots in and drives through. Dudpops sprawls well.
Dudpops appears to be waiting to throw a counter punch to the body.
Dudpops has been the more effective fighter overall so far.
Browning walks into a straight right hand from Dudpops.
And that is the end of the round. The fighters go back to their corners.
That was a close second round but I would say that Jerome Browning will probably get the nod.
OK. That's time! The bell goes and we're back to the action.

Browning shoots in for a takedown but Dudpops shows good takedown defense.
Browning looks frustrated there after his takedown attempt is stuffed easily.
A left lands for Dudpops.
Dudpops scores with a nice right hand.
Browning shoots for a double leg takedown but Dudpops sprawls well. He's pushed Browning's face into the mat and manages to get back to his feet relatively easily.
That's three failed takedown attempts in the round for Jerome Browning. That's going to take a lot out of him.
Browning goes for a double leg but Dudpops avoids the attempt and the two fighters end up clinched against the cage as Dudpops continues to drive forward.
Browning is working for takedown but Dudpops is calmly controlling the position for now.
Browning has dropped down and is looking to force the takedown but it's defended by Dudpops after a bit of a struggle.
We've had a slow start to the round here - hopefully the action picks up.
Dudpops breaks from the clinch.
Browning on the wrong end of an overhand right that came out of nowhere.
Browning throws a looping left and ducks down for a takedown. He's got his arms around Dudpops's waist but Dudpops gets an underhook and avoids the takedown by throwing Browning off to one side.
Both fighters are breathing heavily.
Dudpops tries to land with a swinging hook to the body but Browning was well out of range. Poor timing from Dudpops.
Browning shoots in and scores a nice double leg takedown into half guard.
That's one minute gone in the round.
Browning working over Dudpops with some ground and pound. Dudpops looks like he wants out of this position, which is understandable.
Dudpops is trying to stand up here but Browning is controlling him well.
Dudpops avoiding damage under a succession of punches from Browning.
Browning is trying to control. Dudpops wants to improve his position but can't escape this time.
Dudpops is looking to escape.

Dudpops pushes Browning off and gets back to his feet.
Orville Dudpops seems to be getting the better of the standup.
Dudpops swings wildly with a couple of big hooks
and Browning counters with a nice double leg into guard.
Dudpops wants to stand but Browning is controlling the position.
Browning lands a couple of decent looking shots.
Browning scores with a decent looking elbow strike.
That's two minutes gone in the round.
Browning with a couple of shots to the head there. Not particularly brutal.
Browning is looking to work some ground and pound but Dudpops has wrist control.
Browning trying to land body shots but he keeps hitting the mat.
Browning landing some decent shots from guard.
Browning throwing strikes but missing.
Dudpops is trying to stand up but he's not managed so far.
Browning missing there with some ground and pound from the guard.
The fans in attendance giving it up for the two fighters, who have really let it all hang out in the last minute or so!
Browning is sitting in guard, working some ground and pound.
Dudpops wants to get back to his feet but Browning is in a dominant position and won't allow it.
Jerome Browning overall seems to be getting the better of the ground position in the fight so far.
Browning throws a big elbow that misses.
That's three minutes gone in the round.
Dudpops utilising some decent striking defenses from the guard, preventing the ground and pound.
Dudpops wants to stand up but Browning is controlling him.
Browning tries to free his leg and advance position but Dudpops is retaining full guard.
Browning cracks Dudpops with a solid left hand.
Browning postures up in Dudpops's guard and throws a big left but Dudpops blocks it.
Browning postures up to throw the ground and pound strikes but they don't connect.
Browning throwing elbows and punches but not connecting, as Dudpops works some decent striking defense from the bottom.
Browning is looking to work some ground and pound but Dudpops has wrist control.
Browning throwing shots from guard but he's hitting more mat than opponent.
Dudpops wants to get back to his feet but Browning is in a dominant position and won't allow it.
The referee has motioned to the fighters to stand back up.
Dudpops stuffs a takedown. It's all about dictating where the fight takes place and Dudpops wants it to stay on the feet.
Dudpops jabbing away but nothing is landing.
Dudpops misses the jab.
That's four minutes gone in the round.
Browning with a poor takedown
and Dudpops cracks him with a counter punch right on the button.
Orville Dudpops is looking to keep the fight on the feet at all costs.
Browning shoots in for a takedown but Dudpops shows good takedown defense.
Nice takedown defense from Dudpops. No joy for Browning on that attempt.
Dudpops unleashes a big counter combination but Browning bobs and weaves and avoids any damage.
Browning shoots in from a long way out. He's driving through with the takedown attempt and he eventually gets it, landing in Dudpops's guard.
Dudpops is looking to get back to his feet but can't, whilst Browning is controlling him.
Browning with a flurry of punches that miss.
Dudpops has his feet on Browning's hips. He pushes off and gets to his feet. Nice work.
The crowd cheering loudly, showing their appreciation for the quality fight we're seeing here.
Browning tries for a takedown but Dudpops sees it coming a mile off and avoids it easily.
Dudpops misses with a straight left.
Browning shoots in for a takedown. He's persisting with it as Dudpops sprawls well. Dudpops wins this battle and keeps the fight standing. Browning gets slowly back to his feet.
And that is the end of the round. The fighters go back to their corners.
Orville Dudpops really dominated that round.
The referee calls time. The cornermen exit stage left and we're back to business.

Browning shoots in for a takedown. "I don't think so" says Dudpops as he avoids it easily.
Browning misses with a takedown
and Dudpops connects with a straight left hand counter down the middle.
Browning fails with the takedown.
That's three failed takedown attempts in the round for Jerome Browning. That's going to take a lot out of him.
Browning shoots and misses
and Dudpops counters with a crisp hook to the side of the head.
Browning ducks right into an uppercut from Dudpops.
Dudpops fails to land with the punch combination there - jab, cross, hook, miss, miss, miss.
Browning fails with a rather predictable takedown attempt.
Dudpops now looks to counter with a shot at the body.
We've had a slow start to the round here - hopefully the action picks up.
Dudpops throws an ugly left hook that misses
and Browning counters with a nice double leg into guard.
Browning throwing strikes but missing.
Browning missing there with some ground and pound from the guard.
That's one minute gone in the round.
Dudpops wants to get back to his feet but Browning is in a dominant position and won't allow it.
Dudpops is using up a lot of energy trying to get back to his feet. Perhaps he should improve his position first.
We may be looking at a referee standup if the pace doesn't pick up soon.
Browning throwing strikes from guard but Dudpops blocks nicely.
Browning stands up and looks to throw the legs aside to pass to side control. Dudpops swivels though and keeps the full guard.
The ref stands the fighters back up due to a lack of activity.
Dudpops connects with a hook to the side of his opponent's head.
Browning changes levels and looks for a double leg takedown. Dudpops tries to avoid it but Browning manages to keep hold of a leg and drag Dudpops to the ground. Dudpops escapes though and pops straight back up to his feet.
That's two minutes gone in the round.
A few boos can be heard. I'm sure they will multiply if the fighters don't pick up the pace.
No luck with that takedown attempt from Browning.
A countering left hand to the body from Dudpops misses.
Dudpops getting the better of the striking in that exchange.
Dudpops throws a hook to the side of Browning's head but Browning sees it coming and ducks under it beautifully.
Browning showing good head movement there, avoiding the strikes from Dudpops.
Browning shoots in but Dudpops avoids the takedown attempt easily.
Dudpops lands a nice hook to Browning's body. Browning takes it in his stride and looks to land his own strikes.
Browning takes one to the side of the head.
Browning shoots in but Dudpops avoids the takedown attempt easily.
And an attempted straight right on the counter from Dudpops! But no joy.
That's three minutes gone in the round.
Browning shoots and misses
and Dudpops counters with a crisp hook to the side of the head.
Browning misses with a takedown attempt
and Dudpops counters with a stiff right hand.
It's got to the stage where if one of these guys blows hard enough, the other might fall over.
Dudpops stuffs a takedown. It's all about dictating where the fight takes place and Dudpops wants it to stay on the feet.
Browning fails with the takedown
and Dudpops connects with a straight left hand counter down the middle.
The fighters circling - Dudpops throws out the jab but it was never going to land.
Browning drops his hands and takes a jab to the jaw for his troubles.
Browning dodges the punch combination from Dudpops.
Browning attempts a counter takedown but Dudpops avoids it well and moves away.
Browning fails with a takedown attempt from distance.
Dudpops swings away but doesn't land with a series of punches.
Browning ducks under a wild hook from Dudpops.
Dudpops looks to land a right hand but Browning moved out of range.
That's four minutes gone in the round.
Browning gets his takedown attempt stuffed easily
enabling Dudpops to counter with a crisp jab.
Dudpops throws a hook to the side of Browning's head but Browning sees it coming and ducks under it beautifully.
A lazy left from Dudpops finds it's target.
The crowd cheering loudly, showing their appreciation for the quality fight we're seeing here.
Browning shoots in but no luck this time.
Browning shoots in but no luck this time.
A right-left combo lands from Dudpops.
Dudpops scores with a big left there. The judges will like that one.
Dudpops connects with a body shot that sends Browning's belly button to the back.
Excellent takedown into side control there by Browning.
Browning in side control, throwing shots but Dudpops defends.
Sloppy strikes there by Browning.
And that is the end of the round. The fighters go back to their corners.
Orville Dudpops dominated that fourth round.
The fighters get back to their feet, the hooter sounds and we're back to the action! Let's get this one finished - here comes the final round!

Browning shoots in but doesn't get the takedown
enabling Dudpops to counter with a crisp jab.
Jerome Browning has stepped it up - he knows he needs a finish here!
Browning shoots in but doesn't get the takedown
and Browning takes a counter punch right on the button for his troubles.
Browning slips under a jab.
Browning closes the distance and after a bit of a stuggle, scores a takedown into Dudpops's guard.
Dudpops wants to stand up but Browning is controlling him.
Browning scoring with some ground and pound.
We've had a slow start to the round here - hopefully the action picks up.
Browning keeps in close for a moment and lands a decent shot to the side of Dudpops's head.
Browning is looking to work some ground and pound but Dudpops has wrist control.
Browning content to strike from guard, landing some decent shots.
Browning with a couple of shots to the head there. Not particularly brutal.
Browning throwing elbows and punches but not connecting, as Dudpops works some decent striking defense from the bottom.
That's one minute gone in the round.
Browning lands a couple of decent looking shots.
Browning looking to pass the guard.
Dudpops wants to get back to his feet but Browning is in a dominant position and won't allow it.
Browning postures up and lands some nice ground and pound.
Dudpops has momentary wrist control but Browning slips an elbow through the middle.
Browning missing there with some ground and pound from the guard.
Browning throwing strikes from guard but Dudpops blocks nicely.
Browning is sitting in guard, working some ground and pound.

Dudpops is rocked!
Browning throwing strikes but missing.
Dudpops is still in real trouble! Can Browning finish him?
Browning postures up to throw the ground and pound strikes but they don't connect.
That's two minutes gone in the round.
Browning keeps in close for a moment and lands a decent shot to the side of Dudpops's head.
Browning slips effortlessly into side control - very nice.
Browning working the ground and pound but Dudpops is defending the strikes.
Browning trying to control the position but Dudpops is working away.
Browning creates some space and throws a big elbow, but Dudpops sees it coming and moves his head just enough to avoid the strike.
Browning landing with strikes to the head and body from side control.
Dudpops is not content to let Browning control the position.
Browning lands some shots froms side control.
Browning lands a strong strike to the head of Dudpops. That's dazed him! Browning looking to finish here. Dudpops is waving his arms around trying to block but he's hurt badly - Browning lands more strikes and the referee steps in to end the fight!
Ladies and gentlemen, after 3:57 of round 5, we have a winner by way of TKO (Strikes). Jerome Browning!
Jerome Browning retains his light heavyweight title!
|
|
|
|
|
|
|
|
|
|
|
|
|
|
|
|
|
|
|
|
|
|
|
| S |
C
A |
G |
S |
C
B |
G |
|
S |
C |
G |
|
energy
A | B |
|
hype
A | B |
|
pop
A | B |
|
mgr
A | B |
|
FIGHT
RATING
61% |
|
|
|
|
|
|
