|
|
R4 PBP Commentary |
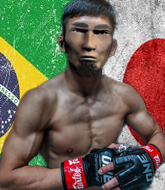
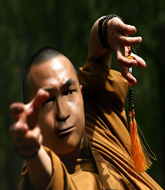
This TWGC bout is 1 fifteen minute round in the lightweight division. Introducing today's competitors. In the red corner, competing out of Rio de Janeiro, with a TWGC record of 1 wins and 2 losses; Ichiroshi Maeda! And in the blue corner, fighting out of Hilo, with a TWGC record of 1 wins and 2 losses; Monk Seal!
The judges for this bout are Steven Brown, James Atkins and Donald Grub.
The fighters bow as they face eachother in the middle of the mat and we are under way.

Seal closes the distance and clinches.

Maeda lands a nice trip takedown into half guard.
Score +2 for takedown into guard / half guard: Maeda (2) vs (0) Seal

Maeda wants to work for an arm triangle but Seal is really keeping half guard well and defending the submission attempt.
Seal won't allow Maeda to pass to mount.
Seal is refusing to be controlled, as Maeda sits in half guard.
Seal wants to control but Maeda is keeping busy.
Seal is looking for a sweep. Maeda is wise to his cunning plan and keeps the top position.
Maeda is looking for an arm triangle, whilst trying to pass to side control. Seal doesn't seem that keen to cooperate though. No luck this time Maeda.
We've had a slow start to the round here - hopefully the action picks up.
Seal wants to improve his position but Maeda is controlling well.

That's one minute gone in the round.
Maeda is pressing down on Seal's thigh, looking to free his foot. Seal is holding on for now.
Seal is defending against the submission attempts here by Maeda.
Maeda looking to pass the half guard. Not this time.
The fighters are pressed up against the cage, both looking to find a bit of space to work.
Seal is defending against the submission attempts here by Maeda.
Seal is looking to get full guard. It looks like he might be successful but at the last minute Maeda jumps into side control! Score +3 for passing guard: Maeda (5) vs (0) Seal

That's two minutes gone in the round.
Maeda wants to work for a kimura but he's foiled early by Seal, who protects the arm well.
Maeda working away.
The fighters are starting to perspire pretty heavily.
Seal is trying to improve his position.
Maeda tries for a kimura. Not really close to a finish though.
Maeda is looking for a kimura. He might have it! No, Seal has escaped the position, nice work there.
Seal manages to work his way to half guard, despite Maeda's best efforts.

That's three minutes gone in the round.
Maeda wants to work for an arm triangle but Seal is really keeping half guard well and defending the submission attempt.
Maeda tries to pass the half guard into mount. Seal knows what he's doing though and prevents the attempt.
Seal trying to control but Maeda postures up.
Maeda trying to pass the guard but Seal defending well.
Seal slips a foot under and gets full guard. Nice work.
Seal manages to sweep nicely, so he's now on top. Maeda manages to get himself to full guard.
Score +2 for sweep to guard / half guard: Maeda (5) vs (2) Seal
Seal preventing the sweep.
Maeda throws his legs up looking for a submission but Seal uses it to pass to side control.
Score +3 for passing guard: Maeda (5) vs (5) Seal

That's four minutes gone in the round.
Seal is looking to take a break and control but Maeda is keeping him honest, looking to work from the bottom.

Seal working hard here to secure a kimura but he's not really in the right position for it.
The ref warns both fighters not to hold the cage as they work up against the meshing.
Maeda is looking for a sweep.
Seal trying to control the action but Maeda is working from the bottom.
Maeda tries to get back to half guard but can't.

That's five minutes gone in the round.
Maeda tries to control the position but he's not in luck - Seal easily slips into full mount! Score +2 for reaching mount: Maeda (5) vs (7) Seal
Maeda is writhing around trying to get back to his feet.
Seal takes Maeda's back. Could be looking for a rear naked choke here - either way, Maeda is in trouble. Score +3 for taking back: Maeda (5) vs (10) Seal
Seal controlling well, preventing Maeda from escaping the position.
Seal tries to keep control of the position but Maeda is staying busy.
Maeda is trying to break free.
Seal is persistently looking for the submission but Maeda is defending it well.

That's six minutes gone in the round.
Seal trying to control.
Maeda is trying to break free.
Maeda trying to control the hands but Seal breaks the grip.
Maeda is displaying good submission defense - not really looking in danger of submitting to the rear naked choke at the moment. That could change in an instant of course if Seal gets his way!
Seal trying to secure his dominant position for a moment - making sure Maeda doesn't escape.
Maeda is defending well here and trying to improve his position.
Maeda manages to reverse the position and now he's in Seal's guard. Nice work there by Maeda.
Score +2 for sweep to guard / half guard: Maeda (7) vs (10) Seal

That's seven minutes gone in the round.
Seal working from the bottom, still in full guard. He's managed to get a loose triangle. Maeda doesn't seem to be doing much to defend here, obviously he feels comfortable in the position. Maeda manages to throw the legs off his shoulder and he's back into guard - no problem.
Seal looking for submissions from the bottom here. Moving his hips around, possibly looking for an armbar.
Seal is looking for a guillotine. You can't force these things though and Maeda defends well.
Maeda controls from within his opponent's guard.
Seal trying to control the position.

That's eight minutes gone in the round.
Maeda trying to control the position from guard on top but Seal is wriggling around, looking for whatever he can.
Maeda avoids a guillotine attempt easily.
Maeda tries to free his leg and advance position but Seal is retaining full guard.
Maeda has to be careful here, sitting in the guard of a superior BJJ player.
Seal working a defensive guard here.
Seal can't keep his opponent in guard - Maeda advances to half guard, no doubt looking to mount.
Maeda seems very keen to just sit and control from half guard but Seal does not like that idea so much and is remaining active off his back.

That's nine minutes gone in the round.
Maeda trying to mount his opponent but Seal defends it.
Maeda is working for a kimura here but Seal manages to reverse the position and he's now in Maeda's guard.
Score +2 for sweep to guard / half guard: Maeda (7) vs (12) Seal
Seal pushes down on Maeda's leg and manages to get into half guard.
Maeda wants to improve his position but Seal is controlling well.
Seal slows the pace down in half guard.
Maeda wants to improve his position but Seal is controlling well.

That's ten minutes gone in the round.
Seal is trying to control the action in half guard but Maeda is working away on the bottom, looking perhaps to get back to full guard.
Seal is stalling here. Maeda is in no mood to hang around though. He's locked up a kimura from the bottom! Seal seems to be keeping calm but he's forced to roll out of the hold and Maeda has ended up in side control on the top. Nice work. Score +4 for clean sweep to past guard: Maeda (11) vs (12) Seal
Maeda is looking for a kimura. He might have it! No, Seal has escaped the position, nice work there.
Seal tries to buck Maeda off but Maeda is having none of it.
Seal prevents Maeda from moving into mount.
Maeda swings around for an armbar but Seal sees it coming a mile off and turns beautifully into Maeda's guard. Score +2 for sweep to guard / half guard: Maeda (11) vs (14) Seal
Seal trying to control the position from guard on top but Maeda is wriggling around, looking for whatever he can.
Seal stands up and looks to throw the legs aside to pass to side control. Maeda swivels though and keeps the full guard.

That's eleven minutes gone in the round.
Seal trying to control the position from guard on top but Maeda is wriggling around, looking for whatever he can.
Seal tries to free his leg and advance position but Maeda is retaining full guard.
Maeda trying to keep a closed guard but Seal is proving a slippery customer.
Seal pressing down on his opponent's thigh, looking to pass guard. Maeda is keeping the position for now.
Seal is trying to work a guillotine from the top, or something like that? Don't know how he thinks he's going to get a finish from there.
Seal is pushing down on Maeda's leg trying to pass to half guard. Maeda is fighting to maintain full guard but Seal has managed to sneak the leg through.

That's twelve minutes gone in the round.
Seal wants to free his trapped foot but Maeda is holding on for dear life with his legs.
Maeda is staying active underneath Seal, who seems content to just control the action from this position.
Maeda is looking to regain full guard. Not this time though.
Maeda trying to keep hold of his opponent's head but Seal manages to pass to mount!
Score +3 for passing guard: Maeda (11) vs (17) Seal
Seal looking to secure an arm triangle but Maeda defends it well.
Maeda tries to reverse the position but Seal maintains control.

That's thirteen minutes gone in the round.
Seal moves to back control. Score +3 for taking back: Maeda (11) vs (20) Seal
Seal really has the hooks in deep now - there seems like no escape for Maeda.
Seal struggling to keep hold of the position.
Maeda turns into Seal and is now in his guard.
Score +2 for sweep to guard / half guard: Maeda (13) vs (20) Seal
Maeda wants to control from the top but Seal keeps moving.
Seal is trying to control the position from the bottom.
Maeda is looking to pass into half guard but Seal pushes him away with his feet and jumps on top - now Seal is in guard. Score +2 for sweep to guard / half guard: Maeda (13) vs (22) Seal

That's fourteen minutes gone in the round.
Maeda working away from the bottom but not quite defensive enough there because Seal has passed into half guard!
Maeda is breathing heavily.
Maeda actively working from the bottom here.
Seal trying to control the action but Maeda is working from the bottom.
Seal might have to switch it up a bit here because his efforts to control Maeda haven't been going to plan, at least at the current moment in time.
Boooooooooooooooooooo!!! God, this has been a terrible round. Come on you two, sort yourselves out!
Maeda is looking for a sweep. Seal is wise to his cunning plan and keeps the top position.
Seal wants to work for an arm triangle but Maeda is really keeping half guard well and defending the submission attempt.
And that's the end of the fight!
Seal wins on points by 22 to 13.
A very excited looking Monk Seal made sure he remembered to thank all the fans both in the arena and on the internet. He said all the coolest people spend all day on MMA websites, which got a big reaction.
Ichiroshi Maeda was interviewed post fight and said 'Respect to my opponent'. |
|
|
|
|
|