|
|
PBP Commentary |
Coming up we have a featherweight MMA rules bout between Bee Millz (ranked 1326 p4p, 2207 weight class) and Do Dim Mak (ranked 142 p4p, 207 weight class). Millz comes into the arena with Knock Yourself Out blaring out of the sound system. The atmosphere really building for this one as we go over to our ring announcer for the fighter introductions!
 |
|
 |
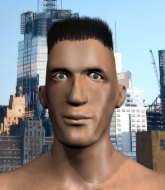
| 180 cm
20
155
5 - 1 - 0 |
|
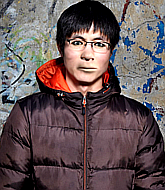
176 cm
21
148
4 - 2 - 0 |
BJJ Purple Belt
Excellent MT
Cardio machine |
|
BJJ Blue Belt
Excellent MT
Powerful |
|
| |
|
Ladies and gentlemen. This fight is 5 rounds, for the featherweight championship of the world!
Introducing the champion to my left, fighting out of the red corner.
With a record of 5 - 1 - 0, fighting out of Los Angeles, Bee Millz!
And introducing the challenger to my right, fighting out of the blue corner.
With a record of 4 - 2 - 0, fighting out of Helsinki, Do Dim Mak!
The judges for this bout are Damien Edna, Donatello Bradman and Ben Watson.

The bell rings for round one and we are underway!
Millz tries to close the distance and clinch up against the cage but Dim Mak paws at him with a jab and circles away.
Millz tries to clinch but Dim Mak is having none of it.
Millz definitely looks more muscular than last time we saw him fight.
Dim Mak buckles his opponent's knee momentarily with a nice leg kick.
Dim Mak lands with a cross to side of his opponent's head.
Dim Mak throws a sloppy head kick and Millz moves out of range easily.
Millz is looking to counter with a shot to the body.
Dim Mak throws a head kick but Millz moves out of range.
Millz tries to clinch
and Dim Mak counters with an inside leg kick.
Millz is looking to clinch but Dim Mak is avoiding it.
Good work by Millz as he checks the leg kick.
Dim Mak misses with a half-hearted attempt at a head kick.
Millz misses with a looping left.
Dim Mak keeps Millz at a distance using the push kick.
Millz on the receiving end of a decent leg kick there by Dim Mak. Dim Mak obviously looking to wear him down.
Dim Mak keeps the fight on the outside.
Dim Mak lands a nice looking body kick.
Millz is looking to clinch.
The fans in attendance giving it up for the two fighters, who have really let it all hang out in the last minute or so!
Millz wants to clinch but Dim Mak slips to the side
and Dim Mak counters with a crisp hook to the side of the head.
Dim Mak throws a head kick that misses.

That's one minute gone in the round.
Millz tries to clinch but Dim Mak is having none of it.
A low kick lands for Dim Mak.
Millz takes a kick to the side of the head.
Millz looks to clinch
and Dim Mak counters with a stiff right hand.
A big left from Millz misses.
Millz fails with an attempt to clinch.
Dim Mak avoids a lazy jab quite easily.
Bee Millz seems to be the more aggressive standup fighter in this bout.
Dim Mak lands with a slapping head kick.
Dim Mak walks straight into a jab right on the nose. That one stung - he's blinking and trying to clear his head.
Millz lands a nice shot that snaps Dim Mak's head back.
Dim Mak fakes a jab and throws a low kick but Millz checks it well.
A swing and a miss from Millz.
Wooooo! Give it up for these two warriors! They are putting on a show!
Millz tries to clinch but Dim Mak is having none of it.
Dim Mak flicks out a counter leg kick but Millz steps away.
Dim Mak swats away the attempt to clinch by Millz.

That's two minutes gone in the round.
Millz takes a nice looking leg kick right on the meat of his thigh there.
Dim Mak swats away the attempt to clinch by Millz.

Millz pushes Dim Mak up against the cage in a clinch.

Dim Mak's corner calls for him to break the clinch, which he does.
Dim Mak is looking to score with low kicks.
It looked like Millz was trying to counter with a body shot coming off that last attack from Dim Mak.
Millz steps to the side to avoid the strikes from Dim Mak.
Millz tries to counter by moving into the clinch but Dim Mak manages to circle out of the way.
Millz keeping his hands up high there, blocking the jab from Dim Mak.
Dim Mak gets tackled into the cage by Millz. Millz maintains the clinch.
Millz gets through Dim Mak's defenses to land a nice punch to the side of the head.
Millz tries a shoulder strike but it doesn't do any damage.
Dim Mak can't break the clinch.
Dim Mak trying to control the position but instead, Millz has worked for underhooks and has pushed Dim Mak into the cage.
Dim Mak looking to stall.

That's three minutes gone in the round.
Millz struggles to land a body shot inside as Dim Mak controls his hands.
Millz lands with a left to the head.
Millz has a couple of punches blocked by Dim Mak.
Dim Mak has had enough of the clinch but Millz keeps him there for the moment.
Millz misses with some punches.
Nice body punch from Millz - that landed with a thud.
Millz fails to land with a short punch on the inside.
The referee calls for Dim Mak to work.
Millz lands a shot to the body.
Dim Mak taking a breather.
Millz lands an uppercut.
Dim Mak can't find room to land a body shot as Millz controls the action.
Millz blocks a punch to the side of the head.
Dim Mak has a couple of punches blocked by Millz.
Dim Mak trying to control the position but instead, Millz has worked for underhooks and has pushed Dim Mak into the cage.
Dim Mak wants to push off and get back to the center of the mat but Millz has him pressed against the cage.
Millz throws a head punch that misses.
Millz makes some space for himself and lands an uppercut.

That's four minutes gone in the round.
Millz has a couple of punches blocked by Dim Mak.
Millz misses with a hook from the clinch.
A head punch blocked on the inside by Dim Mak.
Dim Mak blocking some punches.
A body shot lands from Millz.
Millz throws a head punch that misses.
Millz has Dim Mak pressed against the cage, preventing Dim Mak from circling away and getting back to striking at range.
Dim Mak looks like he'd prefer to be striking at range right now.
Dim Mak tries to pull guard but Millz holds him up against the cage and eventually Dim Mak drops back down to his feet.
The referee calls for Dim Mak to work.
The crowd cheering loudly, showing their appreciation for the quality fight we're seeing here.
Come on Dim Mak - let's have some action - none of this stalling nonsense.
Millz lands punches inside but they're not really causing much damage.
Dim Mak is looking to break free of the clinch but Millz has double underhooks.
Dim Mak dictating the pace here, as the fighters clinch against the cage.
With the fighters clinched against the cage, Millz creates a bit of distance for himself and scores with a nice uppercut.
Millz lands with a right to the head.
Millz goes for a body shot but it's blocked.
And that is the end of the round. The fighters go back to their corners.
A close round but Do Dim Mak will probably get the nod.
That's the end of the interval. I'm sure that seemed a lot quicker than a minute for our two fighters! Back to the action.

The fight stays on the outside here - Millz looks like he's thinking about clinching though.
Millz closes the distance looking to clinch
and Dim Mak cracks him with a counter punch right on the button.
Millz throws a monster uppercut resembling something out of street fighter but it doesn't land.
Dim Mak connects with a nice looking jab.
Millz moves into the clinch successfully.
Millz swings wildly with an uppercut but Dim Mak uses good head movement to avoid it.
Millz throws a head punch that misses.
Bee Millz has scored more points in the clinch so far.
Dim Mak breaks the clinch and we return to the middle of the mat.
Do Dim Mak seems to be getting the better of the standup.
We've had a slow start to the round here - hopefully the action picks up.
Millz takes a step towards his opponent and connects with a left hand, before circling away.
Dim Mak with a nice looking leg kick. You could hear that one land in a back row.
Millz throws out a loose jab but Dim Mak uses good head movement to avoid it.
Millz clinches up with Dim Mak and pushes him back against the cage.
Both fighters working to control the clinch.
Dim Mak takes a shot to the head.
That's one minute gone in the round.
A short right hand to the side of the head by Millz.
Millz misses with a short punch on the inside.
Millz swings away with an uppercut that misses.
An uppercut on the inside fails to land for Millz.
Dim Mak lands with a short punch from the clinch.
Dim Mak is trying to stall.
Millz struggles to land a body shot inside as Dim Mak controls his hands.
Millz scores with a shoulder strike.
Dim Mak taking a breather.
Dim Mak lands with a quick shot inside that doesn't really do much damage.

Dim Mak has managed to pull guard. Let's see whether he can work an aggressive guard. It will also be interesting to see what tactics Millz uses from the top position.
Dim Mak has a closed guard, preventing Millz from standing up.

Millz gets to his feet. Dim Mak looking to butt scoot but the ref puts an end to that. On your feet son!
That's two minutes gone in the round.
Millz tries to clinch but Dim Mak moves away
and Dim Mak counters with a leg kick.
Millz tries to clinch there but Dim Mak circles away.
As Millz backs off Dim Mak throws a huge counter combo but Millz manages to avoid it all.
Dim Mak blocks a jab.
Millz backing away here, and Dim Mak unleashes a leg kick that just misses.
Millz is looking to clinch.
Millz clinches.
Fantastic stuff here - a very entertaining period of action, which has drawn cheers from the crowd.
Dim Mak is looking to control Millz's arms but Millz gets an underhook and turns him. Now Dim Mak has his back to the cage.
An uppercut on the inside fails to land for Millz.
A battle for position here, against the cage.
Dim Mak blocks a couple of punches on the inside.
A head punch on the inside from Millz fails to land.
Dim Mak has had enough of the clinch and is looking to separate.
Millz lands with a good tight uppercut to the head.
Dim Mak working hard to break the clinch.
A short right from Dim Mak on the inside.
Millz lands with a short head shot on the inside.
Millz lands with a right to the head.
Dim Mak wants to break the clinch but can't.
Millz tries a body shot but Dim Mak blocks it.
That's three minutes gone in the round.
Millz working some nice short punches in the clinch.

Millz drops Dim Mak onto one knee with a big uppercut from the clinch! Dim Mak is propped up by the cage and works his way back to his feet!

Dim Mak is rocked!
A real battle for position is taking place between these two warriors.
Dim Mak is still on wobbly legs! Can Millz finish him?
Millz swings wildly with an uppercut but Dim Mak uses good head movement to avoid it.
Dim Mak tries to stall but Millz uses the opportunity to gain a better position.
Millz fails to land with a short punch on the inside.
Millz tries a body shot but Dim Mak blocks it.
Dim Mak prevents a body shot from Millz.
Dim Mak takes a shot to the head.
Millz fails to land with a short punch on the inside.
Dim Mak taking a breather.
Dim Mak breaks the clinch and we return to the middle of the mat.
Millz tries to clinch up but Dim Mak circles away and keeps his distance.
Millz tries to clinch up but Dim Mak circles away and keeps his distance.
Dim Mak misses with a body shot. Nice footwork from Millz.
Dim Mak seems to have recovered his senses.
The fans in attendance giving it up for the two fighters, who have really let it all hang out in the last minute or so!
Millz cracks Dim Mak with a big right hand that sends him crashing to the floor. Millz has the opportunity to follow him to the ground but instead he's beckoning Dim Mak to stand back up!
The fight stays on the outside here - Millz looks like he's thinking about clinching though.
Millz tries to check a leg kick but that clearly hurt him.
That's four minutes gone in the round.
Dim Mak scores with a shot to the body.
Millz closes the distance and clinches.
Dim Mak controlling the action here for a moment.
Millz gets through Dim Mak's defenses to land a nice punch to the side of the head.
Millz pushes Dim Mak back against the cage and unloads with a body punch.
Dim Mak has had enough of the clinch but Millz keeps him there for the moment.
Millz misses with a hook from the clinch.
Millz misses with a short punch on the inside.
Dim Mak blocks a couple of punches on the inside.
Dim Mak blocks a couple of punches on the inside.
Millz misses with some punches.
Dim Mak pulls Millz into guard.
The crowd applaud the fighters' efforts here as the round comes to an end.

Dim Mak looking for submissions from the bottom but instead Millz passes into side control.
Millz wants to stand but Dim Mak has his arm trapped.
And that is the end of the round. The fighters go back to their corners.
Bee Millz dominated that second round.
The fighters' corners scream their final instructions, as the referee calls time. Here we go, back to the action!

Millz wants to clinch up but Dim Mak keeps it at a distance.
Nice straight punches there by Millz. You know Roy Jones Jr respects the hands of Millz.
Millz on the wrong end of a nice low kick. He's acting like it's no big deal but he doesn't want to take many more of those.
Millz has closed the distance and engaged Dim Mak in a clinch.
Dim Mak is trying to slow down the pace of the fight but Millz is keeping busy.
Dim Mak is trying to slow down the pace of the fight but Millz is keeping busy.
Millz pushes Dim Mak back against the cage and lands a hook to the side of the head.
Millz misses with a body punch.
Dim Mak is working hard here but doesn't seem to be able to control effectively, up against the cage.
Dim Mak manages to break the clinch.
We've had a slow start to the round here - hopefully the action picks up.
Dim Mak throws a nice hook to the body that draws an oooh from the crowd.
Millz on the receiving end of a decent leg kick there by Dim Mak. Dim Mak obviously looking to wear him down.
Millz tries to clinch but Dim Mak moves away
and Dim Mak counters with a stiff right hand.
Millz checks the leg kick.
Millz tries to clinch but is not successful on this occasion.
That's one minute gone in the round.
Millz tries to close the distance and clinch up against the cage but Dim Mak paws at him with a jab and circles away.
Millz tries to close the distance and clinch but Dim Mak swats him to one side with an open hand palm strike and circles away.
Dim Mak avoids the clinch attempt nicely.
Millz tries to clinch but Dim Mak moves out of range.
Nice uppercut there from Dim Mak.
Millz is looking to clinch.
Dim Mak lets it all go there with a big combo counter but none of the punches connected.
Millz looks to clinch
and Dim Mak counters with a lovely straight right hand!
Millz tries to clinch but is not successful on this occasion.
Millz avoids a punch combination nicely.
Millz tries to close the distance and clinch up but Dim Mak swats him away and circles back towards the center.
Millz tries to clinch up against the cage, rushing in to close the distance. Dim Mak manages to break the clinch and circles back to the middle of the mat.
Millz tries to close the distance and clinch but Dim Mak swats him to one side with an open hand palm strike and circles away.
Millz moves in looking to clinch but Dim Mak pushes him off.
Millz closes the distance and pushes Dim Mak back into the cage.
Dim Mak is trying to pull guard but being pressed up against the cage enables Millz to keep the fight standing.
That's two minutes gone in the round.
Dim Mak breaks the clinch and we're back to striking at distance.
Millz is hobbling a little on that front leg after taking quite a few leg kicks so far in this fight.
Millz tries to close the distance and clinch up against the cage but Dim Mak paws at him with a jab and circles away.
The fight stays on the outside here - Millz looks like he's thinking about clinching though.
Millz is looking to take this fight into the clinch.
Dim Mak takes a hook to the side of the head. I wonder if that's got his ears ringing.
Millz keeping at a good range here, avoiding a leg kick.
Millz lands a big uppercut and Dim Mak crumbles to the floor! The ref thinks about stopping the fight but Dim Mak looks OK. Millz waves Dim Mak back to his feet!
Fantastic stuff here - a very entertaining period of action, which has drawn cheers from the crowd.
Millz slips a straight right by Dim Mak.
Millz tries to clinch
and Dim Mak counters with a crisp hook to the side of the head.
Millz looks to clinch
enabling Dim Mak to counter with a crisp jab.
Dim Mak lands with a nice combination. Millz backs away looking to recover.
Millz tries to clinch but Dim Mak moves away
and Dim Mak makes the exchange count by landing a cracking kick to the body. Millz really felt that one!
Dim Mak misses with a half-hearted attempt at a head kick.
That's three minutes gone in the round.
Millz tries to close the distance and clinch up but Dim Mak swats him away and circles back towards the center.
Millz looks to clinch
and Dim Mak counters with a head kick. That will keep Millz thinking before he tries any more sloppy attacks!
Dim Mak takes a big intake of breath there - he's definitely tired.
Millz tries to clinch
and Dim Mak counters with an inside leg kick.
Millz uses decent footwork to sidestep a right hand from Dim Mak.
Millz tries to clinch up but Dim Mak circles away and keeps his distance.
Dim Mak keeps the fight on the outside.
Millz tries to clinch up but Dim Mak circles away and keeps his distance.
Millz throws a shot from downtown. Dim Mak moves away and avoids it.
Dim Mak throws a big counter head kick but Millz avoids it with no problem.
Millz moves in looking to clinch but Dim Mak pushes him off.
Millz ducks under an overhand right and circles away with a smile on his face.
Millz drops Dim Mak with a hook right on the temple. He thinks about going to the ground but Dim Mak looks back up at him and smiles so Millz waves him back to his feet - he obviously thinks he can knock him out after that shot landed.
The fans in attendance giving it up for the two fighters, who have really let it all hang out in the last minute or so!
Dim Mak throws a head kick that misses.
Millz tries to counter by moving into the clinch but Dim Mak manages to circle out of the way.
Dim Mak circles away from the clinch attempt
and Dim Mak counters with a left to the body.
That's four minutes gone in the round.
Millz wants to clinch but Dim Mak slips to the side
letting Dim Mak counter with a right hand.
Dim Mak fakes a couple of low kicks, before throwing one on the third attempt. It connects and Millz has to reset his feet before getting ready to engage.
Dim Mak tries to score with a low kick but Millz moves his leg out of the way.
Millz tries to clinch but fails miserably
and Dim Mak counters with a slapping leg kick.
Millz cracks Dim Mak on the jaw with a powerful right hand and Dim Mak falls backwards against the cage. Millz follows up with more strikes that drop Dim Mak to his knees. Millz keeps the pressure on and the referee jumps in to save Dim Mak! This one is all over!
Ladies and gentlemen, after 4:24 of round 3, we have a winner by way of TKO (Strikes). Bee Millz!
Bee Millz retains his featherweight title!
Bee Millz seemed lost for words in his post fight interview but he remembered to thank his fans and directed everyone to his website.
|
|
|
|
|
|
|
|
|
|
|
|
|
|
|
|
|
|
|
|
|
|
|
| S |
C
A |
G |
S |
C
B |
G |
|
S |
C |
G |
|
energy
A | B |
|
hype
A | B |
|
pop
A | B |
|
mgr
A | B |
|
FIGHT
RATING
69% |
|
|
|
|
|
|
