|
|
PBP Commentary |
Coming up we have a welterweight MMA rules bout between Rojesterman Haynes (ranked 24798 p4p, 4322 weight class) and Reginald Whitaker (ranked 0 p4p, 0 weight class). This should be a great matchup!
 |
|
 |
| 180 cm
26
179
2 - 7 - 0 |
|
180 cm
26
175
4 - 0 - 0 |
BJJ Blue Belt
Solid Muay Thai
Experienced |
|
BJJ White Belt
Excellent MT
Heavy handed |
|
| |
|
Ladies and gentlemen. This fight is 3 rounds, in the welterweight division.
Introducing the fighter to my left, fighting out of the red corner.
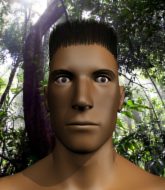
With a record of 2 - 7 - 0, fighting out of Tokyo, Rojesterman Haynes!
And introducing the fighter to my right, fighting out of the blue corner.
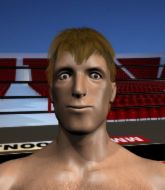
With a record of 4 - 0 - 0, fighting out of New York, Reginald Whitaker!
The judges for this bout are Kenichi Hosakawa, Hirohito Nitta and Yukihiro Shimada.

The bell rings for round one and we are underway!
Whitaker has a takedown stuffed.
Whitaker shoots for a takedown but Haynes saw that one coming a mile off and avoided it easily.
Haynes shoots in for a takedown. "Ole!" shouts Whitaker as he jumps to the side.
Whitaker dives in and grabs Haynes's left leg, looking for a takedown. Haynes pushes down on Whitaker's head and hops out.
Rojesterman Haynes has stuffed three takedown attempts in the round now. That's going to take a lot out of Reginald Whitaker.

Whitaker gets in close and instigates a clinch.
Haynes wants to strike at distance but he can't break free of the clinch.

Haynes has managed to pull guard. Let's see whether he can work an aggressive guard. It will also be interesting to see what tactics Whitaker uses from the top position.
Haynes trying to keep a closed guard but Whitaker is proving a slippery customer.
Whitaker trying to stand up but can't free himself from Haynes's guard.
We've had a slow start to the round here - hopefully the action picks up.
Whitaker must be cautious of submissions here, given that his opponent has the superior Jiu Jitsu.

Haynes pushes Whitaker off and scrambles back to his feet.
Whitaker lands with a nice low kick. That'll leave a bruise.

That's one minute gone in the round.
Whitaker will need to close the distance a bit before he attacks - that leg kick was thrown from too far away.
Haynes shoots for a takedown but Whitaker saw that one coming a mile off and avoided it easily.
Whitaker fails miserably with a takedown attempt.
Whitaker motions for Haynes to come forward. Whitaker throws a leg kick but it misses it's target.
Whitaker throws a leg kick that misses.
Haynes attempts a counter takedown but Whitaker avoids it well and moves away.
Whitaker shoots and misses
and Haynes counters with a shot to the ribs. That looked like it hurt.

Haynes gets caught on his heels momentarily as he allows Whitaker to score an easy takedown into full guard.
Whitaker wants to stand but Haynes has a closed guard, so he can't escape.
Haynes controlling the position.
Whitaker would like to get this fight back to the feet but can't get free from the closed guard.

That's two minutes gone in the round.
Haynes bucks up whilst keeping hold of a body lock, managing to reverse the position. Now he's in top in Whitaker's guard.

We've been hearing that Haynes has been drilling a lot of ground and pound in training, so let's see if he get the finish.
Haynes landing with the ground and pound.
Haynes sitting in guard here, content to control.
Whitaker looking to sweep here. No luck so far.
Whitaker pulls Haynes in to control the position.
Haynes postures up to throw the ground and pound strikes but they don't connect.
Haynes preventing the sweep.

That's three minutes gone in the round.
Whitaker is pulling down on Haynes's head. It's preventing any offense from Haynes, at least for the moment.
Haynes wants to control from the top but Whitaker keeps moving.
The fighters are pressed up against the cage, both looking to find a bit of space to work.
Haynes trying to stand up but can't free himself from Whitaker's guard.

The referee decides to stand the fighters back up.
Whitaker moves into the clinch successfully.

That's four minutes gone in the round.
Neither fighter has done anything of merit for a good minute or two here and the crowd are not happy about it.
Whitaker letting Haynes take a breather here.
Haynes is defending well against a takedown attempt.
Whitaker has a body lock and is looking for a takedown. Haynes is bouncing around trying to prevent the takedown and somehow he has indeed managed to stay on his feet.
Whitaker can't get the takedown.
Whitaker stops a takedown attempt from Haynes.

Haynes escapes the clinch and we're back to striking.
Haynes has his takedown stuffed
and Whitaker counters with a two punch combo.
Whitaker fakes with an overhand right and moves in to clinch with Haynes, pushing him back against the cage.
The crowd thankful this round is nearly over.
Whitaker gets double underhooks to prevent a takedown attempt from Haynes.
Whitaker is looking for a takedown.
And that is the end of the round. The fighters go back to their corners.
That was a close round but I would say that Rojesterman Haynes will probably get the nod.
The corners get their ten second warning. Both fighters stand from their stools and stare each other down, ready to get back to the action.

Haynes shoots in for a takedown. "I don't think so" says Whitaker as he avoids it easily.
Whitaker closes the distance and clinches.
Whitaker tries for a takedown but Haynes manages to get underhooks.
Haynes gets double underhooks to prevent a takedown attempt from Whitaker.
Whitaker is trying to work for a single leg takedown but Haynes pulls him back up using the underhooks.
Rojesterman Haynes has stuffed three takedown attempts in the round now. That's going to take a lot out of Reginald Whitaker.
Haynes breaks from the clinch.
Whitaker forces Haynes back against the cage and clinches.
Whitaker wants a takedown.
We've had a slow start to the round here - hopefully the action picks up.
Haynes prevents a takedown attempt there.
Whitaker looking for a takedown.
Haynes fails to pull guard.
Haynes prevents a takedown attempt there.
That's one minute gone in the round.
Haynes prevents the takedown attempt.
Haynes missing with knees to the body.
Whitaker is trying to drag Haynes to the mat but Haynes just about manages to keep his footing. He used the cage to his advantage there.
Whitaker can't get the takedown.
Whitaker drops down for a takedown but doesn't get it.
Whitaker changes levels and goes for a takedown here. Haynes fights it off and pushes away nicely.
Haynes looking to land some kicks to the body here.
Whitaker shoots in looking for a takedown but Haynes manages to keep the fight standing, pushing Whitaker's face into the canvas for good measure before circling away.
Haynes attempts a low kick but it misses it's target.
Whitaker lets it all go there with a big combo counter but none of the punches connected.
That's two minutes gone in the round.
Whitaker shoots in looking for a takedown but Haynes manages to keep the fight standing, pushing Whitaker's face into the canvas for good measure before circling away.
Whitaker has Haynes up against the cage in a clinch.
Whitaker is working for takedown but Haynes is calmly controlling the position for now.
Whitaker is breathing heavily.
Haynes prevents a takedown attempt there.
The referee is keeping an eye on Haynes - much more stalling and he will separate the fighters.
Haynes is looking to score with knees to the body. Maybe he'll change it up and go body then head. Whitaker is defending well for now.
Whitaker can't get the takedown.
Whitaker has dropped down and is looking to force the takedown but it's defended by Haynes after a bit of a struggle.
Whitaker is working for a takedown up against the cage. He can't get it on this occasion though.
Whitaker prevents the takedown attempt.
A real battle for position is taking place between these two warriors.
Haynes can't break the clinch.
That's three minutes gone in the round.
Haynes is trying to pull guard but being pressed up against the cage enables Whitaker to keep the fight standing.
Whitaker tries for a takedown but Haynes manages to get underhooks.
Whitaker is trying to work for a single leg takedown but Haynes pulls him back up using the underhooks.
Whitaker tries to score a body lock takedown but Haynes shows good agility there to stay on his feet.
Rojesterman Haynes has scored more points in the clinch so far.
Haynes decides to pull guard.

Haynes working from the bottom, still in full guard. He's managed to get a loose triangle. Whitaker doesn't seem to be doing much to defend here, obviously he feels comfortable in the position. Whitaker manages to throw the legs off his shoulder and he's back into guard - no problem.
Whitaker wants to stand and escape but instead Haynes has hit a sweep and he's now on top in guard.
Whitaker really doesn't want to stay on the ground with Haynes. If he can't get it back to his feet, it's only a matter of time before he'll be tapping out.
Haynes trying to control the position from guard on top but Whitaker is wriggling around, looking for whatever he can.
Haynes is stalling in the full guard.
That's four minutes gone in the round.
Haynes wants to control from the top but Whitaker keeps moving.
Haynes in full guard, throwing the ground and pound. No damage this time.
Boooooooooooooooooooo!!! God, this has been a terrible round. Come on you two, sort yourselves out!
Haynes controls the pace of the fight for a moment.
A real slowdown in the pace of the fight for a moment, as Whitaker holds on and takes a little breather.
Haynes trying to control the position from guard on top but Whitaker is wriggling around, looking for whatever he can.
And that is the end of the round. The fighters go back to their corners.
Rojesterman Haynes dominated that second round.
That's the end of the round. The referee orders the cornermen out of the cage so we can get back down to business. This is the final round!

Whitaker does a little shimmy and throws a leg kick. The leg kick missed by a considerable margin though, making him look a little bit silly for doing the shimmy.
Reginald Whitaker has stepped it up - he knows he needs a finish here!

Whitaker tries to keep at a distance but Haynes has taken the fight into the clinch.
Whitaker wants a takedown but no success here.
Whitaker gets double underhooks to prevent a takedown attempt from Haynes.
Haynes tries to pull guard but Whitaker holds him up against the cage and eventually Haynes drops back down to his feet.
Haynes tries to take the fight to the ground by pulling guard but can't manage it.
That's three failed takedown attempts in the round for Rojesterman Haynes. That's going to take a lot out of him.
We've had a slow start to the round here - hopefully the action picks up.
Whitaker has Haynes pressed up against the cage and is working for takedown. Haynes manages to improve position though and keeps the fight standing.
Whitaker has dropped down and is looking to force the takedown but it's defended by Haynes after a bit of a struggle.
Whitaker can't get the takedown.
Whitaker has hold of a leg and is looking for a trip takedown. Haynes avoids it nicely though and we remain in the clinch.
Haynes gets underhooks to prevent Whitaker's takedown attempt.
Whitaker takes a big intake of breath there - he's definitely tired.
That's one minute gone in the round.
Haynes changes levels and goes for a takedown here. Whitaker fights it off and pushes away nicely.
Whitaker tries to score with a low kick but Haynes moves his leg out of the way.
Whitaker closes the distance and clinches.
Whitaker changes levels and goes for a takedown here. Haynes fights it off and pushes away nicely.
Whitaker has Haynes up against the cage in a clinch.
Whitaker wants to take the fight to the mat but Haynes manages to get underhooks and keep the fight in the clinch.
Whitaker has dropped down and is looking to force the takedown but it's defended by Haynes after a bit of a struggle.
Haynes prevents a takedown attempt there.
Whitaker is working for takedown but Haynes is calmly controlling the position for now.
Haynes is working for takedown but Whitaker is calmly controlling the position for now.
That's two minutes gone in the round.
Whitaker has hold of a leg and is looking for a trip takedown. Haynes avoids it nicely though and we remain in the clinch.
Haynes decides to pull guard.
The fighters are working up against the cage. Haynes manages to wriggle his way back to his feet, so the fighters are now clinched against the cage.
Whitaker drops down for a takedown but doesn't get it.
Haynes gets double underhooks to prevent a takedown attempt from Whitaker.
Whitaker has Haynes pressed up against the cage and is working for takedown. Haynes manages to improve position though and keeps the fight standing.
Whitaker fails to land with a short punch on the inside.
Haynes successfully pulls guard.
This has been an exciting period of action!
Haynes is working an open guard here, looking to improve his position. No doubt that will leave him open to counters but at least he's being more offensive.
Haynes is really dominating this fight. Is there anything that Whitaker can do to turn this around?
That's three minutes gone in the round.
Whitaker wanted to stand there but Haynes had control of the position.

Whitaker drops back, looking for a kneebar! Haynes looks panicked! The fighters roll across the mat, one looking to finish, one looking to escape. Haynes looks to have wriggled free... Yes, he's got his leg free and he's dived into side control! Good work there from Haynes!
Whitaker wants to control but Haynes postures up.

Haynes decides to take the fight back to the feet.
Whitaker throws a leg kick but Haynes sees it coming and checks it nicely.
Haynes checks a leg kick nicely.
It looked like Haynes wanted to counter with a hook but didn't fully commit.
Haynes with a poor takedown
and Whitaker counters with a left and a right that stings Haynes.
That's four minutes gone in the round.
Whitaker fails in his attempt to clinch.
Haynes thinks about countering with a head kick.
Haynes moves in looking to clinch but Whitaker pushes him off.
Whitaker drives through and clinches with Haynes against the cage.
Haynes is working for takedown but Whitaker is calmly controlling the position for now.
Whitaker scores with a shoulder strike.
Whitaker is working for a takedown up against the cage. He can't get it on this occasion though.
Haynes working hard to break the clinch.
Whitaker has hold of a leg and is looking for a trip takedown. Haynes avoids it nicely though and we remain in the clinch.
Haynes is pressed up against the cage. Whitaker has hold of a leg and is looking to drag Haynes down to the mat. Haynes avoids the attempt though and has circled away. We're back to striking at a distance.
Haynes tries to clinch up against the cage, rushing in to close the distance. Whitaker manages to break the clinch and circles back to the middle of the mat.
The crowd thankful this round is nearly over.
Haynes clinches up with Whitaker and pushes him back against the cage.
The crowd cheering loudly, showing their appreciation for the quality fight we're seeing here.
Whitaker lands a hook that snaps the head of Haynes backwards.
Whitaker is looking for a takedown.
Rojesterman Haynes is fighting for a decision here - he's started to take the cautious approach.
Whitaker is looking to score with knees to the body. Maybe he'll change it up and go body then head. Haynes is defending well for now.
And that's the end of the fight!
Rojesterman Haynes showed his dominance in that final round.
Well I reckon that's a shut out for Haynes, winning every round. Will the judges agree? They are the ones who matter, even if they are often depressingly incompetent. Over to the ring announcer for the scorecards.
Ladies and gentlemen, after 3 rounds of action, we go to the scorecards for a decision.
Judge Kenichi Hosakawa scores the fight 30:28
Judge Hirohito Nitta scores the fight 30:28
Judge Yukihiro Shimada scores the fight 29:28
In favor of your winner, by unanimous decision... Rojesterman Haynes!
|
|
|
|
|
|
|
|
|
|
|
|
|
|
|
|
|
|
|
|
|
|
|
| S |
C
A |
G |
S |
C
B |
G |
|
S |
C |
G |
|
energy
A | B |
|
hype
A | B |
|
pop
A | B |
|
mgr
A | B |
|
FIGHT
RATING
32% |
|
|
|
|
|
|

