|
|
PBP Commentary |
Coming up we have a bantamweight MMA rules bout between Michael Olawandi (ranked 3601 p4p, 5140 weight class) and Shin Otami (ranked 195 p4p, 0 weight class). These two fighters really are very evenly matched on the feet - it will be fascinating to see who can assert themselves in that aspect of the fight.
 |
|
 |
| 163 cm
23
134
1 - 0 - 0 |
|
180 cm
25
135
4 - 6 - 0 |
BJJ Blue Belt
Brawler
Good chin |
|
BJJ Blue Belt
Solid Muay Thai
Determined |
|
| |
|
Ladies and gentlemen. This fight is 3 rounds, in the bantamweight division.
Introducing the fighter to my left, fighting out of the red corner.
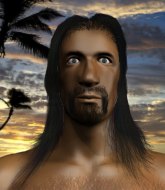
With a record of 1 - 0 - 0, fighting out of Amsterdam, Michael Olawandi!
And introducing the fighter to my right, fighting out of the blue corner.
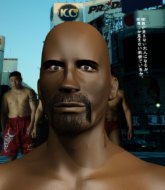
With a record of 4 - 6 - 0, fighting out of Tokyo, Shin Otami!
The judges for this bout are Nard Betker, Paulsen Ambrosius and Aafke Stam.

The bell rings for round one and we are underway!

Olawandi scores with a nice takedown into half guard. Let's see what he's got on the ground.

Olawandi is working for submissions here but there's nothing on.
Nice strikes from Olawandi there.
Olawandi tries to stand and escape but Otami is controlling the position.
Neither fighter is being very active at the moment, with Olawandi in particular looking to stall.
Olawandi is working for submissions here but there's nothing on.
The ref warns both fighters not to hold the cage as they work up against the meshing.
Otami is looking to control Olawandi's leg but it's slowly edging free. Can Otami avoid being mounted?
We've had a slow start to the round here - hopefully the action picks up.
Olawandi wants to free his trapped foot but Otami is holding on for dear life with his legs.
Neither fighter is being very active at the moment, with Olawandi in particular looking to stall.
The fighters are pressed up against the cage, both looking to find a bit of space to work.

That's one minute gone in the round.
Otami trying to control but Olawandi postures up.
Otami pushes Olawandi off looking to stand but Olawandi dives back in and keeps control.
Olawandi wants to take a breather but Otami is having none of it.
Olawandi is looking to advance position but Otami won't allow it.
Olawandi lands strikes from half guard.

Otami looking for submissions from an awkward position here.
Otami trying to control from the bottom.
Olawandi tries to pass the half guard into mount. Otami knows what he's doing though and prevents the attempt.

The referee decides to stand the fighters back up.

That's two minutes gone in the round.
The crowd are starting to boo a lack of action.
Otami lands with a good body shot.

Olawandi closes the distance and presses his opponent up against the cage.
Olawandi stalling against the cage.
Otami drops to a knee looking for a takedown but Olawandi gets the underhooks and prevents it.
Olawandi stops a takedown attempt from Otami.
Olawandi has hold of a leg and is looking for a trip takedown. Otami avoids it nicely though and we remain in the clinch.

Otami breaks from the clinch.
Otami fails miserably with a takedown attempt.
It looked like Olawandi wanted to counter with a hook but didn't fully commit.
Michael Olawandi has stuffed three takedown attempts in the round now. That's going to take a lot out of Shin Otami.

That's three minutes gone in the round.
Olawandi shoots in for a takedown! He's got it and he's managed to land in side control! That's better than Olawandi was expecting from the takedown attempt, I'm sure!
Olawandi working the ground and pound but he's contacting the mat, not the fighter.
Olawandi is trying to get an arm triangle but Otami is defending well.
Olawandi trying to control the position but Otami is working away.
Otami is a painfully thin specimen of a man. You do wonder whether a good body kick would snap him clean in two.
Olawandi taking a breather here.
Olawandi wants to control but Otami is keeping him busy.

That's four minutes gone in the round.
Olawandi moves into full mount!
Olawandi lands a nice shot to the head.
Olawandi avoids the attempt from Otami to control.
Olawandi working some short elbows here. He postures up to throw some more ground and pound but Otami slips a leg through to get back to half guard. Nice work.
The crowd thankful this round is nearly over.
Nice strikes from Olawandi there.
And that is the end of the round. The fighters go back to their corners.
Michael Olawandi dominated that round.
The corners get their ten second warning. Both fighters stand from their stools and stare each other down, ready to get back to the action.

Olawandi closes the distance and pushes Otami back into the cage.
Olawandi fails to pull the fight into his guard.
The two fighters are working to gain dominance in the clinch.
Olawandi tries to pull guard but Otami forces him back to his feet, against the cage.
Olawandi is trying to work out of this bad position, with his back against the cage.
Olawandi is really dominating this fight. Is there anything that Otami can do to turn this around?
Olawandi tries to pull guard but can't drag his opponent to the mat. Otami just stands there and leans against the cage.
That's three failed takedown attempts in the round for Michael Olawandi. That's going to take a lot out of him.
Olawandi tries to jump guard but he falls flat on his backside. Otami smiles and moves away.
Otami checks a leg kick nicely.
Olawandi has taken the fight to the clinch.
We've had a slow start to the round here - hopefully the action picks up.
Otami breaks from the clinch.
Otami avoids the clinch attempt nicely.
Olawandi is looking to chop away at Otami's legs.

Otami closes the distance and clinches.
Otami breaks the clinch.
That's one minute gone in the round.
Olawandi fails to land the takedown.
Otami leaves Olawandi with his face pressed against the mat as he sprawls beautifully, defending against a solid takedown attempt.
Otami displays some good footwork, moving neatly out of range as Olawandi throws out the jab.
Olawandi throws a body shot but no joy.
Otami moves into the clinch.
Olawandi slowing the pace effectively.
Otami prevents a takedown attempt there.
Both fighters are absolutely exhausted here.
Otami breaks from the clinch.
Otami shoots in with a takedown attempt and he has Olawandi pinned against the cage. Olawandi gets the underhooks and manages to circle away.
That's two minutes gone in the round.
Otami takes the fight into the clinch.
Olawandi ties up his opponent against the cage and manages to drag the fight down to the ground. Olawandi no doubt will be looking to work submissions from his guard.
Olawandi doesn't do any damage with a couple of strikes from the bottom.
Otami in full guard, throwing the ground and pound. No damage this time.
Olawandi is working from a closed guard but he's struggling to control his opponent.
Olawandi wants to control but Otami passes easily into half guard.
That's three minutes gone in the round.

Otami gets to his feet - back to striking we go!
Olawandi throws a jab but it's blocked by Otami.
Otami wants to counter with a clinch but Olawandi pushes him away.
Otami checks a leg kick.
Olawandi tries to clinch but is not successful on this occasion.
Olawandi misses with a left hand
and Otami counters with a lovely shot to the body.
Otami shoots in for a takedown but doesn't get it.
Otami delivers a nice body kick.
Otami moves into range and throws a lovely three punch combination.
Olawandi tries to clinch but Otami is having none of it.
Otami jabs Olawandi right on the nose. Olawandi blinks but takes it well.
Otami doesn't manage to clinch there - Olawandi circles away.
That's four minutes gone in the round.
Olawandi swings wildly with a couple of big hooks
and Otami counters with a nice kick to the body.
Olawandi bobs and weaves into range and then changes levels and scores with a nice takedown into side control.

Otami throws Olawandi to one side and escapes!
The fans in attendance giving it up for the two fighters, who have really let it all hang out in the last minute or so!
Olawandi is looking to take this fight into the clinch.
Olawandi stuffs the takedown.
A jab from Olawandi misses.
Olawandi misses with a half-hearted attempt at a head kick.
Otami gets a clinch.
Olawandi fails to pull guard.
Otami's corner calls for him to break the clinch, which he does.
Otami blocks a low kick nicely.
Otami is looking for the big counter here.
And that is the end of the round. The fighters go back to their corners.
Shin Otami showed his class in that round. I'd imagine he'll take it on all the scorecards.
The fighters get back to their feet, the hooter sounds and we're back to the action! Let's hear some noise people - this is the final round!

Olawandi throws a right hand that misses
and Otami counters with a good right hand that lands right on the jaw.
Otami throws a two punch combo that lands nicely.
Olawandi tries to clinch but Otami is having none of it.
Olawandi tries to close the distance and clinch but Otami swats him to one side with an open hand palm strike and circles away.
Olawandi thows a leg kick but Otami checks it
and Otami moves into the clinch.
Olawandi gets underhooks to prevent Otami's takedown attempt.
Olawandi drops to a knee looking for a takedown but Otami gets the underhooks and prevents it.
Olawandi is trying to pull guard but Otami has him pressed against the cage.
We've had a slow start to the round here - hopefully the action picks up.
Otami goes for a takedown attempt but Olawandi pushes him away and we're back to fighting at a distance.
Olawandi throws a hook to the body but it doesn't connect.
Michael Olawandi is looking to throw some combinations by the looks of things.
Olawandi looks for a takedown but Otami sprawls well.
That's three failed takedown attempts in the round for Michael Olawandi. That's going to take a lot out of him.
Both fighters are breathing heavily.
That's one minute gone in the round.
Olawandi throws the overhand right but ducks down into a quick takedown attempt. Otami was covering up waiting for the punch and Olawandi finishes the takedown easily into guard.
Otami is edging up against the cage. He's using the cage to get back to his feet. Nice work there - the fighters are clinched.
Olawandi changes levels and goes for a takedown here. Otami fights it off and pushes away nicely.
Olawandi defends well against a solid takedown attempt from Otami.
Otami shoots for a double leg takedown but Olawandi sprawls well. He's pushed Otami's face into the mat and manages to get back to his feet relatively easily.
Olawandi is looking to clinch.
That's two minutes gone in the round.
Olawandi closes this distance looking for a takedown but Otami circles away.
Michael Olawandi seems to be the more aggressive standup fighter in this bout.
Olawandi tries to clinch but Otami moves away
and Otami counters with a crisp hook to the side of the head.
Otami looks for a takedown but Olawandi sprawls well.
Olawandi tries to close the distance and clinch up but Otami swats him away and circles back towards the center.
Fantastic stuff here - a very entertaining period of action, which has drawn cheers from the crowd.
The fight stays on the outside here - Otami looks like he's thinking about clinching though.
Otami shoots for a takedown but Olawandi saw that one coming a mile off and avoided it easily.
Olawandi fails in his attempt to clinch.
Otami is definitely looking for the counter takedowns here.
Shin Otami seems to be getting the better of the standup.
Olawandi looking to shoot here. He's gone for it and he's landed a takedown into side control! Oh, that's bad for Otami!

Olawandi stands up and beckons Otami to his feet.
That's three minutes gone in the round.
Olawandi stuffs a takedown. It's all about dictating where the fight takes place and Olawandi wants it to stay on the feet.
Olawandi fails miserably with a takedown attempt.
Olawandi dives in and grabs Otami's left leg, looking for a takedown. Otami pushes down on Olawandi's head and hops out.
Olawandi moves to clinch but Otami breaks away
and Otami counters with a lovely straight right hand!
Otami clinches up against the cage.
Olawandi fails to pull guard.
Otami breaks the clinch.
Olawandi misses with a double jab.
A nice combination there by Otami.
That's four minutes gone in the round.
Olawandi swings wildly with a right hand that was never going to find it's target.
Otami avoids the clinch attempt nicely.
Olawandi shoots in but doesn't get the takedown
and Otami counters with a three punch combo that has Olawandi backing up. Olawandi nods at Otami to acknowledge the strikes.
Otami moves into the clinch.
The crowd cheering loudly, showing their appreciation for the quality fight we're seeing here.
Olawandi misses the knee to the body. Nice hip positioning from Otami.
Olawandi tries to pull guard but Otami won't allow it.
Otami manages to get underhooks and slows down the pace for a moment.

Olawandi's corner calls for him to break the clinch, which he does.
And that's the end of the fight!
Shin Otami comfortably won the final round on my scorecard.
I think Otami has won this one but let's see whether the judges agree with me. Over to the ring announcer for the scorecards.
Ladies and gentlemen, after 3 rounds of action, we go to the scorecards for a decision.
Judge Nard Betker scores the fight 28:29
Judge Paulsen Ambrosius scores the fight 28:29
Judge Aafke Stam scores the fight 28:29
In favor of your winner, by unanimous decision... Shin Otami!
|
|
|
|
|
|
|
|
|
|
|
|
|
|
|
|
|
|
|
|
|
|
|
| S |
C
A |
G |
S |
C
B |
G |
|
S |
C |
G |
|
energy
A | B |
|
hype
A | B |
|
pop
A | B |
|
mgr
A | B |
|
FIGHT
RATING
43% |
|
|
|
|
|
|
