|
|
PBP Commentary |
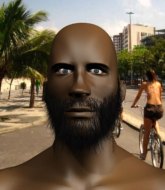
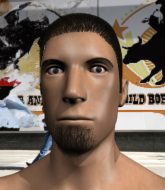
Coming up we have a bantamweight MMA rules bout between Jon Blake (ranked 24271 p4p, 24822 weight class) and Meto McGregor (ranked 0 p4p, 0 weight class). McGregor is bouncing up and down as he enters the arena, backed by hücum marşı. Jon Blake has the better chin. Will he look to stand and bang today?
 |
|
 |
| 188 cm
18
140
1 - 3 - 0 |
|
182 cm
21
143
4 - 8 - 0 |
Good wrestling
Dangerous knees
Good chin |
|
BJJ Blue Belt
Basic striking
Knockout power |
|
| |
|
Ladies and gentlemen. This fight is 3 rounds, in the bantamweight division.
Introducing the fighter to my left, fighting out of the red corner.
With a record of 1 - 3 - 0, fighting out of Tokyo, Jon Blake!
And introducing the fighter to my right, fighting out of the blue corner.
With a record of 4 - 8 - 0, fighting out of Tokyo, Meto McGregor!
The judges for this bout are Taro Takaoka, Hirohito Nitta and Kenichi Hosakawa.

The bell rings for round one and we are underway!
McGregor misses with a two punch combination.
McGregor wants to clinch.
A kick lands to the mid section there for Blake.
McGregor tries to clinch but is not successful on this occasion.
Blake looks to have improved his striking defense since last time we saw him fight.

The fight moves into the clinch position.
Blake tries to land a knee to the body but he is off balance and McGregor avoids it.
Blake lands a knee to the head.
We've had a slow start to the round here - hopefully the action picks up.

McGregor's corner calls for him to break the clinch, which he does.
McGregor moves in looking to clinch but Blake pushes him off.
Blake quickly followed up with a counter body kick but doesn't connect.
Blake throws a half hearted mid kick.
McGregor wants to counter the offense by Blake and move into the clinch position.
Blake throws a half hearted mid kick.
Blake really does look like a pencil wearing a pair of gloves. Let's hope he has a gameplan to suit that ridiculous body shape.
Blake avoids the clinch attempt nicely.
Blake tries to counter by moving into the clinch but McGregor manages to circle out of the way.

That's one minute gone in the round.
Some bone on bone action there as McGregor checks a low kick. Luckily it wasn't a particularly hard one.
McGregor throws a series of punches but Blake moves out of range.
Meto McGregor seems to be the more aggressive standup fighter in this bout.
Blake has his head slapped from side to side by a 3 punch combination. That must have hurt him.
McGregor scores with a nice looking left hook and follows it up with an uppercut!
McGregor throws a nice looking combination but Blake bobs and weaves to avoid any damage.
McGregor fails to land with a series of punches.
No luck for McGregor with that takedown attempt.
McGregor tries to clinch up.
Blake finds nothing but air with that leg kick attempt.
McGregor getting the better of the striking in that exchange.
Blake circles away from the clinch attempt.
Blake moves into range and clinches up with McGregor.
Fantastic stuff here - a very entertaining period of action, which has drawn cheers from the crowd.

Blake gets a trip takedown into half guard.

Blake wants to work for an arm triangle but McGregor is really keeping half guard well and defending the submission attempt.
Blake looking for a kimura but he'll have to free his other leg if he wants to finish that. Perhaps he's just using it as a distraction technique.

That's two minutes gone in the round.
Blake is trying to work for a kimura. This could be trouble! No, McGregor has managed to free his arm - good work.
Blake is looking for a kimura here.
McGregor is looking to control Blake's leg but it's slowly edging free. Can McGregor avoid being mounted?
Blake looking for a kimura but he'll have to free his other leg if he wants to finish that. Perhaps he's just using it as a distraction technique.
McGregor pushes Blake off looking to stand but Blake dives back in and keeps control.

That's three minutes gone in the round.
McGregor trying to control from the bottom.
Blake is trying a forearm choke� I don't think that's going to do much at this level of the game.
McGregor is defending against the submission attempts here by Blake.
Blake is sneakily working for an arm triangle but McGregor sees it coming and defends easily.
The fighters are going at a pretty good pace and they're both starting to sweat now.
McGregor is defending against the submission attempts here by Blake.

McGregor kicks off Blake and gets to his feet.
Blake has managed to clinch.
Blake lands a knee to the head there! That was nasty!

That's four minutes gone in the round.
McGregor wants to break the clinch but can't.
McGregor tries to break free but Blake pushes him back against the cage.
Blake misses with a knee to the head.
McGregor prevents the takedown attempt.
A frustrated look appears on McGregor's face as he tries to break the clinch.
Blake tries a knee to the head but McGregor blocks it.
Blake looking for a takedown.
McGregor is trying to break the clinch but Blake has him pressed against the cage.
Blake looking to throw knees to the head but McGregor is blocking nicely.
McGregor tries to break the clinch but Blake is controlling the position.
McGregor tries to circle away but Blake has him pinned against the cage.
McGregor tries to pull guard but Blake holds him up against the cage and eventually McGregor drops back down to his feet.
Blake is trying to work for a single leg takedown but McGregor pulls him back up using the underhooks.
That's three failed takedown attempts in the round for Jon Blake. That's going to take a lot out of him.
Blake keeps the fight in the clinch, despite McGregor's efforts to push away.
Blake with the Thai clinch. He's looking to land a big knee but he's not managed it this time.
Blake utilising his Muay Thai to score with a knee to the body.
Blake goes for a takedown in the clinch but McGregor prevents it.
And that is the end of the round. The fighters go back to their corners.
That was a close round but I would say that Jon Blake will probably get the nod.
The fighters get back to their feet, the hooter sounds and we're back to the action!

McGregor lands a jab. Then a cross. Then finally a nice hook to the body. Good work there by McGregor.
McGregor looks for a takedown here. Will he get it? Blake is fending him off so far but McGregor persists. Nope, Blake circles away and we're back to standing.
As McGregor backs away, Blake returns fire with a leg kick that just misses.
McGregor moves out of range as Blake throws a body kick.
McGregor throws a one two combo.
McGregor moves in looking to clinch but Blake pushes him off.
McGregor wants to clinch.
Blake rushes McGregor and pushes him back against the cage in a clinch.
We've had a slow start to the round here - hopefully the action picks up.
Blake tries a knee to the head but he's missed.
McGregor is defending well against a takedown attempt.
Blake tries to land a knee to the head but McGregor blocks with his arms.
That's one minute gone in the round.
McGregor is trying to force a seperation but Blake has the dominant position.
McGregor managing to block the knees to the body from Blake.
McGregor is looking to break free of the clinch but Blake has double underhooks.
Blake is working for a takedown up against the cage. He can't get it on this occasion though.
Blake has picked McGregor up - he's going for a ride! Blake dumps his opponent to the mat with a thud and settles into half guard.
Blake is looking for a kimura but he's never going to get it from there.
McGregor is trying to control but can't.
Blake is looking for an arm triangle, whilst trying to pass to side control. McGregor doesn't seem that keen to cooperate though. No luck this time Blake.
McGregor is defending against the submission attempts here by Blake.
Blake is trying a forearm choke� I don't think that's going to do much at this level of the game.
That's two minutes gone in the round.
McGregor regains full guard. Nicely done.
McGregor pulls Blake in close to his closed guard and prevents Blake from doing any damage or advancing position.
McGregor is working the butterfly guard. He manages to land a nice scissor sweep and is now in half guard on the top. Nice move.

Jon Blake overall seems to be getting the better of the ground position in the fight so far.
Blake is trying to maintain the position but McGregor is very close to passing his half guard.
The fighters are battling for position here. Blake manages to regain full guard. Nice work.
Blake on his back here. We all know that wrestlers don't like being on their back so let's see if Blake tries to get out of the position.
McGregor postures up.

McGregor gets to his feet - Blake follows without any prompting.
No joy there for McGregor, who threw a few shots but didn't land.
Blake tries to counter by moving into the clinch but McGregor manages to circle out of the way.
Meto McGregor is looking to throw some combinations by the looks of things.
McGregor tries to clinch but Blake moves out of range.
McGregor is looking to clinch but Blake is avoiding it.
That's three minutes gone in the round.
Blake clinches with his opponent.
Blake missing with knees to the body.
Blake turns his hips and lands a very nice judo throw into side control!
Blake looking for an arm triangle but it's way too loose to do anything.
Blake looking for an arm triangle but it's way too loose to do anything.
Blake looking for an arm triangle but it's way too loose to do anything.
Blake is looking to finish here, going for an Americana. McGregor knows the correct defense though, so he's OK.
Blake wants to work for a kimura but he's foiled early by McGregor, who protects the arm well.
That's four minutes gone in the round.
McGregor can't do much from the bottom here.
Blake is looking for a kimura. He might have it! No, McGregor has escaped the position, nice work there.
Blake goes for an armbar! This could be all over! Wait, no, McGregor rolls with the submission and now he's on top in Blake's guard! Nice work there by McGregor!
Blake looking to hit a scissor sweep but McGregor is one step ahead there.
Blake keeping moving, preventing McGregor from controlling successfully.
McGregor prevents Blake from getting back to his feet.
McGregor gets to his feet. Blake looking to butt scoot but the ref puts an end to that. On your feet son!
And that is the end of the round. The fighters go back to their corners.
A close second round but Meto McGregor will probably get the nod - 10:9.
OK. That's time! The bell goes and we're back to the action. This is the final round!

McGregor tries to close the distance and clinch up against the cage but Blake paws at him with a jab and circles away.
Blake throws a low kick but his opponent is out of range.
As Blake backs off McGregor throws a huge counter combo but Blake manages to avoid it all.
Blake looking to throw a kick but he's pulled out of it.
McGregor throws a head kick that Blake semi-blocks.
McGregor tries to clinch up.
A combination from McGregor does no damage.
Blake throws the kick towards the body but McGregor avoids it.
A solid leg kick lands there for McGregor.
Blake fakes with an overhand right and moves in to clinch with McGregor, pushing him back against the cage.
Blake prevents McGregor from breaking the clinch.
We've had a slow start to the round here - hopefully the action picks up.
McGregor looking to slow down the pace here.
Blake throws a vicious knee straight up the middle but McGregor blocks it with crossed arms.
McGregor on the defensive, avoiding the knees to the body.
McGregor escapes the clinch and we're back to striking.
McGregor is looking to clinch but Blake is avoiding it.
Blake seemed to be looking to counter by closing the distance.
That's one minute gone in the round.
McGregor tries to clinch up.
McGregor shuffles to his left behind two crisp jabs. Blake eats them both and turns towards McGregor to reposition himself and eats a stinging right hand-left hook combo.
Blake throws a feint and then finishes with a kick to the body.
Blake closes the distance and clinches.
Blake is trying to trip McGregor. He has hold of a leg but McGregor is hopping around, keeping his balance for the moment. Blake persists though and gets the takedown into guard.
Blake drops back for a leg! It's a sloppy attempt though and Blake jumps back into guard quickly, to retain the dominant position.
Blake drops back looking for a leg! McGregor is in trouble here! The fighters roll with the hold and McGregor manages to kick Blake off! Blake jumps back into McGregor's guard.
Blake drops back looking for a heel hook - he quickly realises he's not going to get it but McGregor manages to dive on top of him before he can escape and now Blake has McGregor in his guard.
McGregor won't allow Blake to sweep him here.
That's two minutes gone in the round.
McGregor stands up and waves to Blake to follow him.
Fantastic stuff here - a very entertaining period of action, which has drawn cheers from the crowd.
The fight stays on the outside here - McGregor looks like he's thinking about clinching though.
Blake throws a quick counter kick to the body but McGregor avoids it.
McGregor throws a combination that misses
and Blake counters by clinching up.
Blake prevents McGregor from breaking the clinch.

McGregor pulls guard successfully.
Blake drops back looking for a leg! McGregor is in trouble here! The fighters roll with the hold and McGregor manages to kick Blake off! Blake jumps back into McGregor's guard.
Blake drops back for a leg! It's a sloppy attempt though and Blake jumps back into guard quickly, to retain the dominant position.
Blake thinks about going for a leg but decides against it, in order to maintain the position.
Blake drops back for a leg! It's a sloppy attempt though and Blake jumps back into guard quickly, to retain the dominant position.
McGregor can't keep his opponent in guard - Blake advances to half guard, no doubt looking to mount.
That's three minutes gone in the round.
Blake is looking for a kimura. It's going to be difficult to finish that from half guard though and McGregor defends it well.
McGregor throws a strike from the bottom that misses.
McGregor is pressing down on Blake's left leg trying to get back to full guard. He's managed it.
Blake is trying to work a guillotine from the top, or something like that? Don't know how he thinks he's going to get a finish from there.
Blake wants to pass the guard but McGregor is keeping the position.
Blake postures up as if he's going to throw some strikes but drops back for an ankle! McGregor is in big trouble! He looks ready to tap! But no, he's escaped and dives on top of Blake, into his guard.
McGregor trying to control but Blake is working from the bottom.
That's four minutes gone in the round.
McGregor gets to his feet. Blake looking to butt scoot but the ref puts an end to that. On your feet son!
Blake avoids the head kick by McGregor.
McGregor takes a big intake of breath there - he's definitely tired.
Some wild striking there from McGregor.
Blake wants to take advantage of his opponent's missed offense by moving into the clinch.
McGregor falls off balance throwing a combination
and Blake counters with a thumping low kick.
Some wild striking there from McGregor.
McGregor doesn't manage to clinch there - Blake circles away.
Meto McGregor seems to be getting the better of the standup.
McGregor throws a combination that misses
and Blake counters by moving into the clinch. Good anticipation by Blake.
Blake lands a knee to the head.
Blake lands a good knee to the midsection. McGregor won't want to take too many of those.
And that's the end of the fight!
That was a close round. You could make an argument for either fighter but I would give it to Jon Blake.
I think Blake has won this one but let's see what the judges have to say. Over to the ring announcer for the scorecards.
Ladies and gentlemen, after 3 rounds of action, we go to the scorecards for a decision.
Judge Taro Takaoka scores the fight 30:28
Judge Hirohito Nitta scores the fight 29:28
Judge Kenichi Hosakawa scores the fight 29:28
In favor of your winner, by unanimous decision... Jon Blake!
Meto McGregor was interviewed post fight and said 'fuck you'.
|
|
|
|
|
|
|
|
|
|
|
|
|
|
|
|
|
|
|
|
|
|
|
| S |
C
A |
G |
S |
C
B |
G |
|
S |
C |
G |
|
energy
A | B |
|
hype
A | B |
|
pop
A | B |
|
mgr
A | B |
|
FIGHT
RATING
44% |
|
|
|
|
|
|

