|
|
PBP Commentary |
Coming up we have a featherweight MMA rules bout between Kenzo Akemasa (ranked 4184 p4p, 4415 weight class) and Depends On How U Play It (ranked 331 p4p, 339 weight class). We have two fighters making their debuts here, so let's see who comes out of this one with their first professional victory.
 |
|
 |
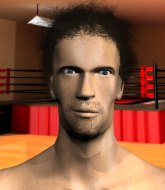
| 172 cm
18
152
0 - 0 - 0 |
|
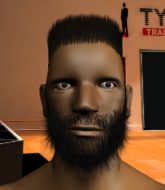
178 cm
19
155
0 - 0 - 0 |
Good takedowns
Basic striking
Good chin |
|
BJJ Blue Belt
Decent boxing
Granite chin |
|
| |
|
Ladies and gentlemen. This fight is 3 rounds, in the featherweight division.
Introducing the fighter to my left, fighting out of the red corner.
With a record of 0 - 0 - 0, fighting out of London, Kenzo Akemasa!
And introducing the fighter to my right, fighting out of the blue corner.
With a record of 0 - 0 - 0, fighting out of Hilo, Depends On How U Play It!
The judges for this bout are Robert Twigg, Tiny Johnson and Stewart Dunkirk.

The bell rings for round one and we are underway!
Akemasa shoots in for a takedown but doesn't get it.
How U Play It throws a looping overhand right but Akemasa ducks down to avoid it.

Akemasa drives through with a takedown into guard.

How U Play It pushes Akemasa off and scrambles back to his feet.
Kenzo Akemasa seems to be the more aggressive standup fighter in this bout.
How U Play It thuds a left hand into Akemasa's body.
Akemasa tries to score a power double leg takedown but How U Play It sees that one coming and sprawls well. That will dishearten Akemasa somewhat.
How U Play It looks like he wants to counter punch here.
Akemasa avoids the body shot from How U Play It.
Akemasa fakes a strike and closes the distance, dragging How U Play It to the ground. Akemasa is now in How U Play It's guard.
We've seen a great period of action over the last minute or so - credit to both fighters for going all out!
Akemasa loading up with the ground and pound but he's missing more than he's landing in this flurry.
How U Play It controlling the position.
Akemasa postures up.
How U Play It avoiding any damage from the ground and pound.
Akemasa tries to free his leg and advance position but How U Play It is retaining full guard.
Akemasa postures up in How U Play It's guard and throws a big left but How U Play It blocks it.

That's one minute gone in the round.
How U Play It is controlling Akemasa's posture.
The fighters are pressed up against the cage, both looking to find a bit of space to work.
Akemasa tries to free his leg and advance position but How U Play It is retaining full guard.
Akemasa lands a nice shot whilst sitting in his opponent's guard.
How U Play It working the defensive guard well to avoid strikes from Akemasa.
Akemasa working some strikes from top position.
How U Play It looking to sweep here. No luck so far.
How U Play It keeping full guard, as Akemasa tries to pass.
Akemasa lands a couple of digs.
How U Play It is looking to get back to his feet but can't, whilst Akemasa is controlling him.

That's two minutes gone in the round.
How U Play It working a defensive guard here.
How U Play It wants to get back to his feet but Akemasa is in a dominant position and won't allow it.
Akemasa postures up to throw the ground and pound strikes but they don't connect.
Akemasa postures up in How U Play It's guard and throws a big left but How U Play It blocks it.
Akemasa won't allow How U Play It to get back to his feet.
We must be close to a standup if these guys don't pick up the pace.
How U Play It looking for a sweep. Not yet How U Play It, not yet.
How U Play It wants to stand up but Akemasa is controlling him.

The ref stands the fighters back up due to a lack of activity.
How U Play It slaps away a takedown attempt from Akemasa, before circling back to the center of the mat.
That's three failed takedown attempts in the round for Kenzo Akemasa. That's going to take a lot out of him.
Akemasa ducks under a wild hook from How U Play It.
Akemasa shoots in for a takedown. "Ole!" shouts How U Play It as he jumps to the side.
Akemasa with a poor takedown
and How U Play It cracks him with a counter punch right on the button.

That's three minutes gone in the round.
Akemasa ducks right into an uppercut from How U Play It.
How U Play It smiles there as he lands a nice right hand right on the button.
Akemasa shoots in for a takedown. He's persisting with it as How U Play It sprawls well. How U Play It wins this battle and keeps the fight standing. Akemasa gets slowly back to his feet.
Akemasa darts in looking for a takedown but How U Play It gets double underhooks and turns Akemasa into the cage.

How U Play It breaks the clinch.
Akemasa gets his head snapped back by a nice shot there.
Akemasa darts in and lands a nice takedown into half guard.
Akemasa missing with some ground and pound from the half guard.
Akemasa works his foot free and advances to mount.
How U Play It tries to reverse the position but Akemasa maintains control.

That's four minutes gone in the round.
The referee warns How U Play It that he has to improve his position here as he takes two more clean shots to the head.
This is a great period of action - very entertaining stuff!
Akemasa punching from mount but How U Play It doing a good job of avoiding damage.
How U Play It is desperately trying to get back to half guard.
Akemasa lands a big elbow.
Akemasa has been looking to land a fair amount of strikes on the ground. He might be looking to soften his opponent up in order to work for a submission.
Akemasa is landing with some decent strikes but How U Play It is trying to advance his position so the referee is letting the fight continue.
How U Play It really trying hard to get back to half guard here.
The ref warns both fighters not to hold the cage as they work up against the meshing.
Akemasa unloading with bombs!
Akemasa lands a heavy elbow.
Akemasa lands a shot to the body, followed up by a shot to the exposed head of his trapped opponent.
Akemasa in mount throwing good strikes here, bouncing his opponent's head off the canvas.
Akemasa scores with a couple of good head shots there.
And that is the end of the round. The fighters go back to their corners.
Kenzo Akemasa dominated that round.
The minute break is over - no more time for sponges and pep talks - back to the action!

How U Play It leaves Akemasa with his face pressed against the mat as he sprawls beautifully, defending against a solid takedown attempt.
Horrible takedown attempt by Akemasa or perhaps it was just good defense by How U Play It, which made it look bad.
Akemasa darts in looking for a takedown but How U Play It gets double underhooks and turns Akemasa into the cage.
That's three failed takedown attempts in the round for Kenzo Akemasa. That's going to take a lot out of him.
How U Play It breaks the clinch and we're back to striking at distance.
How U Play It scores with a straight right hand, right through his opponent's guard.
Akemasa takes one to the chin there.
Akemasa shoots in looking for a takedown but How U Play It manages to keep the fight standing, pushing Akemasa's face into the canvas for good measure before circling away.
How U Play It connects with a looping right hand.
How U Play It misses with a two punch combination.
How U Play It defends well against a solid takedown attempt from Akemasa.
We've had a slow start to the round here - hopefully the action picks up.
Akemasa tries to shoot in for a takedown. He's got hold of a leg but How U Play It swivels and escapes.
How U Play It lands a pitter patter jab to the forehead of his opponent.
Akemasa gets his takedown attempt stuffed easily
and How U Play It counters with a straight punch to the midsection.
The fans in attendance giving it up for the two fighters, who have really let it all hang out in the last minute or so!
Akemasa takes a jab on the nose. He smiles like he loves it and keeps coming.
That's one minute gone in the round.
A really sloppy takedown attempt there from Akemasa.
Akemasa keeping a good distance there, avoiding the body shot.
Akemasa shoots in for a takedown - he's clinched up with How U Play It but How U Play It pushes him off and we're back to square one.
Akemasa shoots in for a takedown. He's persisting with it as How U Play It sprawls well. How U Play It wins this battle and keeps the fight standing. Akemasa gets slowly back to his feet.
Akemasa misses with a takedown
letting How U Play It counter with a right hand.
Akemasa with a lazy takedown attempt
and How U Play It counters with a right hand to the body.
Both fighters are absolutely exhausted here.
Akemasa shoots in for a takedown but How U Play It shows good takedown defense there and keeps this one on the feet.
A left lands for How U Play It.
How U Play It darts in and out, connecting with a jab.
How U Play It lands with an uppercut that bounces Akemasa off the cage and back into range.
Akemasa shoots for a takedown but How U Play It saw that one coming a mile off and avoided it easily.
That's two minutes gone in the round.
No luck for Akemasa with that takedown attempt.
Akemasa shakes his hands off, looking to compose himself, but takes a jab to the jaw whilst he does it.
Fantastic stuff here - a very entertaining period of action, which has drawn cheers from the crowd.
Akemasa misses with a takedown attempt
and How U Play It counters with a good right hand that lands right on the jaw.
Akemasa is pinned up against the cage taking some big shots here. The referee is looking closely deciding whether he should stop the fight.
Akemasa shoots and misses
letting How U Play It counter with a right hand.

Akemasa is rocked!
Akemasa takes a shot to the nose. Hopefully that hasn't broken it.
Oh Akemasa is still all over the place! His legs are completely gone! Will he be able to recover?!!
Akemasa looks up at the clock. Bad move! How U Play It lands a right hand from hell, dropping Akemasa. How U Play It pounces and finishes the fight with a flurry of punches and elbows.
Ladies and gentlemen, after 2:37 of round 2, we have a winner by way of TKO (Strikes). Depends On How U Play It!
|
|
|
|
|
|
|
|
|
|
|
|
|
|
|
|
|
|
|
|
|
|
|
| S |
C
A |
G |
S |
C
B |
G |
|
S |
C |
G |
|
energy
A | B |
|
hype
A | B |
|
pop
A | B |
|
mgr
A | B |
|
FIGHT
RATING
60% |
|
|
|
|
|
|
