|
|
Grappling Hype -1- PBP Commentary |
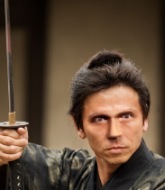
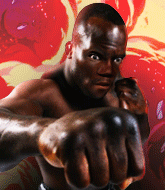
This TWGC bout is 1 fifteen minute round in the super heavyweight division. Introducing today's competitors. In the red corner, competing out of Las Vegas, with a TWGC record of 0 wins and 0 losses; Rounin Hashima! And in the blue corner, fighting out of Las Vegas, with a TWGC record of 0 wins and 0 losses; Salomon Mukunzi!
The judges for this bout are George Francis, Tiny Johnson and Cecil Peabody.
The fighters bow as they face eachother in the middle of the mat and we are under way.
Hashima displays good takedown defense there as he swats away a double leg from Mukunzi.
Mukunzi shoots in and drives through. Hashima sprawls well.
Mukunzi shoots in for a takedown but Hashima shows good takedown defense.
Rounin Hashima has stuffed three takedown attempts in the round now. That's going to take a lot out of Salomon Mukunzi.

Hashima moves into the clinch.

Mukunzi pulls guard successfully.
Hashima controls from within his opponent's guard.
Hashima slips nicely into half guard.
Hashima trying to control the pace.
We've had a slow start to the round here - hopefully the action picks up.
Hashima prevents Mukunzi from improving his position.
The fighters are battling for position here. Mukunzi manages to regain full guard. Nice work.

That's one minute gone in the round.
Hashima preventing the sweep.
Hashima is stalling in the full guard.
Mukunzi is trying to keep Hashima in close.
Hashima's corner is telling him to maintain position.

Mukunzi looks to be working for a triangle here. Oh, it looks like he might have it! Hashima has picked Mukunzi up and slammed him! Mukunzi can't keep hold of the triangle and Hashima manages to pass to side control! Score +3 for passing guard: Hashima (3) vs (0) Mukunzi
Mukunzi is not content to let Hashima control the position.
Hashima tries to move to full mount but Mukunzi actually manages to regain half guard.

That's two minutes gone in the round.
Mukunzi wants to improve his position but Hashima is controlling well.
Mukunzi has no desire to be mounted, so is trying to control. Hashima is working away from the top position though.
Hashima content to sit in half guard and control for a moment.
Hashima has controlled the position for a good 20 seconds, which will no doubt be starting to frustrate his opponent.
Mukunzi is looking to improve his position.

That's three minutes gone in the round.
Still in half guard, Hashima seems content to control.
Mukunzi wants to get back to full guard.
Hashima with a momentary lay and pray from half guard.
Mukunzi is trying to get back to full guard.
Mukunzi is staying active underneath Hashima, who seems content to just control the action from this position.
Well, if Hashima is going to just lie there, perhaps we should talk about what we're having for dinner tonight� I'm having a ham and pineapple pizza� Yum. Can't wait.
Hashima is keen to just control but Mukunzi is a slippery customer.
Mukunzi wants to improve his position but Hashima is controlling well.
Hashima with a momentary lay and pray from half guard.

That's four minutes gone in the round.
Hashima's ground tactics aren't going to win him many fans. Let's hope he's got fireworks for us if he gets back to his feet because he's not doing much on the ground.
Mukunzi wants to improve his position but Hashima is controlling well.
Mukunzi is trying to maintain the position but Hashima is very close to passing his half guard.
Hashima wants to free his trapped foot but Mukunzi is holding on for dear life with his legs.
Mukunzi wants to control but Hashima is keeping busy and won't allow it.
Hashima is figuring out what he wants to do next.
Mukunzi tries to roll over but Hashima keeps him under control.

That's five minutes gone in the round.
Hashima stalling.
The ref warns both fighters not to hold the cage as they work up against the meshing.
Mukunzi is trying to get back to full guard.
Hashima stalling.
Mukunzi is controlling Hashima's trapped leg to prevent Hashima from advancing to side control.
Mukunzi is trying to get back to full guard.

That's six minutes gone in the round.
Hashima content to sit in half guard and control for a moment.
Mukunzi slips a foot under and gets full guard. Nice work.
Mukunzi looking for a sweep. Not yet Mukunzi, not yet.
Mukunzi is working from a closed guard but he's struggling to control his opponent.
Mukunzi pulls Hashima in to control the position.
Mukunzi looking for submissions from the bottom here. Moving his hips around, possibly looking for an armbar.
Mukunzi is pulling down on Hashima's head. It's preventing any offense from Hashima, at least for the moment.
Mukunzi is working an open guard here, looking to improve his position. No doubt that will leave him open to counters but at least he's being more offensive.
The fighters are pressed up against the cage, both looking to find a bit of space to work.

That's seven minutes gone in the round.
Hashima is just sitting in guard, looking to avoid any submissions.
Mukunzi wants to improve his position but instead Hashima has moved into half guard.
Mukunzi is not content to let Hashima control the position.
Mukunzi is looking to regain full guard. Not this time though.
Hashima is keen to just control but Mukunzi is a slippery customer.

That's eight minutes gone in the round.
Mukunzi is looking for a sweep. Hashima is wise to his cunning plan and keeps the top position.
Hashima is taking a breather. Mukunzi says something to him but it's hard to make out. Perhaps he's telling him to get on with it and actually do something.
Mukunzi is looking to get full guard. It looks like he might be successful but at the last minute Hashima jumps into side control! Score +3 for passing guard: Hashima (6) vs (0) Mukunzi
Mukunzi is trying to get back to half guard.
Hashima staying calm.

That's nine minutes gone in the round.
Mukunzi struggling a bit here.
Mukunzi gets back to half guard.
Mukunzi works his way to full guard. Good work.
Mukunzi is working actively off his back, looking to secure an arm or perhaps work for a triangle.
Hashima not doing a lot at the moment. He'll have to show some more aggression or the fight will get stood up.
Mukunzi has his foot on Hashima's thigh. He's trying to push off and get in position for a triangle, I think. Hashima works his way back into a safe position though.
Hashima sitting in guard here, content to control.
Hashima looking to pass the guard.

That's ten minutes gone in the round.
Hashima content to stall in guard here.
Hashima tries to free his leg and advance position but Mukunzi is retaining full guard.
Mukunzi looking to hit a scissor sweep but Hashima is one step ahead there.
Mukunzi throwing his legs up looking for a triangle.
Hashima's corner is telling him to maintain position.
Hashima passes Mukunzi's left leg - he's now in half guard.

That's eleven minutes gone in the round.
Mukunzi is trying to maintain the position but Hashima is very close to passing his half guard.
Hashima controlling the action here.
Mukunzi won't allow Hashima to pass to mount.
Mukunzi trying to control from the bottom.
Mukunzi manages to get to full guard.
Hashima looking to control the position here, rather than advance.
Mukunzi working a defensive guard here.

That's twelve minutes gone in the round.
Hashima controlling from the top position.
Mukunzi is looking for a triangle but Hashima pushes his legs off easily.

That's thirteen minutes gone in the round.
Mukunzi keeping moving, preventing Hashima from controlling successfully.
Hashima is stalling in the full guard.
Hashima stopping the sweep attempt from Mukunzi.
Hashima stays in close to Mukunzi's body and controls the position.
We get told so often about how wrestlers don't like to be on their backs. Let's see if Mukunzi can do anything to dispel that myth.
Hashima trying to control but Mukunzi is working from the bottom.
Mukunzi controls Hashima momentarily but Hashima frees himself.

That's fourteen minutes gone in the round.
Hashima stopping the sweep attempt from Mukunzi.
Mukunzi not looking particularly offensive just at the moment.
Hashima showing good wrestling skills to control the position.
Mukunzi is working an open guard here, looking to improve his position. No doubt that will leave him open to counters but at least he's being more offensive.
Mukunzi trying to keep a closed guard but Hashima is proving a slippery customer.
Boooooooooooooooooooo!!! God, this has been a terrible round. Come on you two, sort yourselves out!
Hashima is frustrating his opponent with some stalling tactics from top position.
Hashima pressing down on his opponent's thigh, looking to pass guard. Mukunzi is keeping the position for now.
And that's the end of the fight!
Hashima takes the fight on points by 6 to 0.
A less than humble Rounin Hashima misjudged his post fight interview somewhat and came across a little too arrogant whilst trying to hype up his own abilities. |
|
|
|
|
|