|
|
Grappling Hype -1- PBP Commentary |
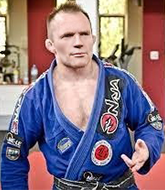
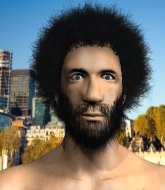
This TWGC bout is 1 fifteen minute round in the bantamweight division. Introducing today's competitors. In the red corner, competing out of Las Vegas, with a TWGC record of 4 wins and 0 losses; Olaf Koks! And in the blue corner, fighting out of London, with a TWGC record of 3 wins and 1 losses; Danger Dobbie!
The judges for this bout are Gwen Towbar, Stewart Dunkirk and Robert Twigg.
The official calls the fighters to the middle and the contest is under way.
Dobbie looks for a takedown but Koks sprawls well.

Dobbie shoots in and scores a nice double leg takedown into half guard. Score +2 for takedown into guard / half guard: Koks (0) vs (2) Dobbie
The fighters are battling for position here. Koks manages to regain full guard. Nice work.
Koks looking to hit a scissor sweep but Dobbie is one step ahead there.
Dobbie trying to control the position from guard on top but Koks is wriggling around, looking for whatever he can.
A real slowdown in the pace of the fight for a moment, as Koks holds on and takes a little breather.
We've had a slow start to the round here - hopefully the action picks up.
Koks continues to stall.
Dobbie stands and throws Koks's legs to the side, diving into side control. Score +3 for passing guard: Koks (0) vs (5) Dobbie
Dobbie advances to mount. Score +2 for reaching mount: Koks (0) vs (7) Dobbie
Dobbie trying to control but he's not successful this time.

That's one minute gone in the round.
Dobbie controlling from the full mount.
Dobbie wants to control the pace but Koks is squirming around nicely.
Dobbie might have to switch it up a bit here because his efforts to control Koks haven't been going to plan, at least at the current moment in time.
Koks is looking to get to half guard.
Dobbie wants to control the pace but Koks is squirming around nicely.
Koks is desperately trying to get back to half guard.

That's two minutes gone in the round.
Dobbie fails to move to back control.
Koks tries to get back to half guard but can't.
Koks wants to hold on but Dobbie pushes him away.
Dobbie wants to take his opponent's back but instead Koks manages to regain half guard.

Dobbie is working for a kimura but Koks is defending it quite comfortably.
Koks has his hands clasped together around Dobbie's back. He's all about the action.
Dobbie has freed up his trapped foot and advances to mount. Score +3 for passing guard: Koks (0) vs (10) Dobbie

That's three minutes gone in the round.
Koks can't escape the position.
Koks gets back to half guard.
Dobbie wants to pass to mount but Koks is defending the position.
Dobbie is looking to take a break and control but Koks is keeping him honest, looking to work from the bottom.
Dobbie is looking for the mount but instead finds himself back in full guard.
Dobbie stands up and looks to throw the legs aside to pass to side control. Koks swivels though and keeps the full guard.
Dobbie trying to control the position from guard on top but Koks is wriggling around, looking for whatever he can.
Dobbie tries to free his leg and advance position but Koks is retaining full guard.

That's four minutes gone in the round.

Koks throwing his legs up looking for a triangle.
The ref warns both fighters not to hold the cage as they work up against the meshing.
Koks is working from a closed guard but he's struggling to control his opponent.
Dobbie forces his way into half guard.
Koks wants to improve his position but Dobbie is controlling well.
Dobbie trying to control from half guard but Koks is working away.
Koks is looking to regain full guard. Not this time though.
Dobbie wants to control but Koks is keeping him busy.
Dobbie content to sit in half guard and control for a moment.

That's five minutes gone in the round.
Dobbie is trying to control. Koks wants to improve his position but can't escape this time.
Koks is looking to regain full guard. Not this time though.
Koks regains full guard. Nicely done.
Koks has Dobbie pulled in close to control his posture.
Koks keeping moving, preventing Dobbie from controlling successfully.
Koks wants to sweep here but Dobbie controlling him for the moment.
Dobbie advances to half guard.
Dobbie is controlling the pace.

That's six minutes gone in the round.
Dobbie is keen to just control but Koks is a slippery customer.
Koks is trying to get back to full guard.
Koks is staying active underneath Dobbie, who seems content to just control the action from this position.
Koks wants to get back to full guard.
Koks has no desire to be mounted, so is trying to control. Dobbie is working away from the top position though.
Koks tries to roll over but Dobbie keeps him under control.
Dobbie is working for a kimura but Koks is defending it quite comfortably.
Koks is looking for a sweep. Dobbie is wise to his cunning plan and keeps the top position.

That's seven minutes gone in the round.
Koks is trying is best to control the position here.
Koks makes his way to full guard. A much better position for Koks.
Dobbie postures up.
Dobbie looking to sit in guard and control but Koks gets the butterfly guard and sweeps. He's now in the guard on the top. Score +2 for sweep to guard / half guard: Koks (2) vs (10) Dobbie
Dobbie is actively looking for submissions from his back. He's worked himself a little space on the bottom and seems to be going for a triangle. No, he's switched into an armbar! That was slick! Koks rolls with it to try and escape but Dobbie cranks on the arm and Koks is forced to tap out! This one is aaaaaaaaall over!
Ladies and gentlemen, after 7:46 of round 1, we have a winner by way of Submission (Armbar). Danger Dobbie!
Danger Dobbie is the new bantamweight champion!
A victorious Danger Dobbie thanked his army of followers in his post fight interview, telling people to make sure they follow him on Twitter. |
|
|
|
|
|