|
|
PBP Commentary |
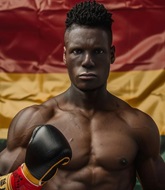
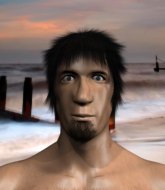
Coming up we have a welterweight MMA rules bout between Didier Boateng (ranked 3860 p4p, 3944 weight class) and JD Hawks (ranked 0 p4p, 407 weight class). We have two fighters making their debuts here, so let's see who comes out of this one with their first professional victory.
 |
|
 |
| 183 cm
18
174
0 - 0 - 0 |
|
186 cm
18
170
0 - 0 - 0 |
Good wrestling
Counter fighter
Cuts easily |
|
Decent wrestler
Basic striking
Tends to cut |
|
| |
|
Ladies and gentlemen. This fight is 3 rounds, in the welterweight division.
Introducing the fighter to my left, fighting out of the red corner.
With a record of 0 - 0 - 0, fighting out of London, Didier Boateng!
And introducing the fighter to my right, fighting out of the blue corner.
With a record of 0 - 0 - 0, fighting out of Amsterdam, JD Hawks!
The judges for this bout are William Gold, James Atkins and Richard Clark.

The bell rings for round one and we are underway!

Hawks closes the distance and scores a nice trip takedown into half guard. Boateng did well to prevent Hawks getting side control.
Boateng on his back here. We all know that wrestlers don't like being on their back so let's see if Boateng tries to get out of the position.

Boateng looking to work for a kimura from the bottom.
Hawks is figuring out what he wants to do next.
Boateng looking to work for a kimura from the bottom.
Hawks prevents Boateng from improving his position.
Hawks moves into full mount! Boateng won't be happy about that!
Hawks tries to control but Boateng wriggling away.
We've had a slow start to the round here - hopefully the action picks up.
Boateng can't escape the position.

That's one minute gone in the round.
Boateng is squirming around, avoiding Hawks's attempts to control the action.
Boateng is looking to get to half guard.
Hawks wants to control the pace but Boateng is squirming around nicely.
Boateng is trying to escape the mount.
Hawks landing strikes from the mount.
Boateng is looking to get to half guard.
Hawks takes a little breather and maintains the position. The referee will be looking for him to stay active from such a dominant position though.
Boateng sneaks a leg under to get to half guard.

That's two minutes gone in the round.
Boateng on the receiving end of some nice ground and pound.
Boateng is trying to get back to full guard.
Boateng is looking to sinch up a guillotine here but Hawks pulls his head out easily.
Boateng actively working from the bottom here.
Hawks content to sit in half guard and control for a moment.
Boateng actively working from the bottom here.
Boateng looking for submissions from an awkward position here.
Boateng wants to improve his position but Hawks is controlling well.
Hawks uses his free foot to push down on Boateng's thigh. Eventually he works his other foot free and he's advanced to mount - this is trouble for Boateng.
Boateng working to try and regain half guard.

That's three minutes gone in the round.
Hawks tucks in and makes sure he doesn't lose the dominant position.
Hawks trying to control but Boateng is having none of it.
Boateng bucks up and manages to get a nice reversal! He's in guard on the top - nicely done!
Hawks keeping moving, preventing Boateng from controlling successfully.

Hawks is throwing his legs up, looking for submissions. Boateng is aware though and is defending well.
Boateng tries to free his leg and advance position but Hawks is retaining full guard.

That's four minutes gone in the round.
Hawks is trying to keep Boateng in close.
Boateng wants to pass the guard but Hawks is keeping the position.
Boateng is holding a leg here, probably looking for an ankle lock - he drops back and goes for it! Hawks is in trouble! Is it all over??? No! Hawks has escaped and now he's on top!

Boateng has a loose triangle. He'll be looking to tighten that up but Hawks can see exactly what he's planning and manages to posture up and free himself.
The crowd thankful this round is nearly over.
Boateng looking for submissions from the bottom here. Moving his hips around, possibly looking for an armbar.
And that is the end of the round. The fighters go back to their corners.
JD Hawks dominated that round.
OK. That's time! The bell goes and we're back to the action.


Hawks has closed the distance and engaged Boateng in a clinch.
Hawks ties up his opponent against the cage and manages to drag the fight down to the ground. Hawks no doubt will be looking to work submissions from his guard.
Boateng pressing down on his opponent's thigh, looking to pass guard. Hawks is keeping the position for now.
Hawks has been the more effective fighter overall so far.
Boateng pushes down on Hawks's leg and manages to get into half guard.
Boateng is looking to advance position but Hawks won't allow it.
Hawks manages to get to full guard.
We've had a slow start to the round here - hopefully the action picks up.
Hawks keeping moving, preventing Boateng from controlling successfully.
Hawks trying to keep a closed guard but Boateng is proving a slippery customer.
That's one minute gone in the round.
Boateng pushing down on Hawks's thigh, trying to pass to half guard. He's managed it... Nice work.
Boateng is working for a submission of some sort.
The fighters are pressed up against the cage, both looking to find a bit of space to work.
Hawks wants to improve his position but Boateng is controlling well.
Boateng is looking for an arm triangle, whilst trying to pass to side control. Hawks doesn't seem that keen to cooperate though. No luck this time Boateng.
Hawks wants to get back to full guard.
Boateng stalling away here and it's allowed Hawks to slip out his trapped foot and regain full guard.
That's two minutes gone in the round.
Well. There's a bit of a lull in the action here and the crowd are starting to get restless.
Boateng pressing down on his opponent's thigh, looking to pass guard. Hawks is keeping the position for now.
Boateng is working hard here to advance position.
Boateng not doing a lot at the moment. He'll have to show some more aggression or the fight will get stood up.
The ref warns both fighters not to hold the cage as they work up against the meshing.
Boateng trying to pass the guard but can't manage it just yet.
Boateng trying to pass the guard. He's being very persistent here but Hawks manages to land a sweep and now he's on top!
Boateng has a loose triangle. He'll be looking to tighten that up but Hawks can see exactly what he's planning and manages to posture up and free himself.
Boateng escapes his hips to the side and looks to be working for an armbar. Hawks gives him a little smile and shakes his head. No chance.
Boateng is active off his back here, looking for submissions.
That's three minutes gone in the round.
Hawks tries to free his leg and advance position but Boateng is retaining full guard.
Boateng looking for submissions from the bottom but instead Hawks passes into side control.
Hawks trying to control the action but Boateng is working from the bottom.
Boateng manages to land a sweep and he's now on top! Lovely Jiu Jitsu!
Boateng wants to free his trapped foot but Hawks is holding on for dear life with his legs.
Hawks tries to get to full guard but Boateng has control of the leg.
Hawks is refusing to be controlled, as Boateng sits in half guard.
That's four minutes gone in the round.
Hawks regains full guard. Nicely done.
Hawks is breathing heavily.
Boateng stands up and looks to throw the legs aside to pass to side control. Hawks swivels though and keeps the full guard.
Boooooooooooooooooooo!!! God, this has been a terrible round. Come on you two, sort yourselves out!
And that is the end of the round. The fighters go back to their corners.
That was a close second round but I would say that Didier Boateng will probably get the nod.
That's time! Back to the action! The crowd applaud as we get ready to start the final round!

Hawks closes the distance and gets a double leg, slamming Boateng to the mat! Boateng manages to get full guard.
Boateng working from the bottom, still in full guard. He's managed to get a loose triangle. Hawks doesn't seem to be doing much to defend here, obviously he feels comfortable in the position. Hawks manages to throw the legs off his shoulder and he's back into guard - no problem.
JD Hawks has got the better of the ground game so far.
Boateng can't do much from the bottom at the moment, as Hawks controls the pace.
Hawks advances position into side control!
Boateng is looking for a sweep.
We've had a slow start to the round here - hopefully the action picks up.
Hawks wants to lay and pray for a moment but Boateng keeps working.
Boateng is looking for a sweep.
Hawks slows the pace down.
Boateng is looking to regain half guard here but Hawks keeps moving and retains side control.
That's one minute gone in the round.
Boateng manages to get back to half guard.
Boateng looking for submissions from an awkward position here.
Boateng actively working from the bottom here.
Boateng slips a foot under and gets full guard. Nice work.
Hawks seems content to control from guard here. He's going to have to remain active though if he doesn't want to get stood back up.
Boateng working from the bottom, still in full guard. He's managed to get a loose triangle. Hawks doesn't seem to be doing much to defend here, obviously he feels comfortable in the position. Hawks manages to throw the legs off his shoulder and he's back into guard - no problem.
That's two minutes gone in the round.
Boateng had isolated an arm as going for a kimura. Hawks defends it easily.
Hawks trying to control the position from guard on top but Boateng is wriggling around, looking for whatever he can.
Boateng has his foot on Hawks's thigh. He's trying to push off and get in position for a triangle, I think. Hawks works his way back into a safe position though.
Hawks controlling from the top position.
Boateng keeping moving, preventing Hawks from controlling successfully.
Hawks takes a big intake of breath there - he's definitely tired.
Boateng looking for submissions from the bottom here. Moving his hips around, possibly looking for an armbar.
Boateng escapes his hips to the side and looks to be working for an armbar. Hawks gives him a little smile and shakes his head. No chance.
That's three minutes gone in the round.
Boateng throwing his legs up looking for a triangle.
Hawks tries to stand but Boateng is controlling from the bottom.
Boateng had isolated an arm as going for a kimura. Hawks defends it easily.
Boateng isolates an arm and boxes in a triangle. Hawks stacks Boateng on his neck as he steps over and passes to the side. He's now in a much more dominant position where he can look to do some serious damage. Nice move by Hawks!
Boateng manages to get back to half guard.
Hawks is thinking about going for an arm triangle but he can't free his leg.
Boateng actively working from the bottom here.
That's four minutes gone in the round.
Hawks wants to lay and pray for a moment but Boateng keeps working.
Boateng looking for subs from the bottom but Hawks mounts him!
Hawks trying to control but he's not successful this time.
Hawks controlling the pace for now.
Boateng regains half guard.
Boateng looking for submissions off his back.
Boooooooooooooooooooo!!! God, this has been a terrible round. Come on you two, sort yourselves out!
Boateng looking for submissions off his back.
And that's the end of the fight!
JD Hawks comfortably won the final round on my scorecard.
Well Hawks has outworked and out performed his opponent in all aspects of the game today. He was simply too good and the decision should be no more than a formality. Over to the ring announcer for the scorecards.
Ladies and gentlemen, after 3 rounds of action, we go to the scorecards for a decision.
Judge William Gold scores the fight 28:29
Judge James Atkins scores the fight 28:29
Judge Richard Clark scores the fight 28:29
In favor of your winner, by unanimous decision... JD Hawks!
|
|
|
|
|
|
|
|
|
|
|
|
|
|
|
|
|
|
|
|
|
|
|
| S |
C
A |
G |
S |
C
B |
G |
|
S |
C |
G |
|
energy
A | B |
|
hype
A | B |
|
pop
A | B |
|
mgr
A | B |
|
FIGHT
RATING
28% |
|
|
|
|
|
|
