|
|
PBP Commentary |
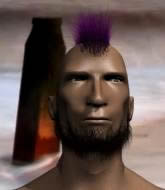
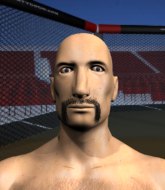
Coming up we have a bantamweight MMA rules bout between Edward Wellington (ranked 3136 p4p, 1827 weight class) and Martin Madrazo (ranked 0 p4p, 0 weight class). Edward Wellington had a look across the cage there at his opponent. He definitely means business
 |
|
 |
| 160 cm
23
144
1 - 0 - 0 |
|
180 cm
25
145
1 - 0 - 0 |
BJJ Purple Belt
Brawler
Granite chin |
|
Good wrestler
Brawler
Intelligent |
|
| |
|
Ladies and gentlemen. This fight is 3 rounds, in the bantamweight division.
Introducing the fighter to my left, fighting out of the red corner.
With a record of 1 - 0 - 0, fighting out of Helsinki, Edward Wellington!
And introducing the fighter to my right, fighting out of the blue corner.
With a record of 1 - 0 - 0, fighting out of New York, Martin Madrazo!
The judges for this bout are Marco Blurstr�m, Roosa J�rvil�inen and Matti Vanhoillinen.

The bell rings for round one and we are underway!

Madrazo scores with a nice takedown into half guard. Let's see what he's got on the ground.
Madrazo tries to pass to full mount but Wellington defends it.
Wellington keeping his head moving to avoid the ground and pound.
Madrazo has the superior BJJ but he's also working some ground strikes into his gameplan.
Madrazo working the head and body with strikes.

Wellington is defending against the submission attempts here by Madrazo.
The fighters are pressed up against the cage, both looking to find a bit of space to work.
Wellington is trying to stand up here but Madrazo is controlling him well.
The ref warns both fighters not to hold the cage as they work up against the meshing.
Wellington wants to improve his position but Madrazo is controlling well.
Wellington is working for an escape here. He's hooked one of Madrazo's legs and he's managed to sneak out and take Madrazo's back!
A lull in the action here.
Madrazo is trying to stand back up.
Madrazo is a painfully thin specimen of a man. You do wonder whether a good body kick would snap him clean in two.

Wellington is persistently looking for the submission but Madrazo is defending it well.

That's one minute gone in the round.

Madrazo is looking to stand back up. He's having to work hard to escape but eventually he manages it.
Madrazo shoots in and bounces Wellington off the cage to secure the takedown into guard.

Wellington has his feet on Madrazo's hips. He pushes off and gets to his feet. Nice work.
Madrazo shoots in and gets a takedown into half guard. Madrazo showed some decent athleticism there.
Wellington pushes Madrazo off and gets back to his feet.
This has been an exciting period of action!
Wellington looks for a takedown but Madrazo sprawls well.

That's two minutes gone in the round.
Madrazo scores a trip takedown into side control. Nice.
Wellington taking a bit of punishment here - Madrazo scoring with strikes.
Madrazo creates a bit of distance and throws down some hard shots.
Madrazo creates a bit of distance and throws down some hard shots.
Madrazo landing strikes.
Madrazo cracks Wellington with a big elbow.
Wellington takes an elbow right on the bridge of the nose and winces in pain.
Madrazo in side control lands a decent elbow.
Madrazo is putting a hurting on Wellington here, landing some big shots from side control.
Madrazo working hard here to secure a kimura but he's not really in the right position for it.
Madrazo looks up at the clock and then as Wellington takes his cue and looks up at the clock too, Madrazo smacks him right in the chops with a big elbow! How rude!

That's three minutes gone in the round.
Wellington managing to avoid any damage from the strikes thrown by Madrazo.
Madrazo working the ground and pound.
Wellington is trying to improve his position.
Madrazo lands a nice forearm strike.
Wellington manages to get one leg in to regain half guard.
Madrazo is keeping good posture, landing some ground and pound.
Madrazo winds up and cracks Wellington with a swinging punch to the side of the head.
Wellington might be looking to lock onto one of his opponent's long limbs for a submission, whilst we're on the ground.
Wellington is trying to control but can't.
Wellington is breathing heavily.
Madrazo working Wellington over with strikes.
Madrazo seems to be working for a kimura but Wellington defends the submission attempt.
Madrazo scores with a couple of good hammerfists.
Wellington wants to improve his position but Madrazo is controlling well.

That's four minutes gone in the round.
Madrazo is looking for a kimura. It's going to be difficult to finish that from half guard though and Wellington defends it well.
Madrazo landing with strikes to the body and head, softening up his opponent.
Madrazo is working for submissions here but there's nothing on.
Madrazo looks towards his corner to check for any instructions. The corner give him nothing to work with, so he cracks Wellington with a short hammerfist. I guess that's as good as any advice he could get in this position.
Wellington keeping his head moving to avoid the ground and pound.
Wellington taking some punishment here, with Madrazo in his half guard.
Ground and pound from Madrazo.
This is a great period of action - very entertaining stuff!
Madrazo looking for a kimura but he'll have to free his other leg if he wants to finish that. Perhaps he's just using it as a distraction technique.
Wellington is trying to defend against the ground and pound but Madrazo scores with a couple of nice shots.
And that is the end of the round. The fighters go back to their corners.
Martin Madrazo dominated that round.
OK. That's time! The bell goes and we're back to the action.

Wellington has a takedown stuffed.
Madrazo drives through with a takedown into guard.
Madrazo throws a big elbow that misses.
Wellington avoiding any damage from the ground and pound.
Madrazo working some strikes from top position.
Madrazo lands a couple of elbows.
Madrazo throwing strikes from guard but Wellington blocks nicely.
Madrazo postures up and lands a big shot to Wellington's brow.
Madrazo lands a couple of elbows.
We've had a slow start to the round here - hopefully the action picks up.
Madrazo throwing shots from guard but he's hitting more mat than opponent.
Madrazo in full guard, throwing the ground and pound. No damage this time.
Madrazo is looking to work some ground and pound but Wellington has wrist control.
Madrazo won't allow Wellington to sweep him here.
Madrazo scores with a decent looking elbow strike.
Madrazo postures up and lands some nice ground and pound.
That's one minute gone in the round.
Madrazo throwing strikes but missing.
Madrazo postures up and lands some nice ground and pound.
Madrazo throwing elbows and punches but not connecting, as Wellington works some decent striking defense from the bottom.
Madrazo loading up with the ground and pound but he's missing more than he's landing in this flurry.
Both fighters are absolutely exhausted here.
Madrazo in full guard, throwing the ground and pound. No damage this time.
Madrazo chips away with some ground and pound.
Madrazo keeps in close for a moment and lands a decent shot to the side of Wellington's head.
Madrazo has been the more effective fighter overall so far.
Madrazo throwing elbows and punches but not connecting, as Wellington works some decent striking defense from the bottom.
Madrazo working some strikes from top position.
Madrazo is looking to work some ground and pound but Wellington has wrist control.
Wellington is trying to keep Madrazo in close.
Madrazo throwing strikes but missing.
Madrazo working from the guard for now, landing some ground and pound.
That's two minutes gone in the round.
Wellington has a loose triangle. He'll be looking to tighten that up but Madrazo can see exactly what he's planning and manages to posture up and free himself.
Madrazo landing some decent shots from guard.
Madrazo throwing strikes but missing.
Madrazo is in close to Wellington's body, working some short punches and elbows.
Madrazo works over Wellington with some ground and pound from guard.
Madrazo postures up in Wellington's guard and throws a big left but Wellington blocks it.
Madrazo lands a couple of elbows.
Martin Madrazo has got the better of the ground game so far.
Madrazo cracks Wellington with a solid left hand.
Madrazo got a little sloppy there for a moment and Wellington has worked his way into a loose triangle - can he finish it?! No, Madrazo has managed to get both his arms back between Wellington's legs - danger averted.
Wellington has momentary wrist control but Madrazo slips an elbow through the middle.
Madrazo postures up and lands a big shot to Wellington's brow.
Madrazo working some strikes from top position.
That's three minutes gone in the round.
Madrazo content to strike from guard, landing some decent shots.
Madrazo content to strike from guard, landing some decent shots.
Madrazo postures up and lands a big shot to Wellington's brow.
Madrazo landing some decent shots from guard.
Wellington trying to control the position.
Madrazo working some strikes from top position.
Madrazo chips away with some ground and pound.
Madrazo postures up to throw the ground and pound strikes but they don't connect.
Madrazo distracts Wellington with his right hand and drops a big elbow with his other arm.
Madrazo landing with the ground and pound.
Madrazo with a couple of shots to the head there. Not particularly brutal.
Madrazo lands a couple of digs.
Madrazo drops back, looking for a kneebar! Wellington looks panicked! The fighters roll across the mat, one looking to finish, one looking to escape. Wellington looks to have wriggled free... Yes, he's got his leg free and he's dived into side control! Good work there from Wellington!

That's four minutes gone in the round.
Madrazo wants to get back to his feet.
Wellington working hard here to secure a kimura but he's not really in the right position for it.
Madrazo wants to get back to his feet but Wellington drags him back down.
And that is the end of the round. The fighters go back to their corners.
Martin Madrazo showed his class in that round. I'd imagine he'll take it on all the scorecards.
The referee calls time. The cornermen exit stage left and we're back to business. This is the final round!

Madrazo shoots in and gets a takedown into half guard. Madrazo showed some decent athleticism there.
Madrazo is trying for a kimura here. Wellington looks like he's in a lot of pain... and he's tapping out! Madrazo wins by kimura!
Ladies and gentlemen, after 0:22 of round 3, we have a winner by way of Submission (Kimura). Martin Madrazo!
Martin Madrazo tried to hype himself up post fight but didn't word it too well and it ended up with him sounding like a bit of a tool.
|
|
|
|
|
|
|
|
|
|
|
|
|
|
|
|
|
|
|
|
|
|
|
| S |
C
A |
G |
S |
C
B |
G |
|
S |
C |
G |
|
energy
A | B |
|
hype
A | B |
|
pop
A | B |
|
mgr
A | B |
|
FIGHT
RATING
58% |
|
|
|
|
|
|
