|
|
PBP Commentary |
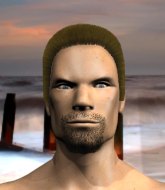
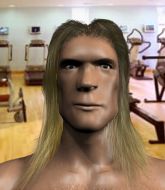
Coming up we have a lightweight MMA rules bout between King Shoota (ranked 0 p4p, 0 weight class) and Noryuki Takahashi (ranked 0 p4p, 0 weight class). Noryuki Takahashi is staring across the cage at his opponent, tweaking his nipples.
 |
|
 |
| 225 cm
19
170 lbs
3 - 4 - 0 |
|
177 cm
21
155 lbs
1 - 2 - 0 |
BJJ White Belt
Solid boxing
Very strong |
|
BJJ Blue Belt
Solid Muay Thai
Determined |
|
| |
|
Ladies and gentlemen. This fight is 3 rounds, in the lightweight division.
Introducing the fighter to my left, fighting out of the red corner.
With a record of
3 - 4 - 0, fighting out of Las Vegas, King Shoota!
And introducing the fighter to my right, fighting out of the blue corner.
With a record of
1 - 2 - 0, fighting out of Las Vegas, Noryuki Takahashi!
The judges for this bout are Cecil Peabody, Tiny Johnson and Chris Downing.

The bell rings for round one and we are underway!
Shoota misses with a jab and misses with a cross straight after too.
Shoota throws a combination but comes up with nothing but fresh air.
Shoota throws a lazy right hand but Takahashi sees it coming a mile off and sidesteps it easily.

Takahashi closes the distance and clinches.
Takahashi trying to stall but Shoota improves his position.
Takahashi keeps control of Shoota as he tries to wriggle out of the double underhooks.
Good anti-grappling being displayed by Shoota as Takahashi tries to tie him up.

Takahashi jumps guard and drags Shoota to the mat. He's obviously going to be looking for submissions off his back.
Shoota has to be careful here, sitting in the guard of a superior BJJ player.
Shoota wants to stand but Takahashi has a closed guard, so he can't escape.
Takahashi looking to control.
Shoota would like to get this fight back to the feet but can't get free from the closed guard.

Takahashi is working an open guard so Shoota takes the opportunity to get back to his feet.
Shoota looks to throw the jab but Takahashi is out of range.
Takahashi takes the fight into the clinch.
Shoota has Takahashi pressed up against the cage and is working for takedown. Takahashi manages to improve position though and keeps the fight standing.

Takahashi pushes off and circles away, back to the middle of the mat.
Shoota swings away but doesn't land with a series of punches.
Takahashi has closed the distance and engaged Shoota in a clinch.
Takahashi tightens his grip and picks Shoota up, before dumping him to the ground. Shoota manages to land in guard.
Takahashi is just sitting in guard, looking to avoid any submissions.

That's one minute gone in the round.
Shoota is looking to get back to his feet but can't, whilst Takahashi is controlling him.
Shoota is breathing heavily.
Takahashi looking to pass the guard.
Shoota is trying to stand up but he's not managed so far.
Shoota is looking to stand back up but Takahashi counters by passing into half guard. Oops... bit sloppy there by Shoota.
The ref warns both fighters not to hold the cage as they work up against the meshing.
Shoota wants to get back to his feet.
Takahashi stands up from half guard... He's had enough of that ground malarky for the time being.

That's two minutes gone in the round.
The crowd are getting on the fighters' backs, as the pace has dropped off in the last minute or so.
Shoota swinging wilding here.
Shoota misses with an uppercut. Takahashi saw that one coming.
Shoota swings wildly with a right hand that was never going to find it's target.
Shoota really does look like a pencil wearing a pair of gloves. Let's hope he has a gameplan to suit that ridiculous body shape.
Some wild striking there from Shoota.
Takahashi darts in and clinches Shoota up against the cage.
Shoota working hard to break the clinch.
Shoota has dropped down and is working for a takedown. Takahashi is trying to keep an underhook but Shoota manages to get the takedown into half guard.
Shoota wants to stand up but Takahashi is controlling the position.
The fighters are battling for position here. Takahashi manages to regain full guard. Nice work.
Takahashi bucks up whilst keeping hold of a body lock, managing to reverse the position. Now he's in top in Shoota's guard.
Takahashi gets to his feet. Shoota looking to butt scoot but the ref puts an end to that. On your feet son!
Shoota looks to land a left hand but Takahashi moved out of range nicely.
A punch lands to the side of Shoota 's head but he takes it in his stride.
King Shoota seems to be the more aggressive standup fighter in this bout.

That's three minutes gone in the round.
Shoota gets taken down but at least he's managed to land in guard.
Shoota keeping moving, preventing Takahashi from controlling successfully.
Takahashi passes easily into side control. Nice work.
Shoota is trying to escape and get back to his feet.
Takahashi is looking to take a break and control but Shoota is keeping him honest, looking to work from the bottom.
Shoota is working hard to escape and get back to his feet. After a battle for position, Takahashi asserts his dominance and retains side control.

That's four minutes gone in the round.

The referee has ruled that neither fighter is active enough on the ground and has stood them back up.
Shoota's corner calls for a 1-2. Shoota obliges with the 1 part as he scores the single shot and moves back out of range.
Shoota thuds his right hand into Takahashi's forehead from close range. That could be painful for both fighters.
Shoota misses with a hook. Takahashi ducked under it nicely.
Takahashi shoots in and bounces Shoota off the cage to secure the takedown into guard.
Takahashi stays in close to Shoota's body and controls the position.
The crowd applaud the fighters efforts here as the round comes to an end.
Shoota wants to stand up but Takahashi is controlling him.
And that�s the end of the round � the fighters go back to their corners.
Noryuki Takahashi dominated that round.
OK. That's time! The bell goes and we're back to the action.

Shoota lands a jab. Then a cross. Then finally a nice hook to the body. Good work there by Shoota.
Takahashi misses with a hook.
Shoota throws an overhand right that lands on Takahashi's shoulder, as Takahashi tries to avoid the shot.
Takahashi fails with an attempt to clinch.
Shoota misses with a jab and misses with a cross straight after too.
A combination from Shoota does no damage.
Shoota misses with a few strikes there.
Takahashi looking to shoot here. He's gone for it and he's landed a takedown into mount! Oh, that's bad for Shoota!
Takahashi scores with a couple of good head shots there.
Takahashi controlling the pace for now.
Takahashi wants to control the pace but Shoota is squirming around nicely.
Shoota on his back here. We all know that wrestlers don't like being on their back so let's see if Shoota tries to get out of the position.
Both fighters are absolutely exhausted here.
That's one minute gone in the round.
Shoota squirming around on the bottom, looking to escape.
Takahashi trying to control but Shoota is having none of it.
Shoota squirming around on the bottom, looking to escape.
Takahashi sitting in mount, just looking to control for the moment.
That's two minutes gone in the round.
The crowd are showing their displeasure at the lack of action as loud boos ring out around the arena.
Shoota is trying to escape but when you're mounted that's not too easy.
Takahashi can't quite control the action as he would like just now, as Shoota is looking to escape.
The fighters are pressed up against the cage, both looking to find a bit of space to work.
That's three minutes gone in the round.
Shoota is looking to get back to his feet - it's going to be hard from this position.
Shoota bucks up and throws Takahashi to the side - he's got back to his feet. Great escape!
Shoota throws a right hand that Takahashi ducks under and follows up with a left that Takahashi also avoids with ease.
Takahashi tries to close the distance and clinch but Shoota swats him to one side with an open hand palm strike and circles away.
Shoota fails to land with the punch combination there - jab, cross, hook, miss, miss, miss.
Takahashi takes the fight into the clinch.
Takahashi scores with a shoulder strike.
Shoota gets a trip takedown into half guard.
Shoota is looking to stand up but he'll have to free his leg first. Instead, Takahashi manages to get to full guard.
Shoota has decided he wants to stand but the closed guard of Takahashi is proving hard to escape from.
That's four minutes gone in the round.
Shoota stands up and waves to Takahashi to follow him.
Takahashi moves in looking to clinch but Shoota pushes him off.
No luck for Takahashi with that takedown attempt.
Shoota scores with a nice one two combo and darts back out of range to avoid anything coming in the opposite direction.
Shoota loads up on a big right hand but Takahashi slips the punch.
King Shoota is looking to keep the fight on the feet at all costs.
Takahashi avoids a lazy jab quite easily.
Takahashi tries to clinch up.
Shoota throws a right and a left that both miss.
Takahashi throws a body punch but Shoota moves out of range.
King Shoota is looking to throw some combinations by the looks of things.
Takahashi tries for a takedown but Shoota sees it coming a mile off and avoids it easily.
Shoota throws out a token jab with nothing on it.
Shoota throws a combination but comes up with nothing but fresh air.
And that�s the end of the round � the fighters go back to their corners.
King Shoota dominated that second round.
The corners get their ten second warning. Both fighters stand from their stools and stare eachother down, ready to get back to the action. Ladies and gentlemen, this is the final round!

Shoota smiles there as he lands a nice right hand right on the button.
Takahashi throws a shot to the body.
A big right from Shoota misses.
A jab from Shoota misses.
Takahashi avoids a punch combination nicely.
Nice defenses there by Takahashi.
Takahashi tries to clinch but is not successful on this occasion.
Shoota throws a series of punches but Takahashi avoids them all with ease.
Shoota swats away the attempt to clinch by Takahashi.
A punch combination from Takahashi misses.
We've had a slow start to the round here - hopefully the action picks up.
Shoota throws a left and a right that both miss
and Takahashi counters with a thumping low kick.
Takahashi scores with a nice looking left hook and follows it up with an uppercut!
Takahashi is looking to clinch but Shoota is avoiding it.
Both fighters are breathing heavily.
Takahashi shoots in for a takedown. He's persisting with it as Shoota sprawls well. Shoota wins this battle and keeps the fight standing. Takahashi gets slowly back to his feet.
Shoota throws a left and a right that both miss
and Takahashi counters with a stiff right hand.
Shoota throws a jab, cross combination which is slipped
and Takahashi decides to take the opportunity to score a takedown. He's landed in Shoota's guard.
That's one minute gone in the round.

Takahashi is trying to work a guillotine from the top, or something like that? Don't know how he thinks he's going to get a finish from there.
Shoota is looking to stand up but Takahashi isn't so interested in that idea.
Noryuki Takahashi has got the better of the ground game so far.
Shoota keeping full guard, as Takahashi tries to pass.
Shoota scrambles and gets back to his feet.
Shoota lands a jab-cross combination.
Shoota throws a hook but Takahashi blocks it.
Takahashi throws a sloppy head kick and Shoota moves out of range easily.
Shoota lands a jab followed by a nice looking cross.
That's two minutes gone in the round.
A lazy left from Shoota finds it's target.
Shoota throws out a token jab with nothing on it.
Takahashi moves in looking to clinch but Shoota pushes him off.
Takahashi takes a punch to the jaw and another one to the bread basket.
Shoota thows a left - swing and a miss!
Takahashi tries to close the distance and clinch but Shoota swats him to one side with an open hand palm strike and circles away.
Nice sprawl there from Shoota as Takahashi shoots in.
Shoota cracks Takahashi with a good shot that sees him stumbling back into the cage.
Shoota tries to bum rush Takahashi with a series of wild strikes but Takahashi uses good footwork to avoid the assault.
A big left from Shoota misses.
Takahashi closes the distance and looks for a trip takedown... aaaand he's got it - Takahashi lands in his opponent's guard.
Shoota wants to stand and escape but Takahashi is having none of it.
Takahashi content to stall in guard here.
That's three minutes gone in the round.
Shoota wriggles free and stands up.
Takahashi has closed the distance and engaged Shoota in a clinch.
Shoota is using his reach advantage well here, landing the more effective single shots from range.
Shoota wants to break free but Takahashi has control.
Takahashi is trying to break free.
Shoota tries for a takedown. No joy.
Takahashi is pressed up against the cage. Shoota has hold of a leg and is looking to drag Takahashi down to the mat. Takahashi avoids the attempt though and has circled away. We're back to striking at a distance.
Takahashi doesn't manage to clinch there - Shoota circles away.
Takahashi uses decent footwork to sidestep a right hand from Shoota.
Takahashi misses with a half-hearted attempt at a head kick.
Shoota jabs Takahashi right on the nose. Takahashi blinks but takes it well.
Shoota lands a head shot.
Takahashi has Shoota up against the cage in a clinch.
Shoota tries to break free but Takahashi pushes him back against the cage.
That's four minutes gone in the round.
A knee to the head by Takahashi.
Shoota is trying to break the clinch but Takahashi is controlling him.
Shoota can't break the clinch.
Shoota is trying to break the clinch but Takahashi has him pressed against the cage.
Shoota wants to push off and get back to the center of the mat but Takahashi has him pressed against the cage.
Shoota wants a takedown but no success here.
That's three failed takedown attempts in the round for King Shoota. That's going to take a lot out of him.
Takahashi lands a nice elbow from the clinch.
Shoota is trying to drag Takahashi to the mat but Takahashi just about manages to keep his footing. He used the cage to his advantage there.
Takahashi has Shoota pressed against the cage, preventing Shoota from circling away and getting back to striking at range.
Takahashi wants to push off and get back to the center of the mat but Shoota has him pressed against the cage.
Shoota is trying to break the clinch but Takahashi is controlling him.
Shoota tries to break the clinch but Takahashi is controlling the position.
Shoota looking for a takedown.
Takahashi has moved round to his opponent's back and is looking for a suplex! Oh snap! He's tossed Shoota clear over his head and slammed him to the mat!
Shoota trying to get back to his feet but Takahashi is in full control for now.
Shoota trying desperately to get back to his feet here but he's not having any joy at all. He's going to tire himself out if he's not careful.
And that's the end of the fight!
Noryuki Takahashi comfortably won the final round on my scorecard.
I think Takahashi has won this one but let's see whether the judges agree with me. Over to the ring announcer for the scorecards.
Ladies and gentlemen, after 3 rounds of action, we go to the scorecards for a decision.
Judge Cecil Peabody scores the fight 28:29
Judge Tiny Johnson scores the fight 28:29
Judge Chris Downing scores the fight 28:29
In favor of your winner, by unanimous decision... Noryuki Takahashi!
|
|
|
|
|
|
|
|
|
|
|
|
|
|
|
|
|
|
|
|
|
|
|
| S |
C
A |
G |
S |
C
B |
G |
|
S |
C |
G |
|
energy
A | B |
|
hype
A | B |
|
pop
A | B |
|
mgr
A | B |
|
FIGHT
RATING
61% |
|
|
|
|
|
|
