|
|
PBP Commentary |
Coming up we have a middleweight MMA rules bout between Gerard Hayashi (ranked 0 p4p, 0 weight class) and Sergio Mora (ranked 0 p4p, 0 weight class). Hayashi comes into the arena with Losing My Religion blaring out of the sound system. Both fighters really staring eachother down here, as Sergio Mora enters the cage!
 |
|
 |
| 186 cm
22
185 lbs
0 - 3 - 0 |
|
182 cm
22
178 lbs
1 - 1 - 0 |
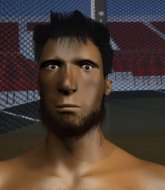
BJJ Purple Belt
Solid boxing
Granite chin |
|
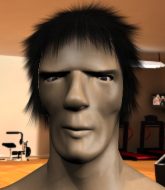
BJJ White Belt
Brawler
Granite chin |
|
| |
|
Ladies and gentlemen. This fight is 3 rounds, in the middleweight division.
Introducing the fighter to my left, fighting out of the red corner.
With a record of
0 - 3 - 0, fighting out of Las Vegas, Gerard Hayashi!
And introducing the fighter to my right, fighting out of the blue corner.
With a record of
1 - 1 - 0, fighting out of Las Vegas, Sergio Mora!
The judges for this bout are Robert Twigg, Daniel Franklin and Alan Glass.

The bell rings for round one and we are underway!
Mora misses with the combination.

Hayashi tries to keep at a distance but Mora has taken the fight into the clinch.

Mora escapes the clinch and we're back to striking.
Sergio Mora seems to be the more aggressive standup fighter in this bout.
No joy there for Mora, who threw a few shots but didn't land.
Mora fails to land with a series of punches.
Mora swats away the attempt to clinch by Hayashi.
Hayashi fakes high and shoots in for a takedown but Mora avoids it really well and circles away.
Mora clinches but Hayashi breaks the clinch
and Hayashi counters with a straight right hand.
Mora will need to tighten up his combinations if he doesn't want to gas himself out, swinging at thin air.
Mora throws a series of punches but Hayashi moves out of range.
Mora clinches up with Hayashi and pushes him back against the cage.
Mora breaks the clinch and we return to the middle of the mat.
Hayashi looks to land a combination but Mora avoids it well.
Mora stuffs the takedown attempt from Hayashi. Hayashi gets slowly back to his feet.
Mora tries to clinch but Hayashi moves out of range.
Mora slips a jab and a cross from Hayashi.
A combination from Hayashi does no damage.
Mora throws a left and a right that both miss
and Hayashi counters with a nice uppercut.
Hayashi misses with a jab, cross combination.

That's one minute gone in the round.
Mora throws a left and a right that both miss
and Hayashi counters with a shot to the ribs. That looked like it hurt.
Mora looks gassed!
Hayashi shoots in for a takedown. "I don't think so" says Mora as he avoids it easily.
That's three failed takedown attempts in the round for Gerard Hayashi. That's going to take a lot out of him.
Mora lands a jab. Then a cross. Then finally a nice hook to the body. Good work there by Mora.

It looks like Gerard Hayashi has been cut.
Sergio Mora is looking to keep the fight on the feet at all costs.
Hayashi scores with a nice right hand.
Hayashi throws a two punch combo that lands nicely.
Mora falls off balance throwing a combination
and Hayashi counters with a right hand to the body.
Hayashi throws a sloppy head kick and Mora moves out of range easily.
A left and a right from Hayashi both land. Nice combination.
Mora is looking to clinch.
Hayashi fails with a takedown attempt from distance.
Hayashi closes the distance and lands a one-two.
Hayashi throws a two punch combo that lands nicely.
Hayashi dives in and grabs Mora's left leg, looking for a takedown. Mora pushes down on Hayashi's head and hops out.
We've seen a great period of action over the last minute or so - credit to both fighters for going all out!
Mora tries to grapple but his opponent circles
and Hayashi counters with a series of strikes. Mora will be more careful next time no doubt.
Hayashi throws a series of punches but Mora avoids them all with ease.
Hayashi will need to tighten up his combinations if he doesn't want to gas himself out, swinging at thin air.

That's two minutes gone in the round.
Hayashi throws a nice looking combination but Mora bobs and weaves to avoid any damage.
Mora clinches with his opponent.
Mora breaks the clinch and we're back to striking at distance.
Hayashi works over Mora's head and body with a nice combination.
Hayashi connects with a nice looking jab.
Hayashi tries a low kick but Mora avoids it.
Hayashi closes the distance and clinches.
Hayashi can't get the takedown.
Hayashi is trying to break free.
Mora breaks from the clinch.
Hayashi misses with a few strikes there.
Hayashi shoots for a takedown but Mora saw that one coming a mile off and avoided it easily.
Mora closes the distance and pushes Hayashi back into the cage.
Mora has Hayashi pressed against the cage, preventing Hayashi from circling away and getting back to striking at range.
Hayashi fails to pull guard.
Mora breaks the clinch.
Mora throws a wild combination but nothing lands.
Mora wants to clinch but Hayashi slips to the side
and Hayashi counters with a two punch combo.
Hayashi is working the combinations to good effect here.

That's three minutes gone in the round.
Mora fails with an attempt to clinch.
Hayashi looks to land a combination but Mora avoids it well.
Hayashi changes levels and looks for a double leg takedown. Mora tries to avoid it but Hayashi manages to keep hold of a leg and drag Mora to the ground. Mora escapes though and pops straight back up to his feet.
Mora misses with a double jab
and Hayashi counters with a two punch combo.
Mora fails to land with the punch combination there - jab, cross, hook, miss, miss, miss.
Hayashi tries to close the distance and clinch up against the cage but Mora paws at him with a jab and circles away.
Mora rushes forward with a series of wild hooks but Hayashi moves out of range and avoids them all easily.
Hayashi throws a two punch combo that lands nicely.
Mora looks to clinch
and Hayashi counters with a two punch combo.
Mora fails in his attempt to clinch.
Hayashi fakes a jab and throws a low kick but Mora checks it well.
Hayashi shoots in with a takedown attempt and he has Mora pinned against the cage. Mora gets the underhooks and manages to circle away.
Hayashi closes the distance and clinches.
A quick uppercut on the inside from Mora.
Hayashi is working for a takedown up against the cage. He can't get it on this occasion though.
Hayashi tries to pull guard but Mora won't allow it.

That's four minutes gone in the round.
Mora escapes the clinch and we're back to striking.
A punch combination from Mora misses.
Hayashi will have to do better than that with his takedown attempts.
Mora misses with a jab, cross combination.
Hayashi closes the distance and clinches up with Mora, looking for a takedown. Hayashi pushes Mora against the cage but Mora circles to the side and manages to break the clinch.
Hayashi dives in and grabs Mora's left leg, looking for a takedown. Mora pushes down on Hayashi's head and hops out.
Hayashi fails with the takedown.
A really sloppy takedown attempt there from Hayashi.
Hayashi takes a punch to the jaw and another one to the bread basket.
Hayashi avoids the clinch attempt nicely.
Hayashi throws a combination but it was largely blocked by Mora.
Hayashi throws a combination but it was largely blocked by Mora.
The crowd applaud the fighters efforts here as the round comes to an end.
Mora throws a right and a left that both miss.
Mora throws a combination but comes up with nothing but fresh air.
Hayashi throws a two punch combo that lands nicely.
Mora wants to clinch up but Hayashi keeps it at a distance.
And that�s the end of the round � the fighters go back to their corners.
That was a close round but I would say that Gerard Hayashi will probably get the nod.
The cut man is working on Gerard Hayashi's cut.
That's time! Hayashi's corner gives him a slap on the ass as he gets ready to fight.

Hayashi scores with a nice looking left hook and follows it up with an uppercut!
Hayashi shoots for a takedown but Mora saw that one coming a mile off and avoided it easily.
Hayashi shoots in with a takedown attempt and he has Mora pinned against the cage. Mora gets the underhooks and manages to circle away.
Hayashi is on the wrong end of a nice combination from Mora.
Mora closes the distance and pushes Hayashi back into the cage.
Mora is pressed up against the cage. Hayashi has hold of a leg and is looking to drag Mora down to the mat. Mora avoids the attempt though and has circled away. We're back to striking at a distance.
That's three failed takedown attempts in the round for Gerard Hayashi. That's going to take a lot out of him.
Mora lunges in with swinging rights and lefts but Hayashi circles away quickly and effectively.
Mora has managed to clinch.
Mora breaks the clinch and we return to the middle of the mat.
Mora throws a combination that misses
and Hayashi counters with a three punch combination, finished off with a leg kick. Nice work.
Mora misses with a series of wild punches.
Hayashi circles away from the clinch attempt.
Both fighters are absolutely exhausted here.
Hayashi circles away from the clinch attempt.
Mora displays good takedown defense there as he swats away a double leg from Hayashi.
Mora has closed the distance and engaged Hayashi in a clinch.
That's one minute gone in the round.
Hayashi goes for a takedown attempt but Mora pushes him away and we're back to fighting at a distance.
The sound of bone on bone echoes around the arena as Mora checks a leg kick.
Mora is looking to take this fight into the clinch.
Mora takes an uppercut right on the button but keeps his composure.
Mora moves in looking to clinch but Hayashi pushes him off.
Hayashi pivots, looking for a leg kick but Mora is out of range and Hayashi settles back down.
Mora swings wildly with a couple of big hooks
and Hayashi counters with a nice uppercut.
Mora will need to tighten up his combinations if he doesn't want to gas himself out, swinging at thin air.
Mora is looking to clinch but Hayashi is avoiding it.
Hayashi throws a looping left and ducks down for a takedown. He's got his arms around Mora's waist but Mora gets an underhook and avoids the takedown by throwing Hayashi off to one side.
Mora swings wildly with a couple of big hooks
and Hayashi counters with a three punch combo that has Mora backing up. Mora nods at Hayashi to acknowledge the strikes.
Mora tries to bum rush Hayashi with a series of wild strikes but Hayashi uses good footwork to avoid the assault.
Hayashi shoots in for a takedown but doesn't get it.
Mora wants to clinch but Hayashi slips to the side
and Hayashi makes him pay by landing a nice hook to the body before moving out of range.
Mora is looking to clinch.
That's two minutes gone in the round.
There's not a lot going on here and the crowd are letting the fighters know they're not willing to tolerate a lack of action.
Hayashi looks for a takedown here. Will he get it? Mora is fending him off so far but Hayashi persists. Nope, Mora circles away and we're back to standing.
Mora throws a left and a right that both miss
and Hayashi makes him pay by landing a nice hook to the body before moving out of range.
Hayashi shoots in looking for a double leg takedown. Mora defends it nicely.
Mora tries to clinch but fails miserably
and Hayashi counters with a shot to the ribs. That looked like it hurt.
Mora tries to clinch but is not successful on this occasion.
Mora throws a jab, cross combination which is slipped
and Hayashi counters with a good right hand that lands right on the jaw.
Mora throws a two punch combo that lands nicely.
Mora throws a jab, cross combination which is slipped
and Hayashi counters with a nice jab to the body that keeps Mora thinking.
Hayashi lands three nice shots there - that looked like it hurt!
Hayashi is looking to clinch but Mora is avoiding it.
Sergio Mora seems to be getting the better of the standup.
Hayashi shoots in for a takedown but Mora shows good takedown defense there and keeps this one on the feet.
Hayashi showing good head movement there, avoiding the strikes from Mora.
Mora is looking to take this fight into the clinch.
Hayashi tries to score with a low kick but Mora moves his leg out of the way.
Hayashi doesn't manage to clinch there - Mora circles away.
That's three minutes gone in the round.
Mora swats away the attempt to clinch by Hayashi.
Hayashi looks to land a combination but Mora avoids it well.
Mora misses with a wild combination.
Gerard Hayashi is looking to throw some combinations by the looks of things.
A really sloppy takedown attempt there from Hayashi.
Mora throws a jab, cross combination which is slipped

and Hayashi counters with a driving takedown into guard. Nice work there by Hayashi.
Hayashi slips nicely into half guard.
Hayashi slips a nice elbow through Mora's hands, connecting with Mora's forehead.
Mora really doesn't want to stay on the ground with Hayashi. If he can't get it back to his feet, it's only a matter of time before he'll be tapping out.
Mora pushes Hayashi off looking to stand but Hayashi dives back in and keeps control.
The referee walks around the fighters to get a better view of the action. Hayashi lands a nice short elbow.
The ref warns both fighters not to hold the cage as they work up against the meshing.

Hayashi stands up from half guard... He's had enough of that ground malarky for the time being.
Hayashi dodges the punch combination from Mora.
That's four minutes gone in the round.
Mora tries to close the distance and clinch up against the cage but Hayashi paws at him with a jab and circles away.
Mora throws a nice looking combination but Hayashi bobs and weaves to avoid any damage.
Hayashi throws a head kick that misses.
Hayashi shoots in for a takedown but doesn't get it.
Mora will need to tighten up his combinations if he doesn't want to gas himself out, swinging at thin air.
Mora tries to clinch but is not successful on this occasion.
No luck with that takedown attempt from Hayashi.
Hayashi keeps the fight on the outside.
Hayashi throws a right hand that Mora ducks under and follows up with a left that Mora also avoids with ease.
Mora fails in his attempt to clinch.
The crowd applaud the fighters efforts here as the round comes to an end.
Hayashi shoots in looking for a single leg takedown. Mora is trying to defend but Hayashi finishes it well and ends up in half guard. Let's see if he can advance position further.
Wooooo! Give it up for these two warriors! They are putting on a show!
Hayashi throwing shots but they're hitting the canvas more than the man.
And that�s the end of the round � the fighters go back to their corners.
A close second round but Sergio Mora will probably get the nod - 10:9.
The cut man is working on Gerard Hayashi's cut.
The minute break is over - no more time for sponges and pep talks - back to the action! This is the final round!

Mora scores with a nice looking left hook and follows it up with an uppercut!
Mora moves into the clinch successfully.
Mora lands a hook that snaps the head of Hayashi backwards.
Mora breaks the clinch.
Some wild striking there from Hayashi.
Hayashi fails with an attempt to clinch.
Hayashi lands a jab-cross combination.
A combination from Hayashi does no damage.
Hayashi rushes forward with a series of wild hooks but Mora moves out of range and avoids them all easily.
Hayashi is looking to chop away at Mora's legs.
Mora has taken the fight to the clinch.
Mora managing to block the knees to the body from Hayashi.
Mora lands a right uppercut that snaps the head of Hayashi backwards.
Both fighters are breathing heavily.
Mora breaks the clinch and we return to the middle of the mat.
Hayashi throws a series of punches but Mora avoids them all with ease.
Mora stuffs the takedown.
Mora tries to clinch but Hayashi moves away
and Hayashi counters with a driving takedown into guard. Nice work there by Hayashi.
Mora is working an open guard so Hayashi takes the opportunity to get back to his feet.
That's one minute gone in the round.
Mora throws a combination that misses
and Hayashi counters with a one-two to the body.
Hayashi shoots in with a takedown attempt and he has Mora pinned against the cage. Mora gets the underhooks and manages to circle away.
Hayashi fails to land with a series of punches.
Hayashi misses with a series of wild punches.
Hayashi misses with a double jab.
Mora closes the distance but Hayashi moves to the side
and Hayashi counters with a three punch combo that has Mora backing up. Mora nods at Hayashi to acknowledge the strikes.
No joy there for Hayashi, who threw a few shots but didn't land.
Mora forces Hayashi back against the cage and clinches.
Mora lands a right uppercut that snaps the head of Hayashi backwards.
Hayashi blocks a punch to the side of the head.
Hayashi is trying to work out of this bad position, with his back against the cage.
Hayashi wants to break the clinch but can't.
Mora pushes off and circles away, back to the middle of the mat.
Mora rushes forward with a series of wild hooks but Hayashi moves out of range and avoids them all easily.
Mora misses with a combination
and Hayashi counters with a three punch combination, finished off with a leg kick. Nice work.
That's two minutes gone in the round.
Neither fighter has done anything of merit for a good minute or two here and the crowd are not happy about it.
Hayashi swats away the attempt to clinch by Mora.
Hayashi displaying good standup as he scores with a three punch combination.
Mora is looking to clinch but Hayashi is avoiding it.
Hayashi misses with a double jab.
Mora is looking to take this fight into the clinch.
Hayashi misses with a double jab.
Hayashi misses with a jab and misses with a cross straight after too.
Mora takes a punch to the jaw and another one to the bread basket.
Hayashi tries to clinch but Mora moves out of range.
No luck for Hayashi with that takedown attempt.
That's three failed takedown attempts in the round for Gerard Hayashi. That's going to take a lot out of him.
Mora is looking to clinch but Hayashi is avoiding it.
Mora closes the distance and clinches.
Hayashi tries to take the fight to the ground by pulling guard but can't manage it.
Mora escapes the clinch and we're back to striking.
Hayashi misses with a takedown attempt. He shot from a bit too far out.
That's three minutes gone in the round.
Mora closes the distance and presses his opponent up against the cage.
Hayashi tries to throw a body punch but Mora avoids it by throwing Hayashi back against the cage.
Mora's head jolts backwards as he takes an uppercut right on the button!
A looping hook to the body misses from Hayashi. Mora does a little dance to reset his feet.
Mora moves into range and throws a lovely three punch combination.
Hayashi throws a one two combo.
Mora leaves Hayashi with his face pressed against the mat as he sprawls beautifully, defending against a solid takedown attempt.
Some wild striking there from Hayashi.
Mora swinging wilding here.
Nice shot by Hayashi.
Mora fails to land with the punch combination there - jab, cross, hook, miss, miss, miss.
Hayashi misses with a wild combination.
Hayashi is looking to clinch.
That's four minutes gone in the round.
My god... these two guys really need to pick up the pace or everyone will leave to go get a beer.
Hayashi misses with a jab, cross combination.
Mora tries to clinch but is not successful on this occasion.
Hayashi stalks Mora and leaps in with a furious combination of punches. Uppercuts and crosses smash into Mora's face. Mora staggers backwards, shaken.
Hayashi throws a nice looking combination but Mora bobs and weaves to avoid any damage.
Mora misses with a two punch combination.
Hayashi shoots in for a takedown but doesn't get it.
Hayashi tries a low kick but Mora avoids it.
Hayashi swats away the attempt to clinch by Mora.
Horrible takedown by Hayashi or perhaps it was just good defense by Mora which made him look bad.
Hayashi misses with a double jab.
Mora throws a series of punches but Hayashi avoids them all with ease.
Mora stuffs the takedown attempt from Hayashi. Hayashi gets slowly back to his feet.
Hayashi shoots in for a takedown - he's clinched up with Mora but Mora pushes him off and we're back to square one.
Mora misses with a combination
and Hayashi counters with a left and a right that stings Mora.
And that's the end of the fight!
That was a close round. You could make an argument for either fighter but I would give it to Gerard Hayashi.
I think Hayashi has won this one but let's see what the judges have to say. Over to the ring announcer for the scorecards.
Ladies and gentlemen, after 3 rounds of action, we go to the scorecards for a decision.
Judge Robert Twigg scores the fight 29:28
Judge Daniel Franklin scores the fight 30:28
Judge Alan Glass scores the fight 30:28
In favor of your winner, by unanimous decision... Gerard Hayashi!
|
|
|
|
|
|
|
|
|
|
|
|
|
|
|
|
|
|
|
|
|
|
|
| S |
C
A |
G |
S |
C
B |
G |
|
S |
C |
G |
|
energy
A | B |
|
hype
A | B |
|
pop
A | B |
|
mgr
A | B |
|
FIGHT
RATING
79% |
|
|
|
|
|
|

