|
|
PBP Commentary |
Coming up we have a bantamweight MMA rules bout between Defoe White (ranked 0 p4p, 0 weight class) and Joe Smasher (ranked 0 p4p, 0 weight class). Rumors backstage are that the fighters have been paid to keep it standing but we know that would never happen in MMA!
 |
|
 |
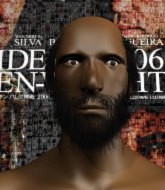
| 180 cm
22
135 lbs
1 - 0 - 0 |
|
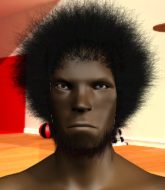
180 cm
22
130 lbs
0 - 1 - 0 |
Good takedowns
Counter striker
Big heart |
|
BJJ White Belt
Excellent boxer
Granite chin |
|
| |
|
Ladies and gentlemen. This fight is 3 rounds, in the bantamweight division.
Introducing the fighter to my left, fighting out of the red corner.
With a record of
1 - 0 - 0, fighting out of London, Defoe White!
And introducing the fighter to my right, fighting out of the blue corner.
With a record of
0 - 1 - 0, fighting out of London, Joe Smasher!
The judges for this bout are Donald Grub, Andrew Berry and Daniel Bishop.

The bell rings for round one and we are underway!
Smasher tries to bum rush White with a series of wild strikes but White uses good footwork to avoid the assault.
White is looking to take this fight into the clinch.
White moves out of range as Smasher strikes.
White looks to score with a jab to the body but Smasher is just out of range.
White fails with a takedown attempt from distance.
White tries to clinch up but Smasher circles away and keeps his distance.
White tries to clinch but Smasher moves out of range.
White misses with a takedown attempt - Smasher sprawls well and throws a nice strike on the way out which just misses.
Smasher looks to land a left hand but White moved out of range nicely.
We've had a slow start to the round here - hopefully the action picks up.
White misses with a takedown attempt - Smasher sprawls well and throws a nice strike on the way out which just misses.
That's three failed takedown attempts in the round for Defoe White. That's going to take a lot out of him.
Smasher stuffs the takedown.
Smasher throws a right and a left that both miss.
Smasher with a hook.

That's one minute gone in the round.
Smasher will need to tighten up his combinations if he doesn't want to gas himself out, swinging at thin air.
Smasher misses with a jab, cross combination.
Smasher keeps the fight on the outside.
White really does look like a pencil wearing a pair of gloves. Let's hope he has a gameplan to suit that ridiculous body shape.
Smasher works over White's head and body with a nice combination.

White is rocked!
Smasher throws a right and a left that both miss.
Oh White is still all over the place! His legs are completely gone! Will he be able to recover?!!
Smasher misses with a jab, cross combination.
White seems to have got his legs back now.
Smasher missing with a left hand there. White was out of range so wasted energy throwing that one.
Smasher misses with a head kick.
Smasher scores with a nice strike.
White shoots in and drives through. Smasher sprawls well.
White tries for a takedown but Smasher sees it coming a mile off and avoids it easily.
White checks a leg kick.

That's two minutes gone in the round.
White shoots in for a double leg but Smasher sprawls well. That's going to sap some energy.
Smasher checks a leg kick.
Smasher throws a right and a left that White avoids nicely.
White avoids the head kick by Smasher.
Smasher misses with a body shot.
Smasher misses with an attempted mid kick.
White throws a looping overhand right but Smasher ducks down to avoid it.
White showing good head movement there, avoiding the strikes from Smasher.
Smasher throws a head kick but White moves out of range.
White shoots in with a takedown attempt and he has Smasher pinned against the cage. Smasher gets the underhooks and manages to circle away.
White shoots in for a takedown. "I don't think so" says Smasher as he avoids it easily.

That's three minutes gone in the round.
A combination from Smasher does no damage.
White is looking to take this fight into the clinch.
White fails with the takedown.
Joe Smasher is looking to keep the fight on the feet at all costs.
White is breathing heavily.
Smasher looks to land a combination but White avoids it well.
Smasher lands with an overhand left.
Smasher goes to the watering hole and comes back with a big thumbs up from the judges as he scores a three punch combo.
Smasher misses with a jab and misses with a cross straight after too.
Smasher throws a jab when White was well out of range.

That's four minutes gone in the round.
White blocks a low kick nicely.
Smasher keeps the fight standing with a nice sprawl.
Smasher misses with a hook. White ducked under it nicely.
White fails to land the takedown.
Smasher throws a low kick, looking for White's leg but White calmly moves out of range.
White takes a hook to the side of the head. I wonder if that's got his ears ringing.
White is looking to clinch.
Smasher scores with a decent looking hook.
Smasher throws a head kick that misses and slips in the process. He scrambles back to his feet and the fighters circle.
White throws a low kick, looking for Smasher's leg but Smasher calmly moves out of range.
And that�s the end of the round � the fighters go back to their corners.
Joe Smasher dominated that round.
The fighters get back to their feet, the hooter sounds and we're back to the action!

The fight stays on the outside here - White looks like he's thinking about clinching though.
White showing good head movement there, avoiding the strikes from Smasher.
White misses with a half-hearted attempt at a head kick.
White shoots in for a takedown. He's persisting with it as Smasher sprawls well. Smasher wins this battle and keeps the fight standing. White gets slowly back to his feet.
Smasher looks to score with a jab to the body but White is just out of range.
We've had a slow start to the round here - hopefully the action picks up.
White is looking to clinch but Smasher is avoiding it.
Smasher displays some good footwork, moving neatly out of range as White throws out the jab.
White tries to close the distance and clinch but Smasher swats him to one side with an open hand palm strike and circles away.
White misses with a series of wild punches.
That's one minute gone in the round.
Smasher misses with a few strikes there.
Smasher misses with a few strikes there.
Smasher dips to his left and cracks White with an uppercut!
White shoots in looking for a takedown. Smasher tries to sprawl out of it but White keeps driving through. The fighters are pinned against the cage. Smasher manages to get underhooks and after a bit of a struggle, circles away and we're back to standing.
White takes a punch to the jaw and another one to the bread basket.
White showing good head movement there, avoiding the strikes from Smasher.
Smasher lands with a cross to side of his opponent's head.
Smasher tries to score with a low kick but White moves his leg out of the way.
That's two minutes gone in the round.
Smasher throws a right and a left that both miss.
Smasher misses with a jab and misses with a cross straight after too.
White attempts a leg kick but it's missed by a good margin.
White misses with a few strikes there.
Smasher lunges in with swinging rights and lefts but White circles away quickly and effectively.
White tries for a takedown but Smasher sees it coming a mile off and avoids it easily.
That's three failed takedown attempts in the round for Defoe White. That's going to take a lot out of him.
White steps to the side to avoid the strikes from Smasher.
White lands a jab to the head.
The fight stays on the outside here - White looks like he's thinking about clinching though.
Smasher throws a head kick that misses and slips in the process. He scrambles back to his feet and the fighters circle.
Smasher misses with a few strikes there.
Joe Smasher seems to be getting the better of the standup.
That's three minutes gone in the round.
Smasher scores with a punch to the gut of his opponent.
Smasher keeping at a good range here, avoiding a leg kick.
Smasher swings wildly with a couple of big hooks

and White counters with a nice double leg into half guard.
Smasher really doesn't want to stay on the ground with White. If he can't get it back to his feet, it's only a matter of time before he'll be tapping out.
Both fighters are absolutely exhausted here.
Smasher is trying to stand.
White missing with some ground and pound from the half guard.
White throwing shots but Smasher is blocking nicely.
White prevents Smasher from standing back up.

White has hold of the far side arm. He's working for the Kimura, can Smasher defend it? White steps over the head and cranks it - Smasher is tapping out! That was textbook stuff right there - nice submission victory for White!
Ladies and gentlemen, after 3:46 of round 2, we have a winner by way of Submission (Kimura). Defoe White!
|
|
|
|
|
|
|
|
|
|
|
|
|
|
|
|
|
|
|
|
|
|
|
| S |
C
A |
G |
S |
C
B |
G |
|
S |
C |
G |
|
energy
A | B |
|
hype
A | B |
|
pop
A | B |
|
mgr
A | B |
|
FIGHT
RATING
38% |
|
|
|
|
|
|

