|
|
PBP Commentary |
Coming up we have a welterweight MMA rules bout between Ethan Bingham (ranked 0 p4p, 0 weight class) and Dan Hardly (ranked 0 p4p, 0 weight class). Dan Hardly will no doubt be trying to keep this one on the feet, where he has a distinct advantage.
 |
|
 |
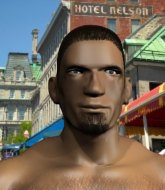
| 170 cm
18
170 lbs
0 - 0 - 0 |
|
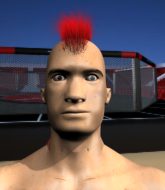
180 cm
22
170 lbs
0 - 1 - 0 |
BJJ Blue Belt
Brawler
KO power |
|
BJJ Blue Belt
Excellent boxer
Heavy handed |
|
| |
|
Ladies and gentlemen. This fight is 3 rounds, in the welterweight division.
Introducing the fighter to my left, fighting out of the red corner.
With a record of
0 - 0 - 0, fighting out of London, Ethan Bingham!
And introducing the fighter to my right, fighting out of the blue corner.
With a record of
0 - 1 - 0, fighting out of London, Dan Hardly!
The judges for this bout are Richard Clark, Andrew Berry and Chris Edwards.

The bell rings for round one and we are underway!
Hardly lunges in with swinging rights and lefts but Bingham circles away quickly and effectively.

Bingham shoots in from a long way out. He's driving through with the takedown attempt and he eventually gets it, landing in Hardly's guard.
Bingham trying to pass the guard but can't manage it just yet.
The fighters are pressed up against the cage, both looking to find a bit of space to work.
Bingham throwing elbows and punches but not connecting, as Hardly works some decent striking defense from the bottom.
Hardly is trying to control the position but Bingham postures up.
Bingham trying to control the position from guard on top but Hardly is wriggling around, looking for whatever he can.
Bingham is stalling in the full guard.

Bingham stands up from guard. Let's bang!
Hardly misses with a takedown

and Bingham counters into the clinch. Nicely done.

Bingham breaks from the clinch.
Bingham scores with a nice takedown into half guard. Let's see what he's got on the ground.
Bingham decides to stand and escape the position.
Hardly will have to do better than that with his takedown attempts.

That's one minute gone in the round.
Bingham closes the distance, clinches up and gets a nice trip takedown into side control. Very smooth.

Bingham working hard here to secure a kimura but he's not really in the right position for it.
Hardly manages to get back to half guard.
Bingham is breathing heavily.
Bingham is looking to take a break and control but Hardly is keeping him honest, looking to work from the bottom.
Hardly tries to get to full guard but Bingham has control of the leg.
Hardly wants to get back to his feet.

That's two minutes gone in the round.
Hardly won't allow Bingham to pass to mount.
Bingham seems very keen to just sit and control from half guard but Hardly does not like that idea so much and is remaining active off his back.

The referee has ruled that neither fighter is active enough on the ground and has stood them back up.
Hardly scores to the head and body with a nice combination!
Hardly displaying good standup as he scores with a three punch combination.
Hardly looks frustrated there after his takedown attempt is stuffed easily.
Ethan Bingham has stuffed three takedown attempts in the round now. That's going to take a lot out of Dan Hardly.
Hardly throws a combination but it was largely blocked by Bingham.
Hardly misses with a takedown attempt
and Bingham counters with a shoot takedown. Hardly fights it but they end up in guard.
Wooooo! Give it up for these two warriors! They are putting on a show!
Hardly wants to sweep but no luck.
Bingham stands up from Hardly's guard - Bingham perhaps looking for a knockout.
Bingham will have to do better than that with his takedown attempts.

That's three minutes gone in the round.
Hardly throws a one two combo.
Hardly throws a series of punches but Bingham moves out of range.
Hardly throws a right and a left that Bingham avoids nicely.
Bingham lands a head kick!
Hardly keeps the fight on the outside.
Hardly scores with a one two! Bingham had his feet all tangled up there and couldn't avoid the strikes.
Bingham has his head slapped from side to side by a 3 punch combination. That must have hurt him.
Hardly fails miserably with a takedown attempt.
Bingham clinches up with Hardly and pushes him back against the cage.
Bingham tries for a takedown but Hardly manages to get underhooks.
Hardly keeps the fight in the clinch, despite Bingham's efforts to push away.
The fighters are starting to get sweaty, which will make takedowns a bit more tricky.
Bingham tries to pull guard but Hardly won't allow it.

That's four minutes gone in the round.
Hardly is looking to break free of the clinch but Bingham has double underhooks.
Hardly tries to break the clinch but Bingham is controlling the position.
Bingham manages to break the clinch.
Bingham goes for a spinning back kick but it misses.
Hardly misses with a few strikes there.
Hardly lands a body shot.
Hardly has a takedown stuffed.
Hardly scores with a three punch combo!
Hardly lands a jab-cross combination.
The crowd applaud the fighters efforts here as the round comes to an end.
Hardly throws a right and a left that Bingham avoids nicely.
Hardly looks to score with a combo but nothing lands.
Hardly misses with a double jab.
And that�s the end of the round � the fighters go back to their corners.
Ethan Bingham dominated that round.
The fighters get back to their feet, the hooter sounds and we're back to the action!

Bingham gets a clinch.
Bingham gets double underhooks and manages to take the fight to the ground.
Bingham gets to his feet. Hardly looking to butt scoot but the ref puts an end to that. On your feet son!
Hardly misses with a takedown
and Bingham moves into the clinch.
The pace really dropping off here, momentarily.
Bingham with a knee to the head.
Bingham breaks the clinch and we're back to striking at distance.
Hardly connects with a body shot.
Hardly keeps his opponent at a distance with a nice jab.
Both fighters are absolutely exhausted here.
Hardly with a poor takedown
and Bingham counters with a driving takedown into guard. Nice work there by Bingham.
This has been an exciting period of action!
Bingham is looking to stand up but Hardly won't let him.
That's one minute gone in the round.
Bingham trying to control the position from guard on top but Hardly is wriggling around, looking for whatever he can.
Bingham tries to free his leg and advance position but Hardly is retaining full guard.
Hardly is looking to stand up but Bingham isn't so interested in that idea.
Bingham stands up and looks to throw the legs aside to pass to side control. Hardly swivels though and keeps the full guard.
Bingham won't allow Hardly to sweep him here.
It looks like we're going to have a standup here. Neither fighter is doing enough on the ground.
Hardly throws a series of punches but Bingham moves out of range.
That's two minutes gone in the round.
The crowd are starting to boo a lack of action.
A nice combination there by Hardly.
Ethan Bingham is looking to throw some combinations by the looks of things.
Hardly moves in looking to clinch but Bingham pushes him off.
Hardly lands a jab. Then a cross. Then finally a nice hook to the body. Good work there by Hardly.
Hardly stuffs the takedown.
Hardly tries to clinch but Bingham is having none of it.
Hardly moves into range and throws a lovely three punch combination.
Hardly shoots in with a takedown attempt and he has Bingham pinned against the cage. Bingham gets the underhooks and manages to circle away.
Ethan Bingham has stuffed three takedown attempts in the round now. That's going to take a lot out of Dan Hardly.
Hardly fakes high and swings low for a body shot but Bingham manages to avoid it.
Bingham bobs and weaves into range and then changes levels and scores with a nice takedown into side control.
Bingham lands some shots froms side control.
Hardly tries to slip a leg under to move to half guard but Bingham presses down on the leg and jumps into full mount!
That's three minutes gone in the round.
Hardly wriggling around on the bottom manages to avoid the strikes thrown by Bingham.
Hardly is squirming around, avoiding Bingham's attempts to control the action.
The ref warns both fighters not to hold the cage as they work up against the meshing.
Hardly keeping his composure momentarily, calmly looking to get back to half guard.
Hardly avoids a series of strikes thrown by Bingham.
That's four minutes gone in the round.
The crowd are hurling abuse towards the fighters... You can hardly blame them though because there isn't a lot going on in the fight.
Hardly is trying desperately to improve position.
Hardly tries to lock up and control but Bingham gives him a forearm to the face and pushes him away.
Bingham goes for an armbar but he's fallen flat on his backside there and now Hardly is on top in guard.
Hardly looking to pass the guard.
And that�s the end of the round � the fighters go back to their corners.
Ethan Bingham dominated that second round.
That's time! Back to the action! So, we enter the final round. Let's see if either fighter can bring us a finish, or whether we're going to the judges scorecards.

Hardly closes the distance and clinches up with Bingham, looking for a takedown. Hardly pushes Bingham against the cage but Bingham circles to the side and manages to break the clinch.
Dan Hardly seems to be the more aggressive standup fighter in this bout.
Bingham fails with an attempt to clinch.
Hardly tries to clinch up
and Bingham counters with a takedown into side control.
Hardly is not content to let Bingham control the position.
Hardly is looking to reverse the position.
Bingham is looking to take a break and control but Hardly is keeping him honest, looking to work from the bottom.
Bingham working hard here to secure a kimura but he's not really in the right position for it.
Both fighters are breathing heavily.
That's one minute gone in the round.
Hardly struggling a bit here.
Bingham tries for a kimura. Not really close to a finish though.
Bingham trying to control the position but Hardly is working away.
Hardly is in a bad spot here and he knows it... just holding on for now.
That's two minutes gone in the round.
A lull in the action here being met with boos from the crowd.
Well, the referee has seen enough. Neither fighter is active enough on the ground so he's stood them back up.
Jab, cross, leg kick. Nice combination by Hardly!
Hardly misses with a few strikes there.
Bingham lands a nice looking body kick.
Hardly misses with a takedown
and Bingham counters with a nice body kick.
Bingham shoots in for a takedown - he's clinched up with Hardly but Hardly pushes him off and we're back to square one.
Hardly lands three nice shots there - that looked like it hurt!
Hardly lands three nice shots there - that looked like it hurt!
A right-left combo lands from Hardly.
Hardly tries to bum rush Bingham with a series of wild strikes but Bingham uses good footwork to avoid the assault.
Hardly stuffs the takedown attempt from Bingham. Bingham gets slowly back to his feet.
That's three minutes gone in the round.
Hardly has his takedown stuffed
and Bingham counters by moving into the clinch.
Ethan Bingham has stuffed three takedown attempts in the round now. That's going to take a lot out of Dan Hardly.
Bingham escapes the clinch and we're back to striking.
Bingham has his head slapped from side to side by a 3 punch combination. That must have hurt him.
Hardly is working the combinations to good effect here.
Hardly tries to bum rush Bingham with a series of wild strikes but Bingham uses good footwork to avoid the assault.
Hardly stuffs the takedown.
Jab, cross, leg kick. Nice combination by Hardly!
Bingham dodges the punch combination from Hardly.
Bingham is trying hard to land a takedown here. Hardly sprawls well and keeps this one on the feet.
Bingham fails with an attempt to clinch.
Good shot there by Hardly.
Hardly lands a jab, followed by a cross and another cross, as Bingham backs up against the cage.
Hardly will need to tighten up his combinations if he doesn't want to gas himself out, swinging at thin air.
That's four minutes gone in the round.
Hardly takes a body punch that cleary hurt but he's trying not to show any weakness.
Bingham swats away the attempt to clinch by Hardly.
Bingham throws a hook to the side of Hardly's head but Hardly sees it coming and ducks under it beautifully.
Hardly bobbing and weaving, closes the distance and lands a hook to the side of Bingham's head.
Bingham fails in his attempt to clinch.
Bingham misses with a double jab
and Hardly counters with a good right hand that lands right on the jaw.
Dan Hardly has stepped it up - he knows he needs a finish here!
Hardly throws a combination but comes up with nothing but fresh air.
Bingham has his head slapped from side to side by a 3 punch combination. That must have hurt him.
Bingham shoots in with a takedown attempt and he has Hardly pinned against the cage. Hardly gets the underhooks and manages to circle away.
Hardly misses with a takedown
and Bingham counters into the clinch. Nicely done.
And that's the end of the fight!
Ethan Bingham showed his dominance in that final round.
Well I reckon that's a shut out for Bingham, winning every round. Will the judges agree? They are the ones who matter, even if they are often depressingly incompetent. Over to the ring announcer for the scorecards.
Ladies and gentlemen, after 3 rounds of action, we go to the scorecards for a decision.
Judge Richard Clark scores the fight 30:27
Judge Andrew Berry scores the fight 30:27
Judge Chris Edwards scores the fight 30:27
In favor of your winner, by unanimous decision... Ethan Bingham!
|
|
|
|
|
|
|
|
|
|
|
|
|
|
|
|
|
|
|
|
|
|
|
| S |
C
A |
G |
S |
C
B |
G |
|
S |
C |
G |
|
energy
A | B |
|
hype
A | B |
|
pop
A | B |
|
mgr
A | B |
|
FIGHT
RATING
52% |
|
|
|
|
|
|

