|
|
PBP Commentary |
Coming up we have a heavyweight MMA rules bout between Tony Stark (ranked 0 p4p, 0 weight class) and Kenneth Townsend (ranked 0 p4p, 0 weight class). Stark comes to the cage accompanied by Black Sabbath - Iron Man. Townsend has chosen Walk by Pantera as his entrance music. Kenneth Townsend is the more experienced fighter, so let's see if that makes a difference tonight.
 |
|
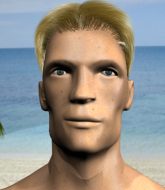 |
| 195 cm
18
280 lbs
3 - 0 - 0 |
|
199 cm
22
250 lbs
10 - 9 - 0 |
BJJ Blue Belt
Counter striker
Intelligent |
|
Good takedowns
Brawler
Knockout power |
|
| |
|
Ladies and gentlemen. This fight is 3 rounds, in the heavyweight division.
Introducing the fighter to my left, fighting out of the red corner.
With a record of
3 - 0 - 0, fighting out of Montreal, Tony Stark!
And introducing the fighter to my right, fighting out of the blue corner.
With a record of
10 - 9 - 0, fighting out of Montreal, Kenneth Townsend!
The judges for this bout are Alec Ball, Dillan Fox and William Peck.

The bell rings for round one and we are underway!
Townsend throws a body punch but Stark moves out of range.
Townsend swings for the body but Stark moves out of range.
Townsend throws a hook to the body but it doesn't connect.
Stark throws a right and a left that both miss.
Stark circles away from the clinch attempt.
Townsend takes a swing at Stark's ribcage but misses.
Townsend misses the shot to the body.
Townsend misses with a takedown attempt. He shot from a bit too far out.
Townsend swings for the body but Stark moves out of range.
Townsend connects with a solid leg kick.
The fight stays on the outside here - Townsend looks like he's thinking about clinching though.
Townsend shoots for a double leg takedown but Stark sprawls well. He's pushed Townsend's face into the mat and manages to get back to his feet relatively easily.
Townsend thows a body shot but no joy.
Stark takes a shot right to the liver - Bas would have been proud of that punch.
Stark is breathing heavily.
The fight stays on the outside here - Townsend looks like he's thinking about clinching though.

Townsend lands a big head kick that sends Stark tumbling to the mat! Townsend takes a step backwards and waves Stark back to his feet - he wants the finish!

It looks like Tony Stark has been cut.

That's one minute gone in the round.

Stark gets caught on his heels momentarily as he allows Townsend to score an easy takedown into full guard.
Townsend pressing down on his opponent's thigh, looking to pass guard. Stark is keeping the position for now.
Stark has Townsend pulled in close to control his posture.
The ref warns both fighters not to hold the cage as they work up against the meshing.

Townsend drops back looking for a leg! Stark is in trouble here! The fighters roll with the hold and Stark manages to kick Townsend off! Townsend jumps back into Stark's guard.
Stark had isolated an arm as going for an omaplata. Townsend is defending the submission well but is in a very vulnerable position. Stark Is leaning forward trying to finish the omaplata but decides to abandon it, and take Townsend's back instead.
Townsend breaks Stark's hooks off and manages to turn into his guard.

That's two minutes gone in the round.
Townsend throwing elbows and punches but not connecting, as Stark works some decent striking defense from the bottom.
Stark avoiding any damage from the ground and pound.
Stark has his foot on Townsend's thigh. He's trying to push off and get in position for a triangle, I think. Townsend works his way back into a safe position though.
Townsend is pushing down on Stark's leg trying to pass to half guard. Stark is fighting to maintain full guard but Townsend has managed to sneak the leg through.
Townsend is trying to work for a kimura. He's got his hands clasped together - this could be trouble! No, Stark has managed to free his arm - good work.
Stark won't allow Townsend to pass to mount.
Townsend is trying to work for a kimura but Stark is defending well.
Stark is defending against the submission attempts here by Townsend.
Stark could do with loosing a few pounds - he looks very soft around the mid section, to put it politely.
Townsend missing with some ground and pound from the half guard.
Townsend has the superior BJJ but he's also working some ground strikes into his gameplan.

That's three minutes gone in the round.
Stark moves into full guard.
Stark is active off his back here, looking for submissions.
Townsend is trying to work a guillotine from the top, or something like that? Don't know how he thinks he's going to get a finish from there.
Townsend drops back looking for a leg! Stark is in trouble here! The fighters roll with the hold and Stark manages to kick Townsend off! Townsend jumps back into Stark's guard.
Townsend wants to pass the guard but Stark is keeping the position.
Stark escapes his hips to the side and looks to be working for an armbar. Townsend gives him a little smile and shakes his head. No chance.
Stark can't keep his opponent in guard - Townsend advances to half guard, no doubt looking to mount.

That's four minutes gone in the round.
Stark is trying to get back to full guard.
Townsend passes the guard and advances to mount!
Stark keeping his composure momentarily, calmly looking to get back to half guard.
Townsend is dominating on the ground here - he's now on his opponent's back, looking to sink in the hooks. Stark is in real trouble.
Both fighters really going for it on the ground here!
Stark defending nicely against the rear naked choke attempt.
As the round comes to an end the crowd are showing their appreciation for a great round of action.
Stark manages to reverse the position and now he's in Townsend's guard. Nice work there by Stark.
And that�s the end of the round � the fighters go back to their corners.
Kenneth Townsend dominated that round.
The cut man is working on Tony Stark's cut.
The minute break is over - no more time for sponges and pep talks - back to the action!

Townsend shoots in for a takedown but Stark shows good takedown defense there and keeps this one on the feet.
Townsend ducks low and lands a nice hook to the body of his opponent.
Townsend fails with a takedown attempt.
Townsend dips down and scores with a jab to the body.
Townsend tries to close the distance and clinch up but Stark swats him away and circles back towards the center.
Townsend lands a jab to Stark's midsection.
Townsend is looking to clinch.
Stark shoots in for a takedown and gets it. Let's see what he's got on the mat.
Both fighters are absolutely exhausted here.
Stark trying to control the position from guard on top but Townsend is wriggling around, looking for whatever he can.
Stark drops back for a leg but he's not going to get it - he lets go and Townsend dives on top into guard.
That's one minute gone in the round.
Townsend slips effortlessly into side control - very nice.
Townsend is looking for a kimura. He might have it! No, Stark has escaped the position, nice work there.
Stark tries to improve position but can't.
Townsend working away.
Kenneth Townsend has got the better of the ground game so far.
Townsend looking for an arm triangle but it's way too loose to do anything.
Stark wants to control but Townsend postures up.
Stark tries to improve position but can't.
Townsend in side control, working for a kimura. He's got hold of an arm and he's torquing it... Stark is tapping! That's the end of the fight!
Ladies and gentlemen, after 2:01 of round 2, we have a winner by way of Submission (Kimura). Kenneth Townsend!
|
|
|
|
|
|
|
|
|
|
|
|
|
|
|
|
|
|
|
|
|
|
|
| S |
C
A |
G |
S |
C
B |
G |
|
S |
C |
G |
|
energy
A | B |
|
hype
A | B |
|
pop
A | B |
|
mgr
A | B |
|
FIGHT
RATING
100% |
|
|
|
|
|
|
