|
|
PBP Commentary |
Coming up we have a bantamweight MMA rules bout between Johnny McBraddish (ranked 0 p4p, 0 weight class) and Nick Shamrock (ranked 0 p4p, 0 weight class). McBraddish comes to the ring accompanied by Broken by 12 Stones. Shamrock has chosen Biggie Smalls-Hypnotize as his entrance music. I don't know about you partner, but I'm pumped for this one!
 |
|
 |
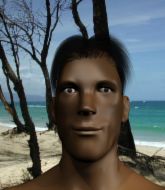
| 150 cm
25
130 lbs
12 - 1 - 0 |
|
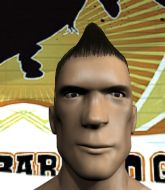
178 cm
20
141 lbs
7 - 2 - 0 |
BJJ Blue Belt
Excellent boxer
Very strong |
|
BJJ Brown Belt
Decent boxing
Powerful |
|
| |
|
Ladies and gentlemen. This fight is 5 rounds, for the bantamweight championship of the world!
Introducing the champion to my left, fighting out of the red corner.
With a record of
12 - 1 - 0, fighting out of London, Johnny McBraddish!
And introducing the challenger to my right, fighting out of the blue corner.
With a record of
7 - 2 - 0, fighting out of London, Nick Shamrock!
The judges for this bout are Andrew Berry, Donald Grub and Paul Tew.

The bell rings for round one and we are underway!
McBraddish misses with a body shot.
McBraddish scores with a jab to the body.
Shamrock dodges the punch combination from McBraddish.
McBraddish jabbing away but nothing is landing.
McBraddish misses with a low kick.
Some wild striking there from McBraddish.
McBraddish throws a jab when Shamrock was well out of range.
Johnny McBraddish seems to be the more aggressive standup fighter in this bout.
McBraddish works the jab nicely.
McBraddish misses the shot to the body.
McBraddish misses with a body shot.

That's one minute gone in the round.
Shamrock moves out of range of the strikes.
McBraddish throws a nice inside leg kick.
Johnny McBraddish is looking to keep the fight on the feet at all costs.
Shamrock uses good head movement to avoid the hook from McBraddish.
McBraddish tries to bum rush Shamrock with a series of wild strikes but Shamrock uses good footwork to avoid the assault.
McBraddish lunges in with swinging rights and lefts but Shamrock circles away quickly and effectively.
McBraddish throws a hook to the body but it doesn't connect.
McBraddish misses with a jab and misses with a cross straight after too.
McBraddish stuffs the takedown attempt from Shamrock. Shamrock gets slowly back to his feet.
McBraddish swings for the body but Shamrock moves out of range.
Shamrock showing good head movement there, avoiding the strikes from McBraddish.

That's two minutes gone in the round.
A few boos can be heard. I'm sure they will multiply if the fighters don't pick up the pace.
McBraddish misses with a body shot.
Shamrock steps to the side to avoid the strikes from McBraddish.
McBraddish lands a lovely overhand right.
McBraddish keeps the fight standing with a nice sprawl.
McBraddish misses with a jab, cross combination.
Shamrock shoots in for a takedown but McBraddish shows good takedown defense.
Johnny McBraddish has stuffed three takedown attempts in the round now. That's going to take a lot out of Nick Shamrock.

Shamrock shoots in and gets a takedown into half guard. Shamrock showed some decent athleticism there.
Shamrock wants to free his trapped foot but McBraddish is holding on for dear life with his legs.
McBraddish on his back here. We all know that wrestlers don't like being on their back so let's see if McBraddish tries to get out of the position.

That's three minutes gone in the round.
Shamrock is persisting with the attempt to improve his position.

Shamrock wants to work for an arm triangle but McBraddish is really keeping half guard well and defending the submission attempt.
Shamrock wants to advance to full mount but McBraddish doesn't think that's going to happen and regains full guard instead.
Shamrock prevents McBraddish from getting back to his feet.

That's four minutes gone in the round.
Well. There's a bit of a lull in the action here and the crowd are starting to get restless.
Shamrock is looking to advance position but McBraddish has hit a scissor sweep - now he's on top in mount!
Shamrock is wriggling around trying to escape.
The fighters are trapped in the ropes so we're going to have a reposition here. The ref calls for a break and repositions the fighters in the center of the ring.
The crowd thankful this round is nearly over.
McBraddish controlling from the full mount.
And that�s the end of the round � the fighters go back to their corners.
Johnny McBraddish dominated that round.
Well, the break between rounds is over. Let's get back to the scrappin!

Shamrock checks a leg kick.
McBraddish fails to land with a series of punches.
Shamrock displays some good footwork, moving neatly out of range as McBraddish throws out the jab.
Shamrock shoots in for a double leg but McBraddish sprawls well. That's going to sap some energy.
McBraddish changes levels and scores with a jab to the body.
We've had a slow start to the round here - hopefully the action picks up.
Shamrock shoots in for a takedown and gets it.
Shamrock is looking to pass the guard... He's managed it - he's now in full mount!
That's one minute gone in the round.
Shamrock sends his fist crashing into the mat - the crowd let out a collective ooooooh. Let's hope he's not broken it!
Shamrock moves to the back position.
The fighters are starting to get a bit slippery now, which will make submissions a bit more difficult.
Shamrock thows a strike but McBraddish uses the opportunity to reverse the position! Great move by McBraddish as he ends up in Shamrock 's guard!
McBraddish preventing the sweep.
Shamrock manages to sweep nicely, so he's now on top. McBraddish manages to get himself to full guard.
Shamrock tries to free his leg and advance position but McBraddish is retaining full guard.
McBraddish is looking to stand up but Shamrock isn't so interested in that idea.
Shamrock loading up with the ground and pound but he's missing more than he's landing in this flurry.
That's two minutes gone in the round.
The crowd are showing their displeasure at the lack of action as loud boos ring out around the arena.
McBraddish wants to stand up but Shamrock is controlling him.
Shamrock pressing down on his opponent's thigh, looking to pass guard. McBraddish is keeping the position for now.
Shamrock is looking to advance position but McBraddish has hit a scissor sweep - now he's on top in mount!
McBraddish sitting in mount, just looking to control for the moment.
Shamrock can't escape the position.
That's three minutes gone in the round.

McBraddish is standing up, even though he is in mount.
McBraddish scores with a slapping inside leg kick.
McBraddish throws a lazy right hand but Shamrock sees it coming a mile off and sidesteps it easily.
Shamrock throws a looping left and ducks down for a takedown. He's got his arms around McBraddish's waist but McBraddish gets an underhook and avoids the takedown by throwing Shamrock off to one side.
Shamrock throws a looping left and ducks down for a takedown. He's got his arms around McBraddish's waist but McBraddish gets an underhook and avoids the takedown by throwing Shamrock off to one side.
Johnny McBraddish has stuffed three takedown attempts in the round now. That's going to take a lot out of Nick Shamrock.
McBraddish fakes high and swings low for a body shot but Shamrock manages to avoid it.
That's four minutes gone in the round.
McBraddish stuffs a takedown. It's all about dictating where the fight takes place and McBraddish wants it to stay on the feet.
Shamrock bobs and weaves well there to avoid the strikes.
Shamrock shoots in for a takedown but doesn't get it.
Shamrock is a painfully thin specimen of a man. You do wonder whether a good body kick would snap him clean in two.
McBraddish throws a body punch but Shamrock moves out of range.
McBraddish throws out a loose jab but Shamrock uses good head movement to avoid it.
McBraddish lands with an overhand left.
McBraddish jabs Shamrock right on the nose. Shamrock blinks but takes it well.
McBraddish throws a hook to the side of Shamrock's head but Shamrock sees it coming and ducks under it beautifully.
Shamrock moves away from the strike by McBraddish.
And that�s the end of the round � the fighters go back to their corners.
Johnny McBraddish dominated that second round.
The fighters' corners scream their final instructions, as the referee calls time. Here we go, back to the action!

McBraddish looks to throw the jab but Shamrock is out of range.
McBraddish thows a left - swing and a miss!
McBraddish looks to land a left hand but Shamrock moved out of range nicely.
McBraddish misses with a looping left.
McBraddish throws a jab when Shamrock was well out of range.
The fighters circling - McBraddish throws out the jab but it was never going to land.
Shamrock throws a looping left and ducks down for a takedown. He's got his arms around McBraddish's waist but McBraddish gets an underhook and avoids the takedown by throwing Shamrock off to one side.
We've had a slow start to the round here - hopefully the action picks up.
The sound of bone on bone echoes around the arena as Shamrock checks a leg kick.
McBraddish throws the left hand but Shamrock avoids the punch easily.
McBraddish throws the left hand but Shamrock avoids the punch easily.
That's one minute gone in the round.
No joy there for McBraddish, who threw a few shots but didn't land.
Shamrock closes the distance and clinches up with McBraddish, looking for a takedown. Shamrock pushes McBraddish against the ropes but McBraddish circles to the side and manages to break the clinch.
McBraddish misses with a looping right.
Shamrock steps to the side to avoid the strikes from McBraddish.
McBraddish waving his hands out infront of him, looking to distract Shamrock.
McBraddish throws a right hand that Shamrock ducks under and follows up with a left that Shamrock also avoids with ease.
McBraddish is really struggling to find his range with his punches. Shamrock's reach advantage is clearly causing him problems.
Shamrock with poor footwork there. He got himself in a bit of a tangle, enabling McBraddish to score with a decent uppercut.
Shamrock misses with a takedown attempt - McBraddish sprawls well and throws a nice strike on the way out which just misses.
Johnny McBraddish has stuffed three takedown attempts in the round now. That's going to take a lot out of Nick Shamrock.
McBraddish tries to work over Shamrock's front leg with a kick but Shamrock checks it.
That's two minutes gone in the round.
The crowd are hurling abuse towards the fighters... You can hardly blame them though because there isn't a lot going on in the fight.
Shamrock takes a shot right to the bread basket.
Shamrock shoots in for a double leg but McBraddish sprawls well. That's going to sap some energy.
McBraddish throws a hook to the body but it doesn't connect.
McBraddish misses with the combination.
Nice defenses there by Shamrock.
McBraddish swings and misses with a hook to the body.
No luck for Shamrock with that takedown attempt.
McBraddish takes a swing at Shamrock's ribcage but misses.
That's three minutes gone in the round.
Shamrock takes one to the side of the head.
Shamrock moves away from the strike by McBraddish.
McBraddish ducks down and throws a hook to the body but Shamrock moves away.
McBraddish throws a wild combination but nothing lands.
Jab by McBraddish.
McBraddish fakes low and throws an overhand right that catches Shamrock on the side of the head.
McBraddish scores with a three punch combo!

Shamrock is rocked!
McBraddish is moving around nicely and scores here with a single head shot.
Shamrock is still on wobbly legs! Can McBraddish finish him?
Shamrock shoots in for a takedown. "I don't think so" says McBraddish as he avoids it easily.
That's four minutes gone in the round.
McBraddish misses with a straight right.
McBraddish is the aggressor but that punch slipped nicely by Shamrock.
Shamrock keeping a good distance there, avoiding the body shot.
McBraddish throws a lazy right hand but Shamrock sees it coming a mile off and sidesteps it easily.
Shamrock seems to have recovered his senses.
McBraddish throws a series of punches but Shamrock avoids them all with ease.
McBraddish misses with a body shot.
Shamrock ducks under a wild hook from McBraddish.
The crowd thankful this round is nearly over.
McBraddish throws a jab when Shamrock was well out of range.
McBraddish throws a hook but Shamrock blocks it.
And that�s the end of the round � the fighters go back to their corners.
Johnny McBraddish clearly takes that round.
The fighters' corners scream their final instructions, as the referee calls time. Here we go, back to the action!

Shamrock shoots in and drives through. McBraddish sprawls well.
No luck for Shamrock with that takedown attempt.
Nice sprawl there from McBraddish as Shamrock shoots in.
Johnny McBraddish has stuffed three takedown attempts in the round now. That's going to take a lot out of Nick Shamrock.
Shamrock defending well as McBraddish loads up on a big left hand.
Shamrock checks a leg kick nicely.
McBraddish throws a looping overhand right but Shamrock ducks down to avoid it.
We've had a slow start to the round here - hopefully the action picks up.
McBraddish throws a jab but it's blocked by Shamrock.
McBraddish throws a hook but Shamrock avoids it easily.
Shamrock avoids a lazy jab quite easily.
That's one minute gone in the round.
McBraddish throws a solid leg kick but Shamrock takes the impact on his shin and smiles at McBraddish.
Shamrock fails with the takedown.
McBraddish throws a leg kick which misses Shamrock's front leg but catches the back leg as Shamrock tries to avoid it.
McBraddish swings away but doesn't land with a series of punches.
Shamrock wants to clinch up but McBraddish keeps it at a distance.
McBraddish is looking to score with low kicks.
McBraddish misses with a body shot. Nice footwork from Shamrock.
McBraddish throws a hook to the side of Shamrock's head but Shamrock sees it coming and ducks under it beautifully.
That's two minutes gone in the round.
There's not a lot going on here and the crowd are letting the fighters know they're not willing to tolerate a lack of action.
Shamrock uses good footwork to avoid the strikes from McBraddish.
McBraddish misses with a jab, cross combination.
A nice leg kick lands there from McBraddish.
A slow jab from McBraddish misses its intended target.
McBraddish throws and low kick but Shamrock moves out of range easily.
Shamrock steps to the side to avoid the strikes from McBraddish.
Shamrock defending well as McBraddish loads up on a big left hand.
A punch lands to the side of Shamrock 's head but he takes it in his stride.
Shamrock uses good footwork to avoid the strikes from McBraddish.
McBraddish misses with a body shot.
That's three minutes gone in the round.
Shamrock moves out of range of the strikes.
Shamrock shoots in for a takedown. "Ole!" shouts McBraddish as he jumps to the side.
McBraddish throws a low kick but his opponent is out of range.
Johnny McBraddish is winning the standup battle so far.
Shamrock slips under a jab.
McBraddish scores with a decent looking hook.
Some wild striking there from McBraddish.
Shamrock shoots in for a takedown but McBraddish shows good takedown defense.
That's four minutes gone in the round.
The crowd are starting to boo a lack of action.
McBraddish missing with a left hand there. Shamrock was out of range so wasted energy throwing that one.
Shamrock misses with a takedown attempt. He shot from a bit too far out.
McBraddish misses with an uppercut.
McBraddish throws a monster uppercut resembling something out of street fighter but it doesn't land.
McBraddish misses with a hook.
Shamrock keeping a good distance there, avoiding the body shot.
Boooooooooooooooooooo!!! God, this has been a terrible round. Come on you two, sort yourselves out!
McBraddish throws the left hand but Shamrock avoids the punch easily.
Shamrock blocks a jab.
McBraddish swings wildly with a right hand that was never going to find it's target.
And that�s the end of the round � the fighters go back to their corners.
Johnny McBraddish had his way with Nick Shamrock in that round.
That's the end of the interval. I'm sure that seemed a lot quicker than a minute for our two fighters! Back to the action. This is the final round!

McBraddish throws a shot to the body.
Shamrock avoids the body shot from McBraddish.
Shamrock uses decent footwork to sidestep a right hand from McBraddish.
McBraddish throws a monster uppercut resembling something out of street fighter but it doesn't land.
Shamrock looking for a takedown here - he's got it.
Shamrock looking to pass the guard.
Shamrock with a flurry of punches that miss.
The fighters are tangled up in the ropes here. We might need a restart if the fighters can't break free themselves.
Shamrock trying to pass the guard. He's being very persistent here but McBraddish manages to land a sweep and now he's on top!
McBraddish knows he needs to get back to his feet asap. He's simply no match for Shamrock on the ground.
That's one minute gone in the round.
Shamrock has a closed guard, preventing McBraddish from standing up.
Shamrock bucks up whilst keeping hold of a body lock, managing to reverse the position. Now he's in top in McBraddish's guard.
Shamrock slips nicely into half guard.
Shamrock is looking to pass the guard... He's managed it - he's now in full mount!
Shamrock is trying to take his opponent's back.
That's two minutes gone in the round.
Shamrock goes for an armbar but McBraddish turns quickly into his guard - lovely anticipation from McBraddish.
Shamrock is wobbling all over the place through exhaustion. Will he make it to the final bell?
Shamrock looking for submissions from the bottom here. Moving his hips around, possibly looking for an armbar.
McBraddish wants to get up but he can't break Shamrock's closed guard. He needs to be careful trying to break the legs open, as he's open to submissions here.
Shamrock bucks up whilst keeping hold of a body lock, managing to reverse the position. Now he's in top in McBraddish's guard.
A big thud reverberates around the arena there as Shamrock accidentally thumps the mat. Hopefully he's not broken his hand.
That's three minutes gone in the round.
Shamrock working some ground and pound from guard but it's not doing any damage.
Shamrock is pushing down on McBraddish's leg trying to pass to half guard. McBraddish is fighting to maintain full guard but Shamrock has managed to sneak the leg through.
Shamrock wants to pass to mount but McBraddish is defending the position.
Shamrock wants to work for an arm triangle but McBraddish is really keeping half guard well and defending the submission attempt.
McBraddish might be looking to lock onto one of his opponent's long limbs for a submission, whilst we're on the ground.
Shamrock prevents McBraddish from standing back up.
Shamrock is looking to pass McBraddish's guard but actually McBraddish recovers to full guard.
Shamrock wants to pass the guard but McBraddish is keeping the position.
Nick Shamrock has stepped it up - he knows he needs a finish here!
That's four minutes gone in the round.
Well. There's a bit of a lull in the action here and the crowd are starting to get restless.
McBraddish wants to get back to his feet but Shamrock is in a dominant position and won't allow it.
Shamrock works a leg free and moves into half guard.
McBraddish is in trouble now - Shamrock has advanced to mount!
Shamrock sends his fist crashing into the mat - the crowd let out a collective ooooooh. Let's hope he's not broken it!
Johnny McBraddish is fighting for a decision here - he's started to take the cautious approach.
Shamrock throws an elbow from mount that misses. Lucky escape for McBraddish because Shamrock loaded up on that one.
And that's the end of the fight!
Nick Shamrock comfortably won the final round on my scorecard.
I think McBraddish has won this one but let's see what the judges have to say. Over to the ring announcer for the scorecards.
Ladies and gentlemen, after 5 rounds of action, we go to the scorecards for a decision.
Judge Andrew Berry scores the fight 49:46
Judge Donald Grub scores the fight 49:46
Judge Paul Tew scores the fight 49:46
In favor of your winner, by unanimous decision... Johnny McBraddish!
Johnny McBraddish retains his bantamweight title!
|
|
|
|
|
|
|
|
|
|
|
|
|
|
|
|
|
|
|
|
|
|
|
| S |
C
A |
G |
S |
C
B |
G |
|
S |
C |
G |
|
energy
A | B |
|
hype
A | B |
|
pop
A | B |
|
mgr
A | B |
|
FIGHT
RATING
43% |
|
|
|
|
|
|
