|
|
PBP Commentary |
Coming up we have a light heavyweight MMA rules bout between Tonyong Bayawak (ranked 0 p4p, 0 weight class) and Scott Etheredge (ranked 0 p4p, 0 weight class). We have two fighters making their debuts here, so let's see who comes out of this one with their first professional victory.
 |
|
 |
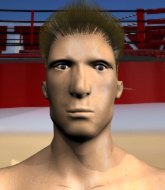
| 188 cm
22
205 lbs
0 - 0 - 0 |
|
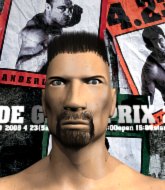
200 cm
22
200 lbs
0 - 0 - 0 |
BJJ Blue Belt
Excellent boxer
Cuts easily |
|
BJJ Blue Belt
Brawler
Determined |
|
| |
|
Ladies and gentlemen. This fight is 3 rounds, in the light heavyweight division.
Introducing the fighter to my left, fighting out of the red corner.
With a record of
0 - 0 - 0, fighting out of Sydney, Tonyong Bayawak!
And introducing the fighter to my right, fighting out of the blue corner.
With a record of
0 - 0 - 0, fighting out of Sydney, Scott Etheredge!
The judges for this bout are John Mangel, Steve Erwin and Damien Edna.

The bell rings for round one and we are underway!
Bayawak throws a wild combination but nothing lands.
Etheredge has a takedown stuffed.
Etheredge wants to clinch.
No joy there for Bayawak, who threw a few shots but didn't land.
Bayawak misses with a double jab.
Etheredge tries to close the distance and clinch up against the cage but Bayawak paws at him with a jab and circles away.
Bayawak looks to score with a combo but nothing lands.
Etheredge is looking to chop away at Bayawak's legs.
Bayawak misses with a wild combination.
Bayawak fails to land with a series of punches.
We've had a slow start to the round here - hopefully the action picks up.
Bayawak tries to bum rush Etheredge with a series of wild strikes but Etheredge uses good footwork to avoid the assault.
Etheredge tries to shoot in for a takedown. He's got hold of a leg but Bayawak swivels and escapes.
Etheredge tries to close the distance and clinch up but Bayawak swats him away and circles back towards the center.
Horrible takedown by Etheredge or perhaps it was just good defense by Bayawak which made him look bad.
Tonyong Bayawak has stuffed three takedown attempts in the round now. That's going to take a lot out of Scott Etheredge.
Etheredge wants to clinch up but Bayawak keeps it at a distance.

That's one minute gone in the round.
Bayawak misses with the combination.
Bayawak misses with a double jab.
Bayawak lunges in with swinging rights and lefts but Etheredge circles away quickly and effectively.
Etheredge slips a jab and a cross from Bayawak.
Etheredge shoots in for a takedown. "Ole!" shouts Bayawak as he jumps to the side.
Etheredge shoots in for a takedown but Bayawak shows good takedown defense.
Bayawak keeps the fight on the outside.
Bayawak throws a right hand that Etheredge ducks under and follows up with a left that Etheredge also avoids with ease.
No joy there for Bayawak, who threw a few shots but didn't land.
Etheredge misses with a wild combination.
Bayawak misses with a wild combination.
Bayawak rushes forward with a series of wild hooks but Etheredge moves out of range and avoids them all easily.
Bayawak misses with a few strikes there.

That's two minutes gone in the round.
Well. There's a bit of a lull in the action here and the crowd are starting to get restless.
Etheredge fails in his attempt to clinch.
Bayawak swings away but doesn't land with a series of punches.
Etheredge shoots in and drives through. Bayawak sprawls well.
Bayawak will need to tighten up his combinations if he doesn't want to gas himself out, swinging at thin air.
Bayawak lands a jab, followed by a cross and another cross, as Etheredge backs up against the cage.
A right-left combo lands from Bayawak.
Etheredge shoots in for a takedown. "Ole!" shouts Bayawak as he jumps to the side.
Etheredge looks gassed!
Etheredge tries to clinch up.
No joy there for Bayawak, who threw a few shots but didn't land.
Bayawak tries to bum rush Etheredge with a series of wild strikes but Etheredge uses good footwork to avoid the assault.
Etheredge fakes high and shoots in for a takedown but Bayawak avoids it really well and circles away.
Etheredge showing good head movement there, avoiding the strikes from Bayawak.

That's three minutes gone in the round.
Etheredge throws a sloppy head kick and Bayawak moves out of range easily.
Etheredge showing good head movement there, avoiding the strikes from Bayawak.
Bayawak lets the fists fly and connects with a left straight followed by a right hook.
Bayawak misses with a jab and misses with a cross straight after too.
Bayawak throws a combination but it was largely blocked by Etheredge.
Bayawak stuffs a takedown. It's all about dictating where the fight takes place and Bayawak wants it to stay on the feet.
Bayawak moves into range and throws a combination. A nice jab followed by a hook to the body.
Bayawak goes to the watering hole and comes back with a big thumbs up from the judges as he scores a three punch combo.
Bayawak misses with a jab, cross combination.
Etheredge throws a combination that misses
and Bayawak counters with a three punch combo that has Etheredge backing up. Etheredge nods at Bayawak to acknowledge the strikes.
Bayawak will need to tighten up his combinations if he doesn't want to gas himself out, swinging at thin air.
A left and a right from Bayawak both land. Nice combination.

That's four minutes gone in the round.
Bayawak looks to land a combination. Etheredge sees it coming but can only parry a couple of the shots.
Bayawak throws a combination but comes up with nothing but fresh air.
Bayawak misses with a two punch combination.
Bayawak swings away but doesn't land with a series of punches.
Etheredge dodges the punch combination from Bayawak.
Etheredge tries to land a leg kick but Bayawak saw it coming and moves away.
Bayawak looks to land a combination but Etheredge avoids it well.
A combination from Bayawak does no damage.
Etheredge tries to clinch but Bayawak moves away
and Bayawak counters with a left and a right that stings Etheredge.
Left hook, right uppercut from Bayawak.
Bayawak is working the combinations to good effect here.
Bayawak misses with a double jab.
Etheredge wants to clinch but Bayawak slips to the side
and Bayawak counters with a two punch combo.
Etheredge finds nothing but air with that leg kick attempt.
And that�s the end of the round � the fighters go back to their corners.
Tonyong Bayawak dominated that round.
Well, the break between rounds is over. Let's get back to the scrappin!

Bayawak moves out of range as Etheredge throws a body kick.
Etheredge is trying desperately to land a takedown but Bayawak is having absolutely none of it. This is turning into a bit of a nightmare for Etheredge.
A solid body kick from Etheredge.
Some wild striking there from Bayawak.
Bayawak will need to tighten up his combinations if he doesn't want to gas himself out, swinging at thin air.
Bayawak throws a right hand that Etheredge ducks under and follows up with a left that Etheredge also avoids with ease.
Etheredge throws a looping left and ducks down for a takedown. He's got his arms around Bayawak's waist but Bayawak gets an underhook and avoids the takedown by throwing Etheredge off to one side.
A punch combination from Bayawak misses.
Etheredge dodges the punch combination from Bayawak.

Etheredge closes the distance and scores a nice trip takedown into half guard. Bayawak did well to prevent Etheredge getting side control.
Bayawak wants to get back to his feet.
Both fighters are absolutely exhausted here.
That's one minute gone in the round.
Etheredge missing with the ground and pound from half guard.
Etheredge not throwing his punches with enough precision this time.
Bayawak wants to get back to his feet.
Etheredge working Bayawak over with strikes.
Bayawak blocking the ground and pound attempt from Etheredge.
Etheredge sitting in half guard, looking to land shots. Bayawak defending well though.

Well, the referee has seen enough. Neither fighter is active enough on the ground so he's stood them back up.
Etheredge will have to do better than that with his takedown attempts.
Bayawak rushes forward with a series of wild hooks but Etheredge moves out of range and avoids them all easily.
Etheredge misses with a double jab
and Bayawak counters with a three punch combination, finished off with a leg kick. Nice work.
Bayawak falls off balance throwing a combination
and Etheredge counters with a takedown into full mount! That could mean trouble for Bayawak!
Bayawak is trying to stand up.
That's two minutes gone in the round.
Etheredge lands a big elbow.
You get the feeling that Bayawak really doesn't like being in this position too much.
Etheredge landing shots from mount.
Etheredge sends his fist crashing into the mat - the crowd let out a collective ooooooh. Let's hope he's not broken it!
Bayawak trying desperately to get to his feet.

Etheredge is in full mount, looking to secure a guillotine but Bayawak is surviving well by controlling Etheredge's body position as best he can.
Bayawak is looking to get back to his feet - it's going to be hard from this position.
Etheredge has the superior BJJ but he's also working some ground strikes into his gameplan.
Etheredge throwing sloppy strikes here. Perhaps if he tightened up his striking from such a dominant position, he'd be able to finish easier.
Etheredge throwing sloppy strikes here. Perhaps if he tightened up his striking from such a dominant position, he'd be able to finish easier.
That's three minutes gone in the round.
Etheredge thuds his fist into the canvas! Oooouch!
Etheredge misses with a head shot.
You get the feeling that Bayawak really doesn't like being in this position too much.
Etheredge in mount throwing good strikes here, bouncing his opponent's head off the canvas.
You get the feeling that Bayawak really doesn't like being in this position too much.
Bayawak is bucking up trying to escape but Etheredge cracks him with another couple of good strikes.
Etheredge landing shots from mount.
Bayawak is in a horrible position here. Etheredge smacks him with another shot as he tries to escape the position.
Bayawak is trying to stand.
That's four minutes gone in the round.
A few boos can be heard. I'm sure they will multiply if the fighters don't pick up the pace.
Etheredge content just to control the position here.
Bayawak tries to buck Etheredge off but he can't manage it.
Bayawak takes a big shot to the head but keeps on trying to improve his position.
Bayawak is squirming around, avoiding Etheredge's attempts to control the action.
Etheredge throws some wild stikes that Bayawak manages to avoid easily.
And that�s the end of the round � the fighters go back to their corners.
Scott Etheredge showed his class in that round. I'd imagine he'll take it on all the scorecards.
Well, the break between rounds is over. Let's get back to the scrappin! Let's get this one finished - here comes the final round!

Etheredge tries to clinch but is not successful on this occasion.
Bayawak moves into range and throws a combination. A nice jab followed by a hook to the body.
Etheredge moves in looking to clinch but Bayawak pushes him off.
Bayawak throws a series of punches but Etheredge moves out of range.
Etheredge just misses with a punch to the body.
Bayawak fails to land with the punch combination there - jab, cross, hook, miss, miss, miss.
Bayawak throws a series of punches but Etheredge moves out of range.
Bayawak misses with the combination.
Bayawak falls off balance throwing a combination
and Etheredge counters with a head kick. That will keep Bayawak thinking before he tries any more sloppy attacks!
Etheredge throws a series of strikes that have Bayawak backpedaling.
Bayawak scores with a one two! Etheredge had his feet all tangled up there and couldn't avoid the strikes.
Bayawak throws a right and a left that Etheredge avoids nicely.
Bayawak falls off balance throwing a combination
and Etheredge counters with a big head kick but Bayawak shrugs it off.
Both fighters are breathing heavily.
That's one minute gone in the round.
Etheredge fails in his attempt to clinch.
No luck with that takedown attempt from Etheredge.
Bayawak throws a series of punches but Etheredge moves out of range.
Bayawak throws a wild combination but nothing lands.
Etheredge shoots in looking for a takedown. Bayawak tries to sprawl out of it but Etheredge keeps driving through. The fighters are pinned against the cage. Bayawak manages to get underhooks and after a bit of a struggle, circles away and we're back to standing.
Bayawak falls off balance throwing a combination
and Etheredge connects with a straight left hand counter down the middle.
Bayawak lands three nice shots there - that looked like it hurt!
Etheredge shoots in for a takedown and gets it. Let's see what he's got on the mat.
Etheredge working some ground and pound from guard but it's not doing any damage.
Bayawak wants to stand and escape but Etheredge is having none of it.
That's two minutes gone in the round.
Etheredge trying to control but Bayawak is working from the bottom.
Bayawak wants to stand but Etheredge is controlling the position.

Etheredge stands up from guard. Let's bang!
Bayawak looks to score with a combo but nothing lands.
Bayawak circles away from the clinch attempt.
Bayawak throws a nice looking combination but Etheredge bobs and weaves to avoid any damage.
That's three minutes gone in the round.
Etheredge thows a body kick. Bayawak tries to catch it but that hurt him.
Nice body kick from Etheredge.

Etheredge drives through and clinches with Bayawak against the cage.
Bayawak wants to break free but Etheredge has control.
Etheredge has Bayawak pressed against the cage, preventing Bayawak from circling away and getting back to striking at range.
Etheredge has Bayawak pressed against the cage, preventing Bayawak from circling away and getting back to striking at range.
Etheredge is working for takedown but Bayawak is calmly controlling the position for now.
Tonyong Bayawak has stuffed three takedown attempts in the round now. That's going to take a lot out of Scott Etheredge.
Bayawak tries to break free but Etheredge pushes him back against the cage.
Etheredge scores with a shoulder strike.
Etheredge pulls guard.
Etheredge working a defensive guard here.
Etheredge working the defensive guard well to avoid strikes from Bayawak.
That's four minutes gone in the round.
Bayawak sitting in guard here, content to control.
The fighters are pressed up against the cage, both looking to find a bit of space to work.
Etheredge wants to stand and escape but Bayawak is having none of it.
The ref warns both fighters not to hold the cage as they work up against the meshing.
Etheredge keeping full guard, as Bayawak tries to pass.
Bayawak seems content to control from guard here. He's going to have to remain active though if he doesn't want to get stood back up.
Bayawak wants to control from the top but Etheredge keeps moving.
And that's the end of the fight!
Scott Etheredge comfortably won the final round on my scorecard.
I think Etheredge has won this one but let's see whether the judges agree with me. Over to the ring announcer for the scorecards.
Ladies and gentlemen, after 3 rounds of action, we go to the scorecards for a decision.
Judge John Mangel scores the fight 28:28
Judge Steve Erwin scores the fight 28:29
Judge Damien Edna scores the fight 28:29
In favor of your winner, by majority decision... Scott Etheredge!
|
|
|
|
|
|
|
|
|
|
|
|
|
|
|
|
|
|
|
|
|
|
|
| S |
C
A |
G |
S |
C
B |
G |
|
S |
C |
G |
|
energy
A | B |
|
hype
A | B |
|
pop
A | B |
|
mgr
A | B |
|
FIGHT
RATING
39% |
|
|
|
|
|
|
