|
|
PBP Commentary |
Coming up we have a lightweight MMA rules bout between Dave Mazinger (ranked 0 p4p, 0 weight class) and Jamie Horton (ranked 0 p4p, 0 weight class). The crowd seem to be enjoying Horton's choice of entrance music: Sorry, you're not a winner. Jamie Horton has the power to score a knockout today if he connects clean with Dave Mazinger's chin.
 |
|
 |
| 180 cm
21
164 lbs
3 - 1 - 0 |
|
179 cm
21
157 lbs
2 - 3 - 0 |
BJJ Purple Belt
Counter striker
Big heart |
|
BJJ Brown Belt
Basic striking
Solid chin |
|
| |
|
Ladies and gentlemen. This fight is 2 rounds, in the lightweight division.
Introducing the fighter to my left, fighting out of the red corner.
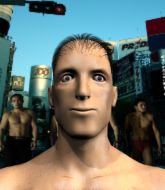
With a record of
3 - 1 - 0, fighting out of London, Dave Mazinger!
And introducing the fighter to my right, fighting out of the blue corner.
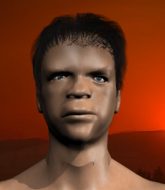
With a record of
2 - 3 - 0, fighting out of London, Jamie Horton!
The judges for this bout are Chris Edwards, James Ackerman and Daniel Bishop.

The bell rings for round one and we are underway!
Horton misses with a hook. Mazinger ducked under it nicely.
Mazinger lunges in with swinging rights and lefts but Horton circles away quickly and effectively.
Horton listening to his corner there, landing a nice uppercut.
Horton shoots in looking for a takedown. Mazinger tries to sprawl out of it but Horton keeps driving through. The fighters are pinned against the cage. Mazinger manages to get underhooks and after a bit of a struggle, circles away and we're back to standing.

The fight moves into the clinch position.

Horton is fighting off a takedown attempt but Mazinger is just too persistent for him and manages to trip Horton to the mat. Horton regains guard as soon as the fighters hit the mat.
Mazinger trying to control but Horton is working from the bottom.

Horton is working actively off his back, looking to secure an arm or perhaps work for a triangle.
Horton is looking to stand up but Mazinger isn't so interested in that idea.
Horton is doing well to control the posture of his opponent and prevent any damage.
Mazinger has to be careful here, sitting in the guard of a superior BJJ player.

That's one minute gone in the round.
Horton working for a triangle but Mazinger defends it easily.
Horton has his foot on Mazinger's thigh. He's trying to push off and get in position for a triangle, I think. Mazinger works his way back into a safe position though.
Horton is active off his back here, looking for submissions.
Mazinger trying to control but Horton is working from the bottom.
Horton looking to sweep here. No luck so far.
Horton is trying to control the position but Mazinger postures up.
Horton looking to control the pace of the fight rather than finish it.
Mazinger wants to control from the top but Horton keeps moving.

That's two minutes gone in the round.
My god... these two guys really need to pick up the pace or everyone will leave to go get a beer.
Mazinger tries to free his leg and advance position but Horton is retaining full guard.
Mazinger wants to control from the top but Horton keeps moving.

It looks like we're going to have a standup here. Neither fighter is doing enough on the ground.
Horton shoots in from a long way out. He's driving through with the takedown attempt and he eventually gets it, landing in Mazinger's guard.
Mazinger not looking particularly offensive just at the moment.
Mazinger is really struggling to control Horton but he's trying to hold on to the position.
Horton wants to control from the top but Mazinger keeps moving.
Horton pushes down on Mazinger's leg and manages to get into half guard.
Horton looks gassed!

That's three minutes gone in the round.
Mazinger trying to control from the bottom.
Horton throwing shots but they're hitting the canvas more than the man.
Mazinger actively working from the bottom here.
The referee has ruled that neither fighter is active enough on the ground and has stood them back up.
Horton misses with a takedown attempt - Mazinger sprawls well and throws a nice strike on the way out which just misses.
Jamie Horton seems to be the more aggressive standup fighter in this bout.
Mazinger fakes an overhand right and shoots for a takedown. Horton sprawls well initially but Mazinger persists and gets the takedown into half guard.
Horton trying to hold on to Mazinger's head to control him but Mazinger postures up.
Mazinger is trying to work for a kimura. This could be trouble! No, Horton has managed to free his arm - good work.

That's four minutes gone in the round.
Mazinger performing his best blanket impression for a moment.
Horton looking for submissions off his back.
The fighters are battling for position here. Horton manages to regain full guard. Nice work.
Mazinger trying to control but Horton is working from the bottom.
Horton looking to control the pace of the fight rather than finish it.
Horton is trying to control the position from the bottom.

That's five minutes gone in the round.
Mazinger sitting in guard, not really doing much.
Horton is working an open guard here, looking to improve his position. No doubt that will leave him open to counters but at least he's being more offensive.
Mazinger pressing down on his opponent's thigh, looking to pass guard. Horton is keeping the position for now.
Horton is throwing his legs up, looking for submissions. Mazinger is aware though and is defending well.
Mazinger drops back, looking for a kneebar! Horton looks panicked! The fighters roll across the mat, one looking to finish, one looking to escape. Horton looks to have wriggled free... Yes, he's got his leg free and he's dived into side control! Good work there from Horton!

That's six minutes gone in the round.
Neither fighter has done anything of merit for a good minute or two here and the crowd are not happy about it.
Horton is looking to finish here, going for an Americana. Mazinger knows the correct defense though, so he's OK.
Mazinger is looking to regain half guard here but Horton keeps moving and retains side control.
Mazinger wants to control but Horton postures up.
Mazinger is trying to improve his position.
Horton tries for an arm triangle. That looks pretty tight to me. Is this one over!?! Possibly, maybe, no Horton has let go of the choke. Obviously it wasn't as tight as we thought!
Mazinger manages to work his way to half guard, despite Horton's best efforts.

That's seven minutes gone in the round.
Horton throwing shots but Mazinger is blocking nicely.
Mazinger is trying to control but can't.
Mazinger actively working from the bottom here.
Horton trying to control from half guard but Mazinger is working away.
Mazinger trying to control from the bottom.
Mazinger blocking the ground and pound attempt from Horton.
Mazinger wants to control but Horton is keeping busy.
Well, the referee has seen enough. Neither fighter is active enough on the ground so he's stood them back up.
Horton shoots and misses
and Mazinger counters by clinching up.
Dave Mazinger has stuffed three takedown attempts in the round now. That's going to take a lot out of Jamie Horton.

That's eight minutes gone in the round.
There's not a lot going on here and the crowd are letting the fighters know they're not willing to tolerate a lack of action.
Mazinger gets underhooks to prevent Horton's takedown attempt.
Horton tries to take the fight to the ground by pulling guard but can't manage it.
Horton has a body lock and is looking for a takedown. Mazinger is bouncing around trying to prevent the takedown and somehow he has indeed managed to stay on his feet.
Mazinger pulls guard successfully.
Mazinger looking to hit a scissor sweep but Horton is one step ahead there.
Mazinger is working hard here to advance position.
Horton passes Mazinger's right leg, so he's now in half guard.
Horton is trying to control. Mazinger wants to improve his position but can't escape this time.
Horton trying to control the pace.
Mazinger looking to work for a kimura from the bottom.

That's nine minutes gone in the round.
Mazinger looking to work for a kimura from the bottom.
Horton not doing much here.
Horton is trying to work for a kimura. This could be trouble! No, Mazinger has managed to free his arm - good work.
Mazinger actively working from the bottom here.
And thats the end of the round the fighters go back to their corners.
Jamie Horton dominated that round.
The minute break is over - no more time for sponges and pep talks - back to the action! This is the final round!

Horton throws a front kick that sends Mazinger stumbling back into the cage.
Horton changes levels and drives through with a really nice takedown into side control. Mazinger looks really pissed at himself for not defending that better.
Mazinger is not content to let Horton control the position.
Mazinger sneaks back into half guard.
Horton is working for submissions here but there's nothing on.
Mazinger looking for submissions off his back.
Still in half guard, Horton seems content to control.
That's one minute gone in the round.
Mazinger tries to roll over but Horton keeps him under control.
The fighters are pressed up against the cage, both looking to find a bit of space to work.
Both fighters are absolutely exhausted here.
Mazinger works his way to full guard. Good work.
Mazinger throwing his legs up looking for a triangle.
Horton trying to control but Mazinger is working from the bottom.
There's a bit of a scramble here and now Mazinger is on top in guard.
Horton trying to keep a closed guard but Mazinger is proving a slippery customer.
Jamie Horton has got the better of the ground game so far.
Horton wants to stand but Mazinger is controlling the position.
That's two minutes gone in the round.
My god... these two guys really need to pick up the pace or everyone will leave to go get a beer.
Mazinger trying to control the position from guard on top but Horton is wriggling around, looking for whatever he can.
Horton is working from a closed guard but he's struggling to control his opponent.
Horton lands a beautiful switch and he's in full mount! That could spell trouble for Mazinger!
Horton looking to finish Mazinger with some ground and pound. This is bad for Mazinger!
Mazinger tries to hold on but Horton pushes him away.
Horton thowing shots but they're missing.
That's three minutes gone in the round.
Horton looking to secure an arm triangle but Mazinger defends it well.
Mazinger working to try and regain half guard.
Horton has hold of Mazinger's left arm, perhaps looking for a submission. The two fighters tussle over control of the isolated limb and Mazinger manages to get his arm back to his side and away from danger.
Horton wants to take his opponent's back but he's not managed it.
Mazinger slips a leg in and gets back to half guard.
Mazinger has no desire to be mounted, so is trying to control. Horton is working away from the top position though.
That's four minutes gone in the round.
The crowd are hurling abuse towards the fighters... You can hardly blame them though because there isn't a lot going on in the fight.
Mazinger looking for submissions off his back.
Horton seems content to maintain position for now, rather than mounting any offense.
Mazinger is looking to control Horton's leg but it's slowly edging free. Can Mazinger avoid being mounted?
That's five minutes gone in the round.
Horton thows a wild elbow that connects with the canvas.
Horton is trying to work for a kimura. This could be trouble! No, Mazinger has managed to free his arm - good work.
Horton is thwarting Mazinger's attempts to control the position.
Mazinger tries to roll over but Horton keeps him under control.
Mazinger is looking to control Horton's leg but it's slowly edging free. Can Mazinger avoid being mounted?
The referee has ruled that neither fighter is active enough on the ground and has stood them back up.
Horton tries to clinch but is not successful on this occasion.
That's six minutes gone in the round.
Neither fighter has done anything of merit for a good minute or two here and the crowd are not happy about it.
Mazinger shoots in but doesn't get the takedown
and Horton counters with a nice double leg into half guard.
Horton seems like he's working for an arm triangle here. He's freed his trapped foot and he's rotating nicely. Mazinger is in big trouble! He's tapping out! This one is aaaaaaaaaaaall over!
Ladies and gentlemen, after 6:30 of round 2, we have a winner by way of Submission (Arm Triangle). Jamie Horton!
|
|
|
|
|
|
|
|
|
|
|
|
|
|
|
|
|
|
|
|
|
|
|
| S |
C
A |
G |
S |
C
B |
G |
|
S |
C |
G |
|
energy
A | B |
|
hype
A | B |
|
pop
A | B |
|
mgr
A | B |
|
FIGHT
RATING
38% |
|
|
|
|
|
|
