|
|
PBP Commentary |
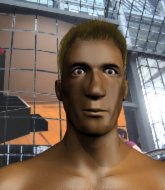
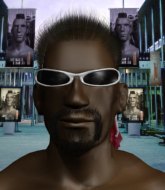
Coming up we have a middleweight MMA rules bout between Kyle Hudd (ranked 0 p4p, 0 weight class) and Ground Pound II (ranked 0 p4p, 0 weight class). Both fighters look fresh as a daisy as they make their way towards the cage.
 |
|
 |
| 189 cm
22
191 lbs
1 - 1 - 0 |
|
186 cm
22
185 lbs
1 - 0 - 0 |
Good takedowns
Brawler
Big heart |
|
Good wrestler
Counter striker
Determined |
|
| |
|
Ladies and gentlemen. This fight is 3 rounds, in the middleweight division.
Introducing the fighter to my left, fighting out of the red corner.
With a record of
1 - 1 - 0, fighting out of Amsterdam, Kyle Hudd!
And introducing the fighter to my right, fighting out of the blue corner.
With a record of
1 - 0 - 0, fighting out of Amsterdam, Ground Pound II!
The judges for this bout are Albert Achterberg, Paulsen Ambrosius and Daniel Blasius.

The bell rings for round one and we are underway!
Hudd shoots in looking for a double leg takedown. Pound II defends it nicely.
Hudd shoots in for a takedown but Pound II shows good takedown defense there and keeps this one on the feet.
Hudd shoots in for a takedown. "I don't think so" says Pound II as he avoids it easily.
That's three failed takedown attempts in the round for Kyle Hudd. That's going to take a lot out of him.

Pound II feints and as Hudd raises his hands in defense, Pound II changes levels and drives through with a takedown into guard.
Hudd keeping moving, preventing Pound II from controlling successfully.
Pound II lands a couple of digs.

Hudd is throwing his legs up, looking for submissions. Pound II is aware though and is defending well.
Pound II chips away with some ground and pound.
Pound II connects with a couple of short punches.
Pound II distracts Hudd with his right hand and drops a big elbow with his other arm.
Hudd is working from a closed guard but he's struggling to control his opponent.
Pound II landing with the ground and pound.
Pound II working from the guard for now, landing some ground and pound.
Pound II trying to control the position from guard on top but Hudd is wriggling around, looking for whatever he can.
The fighters are pressed up against the cage, both looking to find a bit of space to work.

That's one minute gone in the round.
Hudd working away from the bottom but not quite defensive enough there because Pound II has passed into half guard!
Pound II throwing shots but Hudd is blocking nicely.
Pound II is nestled in close to Hudd, controlling him well. He's worked in a nice elbow to the side of the head as well, for good measure.
Hudd wants to get back to full guard.
Hudd moves into full guard.
Pound II works over Hudd with some ground and pound from guard.
Pound II has the superior BJJ but he's also working some ground strikes into his gameplan.
Hudd trying to control the position.
Pound II postures up and lands some nice ground and pound.
Hudd on his back here. We all know that wrestlers don't like being on their back so let's see if Hudd tries to get out of the position.
Pound II works over Hudd with some ground and pound from guard.
The ref warns both fighters not to hold the cage as they work up against the meshing.
Pound II throwing strikes but missing.
Hudd controls Pound II momentarily but Pound II frees himself.
Hudd wants to sweep but no luck.
Hudd is breathing heavily.

That's two minutes gone in the round.
Hudd can't do much from the bottom at the moment, as Pound II controls the pace.
The fighters are starting to get a bit slippery now, which will make submissions a bit more difficult.
Hudd is striking off his back. Pound II thinks nothing of it though and passes easily into half guard.
Pound II is keeping good posture, landing some ground and pound.
The referee walks around the fighters to get a better view of the action. Pound II lands a nice short elbow.
Pound II takes advantage of the dominant position to land a couple of big hammer fists.
The referee walks around the fighters to get a better view of the action. Pound II lands a nice short elbow.
Pound II working over Hudd with some ground and pound. Hudd looks like he wants out of this position, which is understandable.
Pound II lands with an elbow from half guard - that looked like it hurt.
Hudd landing strikes from the bottom.
Pound II is looking for a kimura. It's going to be difficult to finish that from half guard though and Hudd defends it well.
Hudd misses with some strikes from the bottom.

That's three minutes gone in the round.
Pound II content to sit in half guard and control for a moment.
Hudd is trying to get back to full guard.
Hudd is pressing down on Pound II's left leg trying to get back to full guard. He's managed it.
Pound II trying to control the position from guard on top but Hudd is wriggling around, looking for whatever he can.
Hudd throws some sloppy strikes off his back.
Pound II postures up and lands some nice ground and pound.
Hudd tries to land a sweep but no joy.
Pound II postures up and lands some nice ground and pound.
Hudd manages to sweep nicely, so he's now on top. Pound II manages to get himself to full guard.
Hudd makes a bit of distance and scores with some ground and pound, still in guard.

That's four minutes gone in the round.
Pound II preventing the ground and pound from doing any damage.

Pound II pushes Hudd off for just long enough to get back to his feet. Very athletic spring there.
Pound II closes the distance and clinches up, looking for a takedown. He shifts his weight and gets a nice trip into half guard.
Pound II seems to be taking a bit of a break to think of his next move. He lands a short punch in the meantime.
Pound II thumps the canvas. Not on purpose obviously - he just missed Hudd's head.
Hudd flails away from the bottom but he's not doing any damage.
Hudd tries to get to full guard but Pound II has control of the leg.
Both fighters really going for it on the ground here!
Pound II working Hudd over with strikes.
And that�s the end of the round � the fighters go back to their corners.
Ground Pound II dominated that round.
That's time! Back to the action!

Hudd doesn't succeed with the takedown
and Pound II counters with a nice shoot takedown that brings the fighters to the ground.
Hudd not looking particularly offensive just at the moment.
Hudd is working the butterfly guard. He manages to land a nice scissor sweep and is now in half guard on the top. Nice move.
Pound II has no desire to be mounted, so is trying to control. Hudd is working away from the top position though.
Hudd throws a strike but Pound II avoids it easily and moves to full guard.
Pound II lands a beautiful switch and he's in full mount! That could spell trouble for Hudd!
Hudd is trying desperately to improve position.
Both fighters are absolutely exhausted here.
That's one minute gone in the round.
Pound II working away from the top, dropping strikes.
Pound II with the ground and pound from mount.
Hudd tries to get back to half guard but can't.
Pound II is in the full mount, landing strikes.
Pound II is landing with some decent strikes but Hudd is trying to advance his position so the referee is letting the fight continue.
Pound II scoring with strikes but Hudd is staying in there.
Pound II working away from the top, dropping strikes.
Hudd can't escape the position.
Hudd throwing punches from his back but nothing is landing.
Pound II lands a heavy elbow.
Pound II blocks Hudd's feeble attempts to strike from the bottom.
Hudd swinging wildly from the bottom but he's not landing.
Hudd can't escape the position.
Pound II is in the full mount, landing strikes.
Pound II looking to finish Hudd with some ground and pound. This is bad for Hudd!
That's two minutes gone in the round.
Hudd flailing away with punches but nothing is landing.
Pound II scores with a couple of good head shots there.
Pound II has his opponent pinned against the cage, landing some nasty ground and pound that is really making a bit of a mess out of Hudd's face.
Pound II lands a big shot there that rocks Hudd but he's holding on and managing to survive for now.
Hudd is mounted but he's throwing punches.
Pound II is in the full mount, landing strikes.
Pound II has his opponent pinned against the cage, landing some nasty ground and pound that is really making a bit of a mess out of Hudd's face.
Hudd is looking to get to half guard.
Pound II lands a nice shot to the head.
Pound II unloading with bombs!
Pound II blocks Hudd's feeble attempts to strike from the bottom.
Ground Pound II has got the better of the ground game so far.
Hudd keeping his composure momentarily, calmly looking to get back to half guard.
That's three minutes gone in the round.
Hudd is working hard here to advance position.
Pound II lands a shot to the body, followed up by a shot to the exposed head of his trapped opponent.
Pound II fakes a shot to the body and cracks his opponent in the head. Nice ground and pound there!
Hudd is working to get back to half guard.
Pound II avoids the attempt from Hudd to control.
Pound II can't quite control the action as he would like just now, as Hudd is looking to escape.
Pound II blocks Hudd's feeble attempts to strike from the bottom.
That's four minutes gone in the round.
A lull in the action here being met with boos from the crowd.
Pound II jumps to side control looking for an arm triangle but Hudd manages to avoid the submission attempt.

It looks like we're going to have a standup here. Neither fighter is doing enough on the ground.
Hudd gets a takedown into half guard.
Hudd thows a huge punch but Pound II dodges it nicely.
Hudd stops Pound II from getting back to his feet.
Hudd is working for a submission of some sort.
Hudd missing with the ground and pound from half guard.
And that�s the end of the round � the fighters go back to their corners.
Ground Pound II showed his class in that round. I'd imagine he'll take it on all the scorecards.
The minute break is over - no more time for sponges and pep talks - back to the action! Ladies and gentlemen, this is the final round!

Hudd tries for a takedown but Pound II circles away easily
and Pound II counters with a nice single leg takedown and he's in Hudd's guard now.
Hudd doesn't do any damage with a couple of strikes from the bottom.
Pound II lands a couple of decent looking shots.
Pound II working from the guard for now, landing some ground and pound.
Pound II working in close now, lands a nice elbow to the side of Hudd's head.
Hudd had isolated an arm as going for a kimura. Pound II defends it easily.
Pound II landing some decent shots from guard.
Pound II landing with the ground and pound.
Both fighters are breathing heavily.
Pound II keeps in close for a moment and lands a decent shot to the side of Hudd's head.
Pound II scoring with punches to the head and body.
That's one minute gone in the round.
Hudd throws a couple of weedy looking strikes off his back.
Hudd thows some rabbit punches from the bottom but they don't do any damage.
Pound II postures up and lands a big shot to Hudd's brow.
Pound II postures up and scores with a shot to the body and a follow up elbow to the head.
Pound II is trying to work a guillotine from the top, or something like that? Don't know how he thinks he's going to get a finish from there.
Pound II throwing shots from guard but he's hitting more mat than opponent.
Pound II preventing the sweep.
The referee decides to stand the fighters back up.
Hudd slips under a jab from Pound II.
Pound II tries to clinch but Hudd moves out of range.
Hudd tries for a takedown but Pound II circles away easily
and Pound II counters with a nice shoot takedown that brings the fighters to the ground.
Pound II lands a couple of digs.
That's two minutes gone in the round.
Pound II thows a big elbow that misses.
Hudd looking to sweep here. No luck so far.
Hudd throws a couple of shots from the bottom but they don't land.
Pound II passes into half guard under a barage of strikes.
Hudd is pressing down on Pound II's left leg trying to get back to full guard. He's managed it.
Pound II postures up and scores with a shot to the body and a follow up elbow to the head.
Hudd working from the bottom, still in full guard. He's managed to get a loose triangle. Pound II doesn't seem to be doing much to defend here, obviously he feels comfortable in the position. Pound II manages to throw the legs off his shoulder and he's back into guard - no problem.
Hammerfist, elbow! yells Pound II's corner. There ya go! There ya go!
Pound II throwing strikes but missing.
Hudd throwing rabbit punches from the bottom - showing the judges that he's keeping busy.
Pound II decides he's had enough of playing guard and decides to stand. Come on Hudd, up you get!
That's three minutes gone in the round.
Hudd shoots in for a takedown! He's got it and he's managed to land in full mount! That's better than Hudd was expecting from the takedown attempt, I'm sure!
Hudd prevents Pound II from getting the reversal.
Hudd goes for an armbar but he's not got it� Pound II turns into him and now he's in Hudd's guard.
Hudd throwing strikes off his back to little effect.
Pound II stands up over Hudd, holding his feet. He dives back in and lands a decent shot to the head.
Hudd had isolated an arm as going for a kimura. Pound II defends it easily.
Pound II works over Hudd with some ground and pound from guard.
That's four minutes gone in the round.
Hudd trying to strike from the bottom but really, it's not the best position to be doing that from!
Pound II lands a couple of elbows.
Pound II is working the ground and pound from guard. He might want to try advancing position though to get more of an impact.
Hudd utilising some decent striking defenses from the guard, preventing the ground and pound.
Neither fighter is doing enough for the referee's liking and he's decided to stand them back up.
Hudd has his takedown stuffed
and Pound II counters with a nice double leg into side control. Hudd won't be happy with that.
That's three failed takedown attempts in the round for Kyle Hudd. That's going to take a lot out of him.
Pound II cracks Hudd with an elbow. That is naaassty.
Pound II decides to stand back up. Pound II steps back and let's Hudd get back to his feet.
Kyle Hudd has stepped it up - he knows he needs a finish here!
Hudd with a poor takedown
and Pound II counters with a nice single leg takedown and he's in Hudd's guard now.
We've seen a great period of action over the last minute or so - credit to both fighters for going all out!
Hudd throws some sloppy strikes off his back.
The crowd applaud the fighters efforts here as the round comes to an end.
Hudd trying to strike from the bottom but really, it's not the best position to be doing that from!
Pound II trying to pass the guard but can't manage it just yet.
Ground Pound II is fighting for a decision here - he's started to take the cautious approach.
Hudd looking to sweep here. No luck so far.
And that's the end of the fight!
Ground Pound II comfortably won the final round on my scorecard.
Well Pound II has outworked and out performed his opponent in all aspects of the game today. He was simply too good and the decision should be no more than a formality. Over to the ring announcer for the scorecards.
Ladies and gentlemen, after 3 rounds of action, we go to the scorecards for a decision.
Judge Albert Achterberg scores the fight 27:30
Judge Paulsen Ambrosius scores the fight 27:30
Judge Daniel Blasius scores the fight 27:30
In favor of your winner, by unanimous decision... Ground Pound II!
|
|
|
|
|
|
|
|
|
|
|
|
|
|
|
|
|
|
|
|
|
|
|
| S |
C
A |
G |
S |
C
B |
G |
|
S |
C |
G |
|
energy
A | B |
|
hype
A | B |
|
pop
A | B |
|
mgr
A | B |
|
FIGHT
RATING
69% |
|
|
|
|
|
|
