|
|
PBP Commentary |
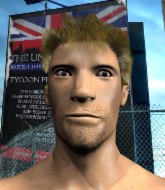
Coming up we have a light heavyweight MMA rules bout between Jack Ozz (ranked 0 p4p, 0 weight class) and Tony Stark (ranked 0 p4p, 0 weight class). Ozz kept the crowd waiting but all that was forgotten when his ring entrance music started. The incomparable musical genius that is So What?-Metallica. The crowd giving both fighters a great reception on their way into the arena. That's good to see.
 |
|
 |
| 190 cm
18
200 lbs
1 - 0 - 0 |
|
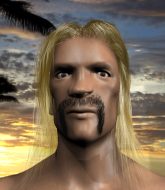
188 cm
18
210 lbs
0 - 1 - 0 |
BJJ Blue Belt
Brawler
KO power |
|
BJJ Blue Belt
Counter striker
Solid chin |
|
| |
|
Ladies and gentlemen. This fight is 3 rounds, in the light heavyweight division.
Introducing the fighter to my left, fighting out of the red corner.
With a record of
1 - 0 - 0, fighting out of Sydney, Jack Ozz!
And introducing the fighter to my right, fighting out of the blue corner.
With a record of
0 - 1 - 0, fighting out of Sydney, Tony Stark!
The judges for this bout are Winston Howard, John Mangel and Hugh Johnson.

The bell rings for round one and we are underway!
Ozz doesn't manage to clinch there - Stark circles away.
Stark avoids the clinch attempt nicely.
Jack Ozz seems to be the more aggressive standup fighter in this bout.

Ozz gets the takedown into side control.
Ozz trying to control the position but Stark is working away.
Ozz tries to advance to mount but can't.
Ozz landing with strikes to the head and body from side control.
Ozz is looking to take a break and control but Stark is keeping him honest, looking to work from the bottom.
Ozz takes a little break here. Stark wants to take advantage but he is being controlled well.
Stark gets one leg under and gets the fight to half guard.
Stark tries to roll over but Ozz keeps him under control.
Stark is looking to get back to is feet but Ozz passes into side control.

That's one minute gone in the round.
Ozz throws an elbow but Stark slips to the side and avoids it well.
Stark is trying to control Ozz's posture but Ozz avoids it.
Stark wants to escape from the position here - easier said than done!
Ozz wants to control but Stark is keeping him busy.
Stark struggling a bit here.

Ozz is looking for a kimura. He might have it! No, Stark has escaped the position, nice work there.

The referee has ruled that neither fighter is active enough on the ground and has stood them back up.
Ozz throws a head kick that misses and slips in the process. He scrambles back to his feet and the fighters circle.
Stark misses with a wild combination.

That's two minutes gone in the round.
The crowd are showing their displeasure at the lack of action as loud boos ring out around the arena.
Jab, cross, leg kick. Nice combination by Stark!
Ozz shoots in and gets a takedown into half guard. Ozz showed some decent athleticism there.
Ozz lands strikes from half guard.
Ozz not throwing his punches with enough precision this time.
Ozz is working for a kimura but Stark is defending it quite comfortably.
Ozz trying to mount his opponent but Stark defends it.
The fighters are going at a pretty good pace and they're both starting to sweat now.
Ozz wants to take a breather but Stark is having none of it.

That's three minutes gone in the round.
Stark makes his way to full guard. A much better position for Stark.
Ozz avoids a guillotine attempt easily.
Ozz wants to control from the top but Stark keeps moving.
Ozz is looking to work some ground and pound but Stark has wrist control.
Stark is trying to control the position but Ozz postures up.

Ozz gets to his feet - Stark follows without any prompting.
Stark looks gassed!
Ozz throws a looping left and ducks down for a takedown. He's got his arms around Stark's waist but Stark gets an underhook and avoids the takedown by throwing Ozz off to one side.
Ozz decides to change it up a bit and drives through with a nice takedown into half guard.
Ozz missing with the ground and pound from half guard.

That's four minutes gone in the round.
Ozz missing with some ground and pound from the half guard.
Ozz throwing shots but they're hitting the canvas more than the man.
Stark is refusing to be controlled, as Ozz sits in half guard.
Ozz is thinking about going for an arm triangle but he can't free his leg.
Ozz lands with an elbow from half guard - that looked like it hurt.
Stark blocking the ground and pound attempt from Ozz.
The fighters are battling for position here. Stark manages to regain full guard. Nice work.
Stark can't do much from the bottom at the moment, as Ozz controls the pace.
And that�s the end of the round � the fighters go back to their corners.
Jack Ozz dominated that round.
The fighters get back to their feet, the hooter sounds and we're back to the action!

Ozz feints and as Stark raises his hands in defense, Ozz changes levels and drives through with a takedown into guard.
Ozz distracts Stark with his right hand and drops a big elbow with his other arm.
Stark keeping moving, preventing Ozz from controlling successfully.
The fighters are pressed up against the cage, both looking to find a bit of space to work.
Stark controlling Ozz's posture.
Stark had isolated an arm as going for a kimura. Ozz defends it easily.
Stark throwing his legs up looking for a triangle.
Stark is breathing heavily.
Stark is throwing his legs up, looking for submissions. Ozz is aware though and is defending well.
That's one minute gone in the round.
Ozz trying to control but Stark is working from the bottom.
Ozz with a nice head shot there.
Stark being controlled here, momentarily.
Ozz lands a couple of decent looking shots.
Ozz stands up from guard. Let's bang!
Ozz moves in looking to clinch but Stark pushes him off.
Stark gets caught flat footed, as Ozz shoots in with a quick takedown into guard.
Ozz passes Stark's left leg - he's now in half guard.
That's two minutes gone in the round.
Ozz perhaps working for something from half guard, or maybe not. It looks like he's just sitting there.
Ozz has controlled the position for a good 20 seconds, which will no doubt be starting to frustrate his opponent.
Ozz is trying for a guillotine from the top but the pressure isn't in the right place so Stark is just riding it out for now. Ozz eventually gives up the hold.
Stark actively working from the bottom here.
Ozz lands strikes from half guard.
Ozz passes to side control.
That's three minutes gone in the round.
Ozz advances to mount.
Ozz lands with some vicious ground and pound - can Stark hang on?
Ozz controlling the position easily from mount.
Ozz has hold of Stark's left arm, perhaps looking for a submission. The two fighters tussle over control of the isolated limb and Stark manages to get his arm back to his side and away from danger.
The ref warns both fighters not to hold the cage as they work up against the meshing.
Stark is wriggling around trying to escape.
Ozz controlling from mount.
Ozz has his opponent pinned against the cage, landing some nasty ground and pound that is really making a bit of a mess out of Stark's face.
That's four minutes gone in the round.
Ozz scoring with strikes but Stark is staying in there.
Ozz punishing his opponent with strikes.
Ozz tries to control but Stark wriggling away.
Ozz working the ground and pound effectively.
Ozz controlling from the full mount.
Ozz can't quite control the action as he would like just now, as Stark is looking to escape.
Ozz dominating with strikes here.
And that�s the end of the round � the fighters go back to their corners.
Jack Ozz dominated that second round.
That's the end of the interval. I'm sure that seemed a lot quicker than a minute for our two fighters! Back to the action. This is the final round!

Ozz showing good head movement there, avoiding the strikes from Stark.
Ozz tries to score a power double leg takedown but Stark sees that one coming and sprawls well. That will dishearten Ozz somewhat.
Ozz tries for a takedown but Stark sees it coming a mile off and avoids it easily.
Ozz moves in looking to clinch but Stark pushes him off.
Ozz wants to clinch.
We've had a slow start to the round here - hopefully the action picks up.
A left and a right from Stark both land. Nice combination.
Stark chopped to the floor by a nice leg kick but he springs right back up before Ozz can pounce on him.
Stark takes a big intake of breath there - he's definitely tired.
That's one minute gone in the round.
Stark leaves Ozz with his face pressed against the mat as he sprawls beautifully, defending against a solid takedown attempt.
That's three failed takedown attempts in the round for Jack Ozz. That's going to take a lot out of him.
Ozz fails with the takedown.
Ozz looks for a takedown but Stark sprawls well.
Stark misses with a jab and misses with a cross straight after too.
Ozz shoots in and gets a takedown into half guard. Ozz showed some decent athleticism there.
Ozz decides to stand and escape the position.
That's two minutes gone in the round.
Ozz is looking to clinch but Stark is avoiding it.
Ozz feints and then dives in with a takedown. That was a long way out but the feint bought him enough time to close the distance and complete the takedown. Now we'll play guard for a bit and see who can get the better of that position.
Ozz decides he's had enough of playing guard and decides to stand. Come on Stark, up you get!
Stark circles away from the clinch attempt.
A combination from Stark does no damage.
Ozz scores with a takedown into Stark's guard.
Fantastic stuff here - a very entertaining period of action, which has drawn cheers from the crowd.
Ozz advances to half guard.
Ozz not landing any meaningful shots this time.
Stark trying to control here.
That's three minutes gone in the round.
Well, if Ozz is going to just lie there, perhaps we should talk about what we're having for dinner tonight� I'm having a ham and pineapple pizza� Yum. Can't wait.
Ozz is looking for an arm triangle, whilst trying to pass to side control. Stark doesn't seem that keen to cooperate though. No luck this time Ozz.
Ozz throwing shots but they're hitting the canvas more than the man.
Jack Ozz is fighting for a decision here - he's started to take the cautious approach.
Stark misses with some strikes from the bottom.
Ozz escapes and gets back to his feet.
Stark gets taken down but at least he's managed to land in guard.
That's four minutes gone in the round.
Ozz sitting in guard here, content to control.
Ozz scores with a decent looking elbow strike.
Tony Stark has stepped it up - he knows he needs a finish here!
Ozz pressing down on his opponent's thigh, looking to pass guard. Stark is keeping the position for now.
Ozz content to stall in guard here.
Ozz wants to control from the top but Stark keeps moving.
The crowd applaud the fighters efforts here as the round comes to an end.
Ozz working in close now, lands a nice elbow to the side of Stark's head.
And that's the end of the fight!
Jack Ozz showed his dominance in that final round.
Well I reckon that's a shut out for Ozz, winning every round. Will the judges agree? They are the ones who matter, even if they are often depressingly incompetent. Over to the ring announcer for the scorecards.
Ladies and gentlemen, after 3 rounds of action, we go to the scorecards for a decision.
Judge Winston Howard scores the fight 30:27
Judge John Mangel scores the fight 30:27
Judge Hugh Johnson scores the fight 30:27
In favor of your winner, by unanimous decision... Jack Ozz!
|
|
|
|
|
|
|
|
|
|
|
|
|
|
|
|
|
|
|
|
|
|
|
| S |
C
A |
G |
S |
C
B |
G |
|
S |
C |
G |
|
energy
A | B |
|
hype
A | B |
|
pop
A | B |
|
mgr
A | B |
|
FIGHT
RATING
56% |
|
|
|
|
|
|

