|
|
PBP Commentary |
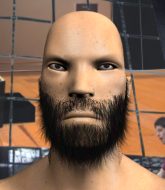
Coming up we have a bantamweight MMA rules bout between Biggs Wafers (ranked 0 p4p, 0 weight class) and Gio Jazz (ranked 0 p4p, 0 weight class). Wafers comes into the arena with Stronger blaring out of the sound system. Biggs Wafers has the edge in experience - let's see if he can make that count tonight.
 |
|
 |
| 171 cm
19
142 lbs
3 - 1 - 0 |
|
150 cm
19
140 lbs
2 - 4 - 0 |
BJJ Blue Belt
Counter striker
Granite chin |
|
BJJ White Belt
Excellent boxer
Powerful |
|
| |
|
Ladies and gentlemen. This fight is 3 rounds, in the bantamweight division.
Introducing the fighter to my left, fighting out of the red corner.
With a record of
3 - 1 - 0, fighting out of New York, Biggs Wafers!
And introducing the fighter to my right, fighting out of the blue corner.
With a record of
2 - 4 - 0, fighting out of New York, Gio Jazz!
The judges for this bout are Jorge Garcia, Dean Styles and Steve Montenegro.

The bell rings for round one and we are underway!
Jazz just misses with a punch to the body.
Jazz misses the shot to the body.
Wafers shoots in for a double leg but Jazz sprawls well. That's going to sap some energy.
Wafers fails miserably with a takedown attempt.
Jazz punishes Wafers's body with a nice straight punch.
Jazz misses with a wild body shot.
No joy there for Jazz, who threw a few shots but didn't land.
Jazz looks to land a right hand but Wafers moved out of range.
Wafers keeping a good distance there, avoiding the body shot.
We've had a slow start to the round here - hopefully the action picks up.
Jazz fakes high and swings low for a body shot but Wafers manages to avoid it.
Jazz moves into range and throws a lovely three punch combination.
Jazz misses the shot to the body.

That's one minute gone in the round.
Wafers keeping a good distance there, avoiding the body shot.
Jazz misses with a two punch combination.
Jazz connects with a looping right hand.
Jazz misses with a body shot. Nice footwork from Wafers.
Jazz just misses with a punch to the body.

Jazz gets taken down but at least he's managed to land in guard.

Jazz kicks Wafers off and gets to his feet.
Jazz wings a very wild body shot but it does the job and lands to the midsection.
Jazz misses with a body shot.
Jazz slaps away a takedown attempt from Wafers, before circling back to the center of the mat.
That's three failed takedown attempts in the round for Biggs Wafers. That's going to take a lot out of him.
Jazz looks to score with a jab to the body but Wafers is just out of range.

That's two minutes gone in the round.
Wafers shoots for a double leg takedown but Jazz sprawls well. He's pushed Wafers's face into the mat and manages to get back to his feet relatively easily.
Jazz dips down and scores with a jab to the body.
Gio Jazz seems to be the more aggressive standup fighter in this bout.
Wafers drops down and drives through with a powerful takedown into guard.
Wafers will need to keep those long limbs tucked in whilst he's on the ground, to prevent any submissions.
Jazz is looking to stand up but Wafers isn't so interested in that idea.
Jazz is wriggling around but Wafers manages to pass to half guard.
Jazz manages to escape and get back to his feet!
Wafers showing good head movement there, avoiding the strikes from Jazz.
Wafers uses some good footwork to avoid the body shot by Jazz.
Wafers walks into a left hand.
The fans in attendance giving it up for the two fighters, who have really let it all hang out in the last minute or so!
Jazz misses with a wild body shot.
Jazz displaying good standup as he scores with a three punch combination.

That's three minutes gone in the round.
Wafers throws the overhand right but ducks down into a quick takedown attempt. Jazz was covering up waiting for the punch and Wafers finishes the takedown easily into guard.
Wafers tries to free his leg and advance position but Jazz is retaining full guard.
Jazz is trying to stand up but he's not managed so far.
We get told so often about how wrestlers don't like to be on their backs. Let's see if Jazz can do anything to dispel that myth.
The ref warns both fighters not to hold the cage as they work up against the meshing.
Wafers pressing down on his opponent's thigh, looking to pass guard. Jazz is keeping the position for now.
Jazz wants to stand but Wafers is controlling the position.
Wafers stands up and looks to throw the legs aside to pass to side control. Jazz swivels though and keeps the full guard.

Neither fighter is doing enough for the referee's liking and he's decided to stand them back up.
Jazz throws a right and a left that Wafers avoids nicely.

That's four minutes gone in the round.
The crowd are starting to boo a lack of action.
Jazz lands a jab to Wafers's midsection.
Wafers misses with a takedown attempt. He shot from a bit too far out.
Jazz ducks down and throws a hook to the body but Wafers moves away.
Jazz throws an uppercut from half a mile away. Wafers sees it coming and avoids it easily.
Wafers shoots in with a takedown attempt and he has Jazz pinned against the cage. Jazz gets the underhooks and manages to circle away.
Jazz ducks down and throws a hook to the body.
Jazz is throwing a lot of body shots here, looking to wear down Wafers rather than just go for the knockout.
Jazz dips down and scores with a jab to the body.
Wafers shoots in for a takedown. "Ole!" shouts Jazz as he jumps to the side.
And thats the end of the round the fighters go back to their corners.
Gio Jazz dominated that round.
The minute break is over - no more time for sponges and pep talks - back to the action!

The fighters circle momentarily. Jazz darts into range and connects with a nice straight punch.
Jazz throws a hook to the body but it doesn't connect.
Jazz misses the shot to the body.
Wafers on the wrong end of an overhand right that came out of nowhere.
A looping hook to the body misses from Jazz. Wafers does a little dance to reset his feet.
A looping hook to the body misses from Jazz. Wafers does a little dance to reset his feet.
Jazz misses the shot to the body.
We've had a slow start to the round here - hopefully the action picks up.
Jazz swings and misses with a hook to the body.
Wafers takes a body punch that cleary hurt but he's trying not to show any weakness.
A swing and a miss from Jazz.
Jazz lands a body shot.
That's one minute gone in the round.
Jazz throws a body punch but Wafers moves out of range.
Wafers bobs and weaves into range and then changes levels and scores with a nice takedown into side control.
Wafers tries to advance to mount but can't.

Wafers is looking for a kimura. He might have it! No, Jazz has escaped the position, nice work there.
Wafers tries to move to mount but Jazz blocks the move with his legs.
Jazz pushes Wafers away and creates a bit of space to escape. He's almost out here... but no, Wafers gets a good hold of his legs and remains firmly in side control.
Wafers tries for an arm triangle. That looks pretty tight to me. Is this one over!?! Possibly, maybe, no Wafers has let go of the choke. Obviously it wasn't as tight as we thought!
Both fighters are absolutely exhausted here.
Jazz is working hard to escape and get back to his feet. After a battle for position, Wafers asserts his dominance and retains side control.
Wafers decides to stand up, so the ref orders Jazz to his feet.
Jazz fakes low and throws an overhand right that catches Wafers on the side of the head.
That's two minutes gone in the round.
Wafers keeping a good distance there, avoiding the body shot.
Wafers showing good head movement there, avoiding the strikes from Jazz.
Wafers fails to land the takedown.
Jazz lands a straight punch to the body, keeping Wafers at a distance.
Jazz misses the shot to the body.
Jazz scores with a one two! Wafers had his feet all tangled up there and couldn't avoid the strikes.
Wafers tries to shoot in for a takedown. He's got hold of a leg but Jazz swivels and escapes.
Jazz fakes and then throws a beautiful body shot. Wafers looks a bit winded and takes a step backwards to take a breath.
That's three minutes gone in the round.
Wafers closes the distance and scores a nice trip takedown into half guard. Jazz did well to prevent Wafers getting side control.
Wafers prevents Jazz from standing back up.
Jazz manages to escape and get back to his feet!
Jazz swings and misses with a hook to the body.
Jazz thows a body shot but no joy.
Jazz looks to score with a jab to the body but Wafers is just out of range.
Wafers shoots in for a takedown but doesn't get it.
That's three failed takedown attempts in the round for Biggs Wafers. That's going to take a lot out of him.
Jazz scores with a decent looking hook.
Jazz comes forward and lands a shot to the body, then darts back out of range.
Jazz swings and misses with a hook to the body.
Wafers shoots in and scores a nice double leg takedown into half guard.
That's four minutes gone in the round.
Wafers prevents Jazz from standing back up.
Wafers is looking for a kimura here.
Wafers tries to pass to full mount but Jazz defends it.
Jazz looks like he's trying to stand up.
Both fighters really going for it on the ground here!
Wafers looking to pass the half guard. Not this time.
Jazz has one foot on Wafers's thigh - he pushes off and manages to get back to his feet.
Jazz misses the shot to the body.
Jazz lands a slapping body shot.
And thats the end of the round the fighters go back to their corners.
Gio Jazz showed his class in that round. I'd imagine he'll take it on all the scorecards.
That's the end of the round. The referee orders the cornermen out of the cage so we can get back down to business. Let's hear some noise people - this is the final round!

Jazz moving in and out of range nicely, whilst landing the scoring shot.
Jazz stuffs a takedown. It's all about dictating where the fight takes place and Jazz wants it to stay on the feet.
A punch combination from Jazz misses.
Jazz misses with a body shot. Nice footwork from Wafers.
Jazz misses the shot to the body.
Jazz connects with a crisp jab.
Jazz ducks down and throws a hook to the body but Wafers moves away.
Jazz catches Wafers with a nice straight right. He seems pissed - ooooh, it's on now! On like donkey kong!
We've had a slow start to the round here - hopefully the action picks up.
Jazz thows a body shot but no joy.
Jazz just misses with a punch to the body.
Jazz looks to score with a jab to the body but Wafers is just out of range.
Jazz keeps the fight on the outside.
That's one minute gone in the round.
Jazz throws a body punch but Wafers moves out of range.
Wafers shoots in with a takedown attempt and he has Jazz pinned against the cage. Jazz gets the underhooks and manages to circle away.
Jazz misses with a two punch combination.
Gio Jazz seems to be getting the better of the standup.
Jazz cracks Wafers with a nice right hand that draws applause from the crowd.
Jazz takes a swing at Wafers's ribcage but misses.
Jazz throws a hard body shot but it just misses.
Jazz throws a wild combination but nothing lands.
Wafers avoids the body shot from Jazz.
Jazz waving his hands out in front of him, looking to distract Wafers.
Gio Jazz is fighting for a decision here - he's started to take the cautious approach.
That's two minutes gone in the round.
The crowd are getting on the fighters' backs, as the pace has dropped off in the last minute or so.
Jazz misses the shot to the body.
Jazz swings for the body but Wafers moves out of range.
Jazz will need to tighten up his combinations if he doesn't want to gas himself out, swinging at thin air.
Gio Jazz is looking to keep the fight on the feet at all costs.
Jazz looks to score with a jab to the body but Wafers is just out of range.
Jazz misses with a body shot. Nice footwork from Wafers.
Jazz lunges in with swinging rights and lefts but Wafers circles away quickly and effectively.
Jazz fakes and then throws a beautiful body shot. Wafers looks a bit winded and takes a step backwards to take a breath.
Wafers keeping a good distance there, avoiding the body shot.
Jazz swings away but doesn't land with a series of punches.
Jazz throws a hard body shot but it just misses.
That's three minutes gone in the round.
Jazz ducks down and throws a hook to the body but Wafers moves away.
Jazz misses with a body shot. Nice footwork from Wafers.
Wafers has a takedown stuffed.
That's three failed takedown attempts in the round for Biggs Wafers. That's going to take a lot out of him.
Jazz throws a hard body shot but it just misses.
Jazz misses with a hook. Wafers ducked under it nicely.
A punch combination from Jazz misses.
Wafers shoots in looking for a takedown. Jazz tries to sprawl out of it but Wafers keeps driving through. The fighters are pinned against the cage. Jazz manages to get underhooks and after a bit of a struggle, circles away and we're back to standing.
Jazz moves into range and throws a lovely three punch combination.
Jazz throws a right hand that Wafers ducks under and follows up with a left that Wafers also avoids with ease.
That's four minutes gone in the round.
Well. There's a bit of a lull in the action here and the crowd are starting to get restless.
Wafers takes a punch right to his stomach. That took the wind out of him momentarily.
Jazz connects with a body shot.
Jazz thows a body shot but no joy.
Jazz misses with a body shot. Nice footwork from Wafers.
Jazz misses with a body shot. Nice footwork from Wafers.
Wafers shoots in with a takedown attempt and he has Jazz pinned against the cage. Jazz gets the underhooks and manages to circle away.
Jazz misses with a double jab.
Biggs Wafers has stepped it up - he knows he needs a finish here!
Boooooooooooooooooooo!!! God, this has been a terrible round. Come on you two, sort yourselves out!
Wafers tries to shoot in for a takedown. He's got hold of a leg but Jazz swivels and escapes.
And that's the end of the fight!
Gio Jazz comfortably won the final round on my scorecard.
I've got Jazz winning every round here. Surely the decision will go his way and he'll pick up a well deserved decision victory. Over to the ring announcer for the scorecards.
Ladies and gentlemen, after 3 rounds of action, we go to the scorecards for a decision.
Judge Jorge Garcia scores the fight 27:30
Judge Dean Styles scores the fight 27:30
Judge Steve Montenegro scores the fight 27:30
In favor of your winner, by unanimous decision... Gio Jazz!
|
|
|
|
|
|
|
|
|
|
|
|
|
|
|
|
|
|
|
|
|
|
|
| S |
C
A |
G |
S |
C
B |
G |
|
S |
C |
G |
|
energy
A | B |
|
hype
A | B |
|
pop
A | B |
|
mgr
A | B |
|
FIGHT
RATING
42% |
|
|
|
|
|
|
