|
|
PBP Commentary |
Coming up we have a welterweight MMA rules bout between Demian Mayo (ranked 0 p4p, 0 weight class) and Jorge Briagga (ranked 0 p4p, 0 weight class). Demian Mayo has the edge in experience - let's see if he can make that count tonight.
 |
|
 |
| 176 cm
22
170 lbs
0 - 1 - 0 |
|
195 cm
22
170 lbs
0 - 1 - 0 |
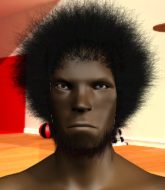
BJJ Purple Belt
Counter striker
Good chin |
|
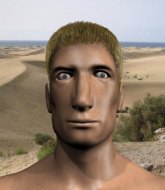
BJJ Brown Belt
Basic striking
Granite chin |
|
| |
|
Ladies and gentlemen. This fight is 3 rounds, in the welterweight division.
Introducing the fighter to my left, fighting out of the red corner.
With a record of
0 - 1 - 0, fighting out of Rio de Janeiro, Demian Mayo!
And introducing the fighter to my right, fighting out of the blue corner.
With a record of
0 - 1 - 0, fighting out of Rio de Janeiro, Jorge Briagga!
The judges for this bout are Felipe Paraventi, Leandro Rodrigues and Alexandre Firmino.

The bell rings for round one and we are underway!
Briagga shoots in with a takedown attempt and he has Mayo pinned against the cage. Mayo gets the underhooks and manages to circle away.
Briagga misses with a wild combination.

Mayo shoots in from a long way out. He's driving through with the takedown attempt and he eventually gets it, landing in Briagga's guard.
Mayo might be looking to lock onto one of his opponent's long limbs for a submission, whilst we're on the ground.
Mayo pressing down on his opponent's thigh, looking to pass guard. Briagga is keeping the position for now.
Mayo thows a big elbow that misses.
Mayo passes easily into side control. Nice work.

Mayo goes for an armbar here - this could be all over! But no, Briagga has escaped beautifully and is now on top in side control! Oh, that's unlucky for Mayo but great work by Briagga.
Mayo is moving his hips around well on the bottom and has managed to get back to half guard.

That's one minute gone in the round.
Briagga is keen to just control but Mayo is a slippery customer.
Mayo looking to work for a kimura from the bottom.
Briagga prevents Mayo from improving his position.
Mayo punching from the bottom.
Mayo slips a foot under and gets full guard. Nice work.
Briagga stands up and looks to throw the legs aside to pass to side control. Mayo swivels though and keeps the full guard.
Mayo working for a triangle but Briagga defends it easily.
Mayo is breathing heavily.
Briagga slips effortlessly into side control - very nice.

That's two minutes gone in the round.
Neither fighter has done anything of merit for a good minute or two here and the crowd are not happy about it.
Mayo is looking for a sweep.
Briagga is maintaining the dominant position - no doubt Mayo will start to get frustrated soon if he's not already.
Briagga tries for an arm triangle. That looks pretty tight to me. Is this one over!?! Possibly, maybe, no Briagga has let go of the choke. Obviously it wasn't as tight as we thought!
Mayo trying his best to control but Briagga has mounted him.
Mayo is working to get back to half guard.
The fighters are starting to perspire pretty heavily.
Mayo gets back to half guard.

That's three minutes gone in the round.
Mayo looking to work for a kimura from the bottom.
Mayo trying to hold on to Briagga's head to control him but Briagga postures up.
Mayo actively working from the bottom here.
Mayo is looking to regain full guard. Not this time though.
Mayo moves his hips nicely and gets into full guard.
Mayo looking to hit a scissor sweep but Briagga is one step ahead there.
The fighters are pressed up against the cage, both looking to find a bit of space to work.
Mayo is active off his back here, looking for submissions.
Briagga is a painfully thin specimen of a man. You do wonder whether a good body kick would snap him clean in two.

That's four minutes gone in the round.
The crowd are showing their displeasure at the lack of action as loud boos ring out around the arena.
Mayo working for a triangle but Briagga defends it easily.
Mayo trying to strike off his back.
Mayo is working actively off his back, looking to secure an arm or perhaps work for a triangle.
Mayo looking for submissions off his back, moving his hips, looking for an opening.
Briagga postures up.
The crowd thankful this round is nearly over.
Briagga slips nicely into half guard.
Mayo makes his way to full guard. A much better position for Mayo.
And that�s the end of the round � the fighters go back to their corners.
Demian Mayo dominated that round.
The minute break is over - no more time for sponges and pep talks - back to the action!

Briagga shoots and misses
and Mayo counters with a takedown into side control.
Mayo goes for an armbar! This could be all over! Wait, no, Briagga rolls with the submission and now he's on top in Mayo's guard! Nice work there by Briagga!
Mayo has his foot on Briagga's thigh. He's trying to push off and get in position for a triangle, I think. Briagga works his way back into a safe position though.
Mayo working for submissions but it's allowed Briagga to get to half guard.
Briagga is just sitting in half guard, waiting for something to happen.
Mayo punching from the bottom.
Both fighters are absolutely exhausted here.
Mayo is trying to stand back up but Briagga is controlling him
Briagga is keen to just control but Mayo is a slippery customer.
That's one minute gone in the round.
Briagga is looking for a kimura here.
Mayo works his way to full guard. Good work.
Mayo controls Briagga momentarily but Briagga frees himself.
Briagga trying to control the position from guard on top but Mayo is wriggling around, looking for whatever he can.
Briagga is in a good position here but he's just trying to control... And he's not even managing to do that successfully.

Neither fighter is doing enough for the referee's liking and he's decided to stand them back up.
Briagga shoots in but doesn't get the takedown
and Mayo counters with a single leg into guard. Briagga didn't expect that.
Briagga controls Mayo momentarily but Mayo frees himself.
Briagga manages to land a sweep and now he's in mount on top!
That's two minutes gone in the round.
Briagga content just to control the position here.
Mayo is wriggling around here but as he tries to escape, Briagga has taken his back.
Mayo staying busy and making it hard for Briagga to control.
Well, with Briagga on his back, surely it's only a matter of time before Mayo is tapping out... Can he escape the position?
Mayo rolls and manages to get back to half guard. Nicely done.
Briagga prevents Mayo from improving his position.
Mayo gets full guard.
That's three minutes gone in the round.
Mayo controls Briagga momentarily but Briagga frees himself.
Briagga trying to control but Mayo is working from the bottom.
Mayo working from the bottom, still in full guard. He's managed to get a loose triangle. Briagga doesn't seem to be doing much to defend here, obviously he feels comfortable in the position. Briagga manages to throw the legs off his shoulder and he's back into guard - no problem.
The ref warns both fighters not to hold the cage as they work up against the meshing.

Briagga stands up and waves to Mayo to follow him.
Mayo looks for a takedown. He's got it. We're now in half guard.
Mayo looking to pass the half guard. Not this time.
That's four minutes gone in the round.
Briagga is not content to let Mayo control the position.
Mayo not throwing his punches with enough precision this time.
Mayo has freed up his trapped foot and advances to mount.
Briagga is squirming around, avoiding Mayo's attempts to control the action.
Mayo working for a submission but Briagga is keeping him at bay.
Mayo is in full mount, looking to secure a guillotine but Briagga is surviving well by controlling Mayo's body position as best he can.
And that�s the end of the round � the fighters go back to their corners.
Demian Mayo dominated that second round.
The fighters' corners scream their final instructions, as the referee calls time. Here we go, back to the action! This is the final round!

Briagga gets taken down but at least he's managed to land in guard.
Mayo is trying to work a guillotine from the top, or something like that? Don't know how he thinks he's going to get a finish from there.
Mayo trying to pass the guard but can't manage it just yet.
Mayo trying to control but Briagga is working from the bottom.
Mayo throwing elbows and punches but not connecting, as Briagga works some decent striking defense from the bottom.
We've had a slow start to the round here - hopefully the action picks up.
Briagga keeping full guard, as Mayo tries to pass.
Mayo has gone for a leg lock! Briagga slips out almost immediately though and dives into Mayo's guard.
Both fighters are breathing heavily.
Briagga wants to pass the guard but Mayo is keeping the position.
That's one minute gone in the round.
Mayo is working actively off his back, looking to secure an arm or perhaps work for a triangle.
Briagga passes Mayo's left leg - he's now in half guard.
Mayo actively working from the bottom here.
Mayo manages to get to full guard.
Briagga avoids a guillotine attempt easily.
Briagga preventing the sweep.
Demian Mayo overall seems to be getting the better of the ground position in the fight so far.
That's two minutes gone in the round.
My god... these two guys really need to pick up the pace or everyone will leave to go get a beer.
Mayo looking for submissions from the bottom but instead Briagga passes into half guard.
Briagga trying to control from half guard but Mayo is working away.
The fighters are battling for position here. Mayo manages to regain full guard. Nice work.
Mayo working for a triangle but Briagga defends it easily.
Mayo working from the bottom, still in full guard. He's managed to get a loose triangle. Briagga doesn't seem to be doing much to defend here, obviously he feels comfortable in the position. Briagga manages to throw the legs off his shoulder and he's back into guard - no problem.
Briagga passes Mayo's left leg - he's now in half guard.
That's three minutes gone in the round.
Mayo kicks off Briagga and gets to his feet.
Mayo shoots in and bounces Briagga off the cage to secure the takedown into guard.
Mayo throwing strikes but missing.
Mayo postures up as if he's going to throw some strikes but drops back for an ankle! Briagga is in big trouble! He looks ready to tap! But no, he's escaped and dives on top of Mayo, into his guard.
Briagga controlling from the guard. I say controlling but really, he's stalling.
That's four minutes gone in the round.
Briagga stopping the sweep attempt from Mayo.
Mayo looks to be working for a triangle here. Oh, it looks like he might have it! Briagga has picked Mayo up and slammed him! Mayo can't keep hold of the triangle and Briagga manages to pass to side control!
Briagga is looking to finish here, going for an Americana. Mayo knows the correct defense though, so he's OK.
Briagga working away.
Mayo tries to improve position but can't.
Briagga advances to mount.
Jorge Briagga has stepped it up - he knows he needs a finish here!
Mayo is looking to get to half guard.
And that's the end of the fight!
That was a close round. You could make an argument for either fighter but I would give it to Demian Mayo.
Well Mayo has outscored his opponent in every aspect of the fight today. Only a scarily incompetent judge or two will keep him from a well deserved win... Over to the ring announcer for the scorecards.
Ladies and gentlemen, after 3 rounds of action, we go to the scorecards for a decision.
Judge Felipe Paraventi scores the fight 30:27
Judge Leandro Rodrigues scores the fight 30:27
Judge Alexandre Firmino scores the fight 30:27
In favor of your winner, by unanimous decision... Demian Mayo!
|
|
|
|
|
|
|
|
|
|
|
|
|
|
|
|
|
|
|
|
|
|
|
| S |
C
A |
G |
S |
C
B |
G |
|
S |
C |
G |
|
energy
A | B |
|
hype
A | B |
|
pop
A | B |
|
mgr
A | B |
|
FIGHT
RATING
41% |
|
|
|
|
|
|

