|
|
PBP Commentary |
Coming up we have a lightweight MMA rules bout between Roy Hunter (ranked 0 p4p, 0 weight class) and Crack Atoa (ranked 0 p4p, 0 weight class). Chooooooooon! I think Hunter might be my favorite fighter, now he's come out to The Used - The Taste Of Ink. The atmosphere really building for this one as we go over to our ring announcer for the fighter introductions!
 |
|
 |
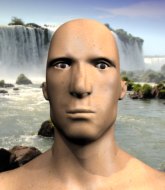
| 177 cm
23
167 lbs
3 - 2 - 0 |
|
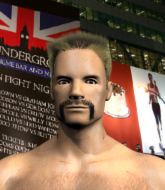
185 cm
23
130 lbs
4 - 1 - 0 |
Good takedowns
Counter striker
Good in bed |
|
Good wrestler
Brawler
Granite chin |
|
| |
|
Ladies and gentlemen. This fight is 3 rounds, in the lightweight division.
Introducing the fighter to my left, fighting out of the red corner.
With a record of
3 - 2 - 0, fighting out of London, Roy Hunter!
And introducing the fighter to my right, fighting out of the blue corner.
With a record of
4 - 1 - 0, fighting out of London, Crack Atoa!
The judges for this bout are Steven Brown, James Atkins and Paul Tew.

The bell rings for round one and we are underway!
Atoa ducks low and lands a nice hook to the body of his opponent.
Atoa takes a swing at Hunter's ribcage but misses.
Atoa rushes forward with a series of wild hooks but Hunter moves out of range and avoids them all easily.
Atoa throws a body punch but Hunter moves out of range.
Atoa ducks down and throws a hook to the body but Hunter moves away.
Atoa misses with a wild body shot.
Atoa pushing out the jab but it's not landing.
Atoa scores with a jab. Hunter acknowledges it with a nod of the head.
Atoa looks to score with a jab to the body but Hunter is just out of range.
Atoa fakes low and throws an overhand right that catches Hunter on the side of the head.
Atoa thows a body shot but no joy.

Hunter feints and then dives in with a takedown. That was a long way out but the feint bought him enough time to close the distance and complete the takedown. Now we'll play guard for a bit and see who can get the better of that position.

Hunter postures up as if he's going to throw some strikes but drops back for an ankle! Atoa is in big trouble! He looks ready to tap! But no, he's escaped and dives on top of Hunter, into his guard.

Atoa stands up from guard. Let's bang!

That's one minute gone in the round.
Atoa swings away but doesn't land with a series of punches.
Hunter moving in and out of range nicely, whilst landing the scoring shot.
Atoa throws the left hand but Hunter avoids the punch easily.
Atoa swings and misses with a hook to the body.
Hunter will have to do better than that with his takedown attempts.
Hunter bobs and weaves well there to avoid the strikes.
Hunter fails with a takedown attempt.
Atoa lunges in with swinging rights and lefts but Hunter circles away quickly and effectively.

That's two minutes gone in the round.
A few boos can be heard. I'm sure they will multiply if the fighters don't pick up the pace.
Atoa swings for the body but Hunter moves out of range.
Hunter avoids a punch combination nicely.
Hunter decides to change it up a bit and drives through with a nice takedown into half guard.
Atoa tries to kick Hunter off but Hunter keeps his base steady and stays in half guard.
Hunter is looking for an arm triangle, whilst trying to pass to side control. Atoa doesn't seem that keen to cooperate though. No luck this time Hunter.
Atoa is trying to stand up here but Hunter is controlling him well.

That's three minutes gone in the round.
Hunter is working for submissions here but there's nothing on.
Hunter is looking for a kimura but he's never going to get it from there.
Hunter is breathing heavily.
Atoa is trying to stand back up but Hunter is controlling him
Hunter is looking to pass the guard... He's managed it - he's now in full mount!
Hunter looks like he's working for a submission but he's not found anything just yet.
Atoa wants to try and get back to his feet.
Atoa is a painfully thin specimen of a man. You do wonder whether a good body kick would snap him clean in two.

That's four minutes gone in the round.
The crowd are hurling abuse towards the fighters... You can hardly blame them though because there isn't a lot going on in the fight.
Hunter fails to move to back control.
Atoa defends a decent attempt at a guillotine from Hunter.
Atoa is trying to stand up.
Hunter working to secure an arm triangle but it's not happening for him just yet.
We get told so often about how wrestlers don't like to be on their backs. Let's see if Atoa can do anything to dispel that myth.
Atoa tries to buck Hunter off but he can't manage it.
And that�s the end of the round � the fighters go back to their corners.
That was a close round but I would say that Roy Hunter will probably get the nod.
That's the end of the round. The referee orders the cornermen out of the cage so we can get back down to business.

Hunter dives in and grabs Atoa's left leg, looking for a takedown. Atoa pushes down on Hunter's head and hops out.
Atoa ducks down and throws a hook to the body but Hunter moves away.
Atoa misses with a body shot. Nice footwork from Hunter.
Crack Atoa seems to be the more aggressive standup fighter in this bout.
Hunter tries to close the distance and clinch up but Atoa swats him away and circles back towards the center.
Hunter uses decent footwork to sidestep a right hand from Atoa.
A looping hook to the body misses from Atoa. Hunter does a little dance to reset his feet.
Atoa misses with a wild body shot.
Hunter staying out of range there.
We've had a slow start to the round here - hopefully the action picks up.
Atoa throws a wild combination but nothing lands.
Well, he's not going to score with shots like that. A lazy body kick attempt from Atoa.
Hunter shoots in for a takedown. "I don't think so" says Atoa as he avoids it easily.
Hunter avoids the body shot from Atoa.
That's one minute gone in the round.
Hunter shoots in looking for a takedown. Atoa tries to sprawl out of it but Hunter keeps driving through. The fighters are pinned against the cage. Atoa manages to get underhooks and after a bit of a struggle, circles away and we're back to standing.
That's three failed takedown attempts in the round for Roy Hunter. That's going to take a lot out of him.
Hunter shoots in looking for a double leg takedown. Atoa defends it nicely.
Both fighters are absolutely exhausted here.
Hunter closes this distance looking for a takedown but Atoa circles away.
Atoa is throwing a lot of body shots here, looking to wear down Hunter rather than just go for the knockout.
Atoa defends well against a solid takedown attempt from Hunter.
Atoa tries to score with a leg kick but it misses it's target.
Atoa throws a body punch but Hunter moves out of range.
Atoa cracks Hunter with a right hand to the side of the head.
That's two minutes gone in the round.
Atoa thows a body shot but no joy.
Atoa throws a combination but it was largely blocked by Hunter.
Atoa looks to land a left hand but Hunter moved out of range nicely.
Atoa takes a swing at Hunter's ribcage but misses.
Hunter keeping a good distance there, avoiding the body shot.
Atoa misses with a head kick.
Atoa changes levels and scores with a jab to the body.
Atoa misses the shot to the body.
Hunter looking to shoot here. He's gone for it and he's landed a takedown into mount! Oh, that's bad for Atoa!
Hunter won't let Atoa get back to his feet... He wants to keep the fight where it is for now.
That's three minutes gone in the round.
Hunter is looking to secure an arm. He's managed it! He's pivoting for an armbar - that looks tight! But Atoa has managed to get out of it and now he's in a dominant position. Nice work from Atoa!
Atoa would like to get this fight back to the feet but can't get free from the closed guard.
That's four minutes gone in the round.
Well. There's a bit of a lull in the action here and the crowd are starting to get restless.
Hunter tries to land a sweep but no joy.
Atoa stands up from guard. Let's bang!
Atoa misses with a looping right.
Atoa throws a body punch but Hunter moves out of range.
Atoa looks to score with a jab to the body but Hunter is just out of range.
The crowd thankful this round is nearly over.
Atoa tries to bum rush Hunter with a series of wild strikes but Hunter uses good footwork to avoid the assault.
Hunter shoots in with a lovely double leg takedown. Atoa manages to land in full guard to minimise the damage.
Hunter in full guard, throwing the ground and pound. No damage this time.
And that�s the end of the round � the fighters go back to their corners.
Crack Atoa showed his class in that round. I'd imagine he'll take it on all the scorecards.
The corners get their ten second warning. Both fighters stand from their stools and stare eachother down, ready to get back to the action. This is the final round!


Hunter moves into the clinch successfully.
Hunter fails to pull the fight into his guard.
Hunter jumps guard but his hands slip and he falls flat on his back. Well, he's made himself look a right mug there, as Atoa walks away with a smile on his face. Hunter gets slowly back to his feet and shakes his head.
Atoa lands a nice shot to the body.
Hunter closes the distance and gets a double leg, slamming Atoa to the mat! Atoa manages to get full guard.
Hunter in full guard, throwing the ground and pound. No damage this time.
Hunter passes Atoa's right leg, so he's now in half guard.
Hunter is working for a submission of some sort.
Hunter wants to pass the guard but Atoa is defending well.
Both fighters are breathing heavily.
Atoa looks like he's trying to stand up.
That's one minute gone in the round.
Atoa is defending against the submission attempts here by Hunter.
Hunter is looking for a kimura but Atoa is holding onto that half guard position, so it's hard for Hunter to get the leverage.
Atoa is trying to stand up here but Hunter is controlling him well.

Well, the referee has seen enough. Neither fighter is active enough on the ground so he's stood them back up.
Atoa throws a series of punches but Hunter avoids them all with ease.
Atoa scores with a three punch combo!
Atoa ducks down and throws a hook to the body but Hunter moves away.
That's two minutes gone in the round.
There's not a lot going on here and the crowd are letting the fighters know they're not willing to tolerate a lack of action.
A punch combination from Hunter misses.
Hunter is looking to clinch but Atoa is avoiding it.
Atoa misses with a body shot.
Atoa throws a hook but Hunter avoids it easily.
Atoa lands a body shot.
Atoa throws a hard body shot but it just misses.
Atoa misses with a jab, cross combination.
Hunter takes a really solid shot there but just smiles back and shrugs his shoulders.
Atoa swings for the body but Hunter moves out of range.
Atoa misses the shot to the body.
That's three minutes gone in the round.
Atoa lands a powerful looking uppercut that connected with his opponent's jaw.
Atoa ducks low and lands a nice hook to the body of his opponent.
Crack Atoa is looking to keep the fight on the feet at all costs.
Hunter uses some good footwork to avoid the body shot by Atoa.
Hunter dives in and grabs Atoa's left leg, looking for a takedown. Atoa pushes down on Hunter's head and hops out.
That's three failed takedown attempts in the round for Roy Hunter. That's going to take a lot out of him.
Atoa misses with a body shot.
Atoa misses with a wild body shot.
Atoa scores with a crisp jab that stopped Hunter in his tracks.
Atoa throws a body punch but Hunter moves out of range.
Atoa lands a nice shot to the body.
Atoa lands a right hook to the body.
Atoa throws a right hand that Hunter ducks under and follows up with a left that Hunter also avoids with ease.
That's four minutes gone in the round.
Atoa misses with a low kick.
Atoa throws a hook but Hunter blocks it.
Hunter keeping a good distance there, avoiding the body shot.
Atoa tries to land with a swinging hook to the body but Hunter was well out of range. Poor timing from Atoa.
Atoa fakes high and swings low for a body shot but Hunter manages to avoid it.
Hunter displays some good footwork, moving neatly out of range as Atoa throws out the jab.
Atoa throws a hook to the body but it doesn't connect.
Atoa misses with a wild body shot.
Atoa stuffs the takedown.
Well, he's not going to score with shots like that. A lazy body kick attempt from Atoa.
And that's the end of the fight!
Crack Atoa comfortably won the final round on my scorecard.
I think Atoa has won this one but let's see whether the judges agree with me. Over to the ring announcer for the scorecards.
Ladies and gentlemen, after 3 rounds of action, we go to the scorecards for a decision.
Judge Steven Brown scores the fight 28:29
Judge James Atkins scores the fight 28:29
Judge Paul Tew scores the fight 28:29
In favor of your winner, by unanimous decision... Crack Atoa!
|
|
|
|
|
|
|
|
|
|
|
|
|
|
|
|
|
|
|
|
|
|
|
| S |
C
A |
G |
S |
C
B |
G |
|
S |
C |
G |
|
energy
A | B |
|
hype
A | B |
|
pop
A | B |
|
mgr
A | B |
|
FIGHT
RATING
33% |
|
|
|
|
|
|
