|
|
PBP Commentary |
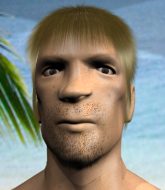
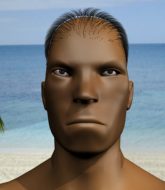
Coming up we have a super heavyweight MMA rules bout between Tommi Uzumaki (ranked 0 p4p, 0 weight class) and Scott McBride (ranked 0 p4p, 0 weight class). Uzumaki comes to the cage accompanied by Children of Bodom - Downfall. McBride is bouncing up and down as he enters the arena, backed by Surfin Dead. These two fighters really are very evenly matched on the feet - it will be fascinating to see who can assert themselves in that aspect of the fight.
 |
|
 |
| 225 cm
22
303 lbs
1 - 1 - 0 |
|
209 cm
18
290 lbs
2 - 0 - 0 |
BJJ White Belt
Excellent boxer
Very strong |
|
BJJ White Belt
Decent boxing
Granite chin |
|
| |
|
Ladies and gentlemen. This fight is 3 rounds, in the super heavyweight division.
Introducing the fighter to my left, fighting out of the red corner.
With a record of
1 - 1 - 0, fighting out of London, Tommi Uzumaki!
And introducing the fighter to my right, fighting out of the blue corner.
With a record of
2 - 0 - 0, fighting out of London, Scott McBride!
The judges for this bout are Sam Margolis, Chris Edwards and Andrew Berry.

The bell rings for round one and we are underway!

McBride fakes with an overhand right and moves in to clinch with Uzumaki, pushing him back against the cage.
Uzumaki misses with a punch to the body.
With the two fighters working up against the cage, Uzumaki just misses with a elbow thrown towards McBride's brow.
McBride is trying to break free.
McBride wants to push off and get back to the center of the mat but Uzumaki has him pressed against the cage.
Uzumaki lands a right uppercut that snaps the head of McBride backwards.

Uzumaki breaks from the clinch.
McBride rushes Uzumaki and pushes him back against the cage in a clinch.
Uzumaki wants to push off and get back to the center of the mat but McBride has him pressed against the cage.
McBride wants to strike at distance but he can't break free of the clinch.
Uzumaki is trying to break the clinch but McBride has him pressed against the cage.
Uzumaki has had enough of the clinch but McBride keeps him there for the moment.

McBride manages to pull guard. Let's see whether he can land a sub off his back.

McBride has butterfly guard. He's looking to stand up here. He pushes Uzumaki off him and springs to his feet nicely. The crowd applauds.
Uzumaki chopping away at his opponent's legs.
Uzumaki gets cracked with a nice right hand there by McBride.
Uzumaki lands with a head kick! That's gotta hurt.

It looks like Scott McBride has been cut.
Uzumaki fails with a takedown attempt from distance.
Uzumaki lands a two punch combo.
The crowd are loving this. Great action here.
Uzumaki tries to clinch up
and McBride counters with a one-two to the body.

That's one minute gone in the round.
Uzumaki will need to tighten up his combinations if he doesn't want to gas himself out, swinging at thin air.
Uzumaki throws a right and a left that McBride avoids nicely.
Uzumaki swings away but doesn't land with a series of punches.
Uzumaki tries to clinch but fails miserably
and McBride holds on and brings the fighters into a clinch.
Uzumaki tries to take the fight to the ground by pulling guard but can't manage it.
Uzumaki has had enough of the clinch but McBride keeps him there for the moment.
Uzumaki tries for a takedown but McBride manages to get underhooks.
That's three failed takedown attempts in the round for Tommi Uzumaki. That's going to take a lot out of him.
Uzumaki wants to get back to striking at distance but McBride won't allow it.
Uzumaki wants to break free but McBride has control.
Uzumaki tries to pull guard but can't drag his opponent to the mat. McBride just stands there and leans against the cage.
McBride wants to break free. God knows he wants to breaaaak freeee.
Uzumaki is looking for a takedown up against the cage. McBride gets underhooks though and prevents the takedown attempt.
Uzumaki is breathing heavily.
McBride is looking to break free of the clinch but Uzumaki has double underhooks.
Uzumaki breaks from the clinch.
Uzumaki wants to clinch
and McBride counters with a straight right hand.
Uzumaki with a lazy takedown attempt
and McBride counters by moving into the clinch.
Uzumaki wants a takedown but no success here.
McBride creates a bit of distance and throws an elbow that only just misses.
McBride wants to break the clinch but can't.
McBride wants to push off and get back to the center of the mat but Uzumaki has him pressed against the cage.

That's two minutes gone in the round.
Uzumaki tries to take the fight to the ground by pulling guard but can't manage it.
McBride is trying to break the clinch but Uzumaki has him pressed against the cage.
McBride tries a knee to the head but he's missed.
McBride pulls guard successfully.
McBride wants to get back to his feet but Uzumaki is in a dominant position and won't allow it.
McBride pushes Uzumaki off for just long enough to get back to his feet. Very athletic spring there.
Nice sprawl there from Uzumaki as McBride shoots in.
Tommi Uzumaki seems to be the more aggressive standup fighter in this bout.
Uzumaki shoots in with a takedown attempt and he has McBride pinned against the cage. McBride gets the underhooks and manages to circle away.
McBride rushes Uzumaki and presses him up against the cage.
McBride wants to break free. God knows he wants to breaaaak freeee.
Uzumaki wants to break free. God knows he wants to breaaaak freeee.
Uzumaki doesn't land with the attempted body shot.
Uzumaki has hold of a leg and is looking for a trip takedown. McBride avoids it nicely though and we remain in the clinch.
McBride throws an elbow but it misses.
Uzumaki struggles to land a body shot inside as McBride controls his hands.
Uzumaki manages to break the clinch.
McBride takes a kick to the side of the head.

That's three minutes gone in the round.
McBride tries for a takedown but Uzumaki sees it coming a mile off and avoids it easily.
McBride stuffs the takedown.
McBride fakes low and throws an overhand right that catches Uzumaki on the side of the head.
Uzumaki tries to clinch but McBride moves away
and McBride holds on and brings the fighters into a clinch.
McBride wants to strike at distance but he can't break free of the clinch.
McBride is trying to break free.
McBride blocks an uppercut.
Uzumaki wants to strike at distance but he can't break free of the clinch.
Uzumaki keeps control of McBride as he tries to wriggle out of the double underhooks.
Uzumaki is trying to maintain a safe position but McBride gets an underhook and turns Uzumaki into the cage.
Uzumaki throws an elbow but it's blocked.
Uzumaki prevents McBride from breaking the clinch.
McBride blocking some punches.
Uzumaki wants to break free. God knows he wants to breaaaak freeee.
Uzumaki tries to jump guard but he falls flat on his backside. McBride smiles and moves away.
Uzumaki clinches up with McBride and pushes him back against the cage.
Uzumaki breaks the clinch and we're back to striking at distance.
McBride tries to clinch but is not successful on this occasion.
McBride clinches.
Uzumaki looking to slow down the pace here.

That's four minutes gone in the round.
Uzumaki manages to break the clinch.
Uzumaki shoots in but McBride avoids the takedown attempt easily.
McBride darts in and clinches Uzumaki up against the cage.
Uzumaki misses with a hook from the clinch.
McBride throws a knee to the head but misses.
Uzumaki breaks the clinch and we're back to striking at distance.
McBride moves into range and clinches up with Uzumaki.
McBride tries to break the clinch but Uzumaki is controlling the position.
Uzumaki tries to break the clinch but McBride is controlling the position.
Uzumaki tries to pull guard but can't drag his opponent to the mat. McBride just stands there and leans against the cage.
McBride wants to break free. God knows he wants to breaaaak freeee.
Uzumaki has had enough of the clinch but McBride keeps him there for the moment.
McBride gets underhooks to prevent Uzumaki's takedown attempt.
McBride tries to pull guard but Uzumaki won't allow it.
McBride misses with an elbow over the top.
As the round comes to an end the crowd are showing their appreciation for a great round of action.
McBride successfully pulls guard.
McBride scrambles and gets back to his feet.
McBride circles away from the clinch attempt
and McBride counters by clinching up.
And that�s the end of the round � the fighters go back to their corners.
A close round but Scott McBride will probably get the nod.
The cut man is working on Scott McBride's cut.
Well, the break between rounds is over. Let's get back to the scrappin!

McBride fakes with an overhand right and moves in to clinch with Uzumaki, pushing him back against the cage.
McBride is trying to break the clinch but Uzumaki has him pressed against the cage.
McBride wants to push off and get back to the center of the mat but Uzumaki has him pressed against the cage.
Uzumaki looks to throw an elbow but misses.
McBride misses with an elbow strike.
McBride breaks the clinch and we return to the middle of the mat.
Uzumaki throws a looping left and ducks down for a takedown. He's got his arms around McBride's waist but McBride gets an underhook and avoids the takedown by throwing Uzumaki off to one side.
McBride tries to shoot in for a takedown. He's got hold of a leg but Uzumaki swivels and escapes.
Uzumaki looks to clinch
and McBride counters by clinching up.
Uzumaki looks to throw an elbow but misses.
McBride has had enough of the clinch but Uzumaki keeps him there for the moment.
McBride taking a break, stalling in the clinch.
Uzumaki wants to strike at distance but he can't break free of the clinch.
Uzumaki fails to pull guard.
McBride throws a nice elbow but it doesn't land.
Uzumaki trying to stall but McBride improves his position.
The two fighters are working to gain dominance in the clinch.
Uzumaki stalls.
McBride leaning his opponent against the cage.
Both fighters are absolutely exhausted here.
A right hand to the body from Uzumaki.
That's one minute gone in the round.
Uzumaki manages to pull guard. Let's see whether he can land a sub off his back.
The fighters are starting to perspire pretty heavily.
McBride preventing the sweep.
Uzumaki is looking to stand back up... there's a bit of a scramble and McBride dives into side control.
McBride stands up.
A left and a right from McBride both land. Nice combination.
Uzumaki shoots in for a takedown - he's clinched up with McBride but McBride pushes him off and we're back to square one.
That's three failed takedown attempts in the round for Tommi Uzumaki. That's going to take a lot out of him.
McBride fails in his attempt to clinch.
McBride clinches with his opponent.
McBride tries to score a body lock takedown but Uzumaki shows good agility there to stay on his feet.
Uzumaki prevents McBride from breaking the clinch.
Uzumaki has hold of a leg and is looking for a trip takedown. McBride avoids it nicely though and we remain in the clinch.
Uzumaki escapes the clinch and we're back to striking.
Uzumaki scores with a head kick.
McBride scoring well with a low kick there.
Uzumaki misses with a takedown attempt - McBride sprawls well and throws a nice strike on the way out which just misses.
That's two minutes gone in the round.
Ouch! a nice leg kick from Uzumaki, right into the meat.
Uzumaki wants to clinch but McBride slips to the side
and McBride counters with a good right hand that lands right on the jaw.
McBride clinches up with Uzumaki and pushes him back against the cage.
McBride blocks a couple of punches on the inside.
McBride wants to break free. God knows he wants to breaaaak freeee.
Uzumaki tries for a takedown but McBride manages to get underhooks.
McBride throws an elbow but it's blocked.
McBride wants to break free. God knows he wants to breaaaak freeee.
Uzumaki tries to break the clinch but McBride is controlling the position.
The fighters are pressed against the cage, as the pace of the fight slows.
McBride is trying to break the clinch but Uzumaki has him pressed against the cage.
McBride wants to break free but Uzumaki has control.
Uzumaki wants to break free. God knows he wants to breaaaak freeee.
Uzumaki missing with knees to the body.
Uzumaki misses with a short punch on the inside.
Uzumaki lands a body shot in the clinch.
The step up in weight doesn't seem to be a problem for McBride. He's performing admirably here against the bigger man.
This is a great period of action - very entertaining stuff!
Uzumaki tries to break the clinch but McBride is controlling the position.
McBride stops a takedown attempt from Uzumaki.
McBride tries for a takedown. No joy.
That's three minutes gone in the round.
McBride tries to break the clinch but Uzumaki is controlling the position.
Uzumaki swings away with an uppercut that misses.
Uzumaki tries to stall but McBride uses the opportunity to gain a better position.
Uzumaki letting McBride take a breather here.
McBride successfully pulls guard.
Uzumaki slows down the pace of the fight, as he sits in guard.
McBride has butterfly guard. He's looking to stand up here. He pushes Uzumaki off him and springs to his feet nicely. The crowd applauds.
Uzumaki fails with a rather predictable takedown attempt.
Uzumaki tries to close the distance and clinch but McBride swats him to one side with an open hand palm strike and circles away.
McBride swings for the body but Uzumaki moves out of range.
Uzumaki tries to clinch but fails miserably
and McBride counters by clinching up.
With the fighters up against the cage, Uzumaki throws an elbow but misses.
Uzumaki dodges an elbow strike from McBride.
McBride throws an elbow that misses.
Uzumaki looking to slow down the pace here.
That's four minutes gone in the round.
Uzumaki wants to push off and get back to the center of the mat but McBride has him pressed against the cage.
McBride prevents the takedown attempt.
Uzumaki tries to pull guard but McBride holds him up against the cage and eventually Uzumaki drops back down to his feet.
Uzumaki breaks from the clinch.
Uzumaki scores with a nice looking left hook and follows it up with an uppercut!
Uzumaki throws a head kick that half lands.

McBride is rocked!
Uzumaki shoots in for a takedown. SLAM! Brutal! McBride is out cold and this one is all over!
Ladies and gentlemen, after 4:27 of round 2, we have a winner by way of KO (Slam). Tommi Uzumaki!
|
|
|
|
|
|
|
|
|
|
|
|
|
|
|
|
|
|
|
|
|
|
|
| S |
C
A |
G |
S |
C
B |
G |
|
S |
C |
G |
|
energy
A | B |
|
hype
A | B |
|
pop
A | B |
|
mgr
A | B |
|
FIGHT
RATING
68% |
|
|
|
|
|
|
