|
|
PBP Commentary |
Coming up we have a featherweight MMA rules bout between Aiden MacMadchea (ranked 0 p4p, 0 weight class) and Rob Hamilton (ranked 0 p4p, 0 weight class). MacMadchea comes to the cage accompanied by London Calling by The Clash. Hamilton has chosen OTC- why can't i as his entrance music. Rob Hamilton struggled to make weight for this fight. He only made it down to 146.1lbs at the first attempt and had to take the additional two hours to make the official bout weight. Let's see how much it's taken out of him. Man, I cannot wait for this one!
 |
|
 |
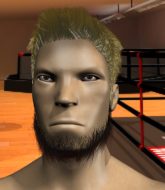
| 170 cm
20
153 lbs
2 - 3 - 0 |
|
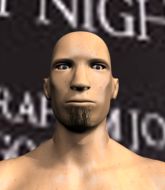
183 cm
19
155 lbs
2 - 2 - 0 |
BJJ Blue Belt
Brawler
Good chin |
|
BJJ Blue Belt
Brawler
Solid chin |
|
| |
|
Ladies and gentlemen. This fight is 3 rounds, in the featherweight division.
Introducing the fighter to my left, fighting out of the red corner.
With a record of
2 - 3 - 0, fighting out of Las Vegas, Aiden MacMadchea!
And introducing the fighter to my right, fighting out of the blue corner.
With a record of
2 - 2 - 0, fighting out of Las Vegas, Rob Hamilton!
The judges for this bout are Daniel Franklin, Robert Twigg and Frank Dennis.

The bell rings for round one and we are underway!
MacMadchea shoots for a takedown but Hamilton saw that one coming a mile off and avoided it easily.
MacMadchea tries to clinch but Hamilton moves out of range.

Hamilton has MacMadchea up against the cage in a clinch.

MacMadchea jumps guard.
MacMadchea is working from a closed guard but he's struggling to control his opponent.
Hamilton trying to pass the guard but can't manage it just yet.
MacMadchea is trying to control the position but Hamilton postures up.
Hamilton throwing shots from guard but he's hitting more mat than opponent.
Hamilton wants to stand but MacMadchea is controlling his posture from full guard.
MacMadchea not looking particularly offensive just at the moment.
We've had a slow start to the round here - hopefully the action picks up.
Hamilton wants to control from the top but MacMadchea keeps moving.

Well, the referee has seen enough. Neither fighter is active enough on the ground so he's stood them back up.
Hamilton gets to the clinch - let's see what his plan is here.
Hamilton tries to jump guard but he falls flat on his backside. MacMadchea smiles and moves away.
MacMadchea fails with the takedown.

That's one minute gone in the round.
Hamilton lands a nice leg kick that just misses MacMadchea's sensitive parts.
MacMadchea shoots in for a takedown. "I don't think so" says Hamilton as he avoids it easily.
That's three failed takedown attempts in the round for Aiden MacMadchea. That's going to take a lot out of him.
Excellent takedown into side control there by Hamilton.
MacMadchea parries the strikes from Hamilton easily there. Hamilton is wary of posturing up too much because it might enable MacMadchea to escape.
MacMadchea is trying to control Hamilton's posture but Hamilton avoids it.
MacMadchea is positioning himself to get back to half guard.

Hamilton tries for a kimura but MacMadchea is defending well.
MacMadchea is trying to get back to half guard.

Hamilton decides to take the fight back to the feet.
Hamilton looks gassed!
Ouch! a nice leg kick from Hamilton, right into the meat.

That's two minutes gone in the round.
Hamilton shoots in and bounces MacMadchea off the cage to secure the takedown into guard.
A real slowdown in the pace of the fight for a moment, as MacMadchea holds on and takes a little breather.
Hamilton has the superior BJJ but he's also working some ground strikes into his gameplan.
Hamilton pressing down on his opponent's thigh, looking to pass guard. MacMadchea is keeping the position for now.
Hamilton stands and steps away. MacMadchea gets to his feet too and we're back to the striking game.
A really sloppy takedown attempt there from MacMadchea.
MacMadchea moves into the clinch successfully.
MacMadchea pulls Hamilton into guard.
Fantastic stuff here - a very entertaining period of action, which has drawn cheers from the crowd.
MacMadchea looking to control.
Hamilton postures up in MacMadchea's guard and throws a big left but MacMadchea blocks it.
Hamilton working some ground and pound from guard but it's not doing any damage.
MacMadchea looking for a sweep. Not yet MacMadchea, not yet.
Hamilton would like to get this fight back to the feet but can't get free from the closed guard.

That's three minutes gone in the round.
MacMadchea is working the butterfly guard. He manages to land a nice scissor sweep and is now in half guard on the top. Nice move.
Hamilton tries to strike from the bottom but it doesn't land.
MacMadchea is tying to control. Hamilton wants to improve his position but can't escape this time.
MacMadchea is working hard to pass the guard. He's done it - he's now in full mount! Trouble for Hamilton!
Hamilton is wriggling around trying to escape.
Hamilton is squirming around, avoiding MacMadchea's attempts to control the action.
Hamilton tries to reverse the position but MacMadchea maintains control.
MacMadchea can't quite control the action as he would like just now, as Hamilton is looking to escape.
Hamilton is working to get back to half guard.

That's four minutes gone in the round.
Well. There's a bit of a lull in the action here and the crowd are starting to get restless.
MacMadchea avoids the attempt from Hamilton to control.
MacMadchea landing strikes from the mount and Hamilton is in trouble!
Hamilton is working to get back to half guard.
MacMadchea punishing his opponent with strikes.
MacMadchea won't let Hamilton get back to his feet... He wants to keep the fight where it is for now.
MacMadchea is looking to secure an arm. He's managed it! He's pivoting for an armbar - that looks tight! But Hamilton has managed to get out of it and now he's in a dominant position. Nice work from Hamilton!
MacMadchea might be looking to lock onto one of his opponent's long limbs for a submission, whilst we're on the ground.
MacMadchea lands a beautiful switch and he's in full mount! That could spell trouble for Hamilton!
MacMadchea takes a little breather and maintains the position. The referee will be looking for him to stay active from such a dominant position though.
Hamilton is working to get back to half guard.
And that�s the end of the round � the fighters go back to their corners.
Rob Hamilton dominated that round.
The corners get their ten second warning. Both fighters stand from their stools and stare eachother down, ready to get back to the action.

Horrible takedown by MacMadchea or perhaps it was just good defense by Hamilton which made him look bad.
Hamilton pushes MacMadchea away with a front kick.
MacMadchea misses with a takedown attempt
and Hamilton counters by moving into the clinch.
MacMadchea is working for takedown but Hamilton is calmly controlling the position for now.
That's three failed takedown attempts in the round for Aiden MacMadchea. That's going to take a lot out of him.
Hamilton jumps into guard, dragging MacMadchea to the mat.
MacMadchea prevents Hamilton from getting back to his feet.
MacMadchea trying to control the position from guard on top but Hamilton is wriggling around, looking for whatever he can.
MacMadchea tries to free his leg and advance position but Hamilton is retaining full guard.
MacMadchea drops back looking for a leg! Hamilton is in trouble here! The fighters roll with the hold and Hamilton manages to kick MacMadchea off! MacMadchea jumps back into Hamilton's guard.
Hamilton looking to sweep here. No luck so far.
A real slowdown in the pace of the fight for a moment, as Hamilton holds on and takes a little breather.
Hamilton is active off his back here, looking for submissions.
That's one minute gone in the round.
MacMadchea stands and throws Hamilton's legs to the side, diving into side control.
Both fighters are absolutely exhausted here.
Hamilton is looking to regain half guard here but MacMadchea keeps moving and retains side control.
Hamilton is persisting with the attempt to improve his position.
Hamilton struggling a bit here.
Hamilton regains half guard.
Hamilton gets back to full guard.
The ref warns both fighters not to hold the cage as they work up against the meshing.
Hamilton trying to strike from the bottom but really, it's not the best position to be doing that from!
Hamilton looking for submissions from the bottom here. Moving his hips around, possibly looking for an armbar.
That's two minutes gone in the round.
Hamilton is working for submissions here. He's thrown up his legs looking for a tringle but MacMadchea frees his head nicely. Oh but Hamilton has switched to an armbar! MacMadchea is tapping furiously! Lovely submission there!
Ladies and gentlemen, after 2:20 of round 2, we have a winner by way of Submission (Triangle Armbar). Rob Hamilton!
|
|
|
|
|
|
|
|
|
|
|
|
|
|
|
|
|
|
|
|
|
|
|
| S |
C
A |
G |
S |
C
B |
G |
|
S |
C |
G |
|
energy
A | B |
|
hype
A | B |
|
pop
A | B |
|
mgr
A | B |
|
FIGHT
RATING
63% |
|
|
|
|
|
|

