|
|
PBP Commentary |
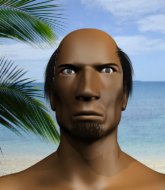
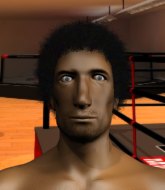
Coming up we have a heavyweight MMA rules bout between Mark Cunns II (ranked 0 p4p, 0 weight class) and Lance Jones (ranked 0 p4p, 0 weight class). Lance Jones is the more experienced fighter, so let's see if that makes a difference tonight.
 |
|
 |
| 194 cm
19
280 lbs
4 - 1 - 0 |
|
200 cm
24
270 lbs
7 - 4 - 0 |
BJJ Blue Belt
Solid boxing
Good chin |
|
BJJ Blue Belt
Excellent boxer
Powerful |
|
| |
|
Ladies and gentlemen. This fight is 3 rounds, in the heavyweight division.
Introducing the fighter to my left, fighting out of the red corner.
With a record of
4 - 1 - 0, fighting out of London, Mark Cunns II!
And introducing the fighter to my right, fighting out of the blue corner.
With a record of
7 - 4 - 0, fighting out of London, Lance Jones!
The judges for this bout are James Atkins, Sam Margolis and Richard Clark.

The bell rings for round one and we are underway!
Jones closes this distance looking for a takedown but Cunns II circles away.
Cunns II lands with a hook. Jones tried to avoid it but it clipped the top of his head.

Cunns II clinches up with Jones and pushes him back against the cage.

Cunns II's corner calls for him to break the clinch, which he does.
Cunns II pushes Jones up against the cage in a clinch.
Jones fails to pull guard.
Cunns II breaks the clinch and we return to the middle of the mat.

Cunns II drops Jones with a beautiful combination! Jones stares up at his opponent, who ushers him back to his feet - Cunns II is looking for the KO!

It looks like Lance Jones has been cut.
We've seen a great period of action over the last minute or so - credit to both fighters for going all out!
Cunns II darts in and out, connecting with a jab.
Cunns II drives through and clinches with Jones against the cage.
Jones tries to take the fight to the ground by pulling guard but can't manage it.
Mark Cunns II has stuffed three takedown attempts in the round now. That's going to take a lot out of Lance Jones.
Jones looks gassed!

Jones ties up his opponent against the cage and manages to drag the fight down to the ground. Jones no doubt will be looking to work submissions from his guard.

Jones pushes Cunns II off and gets back to his feet.
Cunns II takes the fight into the clinch.
Jones tries to take the fight to the ground by pulling guard but can't manage it.
Cunns II escapes the clinch and we're back to striking.
Jones slips under a jab.
Cunns II connects with a looping left hand that seems like it dazed Jones momentarily.
Jones needs to keep his hands up - Cunns II had a free shot at his head there.

That's one minute gone in the round.
Cunns II moves into range and clinches up with Jones.
Jones wants a takedown but no success here.
Jones fails to pull guard.
Cunns II pushes off and circles away, back to the middle of the mat.
Cunns II moves away from the strike by Jones.
Cunns II scores with a reasonable looking shot to the body. Jones doesn't seem bothered though.
Cunns II moves into range and clinches up with Jones.
Cunns II manages to break the clinch.
Jones looks for a takedown but Cunns II sprawls well.
Cunns II connects with a single shot there.
This is a great period of action - very entertaining stuff!
Cunns II clinches with his opponent.
Cunns II manages to break the clinch.
Cunns II thuds a left hand into Jones's body.
Cunns II pushes Jones up against the cage in a clinch.
Cunns II is trying to work for a single leg takedown but Jones pulls him back up using the underhooks.
Jones goes for a takedown in the clinch but Cunns II prevents it.
Cunns II escapes the clinch and we're back to striking.
Jones gets cracked there but stands up to it.
Jones takes a body punch but keeps moving.

That's two minutes gone in the round.
Cunns II swings wildly with a hook that is half blocked by Jones.
Cunns II connects with a hook to the side of his opponent's head.
Cunns II lands a beauty of a right hand that gets the crowd cheering.
Cunns II rushes Jones and presses him up against the cage.
A quick uppercut on the inside from Cunns II.
Jones is trying to break the clinch but Cunns II has him pressed against the cage.
Cunns II has hold of a leg and is looking for a trip takedown. Jones avoids it nicely though and we remain in the clinch.
Jones wants to break free. God knows he wants to breaaaak freeee.
Cunns II has double underhooks and is working for a body lock takedown. He's got it. The fighters land in half guard but Jones regains guard immediately.
Cunns II controls from within his opponent's guard.
Cunns II decides to stand up and beckons his opponent to follow.

That's three minutes gone in the round.
Cunns II misses with a body shot. Nice footwork from Jones.
Cunns II throws a lazy right hand but Jones sees it coming a mile off and sidesteps it easily.
No joy there for Jones, who threw a few shots but didn't land.
Jones throws a hook to the side of Cunns II's head but Cunns II sees it coming and ducks under it beautifully.
Jones misses with a combination
and Cunns II counters with a stiff right hand.
Cunns II lands a nice shot to the body.
Jones throws a shot from downtown. Cunns II moves away and avoids it.
Jones avoids a punch combination nicely.
Cunns II throws a right and a left that both miss.
Cunns II lands with a nice body punch.

That's four minutes gone in the round.
Cunns II scores with a punch to the head.
Jones tries to keep at a distance but Cunns II has taken the fight into the clinch.
Cunns II breaks from the clinch.
Cunns II connects with a lovely right hand, straight down the pipe.
Cunns II is really peppering his opponent's head with punches.
Cunns II connects with the punch.
Cunns II misses with a double jab.
Cunns II just misses with a punch to the body.
Cunns II gets a clinch.
Jones jumps guard but his hands slip and he falls flat on his back. Well, he's made himself look a right mug there, as Cunns II walks away with a smile on his face. Jones gets slowly back to his feet and shakes his head.
This has been an exciting period of action!
Jones slips under a jab from Cunns II.
Nice uppercut lands for Cunns II. That snapped Jones's head back.
Cunns II tests Jones's chin there with a solid looking shot.
Jones takes a jab on the nose. He smiles like he loves it and keeps coming.
The crowd are going absolutely nuts as the round comes to an end - what a fantastic round of action!
Cunns II clobbers Jones with an overhand right that has the crowd gasping. That made a horrendous noise.
Jones takes a big uppercut there. He seems a bit wobbly but no, he's OK.
The fighters are starting to perspire pretty heavily.
Cunns II connects with a slap. Keep your fist closed son.
Cunns II clinches.
And that�s the end of the round � the fighters go back to their corners.
Mark Cunns II dominated that round.
The cut man is working on Lance Jones's cut.
The fighters get back to their feet, the hooter sounds and we're back to the action!

Cunns II throws a series of punches but Jones avoids them all with ease.
Cunns II connects with a looping right hand.
Cunns II has not gone for a single takedown so far in this fight, which seems like a very strange tactic when you consider that he has the superior wrestling and BJJ.
Cunns II lands an overhand left. A wild punch that just about connected.
Cunns II throws a series of punches but Jones moves out of range.
Jones slips under a jab.
Mark Cunns II is looking to throw some combinations by the looks of things.
Cunns II staying out of range there.
Jones throws out a token jab with nothing on it.
A lazy left from Cunns II finds it's target.
Cunns II connects with a looping left hand that seems like it dazed Jones momentarily.
Cunns II lands with a right hand.
Jones fails with a takedown attempt.
Cunns II misses with a straight right.
Cunns II fakes a jab and then connects with a hook.
Both fighters are absolutely exhausted here.
Jones on the wrong end of a nice jab.
Wooooo! Give it up for these two warriors! They are putting on a show!
Jones walks straight into an uppercut. Luckily it didn't land flush.
Cunns II lands a jab to the nose.
Jones gets his head snapped back by a nice shot there.
Cunns II lands a pitter patter jab to the forehead of his opponent.
That's one minute gone in the round.
Cunns II throws a right and a left that Jones avoids nicely.
Cunns II throws out a token jab with nothing on it.
Mark Cunns II is looking to keep the fight on the feet at all costs.
Cunns II gets in close and instigates a clinch.
Cunns II escapes the clinch and we're back to striking.
Jones misses with a straight right.
Jones looks to score with a combo but nothing lands.
Cunns II throws a combination but it was largely blocked by Jones.
Mark Cunns II is winning the standup battle so far.
Cunns II scores with a hook to the body. Jones takes a step back and tries to catch his breath.
Cunns II defends well against a solid takedown attempt from Jones.
Decent striking displayed by Cunns II there.
Jones misses with a double jab.
Cunns II misses with a two punch combination.
Wow, both these guys are really going for it!
Jones fails to land the takedown.
Mark Cunns II has stuffed three takedown attempts in the round now. That's going to take a lot out of Lance Jones.
Cunns II is moving around nicely and scores here with a single head shot.
Jones lands with an overhand left.
Cunns II lands with a nice body punch.
Jab, jab by Cunns II - just one landing.
The fight stays on the outside here - Cunns II looks like he's thinking about clinching though.
That's two minutes gone in the round.
Cunns II ducks under a wild hook from Jones.
Cunns II jabs at Jones's body.
Jones swings away but doesn't land with a series of punches.
Cunns II lands a straight punch to the body, keeping Jones at a distance.
Jones ducks under a wild hook from Cunns II.
Jones throws an overhand right that lands on Cunns II's shoulder, as Cunns II tries to avoid the shot.
Cunns II misses with a jab and misses with a cross straight after too.
A decent looking cross lands there for Jones.
Cunns II loads up on a big right hand but Jones slips the punch.
Jones avoids a punch combination nicely.
Cunns II avoids a punch combination nicely.
Jones misses the body punch
and Cunns II connects with a straight left hand counter down the middle.
Cunns II moves into the clinch successfully.
Jones is working for takedown but Cunns II is calmly controlling the position for now.
Cunns II is trying to break the clinch but Jones is controlling him.
Jones jumps guard but Cunns II stands there with Jones around his waist. Jones gives up and drops back to his feet. We remain in the clinch.
That's three minutes gone in the round.
Jones tries to score a body lock takedown but Cunns II shows good agility there to stay on his feet.
Jones drops down looking for an ankle pick but Cunns II pulls his leg out and moves away.
Cunns II is really dominating this fight. Is there anything that Jones can do to turn this around?
Cunns II lands a two punch combo.
Jones misses with a two punch combination.
Jones has a pretty nasty looking mouse under his right eye.
Cunns II moves into range and clinches up with Jones.
Cunns II pushes off and circles away, back to the middle of the mat.
Good exchange - Cunns II coming out on top.
Cunns II instigates a clinch.
Jones jumps guard but his hands slip and he falls flat on his back. Well, he's made himself look a right mug there, as Cunns II walks away with a smile on his face. Jones gets slowly back to his feet and shakes his head.
Jones shoots for a double leg takedown but Cunns II sprawls well. He's pushed Jones's face into the mat and manages to get back to his feet relatively easily.
Cunns II moves into the clinch successfully.
Cunns II tries to score a body lock takedown but Jones shows good agility there to stay on his feet.
Jones drops down for a takedown but doesn't get it.
Jones goes for a takedown in the clinch but Cunns II prevents it.
That's four minutes gone in the round.
Jones tries to pull guard but can't drag his opponent to the mat. Cunns II just stands there and leans against the cage.
Jones goes for a takedown in the clinch but Cunns II prevents it.
Jones is trying to drag Cunns II to the mat but Cunns II just about manages to keep his footing. He used the cage to his advantage there.
Cunns II is trying to break free.
Cunns II is pressed up against the cage. Jones has hold of a leg and is looking to drag Cunns II down to the mat. Cunns II avoids the attempt though and has circled away. We're back to striking at a distance.
Jones takes a shot to the nose. Hopefully that hasn't broken it.
Jones drops his hands and takes a jab to the jaw for his troubles.
Jones staying out of range there.
As the round comes to an end the crowd are showing their appreciation for a great round of action.
Cunns II takes the fight into the clinch.
Cunns II has hold of one of Jones's legs. Jones is fighting the takedown attempt but Cunns II gets the trip and lands the takedown into guard.
The crowd are loving this. Great action here.
Jones kicks Cunns II off and gets to his feet.
And that�s the end of the round � the fighters go back to their corners.
Mark Cunns II dominated that second round.
The cut man is working on Lance Jones's cut.
That's time! Back to the action! This is the final round!

Jones shoots in for a takedown but Cunns II shows good takedown defense.
Cunns II cracks a nice hook into Jones's ribs.
Jones throws a looping overhand right but Cunns II ducks down to avoid it.
A nice combination there by Cunns II.
Cunns II throws a series of strikes that have Jones backpedaling.
Cunns II throws a series of punches but Jones moves out of range.
Jones looks to land a right hand but Cunns II moved out of range.
Jones thows a left - swing and a miss!
Cunns II rushes Jones and pushes him back against the cage in a clinch.
Jones gets underhooks to prevent Cunns II's takedown attempt.
Jones drops down for a takedown but doesn't get it.
Cunns II's corner calls for him to break the clinch, which he does.
Jones shoots in for a takedown. He's persisting with it as Cunns II sprawls well. Cunns II wins this battle and keeps the fight standing. Jones gets slowly back to his feet.
Mark Cunns II has stuffed three takedown attempts in the round now. That's going to take a lot out of Lance Jones.
Both fighters are breathing heavily.
Jones displays some good footwork, moving neatly out of range as Cunns II throws out the jab.
Cunns II scores with a sloppy right hand. Jones should have avoided that one.
That's one minute gone in the round.
Jones moves into range and throws a lovely three punch combination.
Jab, jab by Cunns II - just one landing.
Nice cross by Cunns II.
Cunns II gets a clinch.
Jones tries to jump guard but he falls flat on his backside. Cunns II smiles and moves away.
The fight moves into the clinch position.
Cunns II breaks the clinch and we're back to striking at distance.
Cunns II lunges at Jones with a hook that half lands and is half blocked by Jones's hand.
No joy there for Cunns II, who threw a few shots but didn't land.
Cunns II slips a jab from Jones.
Jones has his hands up protecting his head but a hook from Cunns II finds it's way round the side to connect with Jones's head.
Cunns II tries to bum rush Jones with a series of wild strikes but Jones uses good footwork to avoid the assault.
Cunns II misses with an uppercut.
Jones misses with a two punch combination.
Cunns II ducks low and lands a nice hook to the body of his opponent.
That's two minutes gone in the round.
Cunns II falls off balance throwing a combination
and Jones counters with a nice jab to the body that keeps Cunns II thinking.
Cunns II falls off balance throwing a combination
and Jones cracks him with a counter punch right on the button.
Cunns II moves into range and clinches up with Jones.
Jones tries to pull guard but Cunns II holds him up against the cage and eventually Jones drops back down to his feet.
Jones tries to pull guard but can't drag his opponent to the mat. Cunns II just stands there and leans against the cage.
Cunns II breaks from the clinch.
Cunns II cracks Jones with a right hand to the side of the head.
A punch lands to the side of Jones 's head but he takes it in his stride.
Cunns II connects with a nice looking jab.
Cunns II throws a combination but comes up with nothing but fresh air.
Jones throws a two punch combo that lands nicely.
Cunns II dodges the punch combination from Jones.
Cunns II closes the distance and clinches.
Jones changes levels and goes for a takedown here. Cunns II fights it off and pushes away nicely.
That's three minutes gone in the round.
A decent looking cross lands there for Cunns II.
Cunns II has Jones up against the cage in a clinch.
Jones breaks the clinch and we return to the middle of the mat.
Cunns II throws a right and a left that Jones avoids nicely.
Cunns II throws a series of punches but Jones avoids them all with ease.
Jones lands a really nice looking cross but Cunns II seems unphased.
Jones misses with a wild combination.
Cunns II scores with a nice strike.
Jones swinging wildly here.
Cunns II will need to tighten up his combinations if he doesn't want to gas himself out, swinging at thin air.
Jones throws a combination that misses
letting Cunns II counter with a right hand.
Jones gets cracked there but stands up to it.
Cunns II throws a hook but Jones blocks it.
That's four minutes gone in the round.
Well. There's a bit of a lull in the action here and the crowd are starting to get restless.
A punch combination from Cunns II misses.
Jones closes the distance and lands a one-two.
Jones misses with a double jab
and Cunns II counters with a lovely straight right hand!
Cunns II swings for the body but Jones moves out of range.
Cunns II fails in his attempt to clinch.
Jones takes a step towards his opponent and connects with a left hand, before circling away.
Mark Cunns II is fighting for a decision here - he's started to take the cautious approach.
Jones scores with a nice head shot.
Cunns II steps to the side to avoid the strikes from Jones.
Cunns II bobbing and weaving, closes the distance and lands a hook to the side of Jones's head.
Cunns II lands a straight punch to the body, keeping Jones at a distance.
Jones just misses with a punch to the body.
Cunns II drives through and clinches with Jones against the cage.
Jones is trying to drag Cunns II to the mat but Cunns II just about manages to keep his footing. He used the cage to his advantage there.
Lance Jones has stepped it up - he knows he needs a finish here!
The crowd applaud the fighters efforts here as the round comes to an end.
Cunns II breaks the clinch and we return to the middle of the mat.
Cunns II drives through and clinches with Jones against the cage.
Jones drops down for a takedown but doesn't get it.
And that's the end of the fight!
Mark Cunns II showed his dominance in that final round.
Well Cunns II has outscored his opponent in every aspect of the fight today. Only a scarily incompetent judge or two will keep him from a well deserved win... Over to the ring announcer for the scorecards.
Ladies and gentlemen, after 3 rounds of action, we go to the scorecards for a decision.
Judge James Atkins scores the fight 30:26
Judge Sam Margolis scores the fight 30:25
Judge Richard Clark scores the fight 30:26
In favor of your winner, by unanimous decision... Mark Cunns II!
|
|
|
|
|
|
|
|
|
|
|
|
|
|
|
|
|
|
|
|
|
|
|
| S |
C
A |
G |
S |
C
B |
G |
|
S |
C |
G |
|
energy
A | B |
|
hype
A | B |
|
pop
A | B |
|
mgr
A | B |
|
FIGHT
RATING
100% |
|
|
|
|
|
|
