|
|
PBP Commentary |
Coming up we have a bantamweight MMA rules bout between Jayson Ward (ranked 0 p4p, 0 weight class) and Alistar Overeme (ranked 0 p4p, 0 weight class). Overeme has chosen calm slow anthem as his entrance music. Both fighters really staring eachother down here, as Alistar Overeme enters the cage!
 |
|
 |
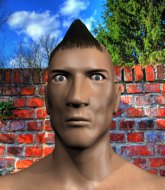
| 170 cm
22
135 lbs
1 - 0 - 0 |
|
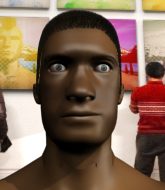
195 cm
22
145 lbs
0 - 0 - 0 |
BJJ Blue Belt
Counter striker
Good chin |
|
Good wrestler
Basic striking
Granite chin |
|
| |
|
Ladies and gentlemen. This fight is 3 rounds, in the bantamweight division.
Introducing the fighter to my left, fighting out of the red corner.
With a record of
1 - 0 - 0, fighting out of Las Vegas, Jayson Ward!
And introducing the fighter to my right, fighting out of the blue corner.
With a record of
0 - 0 - 0, fighting out of Las Vegas, Alistar Overeme!
The judges for this bout are Cecil Peabody, Gwen Towbar and Robert Twigg.

The bell rings for round one and we are underway!

Overeme shoots in and bounces Ward off the cage to secure the takedown into guard.
Overeme trying to pass the guard but can't manage it just yet.
Overeme loading up with the ground and pound but he's missing more than he's landing in this flurry.

Ward throwing his legs up looking for a triangle.
Ward keeping moving, preventing Overeme from controlling successfully.

Ward scrambles and gets back to his feet.
Overeme takes a punch to the jaw and another one to the bread basket.
Overeme shoots for a takedown but Ward saw that one coming a mile off and avoided it easily.
Nice sprawl there from Ward as Overeme shoots in.
Overeme gets a takedown into half guard.

That's one minute gone in the round.
Overeme is looking to stall here but Ward recovers full guard.
Ward tries to land a sweep but no joy.
Overeme postures up in Ward's guard and throws a big left but Ward blocks it.
Overeme throwing strikes but missing.
Overeme working some strikes from top position.
Overeme with a flurry of punches that miss.
The fighters are pressed up against the cage, both looking to find a bit of space to work.
Overeme wants to control from the top but Ward keeps moving.
Ward might be looking to lock onto one of his opponent's long limbs for a submission, whilst we're on the ground.
Overeme must be cautious of submissions here, given that his opponent has the superior Jiu Jitsu.

That's two minutes gone in the round.
Well. There's a bit of a lull in the action here and the crowd are starting to get restless.
Overemeis looking to pass into half guard but Ward pushes him away with his feet and jumps on top - now Ward is in guard.
Overeme manages to land a sweep and now he's in mount on top!
Ward is wriggling around trying to escape.
Overeme controlling his opponent.
Ward gets back to half guard.
Overeme is keen to just control but Ward is a slippery customer.
Ward is looking to escape.
Overeme is keeping good posture, landing some ground and pound.
Overeme scores with a couple of good hammerfists.
Overeme is a painfully thin specimen of a man. You do wonder whether a good body kick would snap him clean in two.

That's three minutes gone in the round.
Ward wants to improve his position but Overeme is controlling well.
Ward manages to get to full guard.
Ward is breathing heavily.
Overeme makes a bit of distance and scores with some ground and pound, still in guard.
Overeme keeps in close for a moment and lands a decent shot to the side of Ward's head.
Overeme is working Ward over from the guard. He should look to pass the guard and do a little more damage with these strikes.
Ward pushes Overeme off and gets back to his feet.
Ward keeps the fight standing with a nice sprawl.
Jayson Ward has stuffed three takedown attempts in the round now. That's going to take a lot out of Alistar Overeme.
Overeme tries for a takedown but Ward sees it coming a mile off and avoids it easily.
Overeme closes the distance and clinches up with Ward, looking for a takedown. Overeme pushes Ward against the cage but Ward circles to the side and manages to break the clinch.

That's four minutes gone in the round.
Ward shoots in for a takedown. "I don't think so" says Overeme as he avoids it easily.
Overeme has his takedown stuffed
and Ward counters with an inside leg kick.
Overeme fails with the takedown
and Ward counters with a three punch combination, finished off with a leg kick. Nice work.
Ward plants his feet and lands a nice head kick!
Overeme fails with the takedown
and Ward counters with a left and a right that stings Overeme.
Overeme changes levels and drives through with a really nice takedown into side control. Ward looks really pissed at himself for not defending that better.
Ward is looking to regain half guard here but Overeme keeps moving and retains side control.
Ward takes a couple of big shots there - the referee warns him that he has to defend himself better.
The crowd applaud the fighters efforts here as the round comes to an end.
Overeme working the head and body with strikes.
Overeme lands a knee to the body and follows it up with some ground and pound to the head. That will wear Ward down.
This is a great period of action - very entertaining stuff!
Ward takes a big shot right to the temple there but he's taken it well.
And that�s the end of the round � the fighters go back to their corners.
Alistar Overeme dominated that round.
The referee calls time. The cornermen exit stage left and we're back to business.

A combination from Ward does no damage.
Alistar Overeme seems to be the more aggressive standup fighter in this bout.
Overeme steps to his left, right into the path of a big body kick from Ward. That one must have hurt.
Overeme fails with the takedown
and Ward counters with a series of strikes. Overeme will be more careful next time no doubt.
Overeme gets his takedown attempt stuffed easily
and Ward counters with a solid body kick.
Overeme shoots and misses
and Ward counters with a three punch combo that has Overeme backing up. Overeme nods at Ward to acknowledge the strikes.
Jayson Ward has stuffed three takedown attempts in the round now. That's going to take a lot out of Alistar Overeme.
Ward gets the takedown into side control.
Ward is looking for a kimura. He might have it! No, Overeme has escaped the position, nice work there.
Overeme throws a couple of punches but he's in a bad position and they don't land.
Overeme tries to get back to half guard but can't.
Both fighters are absolutely exhausted here.
Overeme throws a couple of punches but he's in a bad position and they don't land.
Overeme is trying to get back to half guard.
That's one minute gone in the round.
Alistar Overeme has got the better of the ground game so far.
Ward working away.
Overeme manages to work his way to half guard, despite Ward's best efforts.
Ward stands, ready to strike. The ref makes him back up and allows Overeme to get to his feet.
Overeme with a poor takedown
and Ward counters with a nice body kick.
Overeme fails with the takedown
and Ward counters with a solid body kick.
Overeme fails with the takedown

and Ward counters by moving into the clinch. Good anticipation by Ward.
Overeme prevents Ward from breaking the clinch.
Overeme goes for a takedown attempt but Ward pushes him away and we're back to fighting at a distance.
That's two minutes gone in the round.
Ward feints and then dives in with a takedown. That was a long way out but the feint bought him enough time to close the distance and complete the takedown. Now we'll play guard for a bit and see who can get the better of that position.
Ward stopping the sweep attempt from Overeme.
Ward is pushing down on Overeme's leg trying to pass to half guard. Overeme is fighting to maintain full guard but Ward has managed to sneak the leg through.
Overeme trying to hold on to Ward's head to control him but Ward postures up.
Overeme moves into full guard.
Ward loading up with the ground and pound but he's missing more than he's landing in this flurry.
Ward preventing the sweep.
Overeme lands a beautiful switch and he's in full mount! That could spell trouble for Ward!
That's three minutes gone in the round.
Overeme landing shots from mount.
A nice elbow there by Overeme.
Ward is trying desperately to improve position.
You get the feeling that Ward really doesn't like being in this position too much.
Ward bucks up and manages to get a nice reversal! He's in guard on the top - nicely done!
Overeme wants to sweep but no luck.
Overeme keeping full guard, as Ward tries to pass.
We get told so often about how wrestlers don't like to be on their backs. Let's see if Overeme can do anything to dispel that myth.
Ward gets to his feet - Overeme follows without any prompting.
Overeme gets his takedown attempt stuffed easily
and Ward counters with a leg kick that reverborates around the arena.
That's four minutes gone in the round.
Ward shoots in from a long way out. He's driving through with the takedown attempt and he eventually gets it, landing in Overeme's guard.
Overeme will have to put a bit more behind his punches if he's going to do any damage from this position.
Overeme manages to sweep nicely, so he's now on top. Ward manages to get himself to full guard.
Ward is working the butterfly guard. He manages to land a nice scissor sweep and is now in half guard on the top. Nice move.
Ward prevents Overeme from improving his position.
Ward wants to stand but Overeme has hold of a leg and an arm, so he's trapped for now.
Overeme throws a strike from the bottom but Ward passes into side control!
Overeme tries to get back to half guard but can't.
And that�s the end of the round � the fighters go back to their corners.
Jayson Ward dominated that second round.
The fighters' corners scream their final instructions, as the referee calls time. Here we go, back to the action! So, we enter the final round. Let's see if either fighter can bring us a finish, or whether we're going to the judges scorecards.

That's a knee to de groin and it's over and out! Overeme crumples to the ground after an illegal strike from Ward - the referee stops the clock and Overeme gets 5 minutes to recover from that one. "I'm sorry" says Ward. Overeme manages to get back to his feet and the fight resumes.
A nice combination there by Ward.
Overeme shoots in but doesn't get the takedown
and Ward counters with a three punch combination, finished off with a leg kick. Nice work.
Ward stalks Overeme and leaps in with a furious combination of punches. Uppercuts and crosses smash into Overeme's face. Overeme staggers backwards, shaken.
Overeme fails with the takedown
and Ward counters with a good low kick that Overeme was not able to check.
Ward looks for a takedown but Overeme sprawls well.
Overeme doesn't succeed with the takedown
and Ward counters with a two punch combo.
Jayson Ward has stuffed three takedown attempts in the round now. That's going to take a lot out of Alistar Overeme.
We've had a slow start to the round here - hopefully the action picks up.
Overeme misses with a takedown
and Ward finishes the little exchange by landing a big kick to the body.
Both fighters are breathing heavily.
Overeme misses with a takedown attempt
and Ward counters with a three punch combination, finished off with a leg kick. Nice work.
A head kick from Ward lands but Overeme takes it in his stride.
No luck for Ward with that takedown attempt.
Overeme doesn't succeed with the takedown
and Ward counters with a good, hard body kick but Overeme shrugs it off.
That's one minute gone in the round.
Overeme gets taken down but at least he's managed to land in guard.
Overeme is working an open guard here, looking to improve his position. No doubt that will leave him open to counters but at least he's being more offensive.
Ward stands up from guard. Let's bang!
Overeme misses with a takedown
and Ward counters by moving into the clinch. Good anticipation by Ward.
Ward is trying to stall.
Overeme tries to score a body lock takedown but Ward shows good agility there to stay on his feet.
That's two minutes gone in the round.
Ward gets underhooks to prevent Overeme's takedown attempt.
Ward wants to break the clinch but can't.
Ward can't break the clinch.
Ward jumps guard but Overeme stands there with Ward around his waist. Ward gives up and drops back to his feet. We remain in the clinch.
Overeme has Ward pressed up against the cage and is working for takedown. Ward manages to improve position though and keeps the fight standing.
Overeme has Ward pressed up against the cage and is working for takedown. Ward manages to improve position though and keeps the fight standing.

Ward breaks the clinch.
That's three minutes gone in the round.
Overeme shoots in for a takedown but doesn't get it.
Ward misses with a wild combination.
Ward moves into range and lands a nice body kick.
Overeme keeps the fight on the outside.
Overeme tries to shoot in for a takedown. He's got hold of a leg but Ward swivels and escapes.
Ward fails to land with a series of punches.
Overeme closes this distance looking for a takedown but Ward circles away.
Overeme fails miserably with a takedown attempt.
Nice body kick there by Ward.
Overeme avoids the clinch attempt nicely.
Ward throws a body kick that sends a sickening thudding noise reverberating around the arena.
Ooooh, nice body kick lands from Ward. Overeme shrugs it off though.
Ward feints and then cracks Overeme's leading leg with a nice low kick. He's obviously looking to slow Overeme down.
That's four minutes gone in the round.
Overeme misses with a takedown
and Ward counters with a body kick that stops Overeme in his tracks momentarily.
Ward lands a jab-cross combination.
Overeme with a lazy takedown attempt
so Ward counters with a double leg into guard. Good agility.
Overeme looking for a sweep. Not yet Overeme, not yet.
Overeme wants to control the position but Ward says "no thanks buddy" and passes to half guard.
Ward wants to stand but Overeme has hold of a leg and an arm, so he's trapped for now.
Overeme wants to get back to full guard.
Overeme moves his hips nicely and gets into full guard.
Ward stopping the sweep attempt from Overeme.
And that's the end of the fight!
Jayson Ward showed his dominance in that final round.
Well Ward has outscored his opponent in every aspect of the fight today. Only a scarily incompetent judge or two will keep him from a well deserved win... Over to the ring announcer for the scorecards.
Ladies and gentlemen, after 3 rounds of action, we go to the scorecards for a decision.
Judge Cecil Peabody scores the fight 29:28
Judge Gwen Towbar scores the fight 29:28
Judge Robert Twigg scores the fight 29:28
In favor of your winner, by unanimous decision... Jayson Ward!
|
|
|
|
|
|
|
|
|
|
|
|
|
|
|
|
|
|
|
|
|
|
|
| S |
C
A |
G |
S |
C
B |
G |
|
S |
C |
G |
|
energy
A | B |
|
hype
A | B |
|
pop
A | B |
|
mgr
A | B |
|
FIGHT
RATING
53% |
|
|
|
|
|
|
