|
|
PBP Commentary |
Coming up we have a welterweight MMA rules bout between Hellson Ballswick (ranked 0 p4p, 0 weight class) and Akio Yumi (ranked 0 p4p, 0 weight class). I can't wait for this one - let's get the fighter introductions out of the way and get this one started!
 |
|
 |
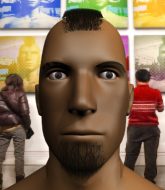
| 175 cm
24
180 lbs
7 - 5 - 0 |
|
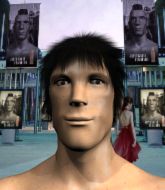
180 cm
26
182 lbs
9 - 4 - 0 |
Powerful takedowns
Excellent boxer
Very strong |
|
Good wrestler
Great elbows
Powerful |
|
| |
|
Ladies and gentlemen. This fight is 3 rounds, in the welterweight division.
Introducing the fighter to my left, fighting out of the red corner.
With a record of
7 - 5 - 0, fighting out of Tokyo, Hellson Ballswick!
And introducing the fighter to my right, fighting out of the blue corner.
With a record of
9 - 4 - 0, fighting out of Tokyo, Akio Yumi!
The judges for this bout are Kenichi Hosakawa, Yukihiro Yamamoto and Taro Takaoka.

The bell rings for round one and we are underway!

Yumi closes the distance and pushes Ballswick back into the cage.
Ballswick blocks the elbow strike.
Yumi is looking to score with knees to the body. Maybe he'll change it up and go body then head. Ballswick is defending well for now.
Yumi tries to land a knee to the body but he is off balance and Ballswick avoids it.
Yumi lands an elbow inside.
Yumi looks to throw an elbow but misses.
Yumi creates a bit of distance and throws an elbow that only just misses.
Yumi is looking to score with knees to the body. Maybe he'll change it up and go body then head. Ballswick is defending well for now.
Ballswick avoiding damage as Yumi throws knees to the body.
Yumi gets underhooks to prevent Ballswick's takedown attempt.
Ballswick avoids the elbow strike from Yumi, against the cage.
Ballswick blocks a knee to the body. He'll have a nicely bruised forearm in the morning.
Yumi trying to land knees to the body.
Ballswick avoids a wild elbow strike from Yumi.
Ballswick is working for takedown but Yumi is calmly controlling the position for now.
Ballswick avoiding damage as Yumi throws knees to the body.
We've had a slow start to the round here - hopefully the action picks up.
Yumi misses the knee to the body. Nice hip positioning from Ballswick.
Ballswick dodges an elbow strike from Yumi.
Yumi throws an elbow that misses.
Yumi throws a nice elbow but it doesn't land.
Yumi using the Thai plumb to throw knees but Ballswick has his back arched nicely, preventing the strike.
Ballswick avoiding damage as Yumi throws knees to the body.
Yumi with the Thai clinch. He's looking to land a big knee but he's not managed it this time.
Yumi missing with knees to the body.

That's one minute gone in the round.
Ballswick blocks an elbow strike from Yumi.
Ballswick avoids the elbow strike from Yumi, against the cage.
Yumi looks gassed!
Yumi comes over the top with an elbow. That landed flush.
Yumi creates a bit of distance and throws an elbow that only just misses.
Yumi throws an elbow but it misses.
Yumi missing with knees to the body.
Ballswick managing to block the knees to the body from Yumi.
Ballswick on the defensive, avoiding the knees to the body.
Ballswick is trying to drag Yumi to the mat but Yumi just about manages to keep his footing. He used the cage to his advantage there.
That's three failed takedown attempts in the round for Hellson Ballswick. That's going to take a lot out of him.
Yumi prevents a takedown attempt there.
Knees to the body from Yumi.
Ballswick blocks an elbow strike.
Ballswick blocks a knee to the body. He'll have a nicely bruised forearm in the morning.
Ballswick drops down for a takedown but doesn't get it.
With the fighters up against the cage, Yumi throws an elbow but misses.

That's two minutes gone in the round.
Ballswick is working for takedown but Yumi is calmly controlling the position for now.
Ballswick managing to block the knees to the body from Yumi.
Ballswick avoids the elbow strike from Yumi, against the cage.
Yumi throws an elbow but it misses.

Ballswick has dropped down and is working for a takedown. Yumi is trying to keep an underhook but Ballswick manages to get the takedown into half guard.
Ballswick controlling the action here.
Ballswick is looking to advance position but Yumi won't allow it.
Yumi wants to control but Ballswick is keeping busy and won't allow it.
Yumi is holding on to half guard well.
The ref warns both fighters not to hold the cage as they work up against the meshing.

Ballswick is trying to work for a kimura but Yumi is defending well.
Ballswick prevents Yumi from improving his position.

That's three minutes gone in the round.
Yumi is controlling Ballswick's trapped leg to prevent Ballswick from advancing to side control.
Ballswick is working for a submission of some sort.
Ballswick is sneakily working for an arm triangle but Yumi sees it coming and defends easily.
Yumi wants to get back to full guard.
Yumi tries to kick Ballswick off but Ballswick keeps his base steady and stays in half guard.
Yumi is trying to get back to full guard.
Ballswick is looking for a kimura but he's never going to get it from there.

That's four minutes gone in the round.
The crowd are getting on the fighters' backs, as the pace has dropped off in the last minute or so.
The fighters are starting to perspire pretty heavily.
Yumi works his way to full guard. Good work.
Ballswick won't allow Yumi to sweep him here.
Ballswick drops back for a leg! It's a sloppy attempt though and Ballswick jumps back into guard quickly, to retain the dominant position.
Yumi controls Ballswick momentarily but Ballswick frees himself.

Neither fighter is doing enough for the referee's liking and he's decided to stand them back up.
Yumi slips under a jab from Ballswick.
Ballswick scores with a jab. Yumi acknowledges it with a nod of the head.
Yumi moves in looking to clinch but Ballswick pushes him off.
The crowd thankful this round is nearly over.
Ballswick moves out of range of the body kick.
A slow jab from Ballswick misses its intended target.
Ballswick bobbing and weaving, closes the distance and lands a hook to the side of Yumi's head.
Ballswick changes levels and drives through with a really nice takedown into side control. Yumi looks really pissed at himself for not defending that better.
And that�s the end of the round � the fighters go back to their corners.
That was a close round but I would say that Hellson Ballswick will probably get the nod.
The fighters get back to their feet, the hooter sounds and we're back to the action!

Yumi throws a body kick but he wasn't in range.
Yumi misses with a low kick.
Ballswick loads up on a big right hand but Yumi slips the punch.
Yumi tries to clinch but Ballswick moves out of range.
Ballswick looking to shoot here. He's gone for it and he's landed a takedown into mount! Oh, that's bad for Yumi!
Yumi regains half guard.
Ballswick passes to side control.
Ballswick is trying to land an Americana. He has the arm isolated but Yumi is keeping cool and he's avoided the danger for now.
Yumi is trying to control Ballswick's posture but Ballswick avoids it.
Yumi sneaks back into half guard.
That's one minute gone in the round.
Ballswick trying to pass the guard but Yumi defending well.
Ballswick is trying to work for a kimura. This could be trouble! No, Yumi has managed to free his arm - good work.
The fighters are pressed up against the cage, both looking to find a bit of space to work.
Both fighters are absolutely exhausted here.
Yumi is looking to regain full guard. Not this time though.
Yumi is working for an escape here. He's hooked one of Ballswick's legs and he's managed to sneak out and take Ballswick's back!
Ballswick wants to escape the position.
A bit of a pause in the action here. Yumi controlling the positon.
Ballswick holding both Yumi 's hands and preventing any damage.
That's two minutes gone in the round.
The crowd are getting on the fighters' backs, as the pace has dropped off in the last minute or so.
Yumi has good solid back control here.
A lull in the action here.
Yumi is trying to stick to Ballswick's back but Ballswick is turning into Yumi. He's managed to reverse the position - now he's in Yumi's guard. Polite applause from the crowd in appreciation of some nice Jiu Jitsu by Ballswick.
Yumi is trying to control the position from the bottom.
Ballswick pushing down on Yumi's thigh, trying to pass to half guard. He's managed it... Nice work.
That's three minutes gone in the round.
Ballswick is working for a submission of some sort.
Ballswick seems to be working for a kimura but Yumi defends the submission attempt.
Ballswick tries to pass to full mount but Yumi defends it.
Yumi moves into full guard.
Ballswick is trying to work a guillotine from the top, or something like that? Don't know how he thinks he's going to get a finish from there.
Yumi looking to sweep here. No luck so far.
That's four minutes gone in the round.
The crowd are showing their displeasure at the lack of action as loud boos ring out around the arena.
Yumi is controlling Ballswick's posture.
Yumi looking to hit a scissor sweep but Ballswick is one step ahead there.
Ballswick is trying to work a guillotine from the top, or something like that? Don't know how he thinks he's going to get a finish from there.
Yumi is trying to keep Ballswick in close.
The crowd thankful this round is nearly over.
Ballswick drops back for a leg! It's a sloppy attempt though and Ballswick jumps back into guard quickly, to retain the dominant position.
The referee decides to stand the fighters back up.
Yumi doesn't manage to clinch there - Ballswick circles away.
And that�s the end of the round � the fighters go back to their corners.
That was a close second round but I would say that Hellson Ballswick will probably get the nod.
OK. That's time! The bell goes and we're back to the action. This is the final round!

Ballswick cracks Yumi with a hook to the jaw. Both fighters smile at eachother and high-five before getting back down to business.
A chopping leg kick lands by Yumi.
Yumi cracks the inside of Ballswick's front leg.
Yumi misses with a kick to the body.
Yumi tries to close the distance and clinch up against the cage but Ballswick paws at him with a jab and circles away.
Yumi is looking to clinch but Ballswick is avoiding it.
Ballswick takes a kick to the side of the head.
Yumi misses with a leg kick.
Ballswick lands a lovely overhand right.
Yumi steps to the side to avoid the strikes from Ballswick.
Yumi is looking to take this fight into the clinch.
Yumi uses some good footwork to avoid the body shot by Ballswick.
Ballswick clobbers Yumi with an overhand right that has the crowd gasping. That made a horrendous noise.
Yumi tries to clinch up.
Ballswick throws a shot to the body.
Ballswick keeps the fight on the outside.
Ballswick scores with a hook.
That's one minute gone in the round.
Yumi defending well as Ballswick loads up on a big left hand.
Yumi is looking to clinch but Ballswick is avoiding it.
Ballswick ducks down and throws a hook to the body but Yumi moves away.
Yumi is looking to clinch but Ballswick is avoiding it.
Yumi misses with a head kick.
Yumi takes a big intake of breath there - he's definitely tired.
Yumi takes a jab right on the kisser.
Yumi clinches up against the cage.
Yumi lands a damaging elbow.
Ballswick has double underhooks and is working for a body lock takedown. He's got it. The fighters land in half guard but Yumi regains guard immediately.
Yumi controls Ballswick momentarily but Ballswick frees himself.
Ballswick trying to control the position from guard on top but Yumi is wriggling around, looking for whatever he can.
Ballswick slips effortlessly into side control - very nice.
Ballswick wants to lay and pray for a moment but Yumi keeps working.
That's two minutes gone in the round.
Yumi tries to get back to half guard but can't.
Ballswick is trying to get an arm triangle but Yumi is defending well.
Yumi is trying to escape and get back to his feet.
Ballswick is looking for a kimura. He might have it! No, Yumi has escaped the position, nice work there.
Yumi sneaks back into half guard.
Ballswick prevents Yumi from standing back up.
Akio Yumi has stepped it up - he knows he needs a finish here!
That's three minutes gone in the round.
Ballswick is working for submissions here but there's nothing on.
Yumi is staying active underneath Ballswick, who seems content to just control the action from this position.
Yumi is working for an escape here. He's hooked one of Ballswick's legs and he's managed to sneak out and take Ballswick's back!
Ballswick breaks Yumi's hooks off and manages to turn into his guard.
Yumi is doing well to control the posture of his opponent and prevent any damage.
Ballswick drops back for a leg! It's a sloppy attempt though and Ballswick jumps back into guard quickly, to retain the dominant position.

Yumi kicks Ballswick off and gets to his feet.
Ballswick walks forward, straight into a front kick from Yumi.
Ballswick blocks a head kick by Yumi.
Akio Yumi is looking to keep the fight on the feet at all costs.
Ballswick uses good footwork to get in and out and land a nice right hand before Yumi has time to react.
Yumi shapes like he's going to throw a leg kick but settles back down.
That's four minutes gone in the round.
Yumi tries to clinch up.
Yumi doesn't manage to clinch there - Ballswick circles away.
Yumi gets his head snapped back by a nice shot there.
Ballswick fakes a jab and then connects with a hook.
Yumi is looking to clinch but Ballswick is avoiding it.
Yumi wants to land a leg kick but Ballswick is out of range.
Yumi takes one to the chin there.
Ballswick misses with a hook. Yumi ducked under it nicely.
Ballswick lands with a straight right. Yumi didn't see that one coming.
The fighters circling - Ballswick throws out the jab but it was never going to land.
Ballswick uses good footwork to get in and out, landing a nice hook.
Yumi moves out of range of the strikes.
Yumi fakes a jab and throws a low kick but Ballswick checks it well.
Yumi chopping away at his opponent's legs.
Yumi misses with a low kick.
Yumi will need to close the distance a bit before he attacks - that leg kick was thrown from too far away.
And that's the end of the fight!
That was a close round. You could make an argument for either fighter but I would give it to Hellson Ballswick.
Well I reckon that's a shut out for Ballswick, winning every round. Will the judges agree? They are the ones who matter, even if they are often depressingly incompetent. Over to the ring announcer for the scorecards.
Ladies and gentlemen, after 3 rounds of action, we go to the scorecards for a decision.
Judge Kenichi Hosakawa scores the fight 30:28
Judge Yukihiro Yamamoto scores the fight 30:27
Judge Taro Takaoka scores the fight 30:28
In favor of your winner, by unanimous decision... Hellson Ballswick!
|
|
|
|
|
|
|
|
|
|
|
|
|
|
|
|
|
|
|
|
|
|
|
| S |
C
A |
G |
S |
C
B |
G |
|
S |
C |
G |
|
energy
A | B |
|
hype
A | B |
|
pop
A | B |
|
mgr
A | B |
|
FIGHT
RATING
39% |
|
|
|
|
|
|
