|
|
PBP Commentary |
Coming up we have a welterweight MMA rules bout between Jonathan Hawkes (ranked 0 p4p, 0 weight class) and Greer Morimune (ranked 0 p4p, 0 weight class). Jonathan Hawkes could well score a knockout today. He has the power to get to Greer Morimune's chin.
 |
|
 |
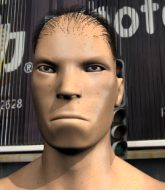
| 180 cm
23
181 lbs
7 - 6 - 0 |
|
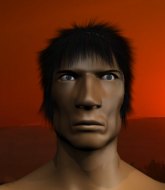
182 cm
25
180 lbs
6 - 5 - 1 |
BJJ Purple Belt
Good knees
Granite chin |
|
Good takedowns
Good kicks
Knockout power |
|
| |
|
Ladies and gentlemen. This fight is 3 rounds, in the welterweight division.
Introducing the fighter to my left, fighting out of the red corner.
With a record of
7 - 6 - 0, fighting out of Tokyo, Jonathan Hawkes!
And introducing the fighter to my right, fighting out of the blue corner.
With a record of
6 - 5 - 1, fighting out of Tokyo, Greer Morimune!
The judges for this bout are Shirou Masuda, Kenichi Hosakawa and Yasuomi Hirokawa.

The bell rings for round one and we are underway!
Hawkes is looking to clinch.
Morimune shoots in for a takedown but Hawkes shows good takedown defense there and keeps this one on the feet.

Hawkes lands a big head kick that sends Morimune tumbling to the mat! Hawkes takes a step backwards and waves Morimune back to his feet - he wants the finish!

Morimune is rocked!

It looks like Greer Morimune has been cut.
Morimune takes a step back and watches a body kick go sailing past his mid section.
Morimune is still on wobbly legs! Can Hawkes finish him?
Hawkes tries to close the distance and clinch up against the cage but Morimune paws at him with a jab and circles away.
Hawkes pulls out of a head kick attempt.
Morimune moves out of range of the body kick from Hawkes.
Morimune seems to have recovered his senses.

Excellent takedown into side control there by Morimune.

Morimune tries for a kimura. Not really close to a finish though.
Morimune is staying tight to Hawkes's torso, preventing him from escaping.
Morimune trying to control the action but Hawkes is working from the bottom.
Hawkes prevents Morimune from improving position.

That's one minute gone in the round.
Morimune is trying to land an Americana. He has the arm isolated but Hawkes is keeping cool and he's avoided the danger for now.
Morimune is looking to finish here, going for an Americana. Hawkes knows the correct defense though, so he's OK.
Hawkes manages to get one leg in to regain half guard.
The fighters are pressed up against the cage, both looking to find a bit of space to work.
Morimune looks over to his corner - he wants some instructions but his corner are not responding.
Hawkes trying to control but Morimune postures up.

That's two minutes gone in the round.
The crowd are showing their displeasure at the lack of action as loud boos ring out around the arena.
Hawkes is going to have to think about doing something other than just controlling because Morimune is managing to avoid having the position dictated to him.
Hawkes tries to get to full guard but Morimune has control of the leg.
Hawkes is doing well to control the position and prevent Morimune from advancing to side control.
Hawkes moves his hips nicely and gets into full guard.
Morimune's corner is telling him to maintain position.
Hawkes looking to control.

That's three minutes gone in the round.
Hawkes looking to control but Morimune passes into half guard.
Morimune performing his best blanket impression for a moment.
Hawkes preventing any damage for now, controlling his opponent's head.
Morimune trying to control from half guard but Hawkes is working away.
Morimune prevents Hawkes from standing back up.
Hawkes is refusing to be controlled, as Morimune sits in half guard.

That's four minutes gone in the round.
A lull in the action here being met with boos from the crowd.
Morimune is thinking about going for an arm triangle but he can't free his leg.
Hawkes is not content to let Morimune control the position.

Neither fighter is doing enough for the referee's liking and he's decided to stand them back up.
Morimune looks for a takedown but Hawkes sprawls well.
A telegraphed takedown attempt from Morimune is defended easily by Hawkes.
Jonathan Hawkes has stuffed three takedown attempts in the round now. That's going to take a lot out of Greer Morimune.
Nice cross by Hawkes.
Jonathan Hawkes is looking to keep the fight on the feet at all costs.
Hawkes gets caught flat footed, as Morimune shoots in with a quick takedown into guard.
Hawkes trying to keep a closed guard but Morimune is proving a slippery customer.
Hawkes is pulling down on Morimune's head to control his posture.
And that�s the end of the round � the fighters go back to their corners.
Jonathan Hawkes dominated that round.
The cut man is working on Greer Morimune's cut.
The corners get their ten second warning. Both fighters stand from their stools and stare eachother down, ready to get back to the action.

Hawkes lands three nice shots there - that looked like it hurt!
Morimune fakes high and shoots in for a takedown but Hawkes avoids it really well and circles away.
Morimune looks for a takedown. He's got it. We're now in half guard.
Morimune is trying to control. Hawkes wants to improve his position but can't escape this time.
Neither fighter is being very active at the moment, with Morimune in particular looking to stall.
Morimune wants to control but Hawkes is keeping him busy.
Hawkes wants to control but Morimune is keeping busy.
Morimune trying to control the action but Hawkes is working from the bottom.
That's one minute gone in the round.
Morimune is looking for a kimura. It's going to be difficult to finish that from half guard though and Hawkes defends it well.
Morimune is breathing heavily.
Morimune trying to control the action but Hawkes is working from the bottom.
The referee has ruled that neither fighter is active enough on the ground and has stood them back up.
Morimune shoots in for a takedown. "Ole!" shouts Hawkes as he jumps to the side.
Hawkes pivots as if he's going to throw a leg kick but stops half way.
Jonathan Hawkes seems to be the more aggressive standup fighter in this bout.
Hawkes throws a body kick but he wasn't in range.
Hawkes throws a head kick that misses and slips in the process. He scrambles back to his feet and the fighters circle.
Hawkes leaves Morimune with his face pressed against the mat as he sprawls beautifully, defending against a solid takedown attempt.
Jonathan Hawkes has stuffed three takedown attempts in the round now. That's going to take a lot out of Greer Morimune.
Hawkes fails to land with a series of punches.
Morimune shoots for a takedown but Hawkes saw that one coming a mile off and avoided it easily.
That's two minutes gone in the round.
The crowd are showing their displeasure at the lack of action as loud boos ring out around the arena.
Morimune uses decent footwork to sidestep a right hand from Hawkes.
Hawkes scores with a straight right hand, right through his opponent's guard.
Hawkes throws an overhand right that lands on Morimune's shoulder, as Morimune tries to avoid the shot.
Hawkes throws a low kick but it's checked well by Morimune.
Hawkes keeps the fight standing with a nice sprawl.

Hawkes clinches up with Morimune and pushes him back against the cage.
Hawkes with the Thai clinch. He's looking to land a big knee but he's not managed it this time.

Hawkes manages to break the clinch.
Jonathan Hawkes is looking to throw some combinations by the looks of things.
Hawkes throws a low kick but Morimune avoids it.
Hawkes misses with a low kick.
No luck with that takedown attempt from Morimune.
A jab from Hawkes misses.
Hawkes throws a body kick but he was well out of range there.
That's three minutes gone in the round.
Morimune shoots in for a takedown and gets it. Oh and he's advanced to full mount straight away.
Morimune is looking to secure an arm. He's managed it! He's pivoting for an armbar - that looks tight! But Hawkes has managed to get out of it and now he's in a dominant position. Nice work from Hawkes!
Hawkes wants to control from the top but Morimune keeps moving.
Morimune wants to hit a switch here but Hawkes passes into full mount! Oh no, disaster for Morimune there!
Morimune is trying to escape the mount.
Hawkes is working for a guillotine from mount but Morimune frees his head quite easily.
That's four minutes gone in the round.
Morimune is desperately trying to improve his position but Hawkes has a good base and remains in mount.
Hawkes avoids the attempt from Morimune to control.
Hawkes is in the full mount, landing strikes.
Morimune is writhing around trying to get back to his feet.
Morimune is working to get back to half guard.
Hawkes working Morimune over with strikes here.
Hawkes unloading with bombs!
Morimune is trying to escape the mount.
And that�s the end of the round � the fighters go back to their corners.
Jonathan Hawkes dominated that second round.
The cut man is working on Greer Morimune's cut.
OK. That's time! The bell goes and we're back to the action. This is the final round!

Morimune fails to land the takedown.
Hawkes looking to throw a kick but he's pulled out of it.
Morimune looks frustrated there after his takedown attempt is stuffed easily.
Morimune shoots in with a takedown attempt and he has Hawkes pinned against the cage. Hawkes gets the underhooks and manages to circle away.
Jonathan Hawkes has stuffed three takedown attempts in the round now. That's going to take a lot out of Greer Morimune.
Hawkes throws a head kick that looked like it stung.
The fight stays on the outside here - Hawkes looks like he's thinking about clinching though.
Morimune avoids a punch combination nicely.
Morimune closes this distance looking for a takedown but Hawkes circles away.
Morimune takes a big intake of breath there - he's definitely tired.
That's one minute gone in the round.
Morimune shoots for a double leg takedown but Hawkes sprawls well. He's pushed Morimune's face into the mat and manages to get back to his feet relatively easily.
Morimune circles away from the clinch attempt.
Morimune shoots in for a takedown and gets it.
Hawkes tries to get to full guard but Morimune has control of the leg.
Morimune in half guard on the top. He's looking for a kimura... He's got it locked and he's managed to free his trapped foot. Hawkes tries to escape but it's on too tight and he has to tap! Great BJJ skills there from Morimune!
Ladies and gentlemen, after 1:56 of round 3, we have a winner by way of Submission (Kimura). Greer Morimune!
|
|
|
|
|
|
|
|
|
|
|
|
|
|
|
|
|
|
|
|
|
|
|
| S |
C
A |
G |
S |
C
B |
G |
|
S |
C |
G |
|
energy
A | B |
|
hype
A | B |
|
pop
A | B |
|
mgr
A | B |
|
FIGHT
RATING
100% |
|
|
|
|
|
|
