|
|
PBP Commentary |
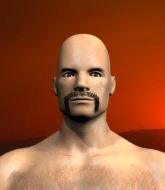
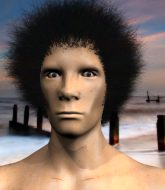
Coming up we have a welterweight MMA rules bout between Stevie Why (ranked 0 p4p, 0 weight class) and Laurel Aitken (ranked 0 p4p, 0 weight class). Aitken is bobbing his head along to his entrance song: Two Joints- Sublime. Both fighters look pumped up here. Let's hope this is a good fight!
 |
|
 |
| 180 cm
26
180 lbs
12 - 8 - 0 |
|
187 cm
27
183 lbs
14 - 8 - 0 |
Good wrestling
Excellent boxer
Very strong |
|
BJJ Purple Belt
Excellent boxer
Heavy handed |
|
| |
|
Ladies and gentlemen. This fight is 3 rounds, in the welterweight division.
Introducing the fighter to my left, fighting out of the red corner.
With a record of
12 - 8 - 0, fighting out of Las Vegas, Stevie Why!
And introducing the fighter to my right, fighting out of the blue corner.
With a record of
14 - 8 - 0, fighting out of Las Vegas, Laurel Aitken!
The judges for this bout are Gwen Towbar, Frank Dennis and Robert Twigg.

The bell rings for round one and we are underway!

Why closes the distance and scores a nice trip takedown into half guard. Aitken did well to prevent Why getting side control.
Why not throwing his punches with enough precision this time.
Aitken is looking to escape.

Why is trying to work for a kimura. This could be trouble! No, Aitken has managed to free his arm - good work.
Why trying to mount his opponent but Aitken defends it.
Why trying to control from half guard but Aitken is working away.
Aitken trying to control but Why postures up.
Aitken slips a foot under and gets full guard. Nice work.

That's one minute gone in the round.
Why wants to stand but Aitken is controlling his posture from full guard.

It looks like we're going to have a standup here. Neither fighter is doing enough on the ground.
Aitken scores with a hook to the body. Why takes a step back and tries to catch his breath.
Why takes a solid shot to the body. That one hurt him but he's trying not to show it.
Aitken throws a right hand that Why ducks under and follows up with a left that Why also avoids with ease.

Aitken lands a left and a right that send Why crashing to the mat, dazed. Aitken thinks about following him to the mat but decides to wave him back up to his feet!

It looks like Stevie Why has been cut.
Fantastic stuff here - a very entertaining period of action, which has drawn cheers from the crowd.
Aitken throws a body punch but Why moves out of range.
Why slips a straight right by Aitken.
Aitken throws a lazy right hand but Why sees it coming a mile off and sidesteps it easily.
Why throws a left and a right that both miss
and Aitken counters with a crisp right hand that drops Why! Aitken lets Why back up to his feet, looking for a finish!

Why is rocked!
Oooooooooooh, not good. A low kick from Why lands where it shouldn't have, right in the... well, you know what he did? He kicked him in the penis. He's injured, injured bad. The referee sends both fighters to their corners and Aitken has 5 minutes to recover. He's OK now though... a thumbs up from Aitken and we're back underway with a touch of gloves.
Oh Why is still all over the place! His legs are completely gone! Will he be able to recover?!!

That's two minutes gone in the round.
Aitken waving his hands out in front of him, looking to distract Why.
A looping hook to the body misses from Why. Aitken does a little dance to reset his feet.
Why seems to have got his legs back now.
Why throws a right hand that Aitken ducks under and follows up with a left that Aitken also avoids with ease.
Nice defenses there by Why.
Aitken sends Why crashing to the mat with a devastating uppercut! Aitken is motioning to the referee to let Why up. He wants to try and finish this one on the feet!
Aitken throws a jab, cross combination which is slipped
and Why counters with a lovely straight right hand!
Why looking to shoot here. He's gone for it and he's landed a takedown into mount! Oh, that's bad for Aitken!
Why postures up and cracks his opponent a couple of times before moving back into close ground control. Aitken looks a forlorn figure.
Why is landing with some decent strikes but Aitken is trying to advance his position so the referee is letting the fight continue.
Aitken can't escape the position.
Why has been looking to land a fair amount of strikes on the ground. He might be looking to soften his opponent up in order to work for a submission.

That's three minutes gone in the round.
Why tries to control but Aitken wriggling away.
Why looking to ground and pound but Aitken is blocking nicely.
Aitken is in a horrible position here, under a barrage of strikes, he's managing to avoid any damage.
Aitken is writhing around trying to get back to his feet.
Aitken can't escape the position.
Why landing strikes from the mount.
Why lands a heavy elbow.
Why controlling the pace for now.
Why landing strikes from the mount.

That's four minutes gone in the round.
Why in mount throwing good strikes here, bouncing his opponent's head off the canvas.
Why controlling from mount.
The ref warns both fighters not to hold the cage as they work up against the meshing.
Why thuds his fist into the canvas! Oooouch!
As the round comes to an end the crowd are showing their appreciation for a great round of action.
Why looking to control but Aitken is working nicely, looking to advance position himself.
And that�s the end of the round � the fighters go back to their corners.
Laurel Aitken dominated that round.
The cut man is working on Stevie Why's cut.
That's time! Back to the action!

Aitken pushing out the jab but it's not landing.
Why ducks under an overhand right and circles away with a smile on his face.
Jab from Why.
Why moves away from the strike by Aitken.
Aitken throws a leg kick but Why checks it.
Why throws a right and a left that Aitken avoids nicely.
A big right from Aitken misses.
Aitken takes an uppercut right on the button but keeps his composure.
Why lands a jab-cross combination.
Aitken is rocked!
Why throws a right and a left that Aitken avoids nicely.
Aitken is still on wobbly legs! Can Why finish him?
Laurel Aitken seems to be getting the better of the standup.
Why scores with a nice takedown into half guard. Let's see what he's got on the ground.
Why lands with a punch from half guard.
Why working some ground and pound from close in. He's looking to maintain this position and strike for a while by the looks of things... although he'll probably advance to full mount in a minute now I've said that.
That's one minute gone in the round.
Why not throwing his punches with enough precision this time.
Aitken is looking to regain full guard. Not this time though.
Aitken seems to have recovered his senses.
Why wants to free his trapped foot but Aitken is holding on for dear life with his legs.
Why thumps the canvas. Not on purpose obviously - he just missed Aitken's head.
Neither fighter is being very active at the moment, with Why in particular looking to stall.
Why is trying to work for a kimura. This could be trouble! No, Aitken has managed to free his arm - good work.
That's two minutes gone in the round.
The crowd are showing their displeasure at the lack of action as loud boos ring out around the arena.
The referee decides to stand the fighters back up.
Why throws a series of punches but Aitken moves out of range.
Aitken misses with a body shot. Nice footwork from Why.
Aitken ducks under an overhand right and circles away with a smile on his face.
Aitken throws a jab to the body, straight down the pipe. Boom. That sent Why stumbling backwards but he manages to regain his composure quickly.
Why dives in and grabs Aitken's left leg, looking for a takedown. Aitken pushes down on Why's head and hops out.
Both fighters are absolutely exhausted here.
Why throws a shot from downtown. Aitken moves away and avoids it.
Why needs to keep his hands up - Aitken had a free shot at his head there.
Why swings wildly with a couple of big hooks
and Aitken counters with a nice jab to the body that keeps Why thinking.
Why misses with a double jab
and Aitken counters with a straight punch to the midsection.
That's three minutes gone in the round.
Why swings and misses with a hook to the body.
Aitken looks to throw the jab but Why is out of range.
Why wants to clinch up but Aitken keeps it at a distance.
Why looking to shoot here. He's gone for it and he's landed a takedown into mount! Oh, that's bad for Aitken!
Why looking to ground and pound but Aitken is blocking nicely.
Aitken is looking to improve his position but Why isn't that keen on the idea.
Aitken wants to hold on but Why pushes him away.
That's four minutes gone in the round.
Why throws a sloppy strike and Aitken uses the opportunity to reverse the position! A bit of a scramble here and Aitken has ended up in Why's guard.
Aitken trying to control the position from guard on top but Why is wriggling around, looking for whatever he can.
Aitken trying to stand up but can't free himself from Why's guard.
Aitken trying to pass the guard but can't manage it just yet.
The referee has ruled that neither fighter is active enough on the ground and has stood them back up.
Why throws a looping left and ducks down for a takedown. He's got his arms around Aitken's waist but Aitken gets an underhook and avoids the takedown by throwing Why off to one side.
The crowd applaud the fighters efforts here as the round comes to an end.
Why with a lazy takedown attempt
and Aitken counters with a straight punch to the midsection.
That's three failed takedown attempts in the round for Stevie Why. That's going to take a lot out of him.
Aitken throws the left hand but Why avoids the punch easily.
Laurel Aitken is looking to keep the fight on the feet at all costs.
Why fails to land the takedown.
And that�s the end of the round � the fighters go back to their corners.
Stevie Why dominated that second round.
The cut man is working on Stevie Why's cut.
Well, the break between rounds is over. Let's get back to the scrappin! Let's hear some noise people - this is the final round!

Why shoots in for a takedown but Aitken shows good takedown defense.
Aitken pushing out the jab but it's not landing.
Why takes one on the chin but seems OK.
Aitken throws a jab but it's blocked by Why.
Why lunges at Aitken with a hook that half lands and is half blocked by Aitken's hand.
Why shoots in but Aitken avoids the takedown attempt easily.
Why checks a low kick from Aitken.
Aitken keeps his opponent at a distance with a nice jab.
Both fighters are breathing heavily.
Aitken throws a hook but Why blocks it.
Aitken moves out of range as Why strikes.
A swing and a miss from Why.
Why walks forward and throws out a flicking leg kick. Aitken checks it nicely though, as he moves to the side.
That's one minute gone in the round.
Aitken showing good head movement there, avoiding the strikes from Why.
Why lands with a straight right. Aitken didn't see that one coming.
Why throws a big shot that misses.
Why shoots in for a takedown and gets it. Oh and he's advanced to full mount straight away.
Aitken is trying to escape the mount.
Aitken wants to improve position but instead he's given up his back.
Why lands a shot to the body.
Aitken is taking damage to the body and head.
Why lands a shot to the body.
That's two minutes gone in the round.
Why throwing damaging strikes from the back! Aitken could be in trouble here!
The fighters are pressed up against the cage, both looking to find a bit of space to work.
Why looking for the choke but no joy.
Aitken is in a world of trouble here. He's outmatched on the ground here and he'd better get Why off his back sharpish unless he wants to be submitted.
Aitken looking to stop the rear naked choke attempt by controlling the hands.
Aitken looking very determined here, making life difficult for Why.
Why has his opponent trapped and is landing shots. Not a good position for Aitken.
Why is working for the rear naked choke. He has one arm under the chin but Aitken has hold of the other arm. A bit of a stalemate here.
That's three minutes gone in the round.
Why misses with punches from the back.
Aitken trying to control the hands but Why breaks the grip.
Why is punishing Aitken with strikes - can he finish him?!
Aitken is really stuck here.
Aitken is trying to escape under a series of strikes and manages to escape from Why 's hooks.
Why looking to control but Aitken is working nicely, looking to advance position himself.
Aitken is looking to improve his position but Why isn't that keen on the idea.
That's four minutes gone in the round.
A lull in the action here being met with boos from the crowd.
Why has control of Aitken's right arm, working for a kimura. It's a bit of a token attempt though and Aitken regains control of the situation pretty easily.
Why can't quite control the action as he would like just now, as Aitken is looking to escape.
Aitken tries to reverse the position but Why maintains control.
And that's the end of the fight!
Stevie Why showed his dominance in that final round.
I think Why has won this one but let's see what the judges have to say. Over to the ring announcer for the scorecards.
Ladies and gentlemen, after 3 rounds of action, we go to the scorecards for a decision.
Judge Gwen Towbar scores the fight 29:28
Judge Frank Dennis scores the fight 29:28
Judge Robert Twigg scores the fight 29:28
In favor of your winner, by unanimous decision... Stevie Why!
|
|
|
|
|
|
|
|
|
|
|
|
|
|
|
|
|
|
|
|
|
|
|
| S |
C
A |
G |
S |
C
B |
G |
|
S |
C |
G |
|
energy
A | B |
|
hype
A | B |
|
pop
A | B |
|
mgr
A | B |
|
FIGHT
RATING
81% |
|
|
|
|
|
|
