|
|
PBP Commentary |
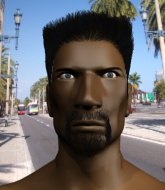
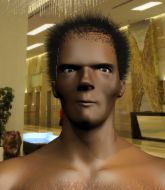
Coming up we have a heavyweight MMA rules bout between Yoshi Doldersum (ranked 0 p4p, 0 weight class) and Zak Brutes (ranked 0 p4p, 0 weight class). Zak Brutes is the more experienced fighter, so let's see if that makes a difference tonight.
 |
|
 |
| 194 cm
22
225 lbs
0 - 2 - 0 |
|
199 cm
23
235 lbs
1 - 4 - 0 |
BJJ White Belt
Excellent boxer
Granite chin |
|
BJJ White Belt
Basic striking
Solid chin |
|
| |
|
Ladies and gentlemen. This fight is 3 rounds, in the heavyweight division.
Introducing the fighter to my left, fighting out of the red corner.
With a record of
0 - 2 - 0, fighting out of Sydney, Yoshi Doldersum!
And introducing the fighter to my right, fighting out of the blue corner.
With a record of
1 - 4 - 0, fighting out of Sydney, Zak Brutes!
The judges for this bout are Skip Squint, Summer Carpenter and Steve Erwin.

The bell rings for round one and we are underway!
Brutes stuffs the takedown attempt from Doldersum. Doldersum gets slowly back to his feet.
Doldersum swats away the attempt to clinch by Brutes.
Zak Brutes seems to be the more aggressive standup fighter in this bout.
Doldersum shoots in for a takedown. He's persisting with it as Brutes sprawls well. Brutes wins this battle and keeps the fight standing. Doldersum gets slowly back to his feet.
Doldersum misses with a takedown attempt. He shot from a bit too far out.
That's three failed takedown attempts in the round for Yoshi Doldersum. That's going to take a lot out of him.
Brutes just misses with a punch to the body.
Doldersum tries to shoot in for a takedown. He's got hold of a leg but Brutes swivels and escapes.

Brutes moves into range and clinches up with Doldersum.
Doldersum wants to break free but Brutes has control.

Brutes breaks the clinch.
Brutes throws a lazy right hand but Doldersum sees it coming a mile off and sidesteps it easily.
Brutes moves into the clinch.
Doldersum tries to land a knee to the head but Brutes blocks with his arms.
Doldersum wants a takedown but no success here.
Brutes misses the knee to the body. Nice hip positioning from Doldersum.
Brutes stalling in the clinch but Doldersum improves position.
Brutes breaks from the clinch.

That's one minute gone in the round.
Doldersum takes a body punch but keeps moving.
Brutes ducks down and throws a hook to the body but Doldersum moves away.
Brutes misses with a wild body shot.
Doldersum looks for a takedown but Brutes sprawls well.
Doldersum tries to clinch up.
The fight stays on the outside here - Brutes looks like he's thinking about clinching though.
Brutes misses with a body shot.
Doldersum throws a head kick but Brutes moves out of range.
Doldersum throws a right hand that Brutes ducks under and follows up with a left that Brutes also avoids with ease.
Nice sprawl there from Brutes as Doldersum shoots in.
Doldersum is breathing heavily.
Brutes wants to clinch but Doldersum slips to the side
and Doldersum counters with a lovely straight right hand!
Brutes circles away from the clinch attempt.
Brutes pushes Doldersum up against the cage in a clinch.
Doldersum wants to break the clinch but can't.
Doldersum wants to push off and get back to the center of the mat but Brutes has him pressed against the cage.
Brutes breaks the clinch.
Doldersum ducks under a wild hook from Brutes.
Brutes throws a nice head kick!

That's two minutes gone in the round.
Brutes stuffs the takedown attempt from Doldersum. Doldersum gets slowly back to his feet.
Brutes throws a head kick that misses.
Brutes throws a head kick but Doldersum moves out of range.
Brutes misses with a body shot.
Brutes misses with a shot to the body
and Doldersum counters with a nice body shot.
Brutes jabs at Doldersum's body.
Brutes fails to land with the punch combination there - jab, cross, hook, miss, miss, miss.
Brutes throws a hard body shot but it just misses.
Brutes misses with a wild body shot.
Brutes wants to clinch up but Doldersum keeps it at a distance.
Doldersum fails miserably with a takedown attempt.
Brutes drives through and clinches with Doldersum against the cage.
Brutes's corner calls for him to break the clinch, which he does.
Brutes is throwing a lot of body shots here, looking to wear down Doldersum rather than just go for the knockout.
Brutes is looking to clinch but Doldersum is avoiding it.
Brutes misses with a body shot.
Brutes throws a body punch but Doldersum moves out of range.
Brutes tries to clinch but Doldersum moves out of range.

That's three minutes gone in the round.
Brutes tries to close the distance and clinch up against the cage but Doldersum paws at him with a jab and circles away.
Brutes looks to clinch
and Doldersum holds on and brings the fighters into a clinch.
Brutes breaks the clinch.
Brutes misses with a wild body shot.
Brutes takes a swing at Doldersum's ribcage but misses.
Brutes looks to score with a jab to the body but Doldersum is just out of range.
Brutes throws a combination that misses
and Doldersum counters by moving into the clinch. Good anticipation by Doldersum.
Brutes breaks the clinch.
Brutes swings for the body but Doldersum moves out of range.
Doldersum pulls out of a head kick attempt.
Doldersum avoids the clinch attempt nicely.
Doldersum blocks a jab.
Doldersum throws a lazy head kick
and Brutes counters with a right hand to the body.
Brutes keeping at a good range here, avoiding a leg kick.
Brutes misses the shot to the body.
Brutes tries to clinch

so Doldersum counters with a double leg into guard. Good agility.
Doldersum trying to control the position from guard on top but Brutes is wriggling around, looking for whatever he can.

That's four minutes gone in the round.
Brutes pulls Doldersum in close to prevent any damage.

Brutes throwing his legs up looking for a triangle.
Brutes keeping moving, preventing Doldersum from controlling successfully.
And that�s the end of the round � the fighters go back to their corners.
Zak Brutes dominated that round.
Well, the break between rounds is over. Let's get back to the scrappin!

Doldersum shoots in for a takedown - he's clinched up with Brutes but Brutes pushes him off and we're back to square one.
Doldersum scores with a one two! Brutes had his feet all tangled up there and couldn't avoid the strikes.
Brutes stuffs the takedown.
Doldersum gets the takedown into side control.
The fighters are starting to get a bit slippery now, which will make submissions a bit more difficult.
Doldersum working away.
Doldersum wants to work for a kimura but he's foiled early by Brutes, who protects the arm well.
The fighters are pressed up against the cage, both looking to find a bit of space to work.
Doldersum goes for an armbar here - this could be all over! But no, Brutes has escaped beautifully and is now on top in side control! Oh, that's unlucky for Doldersum but great work by Brutes.
Both fighters are absolutely exhausted here.
That's one minute gone in the round.
Brutes slows the pace down.
Brutes sitting in side control, looking to soften his opponent up with elbows and hammerfists but Doldersum is avoiding damage well and looking to escape the position.
Doldersum is looking to reverse the position.

Doldersum bucks up and manages to escape back to his feet!
Doldersum has a takedown stuffed.
That's three failed takedown attempts in the round for Yoshi Doldersum. That's going to take a lot out of him.
Brutes looks to land a left hand but Doldersum moved out of range nicely.
That's two minutes gone in the round.
A few boos can be heard. I'm sure they will multiply if the fighters don't pick up the pace.
Doldersum looks for a takedown but Brutes sprawls well.
Brutes throws a sloppy head kick and Doldersum moves out of range easily.
Doldersum avoids the head kick by Brutes.
Brutes slaps away a takedown attempt from Doldersum, before circling back to the center of the mat.
Doldersum avoids the clinch attempt nicely.
Doldersum shoots in but no luck this time.
Doldersum fails to land the takedown.
Brutes blocks the body kick.
Doldersum avoids the body shot from Brutes.
Doldersum tries to score a power double leg takedown but Brutes sees that one coming and sprawls well. That will dishearten Doldersum somewhat.
Brutes throws a jab to the body, straight down the pipe. Boom. That sent Doldersum stumbling backwards but he manages to regain his composure quickly.
That's three minutes gone in the round.
Doldersum shoots in for a takedown but Brutes shows good takedown defense.
Brutes slaps away a takedown attempt from Doldersum, before circling back to the center of the mat.
Brutes tries to clinch but is not successful on this occasion.
Brutes throws a hard body shot but it just misses.
Doldersum scores with a jab to the jaw.
Brutes fails with an attempt to clinch.
Doldersum lands a jab-cross combination.
Doldersum tries to score a power double leg takedown but Brutes sees that one coming and sprawls well. That will dishearten Doldersum somewhat.
Doldersum lands with a thumping leg kick.
Doldersum keeping a good distance there, avoiding the body shot.
Brutes misses with a body shot.
Brutes tries to keep at a distance but Doldersum has taken the fight into the clinch.
Brutes keeps the fight in the clinch, despite Doldersum's efforts to push away.
That's four minutes gone in the round.
Doldersum wants a takedown but no success here.
Brutes manages to break the clinch.
Doldersum shoots and misses
and Brutes cracks him with a counter punch right on the button.
Brutes closes the distance and clinches.
Doldersum tries for a takedown. No joy.
Doldersum tries to take the fight to the ground by pulling guard but can't manage it.
Doldersum tries to take the fight to the ground by pulling guard but can't manage it.
Doldersum tries to take the fight to the ground by pulling guard but can't manage it.
Doldersum looking to throw knees to the head but Brutes is blocking nicely.
Brutes's corner calls for him to break the clinch, which he does.
Brutes walks into a straight right hand from Doldersum.
And that�s the end of the round � the fighters go back to their corners.
That was a close second round but I would say that Yoshi Doldersum will probably get the nod.
The corners get their ten second warning. Both fighters stand from their stools and stare eachother down, ready to get back to the action. Let's hear some noise people - this is the final round!

Doldersum throws a two punch combo that lands nicely.
The fight stays on the outside here - Doldersum looks like he's thinking about clinching though.
Doldersum fails to land with the punch combination there - jab, cross, hook, miss, miss, miss.
Doldersum lands three nice shots there - that looked like it hurt!
Brutes swinging wildly here.
Brutes checks a leg kick nicely.
Doldersum fails with the takedown.
Doldersum shoots in for a takedown. "Ole!" shouts Brutes as he jumps to the side.
A jab from Brutes misses.
We've had a slow start to the round here - hopefully the action picks up.
Brutes scores with a shot to the body.
The fight stays on the outside here - Brutes looks like he's thinking about clinching though.
Both fighters are breathing heavily.
Brutes is looking to clinch.
Brutes lands a high kick!
That's one minute gone in the round.
Doldersum tries to clinch up.
Brutes wants to clinch up but Doldersum keeps it at a distance.
Brutes throws a sloppy body shot
and Doldersum moves into the clinch.
Brutes escapes the clinch and we're back to striking.
The fight stays on the outside here - Doldersum looks like he's thinking about clinching though.
Brutes moves into the clinch.
Brutes manages to break the clinch.
Doldersum tries to clinch
and Brutes counters with a head kick. That will keep Doldersum thinking before he tries any more sloppy attacks!
Brutes changes levels and scores with a jab to the body.
Brutes misses the shot to the body.
Brutes misses the shot to the body.
Doldersum uses some good footwork to avoid the body shot by Brutes.
Brutes looks to clinch
and Doldersum counters with a nice double leg into guard.
Brutes trying to control the position.
That's two minutes gone in the round.
Doldersum won't allow Brutes to sweep him here.
Doldersum sitting in guard here, content to control.
Doldersum pressing down on his opponent's thigh, looking to pass guard. Brutes is keeping the position for now.
Brutes is trying to control the position from the bottom.
That's three minutes gone in the round.
Doldersum controls from within his opponent's guard.
Doldersum trying to control but Brutes is working from the bottom.
Brutes is trying to control the position but Doldersum postures up.
That's four minutes gone in the round.
Neither fighter has done anything of merit for a good minute or two here and the crowd are not happy about it.

The referee decides to stand the fighters back up.
Doldersum shoots in for a double leg but Brutes sprawls well. That's going to sap some energy.
That's three failed takedown attempts in the round for Yoshi Doldersum. That's going to take a lot out of him.
Doldersum shoots for a takedown but Brutes saw that one coming a mile off and avoided it easily.
No luck with that takedown attempt from Doldersum.
Doldersum shoots for a double leg takedown but Brutes sprawls well. He's pushed Doldersum's face into the mat and manages to get back to his feet relatively easily.
Brutes throws a head kick that misses and slips in the process. He scrambles back to his feet and the fighters circle.
The fight stays on the outside here - Doldersum looks like he's thinking about clinching though.
Zak Brutes seems to be getting the better of the standup.
Doldersum rushes Brutes and pushes him back against the cage in a clinch.
Doldersum is trying to force a seperation but Brutes has the dominant position.
Doldersum keeps control of Brutes as he tries to wriggle out of the double underhooks.
Doldersum tries to jump guard but he falls flat on his backside. Brutes smiles and moves away.
Doldersum with a poor takedown
and Brutes counters by clinching up.
Doldersum tries to jump guard but he falls flat on his backside. Brutes smiles and moves away.
And that's the end of the fight!
That was a close round. You could make an argument for either fighter but I would give it to Yoshi Doldersum.
I think Doldersum has won this one but let's see what the judges have to say. Over to the ring announcer for the scorecards.
Ladies and gentlemen, after 3 rounds of action, we go to the scorecards for a decision.
Judge Skip Squint scores the fight 29:28
Judge Summer Carpenter scores the fight 29:28
Judge Steve Erwin scores the fight 29:29
In favor of your winner, by majority decision... Yoshi Doldersum!
|
|
|
|
|
|
|
|
|
|
|
|
|
|
|
|
|
|
|
|
|
|
|
| S |
C
A |
G |
S |
C
B |
G |
|
S |
C |
G |
|
energy
A | B |
|
hype
A | B |
|
pop
A | B |
|
mgr
A | B |
|
FIGHT
RATING
48% |
|
|
|
|
|
|
