|
|
PBP Commentary |
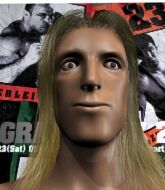
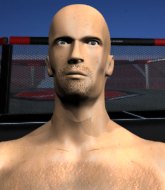
Coming up we have a light heavyweight MMA rules bout between Keith Higham (ranked 0 p4p, 0 weight class) and Randy Rage (ranked 0 p4p, 0 weight class). Both fighter's entrance songs getting the crowd jumping here.
 |
|
 |
| 200 cm
22
215 lbs
9 - 1 - 1 |
|
185 cm
25
215 lbs
7 - 2 - 0 |
Good wrestling
Basic striking
Very quick |
|
Good wrestler
Decent boxing
Powerful |
|
| |
|
Ladies and gentlemen. This fight is 3 rounds, in the light heavyweight division.
Introducing the fighter to my left, fighting out of the red corner.
With a record of
9 - 1 - 1, fighting out of Hilo, Keith Higham!
And introducing the fighter to my right, fighting out of the blue corner.
With a record of
7 - 2 - 0, fighting out of Hilo, Randy Rage!
The judges for this bout are , and .

The bell rings for round one and we are underway!
Rage takes one on the button.
Higham lands with a hook. Rage tried to avoid it but it clipped the top of his head.
Higham tries to clinch but is not successful on this occasion.
Higham is looking to clinch but Rage is avoiding it.
Higham looks to score with a jab to the body but Rage is just out of range.
Higham wants to clinch up but Rage keeps it at a distance.
Higham throws a leg kick but Rage sees it coming and moves out of range.

Higham closes the distance and clinches.
Higham wants to push off and get back to the center of the mat but Rage has him pressed against the ropes.
Higham prevents a takedown attempt there.

Higham breaks the clinch and we're back to striking at distance.
Wow, both these guys are really going for it!
Higham defends well against a solid takedown attempt from Rage.
Higham tries to clinch but is not successful on this occasion.

Rage drives through with a really nice takedown into side control.
Rage tries to get to his feet but he's trapped momentarily.
Higham is looking for a sweep.

Rage looking for an arm triangle but it's way too loose to do anything.

That's one minute gone in the round.
Higham gets back to half guard.
Rage is working for submissions here but there's nothing on.
Higham is looking for a sweep. Rage is wise to his cunning plan and keeps the top position.
Rage is looking to advance position but Higham won't allow it.
The fighters are tangled up in the ropes here. We might need a restart if the fighters can't break free themselves.

It looks like we're going to have a standup here. Neither fighter is doing enough on the ground.
Rage shoots in for a takedown. He's persisting with it as Higham sprawls well. Higham wins this battle and keeps the fight standing. Rage gets slowly back to his feet.
Keith Higham has stuffed three takedown attempts in the round now. That's going to take a lot out of Randy Rage.
A telegraphed takedown attempt from Rage is defended easily by Higham.

That's two minutes gone in the round.
A few boos can be heard. I'm sure they will multiply if the fighters don't pick up the pace.
Higham displays some good footwork, moving neatly out of range as Rage throws out the jab.
Higham swings away with a leg kick that misses.
Rage shoots in for a takedown - he's clinched up with Higham but Higham pushes him off and we're back to square one.
Higham dips down and scores with a jab to the body.
Rage looks gassed!
Higham lands with a straight right. Rage didn't see that one coming.
Higham misses with a low kick as Rage jumps back.
Higham scores with the left hand. Rage knows he should have avoided that one.
Rage moves out of range of the leg kick from Higham.
A combination from Rage does no damage.
A clash of legs there as Rage blocks the low kick.
Higham misses with a jab, cross combination.
A jab from Higham does it's job there.
Rage checks a low kick from Higham.
Rage checks a low kick from Higham.
Rage shoots in for a double leg but Higham sprawls well. That's going to sap some energy.
Well, he's not going to score with shots like that. A lazy body kick attempt from Higham.
Higham clinches up against the ropes.
Higham pushes off and circles away, back to the middle of the mat.
Higham cracks Rage with a right hand to the side of the head.

That's three minutes gone in the round.
Higham scores with the left hand. Rage knows he should have avoided that one.
A leg kick checked by Rage.
Rage misses with a double jab
and Higham counters with a takedown into full mount! That could mean trouble for Rage!
Higham is working on an americana here. Ooh, that looks pretty nasty! Nope, Rage has managed to escape the submission attempt.
Higham is going oldschool here, as he tries to force Rage to tap using a forearm choke. This isn't 1993 though, so Rage shrugs it off.
Higham goes for an armbar but Rage turns quickly into his guard - lovely anticipation from Rage.
Higham escapes his hips to the side and looks to be working for an armbar. Rage gives him a little smile and shakes his head. No chance.
Higham looking for submissions off his back, moving his hips, looking for an opening.

That's four minutes gone in the round.
Rage stands and throws Higham's legs to the side, diving into side control.
Higham wants to control but Rage postures up.
Rage taking a break here but Higham is having none of it and regains half guard.
Rage sitting in half guard, looking to land shots. Higham defending well though.
The crowd applaud the fighters efforts here as the round comes to an end.
Rage tries to pass to full mount but Higham defends it.
Higham flails away from the bottom but he's not doing any damage.
And that�s the end of the round � the fighters go back to their corners.
Keith Higham dominated that round.
That's the end of the interval. I'm sure that seemed a lot quicker than a minute for our two fighters! Back to the action.

Rage misses with a takedown attempt. He shot from a bit too far out.
Higham thows a left - swing and a miss!
Higham swings and misses with a hook to the body.
Higham misses with a body shot.
Higham is using his reach advantage well here, landing the more effective single shots from range.
Higham bobbing and weaving, closes the distance and lands a hook to the side of Rage's head.
Higham stuffs the takedown attempt from Rage. Rage gets slowly back to his feet.
Rage drives through with a really nice takedown into side control.
Higham is looking to reverse the position.
Higham manages to get back to half guard.
Rage stalling away here and it's allowed Higham to slip out his trapped foot and regain full guard.
Higham utilising some decent striking defenses from the guard, preventing the ground and pound.
That's one minute gone in the round.
Rage postures up as if he's going to throw some strikes but drops back for an ankle! Higham is in big trouble! He looks ready to tap! But no, he's escaped and dives on top of Rage, into his guard.
Higham trying to control the position from guard on top but Rage is wriggling around, looking for whatever he can.
Rage lands a beautiful switch and he's in full mount! That could spell trouble for Higham!
Rage throwing sloppy strikes here. Perhaps if he tightened up his striking from such a dominant position, he'd be able to finish easier.
Higham is wriggling around trying to escape.
Rage wants to control the pace but Higham is squirming around nicely.
That's two minutes gone in the round.
The crowd are showing their displeasure at the lack of action as loud boos ring out around the arena.
Higham is trying desperately to improve position.
Rage jumps to the side looking to secure the arm triangle�. Ooooh, that looks tight� Higham is gargling but he's managed to escape! Nice work there by Higham and Rage has given up the dominant position trying to land that submission.
Higham trying to control but Rage flips him over like a cheap hooker and has his back!
Rage biding his time, controlling Higham.
Rage looking for the choke but no joy.
That's three minutes gone in the round.
Higham trying to control the action but Rage just sinks the hooks in.
Higham turns into Rage and is now in his guard.
Higham pressing down on his opponent's thigh, looking to pass guard. Rage is keeping the position for now.
Higham won't allow Rage to sweep him here.
Higham thinks about going for a leg but decides against it, in order to maintain the position.
Higham trying to control but Rage is working from the bottom.
Higham postures up.
That's four minutes gone in the round.
Well. There's a bit of a lull in the action here and the crowd are starting to get restless.
The referee decides to stand the fighters back up.
Rage misses with a wild combination.
Higham jabs away that one connects to the head of his opponent.
Higham throws a low kick, looking for Rage's leg but Rage calmly moves out of range.
Higham lands a lovely overhand right.
Higham displays good takedown defense there as he swats away a double leg from Rage.
Keith Higham has stuffed three takedown attempts in the round now. That's going to take a lot out of Randy Rage.
Rage throws a right and a left that both miss.
Rage is breathing heavily.
Higham lands with a kick to the ribs.
Rage lands with a right hand.
Nice shot lands for Higham.
Rage swings away but doesn't land with a series of punches.
Higham shoots in and bounces Rage off the ropes to secure the takedown into guard.
Higham thinks about going for a leg but decides against it, in order to maintain the position.
Higham is trying to work a guillotine from the top, or something like that? Don't know how he thinks he's going to get a finish from there.
And that�s the end of the round � the fighters go back to their corners.
Keith Higham dominated that second round.
The fighters get back to their feet, the hooter sounds and we're back to the action! Let's hear some noise people - this is the final round!

Higham gets a takedown into half guard.
Both fighters really going for it on the ground here!
Higham looking for a kimura but he'll have to free his other leg if he wants to finish that. Perhaps he's just using it as a distraction technique.
Keith Higham overall seems to be getting the better of the ground position in the fight so far.
Higham is looking for an arm triangle, whilst trying to pass to side control. Rage doesn't seem that keen to cooperate though. No luck this time Higham.
Rage is trying to get back to full guard.
That's one minute gone in the round.
Rage looking for submissions from an awkward position here.
Rage gets back to full guard.
Higham will need to keep those long limbs tucked in whilst he's on the ground, to prevent any submissions.
Higham looking to pass the guard.
Rage looking for a guillotine here but Higham defends easily.
Rage takes a big intake of breath there - he's definitely tired.
Higham thinks about going for a leg but decides against it, in order to maintain the position.
Higham is holding a leg here, probably looking for an ankle lock - he drops back and goes for it! Rage is in trouble! Is it all over??? No! Rage has escaped and now he's on top!
That's two minutes gone in the round.
The crowd are getting on the fighters' backs, as the pace has dropped off in the last minute or so.
Rage looking to sit in guard and control but Higham gets the butterfly guard and sweeps. He's now in the guard on the top.
Higham postures up as if he's going to throw some strikes but drops back for an ankle! Rage is in big trouble! He looks ready to tap! But no, he's escaped and dives on top of Higham, into his guard.
Rage advances position into side control!
The fighters are trapped in the ropes so we're going to have a reposition here. The ref calls for a break and repositions the fighters in the center of the ring.
Rage trying to control the action but Higham is working from the bottom.
That's three minutes gone in the round.
Higham is sneaking out the side here. He's bucked Rage off and has taken his back!
Rage can't escape the position.
Higham is working really hard to secure the rear naked choke. Rage defends successfully for a significant amount of time. Both fighters are looking very determined.
Rage manages to reverse the position and now he's in Higham's guard. Nice work there by Rage.
Higham working for submissions but it's allowed Rage to get to half guard.
Rage passes to side control.
Randy Rage has stepped it up - he knows he needs a finish here!
Keith Higham is fighting for a decision here - he's started to take the cautious approach.
That's four minutes gone in the round.
Rage misses with a strike but at least he's keeping busy, looking to cause some damage - that will still help him when it comes to the judges scorecards.
Higham regains half guard there - taking advantage of Rage's attempt to lay and pray for a moment.
Rage missing with some ground and pound from the half guard.
The crowd thankful this round is nearly over.
Higham is not content to let Rage control the position.
Rage is pressing down on Higham's thigh, looking to free his foot. Higham is holding on for now.
And that's the end of the fight!
I would just about give that final round to Randy Rage.
Well Higham has outscored his opponent in every aspect of the fight today. Only a scarily incompetent judge or two will keep him from a well deserved win... Over to the ring announcer for the scorecards.
Ladies and gentlemen, after 3 rounds of action, we go to the scorecards for a decision.
Judge Andi Peters scores the fight 29:28
Judge Gordon Ramsey scores the fight 29:28
Judge Frank Skinner scores the fight 30:28
In favor of your winner, by unanimous decision... Keith Higham!
|
|
|
|
|
|
|
|
|
|
|
|
|
|
|
|
|
|
|
|
|
|
|
| S |
C
A |
G |
S |
C
B |
G |
|
S |
C |
G |
|
energy
A | B |
|
hype
A | B |
|
pop
A | B |
|
mgr
A | B |
|
FIGHT
RATING
53% |
|
|
|
|
|
|

