|
|
PBP Commentary |
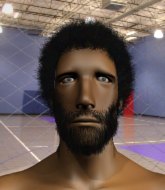
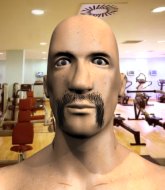
Coming up we have a welterweight MMA rules bout between Bill Baringer (ranked 0 p4p, 0 weight class) and Justin Keen (ranked 0 p4p, 0 weight class). Keen is bouncing up and down as he enters the arena, backed by Round One. Man, I cannot wait for this one!
 |
|
 |
| 183 cm
25
183 lbs
7 - 10 - 1 |
|
190 cm
23
175 lbs
9 - 5 - 0 |
BJJ Purple Belt
Solid boxing
Experienced |
|
Good takedowns
Decent boxing
Determined |
|
| |
|
Ladies and gentlemen. This fight is 3 rounds, in the welterweight division.
Introducing the fighter to my left, fighting out of the red corner.
With a record of
7 - 10 - 1, fighting out of Los Angeles, Bill Baringer!
And introducing the fighter to my right, fighting out of the blue corner.
With a record of
9 - 5 - 0, fighting out of Los Angeles, Justin Keen!
The judges for this bout are Timothy Bukovac, and Frank Antenori.

The bell rings for round one and we are underway!
Keen lands a glancing blow to the side of Baringer's head.

It looks like Bill Baringer has been cut.
Baringer slaps away a takedown attempt from Keen, before circling back to the center of the mat.
Keen takes a head kick and keeps coming.
It looks like Justin Keen has been cut.
Keen walks into a straight right hand from Baringer.
Keen closes this distance looking for a takedown but Baringer circles away.
Justin Keen seems to be the more aggressive standup fighter in this bout.
Keen checks a low kick from Baringer.
Keen fails with a rather predictable takedown attempt.
Bill Baringer has stuffed three takedown attempts in the round now. That's going to take a lot out of Justin Keen.
A combination from Baringer does no damage.
Keen dives in and grabs Baringer's left leg, looking for a takedown. Baringer pushes down on Keen's head and hops out.
Keen lands a jab. Then a cross. Then finally a nice hook to the body. Good work there by Keen.
This is a great period of action - very entertaining stuff!
Baringer tries a head kick but it misses.
Jab, jab by Baringer - just one landing.
Baringer misses with an attempted mid kick.
Keen blocks a head kick by Baringer.
Baringer moves away from the strike by Keen.

That's one minute gone in the round.
Keen fails in his attempt to clinch.
Keen swings wildly with a couple of big hooks
and Baringer counters with a leg kick that reverborates around the arena.
Keen tries to check the leg kick but that clearly hurt him.
Keen throws a series of strikes that have Baringer backpedaling.

Baringer gets caught on his heels momentarily as he allows Keen to score an easy takedown into full guard.
Keen trying to control the position from guard on top but Baringer is wriggling around, looking for whatever he can.
Baringer is trying to control the position but Keen postures up.
Baringer is adopting a defensive guard.
Keen wants to pass the guard but Baringer is keeping the position.

That's two minutes gone in the round.
Baringer is working from a closed guard but he's struggling to control his opponent.

Baringer throwing his legs up looking for a triangle.
Keen missing there with some ground and pound from the guard.
Keen pressing down on his opponent's thigh, looking to pass guard. Baringer is keeping the position for now.

Well, the referee has seen enough. Neither fighter is active enough on the ground so he's stood them back up.
Baringer throws a jab, cross combination which is slipped
and Keen counters with a series of strikes. Baringer will be more careful next time no doubt.
A left and a right from Keen both land. Nice combination.

That's three minutes gone in the round.
Keen gets his takedown attempt stuffed easily
and Baringer counters with a head kick. That will keep Keen thinking before he tries any more sloppy attacks!
Baringer is breathing heavily.
Keen uses good footwork to avoid the strikes from Baringer.
Baringer tries a switch kick but it misses it's target.
Keen tries to grapple but his opponent circles
and Baringer counters with a big head kick but Keen shrugs it off.
Keen shoots in but doesn't get the takedown
and Baringer connects with a straight left hand counter down the middle.
Baringer throws a head kick that misses and slips in the process. He scrambles back to his feet and the fighters circle.
Baringer moves away from the strike by Keen.
Keen misses with a looping left.
Baringer takes a body punch but keeps moving.

That's four minutes gone in the round.
Left hook, right uppercut from Baringer.
Keen shoots and misses
and Baringer counters with a nice leg kick.
Nice body punch from Keen.
Baringer looks shocked there as he takes a right hand to the temple.
Keen shoots in but no luck this time.
Keen scores with a decent looking hook.
Keen throws a good cross that connects.
Keen throws a jab but it's blocked by Baringer.
Baringer takes a swing at Keen's ribcage but misses.
Keen throws a shot from downtown. Baringer moves away and avoids it.
As the round comes to an end the crowd are showing their appreciation for a great round of action.
Keen throws a lazy right hand but Baringer sees it coming a mile off and sidesteps it easily.
Baringer misses with a head kick.
Keen throws a hook to the body but it doesn't connect.
And that�s the end of the round � the fighters go back to their corners.
Justin Keen dominated that round.
Both fighters have cut men working on them during the interval.
The referee calls time. The cornermen exit stage left and we're back to business.

Keen cracks Baringer with a hook to the jaw. Both fighters smile at eachother and high-five before getting back down to business.
Keen lands with a cross to side of his opponent's head.

Baringer is rocked!
Bill Baringer's cut is getting worse.

Keen moves into the clinch successfully.
Baringer tries a knee to the head but Keen blocks it.
Baringer tries to pull guard but Keen holds him up against the cage and eventually Baringer drops back down to his feet.
Both guys are working to get underhooks.
Baringer has hold of a leg and is looking for a trip takedown. Keen avoids it nicely though and we remain in the clinch.
Baringer tries for a takedown. No joy.
That's three failed takedown attempts in the round for Bill Baringer. That's going to take a lot out of him.
Baringer misses with an elbow over the top.
Both fighters are absolutely exhausted here.
Baringer landing knees to the body.
Baringer manages to pull guard. Let's see whether he can land a sub off his back.
Keen throwing shots from guard but he's hitting more mat than opponent.
That's one minute gone in the round.
Keen in full guard, throwing the ground and pound. No damage this time.
Keen trying to land body shots but he keeps hitting the mat.
Baringer working for a triangle but Keen defends it easily.
Keen trying to control but Baringer is working from the bottom.
Keen is in close to Baringer's body, working some short punches and elbows.
Keen working from the guard for now, landing some ground and pound.
Keen missing there with some ground and pound from the guard.
Keen has the superior BJJ but he's also working some ground strikes into his gameplan.
That's two minutes gone in the round.
Well. There's a bit of a lull in the action here and the crowd are starting to get restless.
Keen is working Baringer over from the guard. He should look to pass the guard and do a little more damage with these strikes.
Keen with a flurry of punches that miss.
Keen stands up and looks to throw the legs aside to pass to side control. Baringer swivels though and keeps the full guard.
Keen postures up and lands some nice ground and pound.
Baringer is avoiding any damage by keeping wrist control.
Baringer has an active guard here but Keen has managed to pass into half guard.
Baringer is looking to improve his position.
That's three minutes gone in the round.
Baringer keeping his head moving to avoid the ground and pound.
Baringer avoiding damage under a succession of punches from Keen.
Keen is looking for a kimura. It's going to be difficult to finish that from half guard though and Baringer defends it well.
Keen missing with some ground and pound from the half guard.
Baringer has hold of Keen's hands but Keen slips his arm to the side and lands an elbow.
Keen thumps the canvas. Not on purpose obviously - he just missed Baringer's head.
Keen wants to lay and pray for a moment but Baringer keeps working.
That's four minutes gone in the round.
The crowd are hurling abuse towards the fighters... You can hardly blame them though because there isn't a lot going on in the fight.
The referee decides to stand the fighters back up.
Baringer throws a head kick that Keen semi-blocks.
Keen misses with a looping right.
Keen takes one on the button.
Keen looks for a takedown. He's got it. We're now in half guard.
Keen is just content to waste time from the top position. Baringer takes advantage of the situation and regains full guard.
Baringer is throwing his legs up, looking for submissions. Keen is aware though and is defending well.
Keen works over Baringer with some ground and pound from guard.
Baringer is trying to keep Keen in close.
Keen postures up and lands some nice ground and pound.
And that�s the end of the round � the fighters go back to their corners.
Justin Keen showed his class in that round. I'd imagine he'll take it on all the scorecards.
Both fighters have cut men working on them during the interval.
The corners get their ten second warning. Both fighters stand from their stools and stare eachother down, ready to get back to the action. This is the final round!

The crowd cheers as Keen lands an impressive looking overhand right. Baringer doesn't seem phased though.
Keen bobs and weaves and throws out a fast jab that snaps Baringer's head backwards.
Keen looks to score with a jab to the body but Baringer is just out of range.
Excellent takedown into side control there by Keen.
Keen lands a knee to the body and a forearm to the face.
The strikes coming from Keen are missing the target in this wave of attacks.
Baringer struggling a bit here.
Keen throwing strikes but missing, from side control.
Keen in side control, trying to ground and pound but not landing this time.
Both fighters are breathing heavily.
Baringer gives up the full mount - oops, sloppy defensive grappling there!
That's one minute gone in the round.
Baringer tries to lock up and control but Keen gives him a forearm to the face and pushes him away.
The ref warns both fighters not to hold the cage as they work up against the meshing.
Baringer in a bad spot here, taking shots to the head.
Keen putting on the heat here with some good ground and pound!
Oh Baringer is still in real trouble! Will he be able to recover?!!
Keen has his opponent pinned against the cage, landing some nasty ground and pound that is really making a bit of a mess out of Baringer's face.
Keen working for a guillotine from mount but Baringer is in no mood to give up.
Keen prevents Baringer from getting the reversal.
Keen looking to ground and pound his opponent to a finish here.
That's two minutes gone in the round.
Keen looking to ground and pound his opponent to a finish here.
Keen postures up and throws a couple of big shots that have Baringer in real trouble here! The ref calls for Baringer to improve his position which he doesn't do, so the referee has no choice but to end the fight due to the strikes!
Ladies and gentlemen, after 2:27 of round 3, we have a winner by way of TKO (Strikes). Justin Keen!
|
|
|
|
|
|
|
|
|
|
|
|
|
|
|
|
|
|
|
|
|
|
|
| S |
C
A |
G |
S |
C
B |
G |
|
S |
C |
G |
|
energy
A | B |
|
hype
A | B |
|
pop
A | B |
|
mgr
A | B |
|
FIGHT
RATING
100% |
|
|
|
|
|
|

