|
|
PBP Commentary |
Coming up we have a middleweight MMA rules bout between Kaz Shiroma (ranked 0 p4p, 0 weight class) and Big Hurt (ranked 0 p4p, 0 weight class). Shiroma comes to the cage accompanied by Enter The Ninja. Kaz Shiroma is staring across the cage at his opponent, tweaking his nipples... Tweaking his own nipples that is.
 |
|
 |
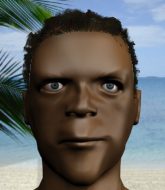
| 185 cm
27
195 lbs
13 - 2 - 0 |
|
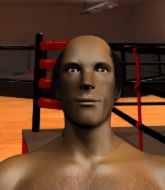
176 cm
19
197 lbs
4 - 1 - 0 |
BJJ Purple Belt
Solid boxing
Big right hand |
|
BJJ White Belt
Counter striker
Determined |
|
| |
|
Ladies and gentlemen. This fight is 5 rounds, for the middleweight championship of the world!
Introducing the champion to my left, fighting out of the red corner.
With a record of
13 - 2 - 0, fighting out of Montreal, Kaz Shiroma!
And introducing the challenger to my right, fighting out of the blue corner.
With a record of
4 - 1 - 0, fighting out of St Petersburg, Big Hurt!
The judges for this bout are Steve Smith, William Peck and Elvis Blanc.

The bell rings for round one and we are underway!
Hurt ducks under a wild hook from Shiroma.
Hurt shoots in looking for a takedown. Shiroma tries to sprawl out of it but Hurt keeps driving through. The fighters are pinned against the cage. Shiroma manages to get underhooks and after a bit of a struggle, circles away and we're back to standing.

Hurt gets the takedown into side control.
The ref warns both fighters not to hold the cage as they work up against the meshing.
Hurt tries to advance to mount but can't.
Shiroma sneaks back into half guard.
Shiroma moves his hips nicely and gets into full guard.
Hurt won't allow Shiroma to get back to his feet.
Hurt wants to control from the top but Shiroma keeps moving.
Shiroma is pulling down on Hurt's head to control his posture.
Hurt stands up and looks to throw the legs aside to pass to side control. Shiroma swivels though and keeps the full guard.

That's one minute gone in the round.
Hurt being controlled here momentarily.
Hurt throws a strike but Shiroma rolls with it and manages to sweep. Now he's in guard on top.
Shiroma tries to free his leg and advance position but Hurt is retaining full guard.

That's two minutes gone in the round.
My god... these two guys really need to pick up the pace or everyone will leave to go get a beer.
Shiroma sitting in guard here, content to control.

Hurt looking for submissions from the bottom but instead Shiroma passes into side control.
Hurt can't do much from the bottom here.

Shiroma stands up.

That's three minutes gone in the round.
The fighters are starting to get sweaty, which will make takedowns a bit more tricky.
Shiroma misses the shot to the body.
Kaz Shiroma is looking to keep the fight on the feet at all costs.
Shiroma pulls out of a head kick attempt.
Shiroma misses the shot to the body.
Hurt takes one on the chin but seems OK.
Shiroma stuffs a takedown. It's all about dictating where the fight takes place and Shiroma wants it to stay on the feet.
Hurt fails with a takedown attempt.
Kaz Shiroma has stuffed three takedown attempts in the round now. That's going to take a lot out of Big Hurt.
Shiroma scores with a jab to the jaw.
Hurt shoots in looking for a double leg takedown. Shiroma defends it nicely.
Hurt fails with an attempt to clinch.

That's four minutes gone in the round.
Shiroma misses with a two punch combination.
Shiroma lunges in with swinging rights and lefts but Hurt circles away quickly and effectively.
Nice uppercut there from Shiroma.
Hurt fails with a takedown attempt from distance.
Shiroma just misses with a punch to the body.
Shiroma swings away but doesn't land with a series of punches.
Shiroma is breathing heavily.
Shiroma missing with a left hand there. Hurt was out of range so wasted energy throwing that one.
A big left from Shiroma misses.
Shiroma throws a leg kick but he was too far away and it doesn't land.
Shiroma comes forward and lands a shot to the body, then darts back out of range.
Shiroma misses with a series of wild punches.
And that�s the end of the round � the fighters go back to their corners.
Kaz Shiroma dominated that round.
The corners get their ten second warning. Both fighters stand from their stools and stare eachother down, ready to get back to the action.

A really sloppy takedown attempt there from Hurt.
A punch combination from Shiroma misses.
Hurt scores with a takedown into Shiroma's guard.
Hurt drops back, looking for a kneebar! Shiroma looks panicked! The fighters roll across the mat, one looking to finish, one looking to escape. Shiroma looks to have wriggled free... Yes, he's got his leg free and he's dived into side control! Good work there from Shiroma!
Shiroma thinks about going for a far side armbar but bails out and retains the dominant position instead.
Both fighters are absolutely exhausted here.
Hurt tries to work a leg under to get back to half guard but Shiroma wriggles his own leg back out and remains in side control.
That's one minute gone in the round.
Hurt wants to control but Shiroma postures up.
Shiroma decides to stand back up.
Shiroma throws a hard body shot but it just misses.
Hurt fails with a takedown attempt from distance.
Hurt fails miserably with a takedown attempt.
Kaz Shiroma has stuffed three takedown attempts in the round now. That's going to take a lot out of Big Hurt.
Shiroma lands with a nice body punch.
Shiroma scores with a nice strike.
Shiroma connects with the punch.
Hurt fails with a takedown attempt.
Shiroma swinging wildly here.
That's two minutes gone in the round.
Shiroma throws out a loose jab but Hurt uses good head movement to avoid it.
Shiroma misses with a straight right.
Hurt shoots in with a takedown attempt and he has Shiroma pinned against the cage. Shiroma gets the underhooks and manages to circle away.
A punch combination from Shiroma misses.
Shiroma throws a mid kick that lands with a slap.
Shiroma throws a hook to the body but it doesn't connect.
That's three minutes gone in the round.
Hurt tries to clinch but Shiroma is having none of it.
Shiroma tries to bum rush Hurt with a series of wild strikes but Hurt uses good footwork to avoid the assault.
The fighters circling - Hurt throws out the jab but it was never going to land.
Hurt walks into a straight right hand from Shiroma.
Hurt is trying hard to land a takedown here. Shiroma sprawls well and keeps this one on the feet.
Shiroma misses with the combination.
Shiroma keeps the fight on the outside.
Hurt shoots in but Shiroma avoids the takedown attempt easily.
Hurt bobs and weaves into range and then changes levels and scores with a nice takedown into side control.
Shiroma gets back to half guard.
The fighters are pressed up against the cage, both looking to find a bit of space to work.
That's four minutes gone in the round.
Shiroma is trying to stand back up but Hurt is controlling him
Shiroma moves into full guard.
Hurt postures up as if he's going to throw some strikes but drops back for an ankle! Shiroma is in big trouble! He looks ready to tap! But no, he's escaped and dives on top of Hurt, into his guard.
Hurt looking to control.
We get told so often about how wrestlers don't like to be on their backs. Let's see if Hurt can do anything to dispel that myth.
Hurt is working an open guard so Shiroma takes the opportunity to get back to his feet.
Hurt looks for a takedown here. Will he get it? Shiroma is fending him off so far but Hurt persists. Nope, Shiroma circles away and we're back to standing.
And that�s the end of the round � the fighters go back to their corners.
Kaz Shiroma dominated that second round.
The corners get their ten second warning. Both fighters stand from their stools and stare eachother down, ready to get back to the action.

Hurt gets cracked there but stands up to it.
Shiroma misses the jab.
Hurt throws an uppercut from half a mile away. Shiroma sees it coming and avoids it easily.
A left lands for Shiroma.
Kaz Shiroma seems to be the more aggressive standup fighter in this bout.
Shiroma goes to the watering hole and comes back with a big thumbs up from the judges as he scores a three punch combo.
Shiroma throws a wild combination but nothing lands.
Hurt fails with a rather predictable takedown attempt.
Kaz Shiroma is looking to throw some combinations by the looks of things.
Hurt uses decent footwork to sidestep a right hand from Shiroma.
Shiroma uses good footwork to get in and out, landing a nice hook.
Both fighters are breathing heavily.
Hurt steps to the side to avoid the strikes from Shiroma.
Hurt looks for a takedown but Shiroma sprawls well.
That's one minute gone in the round.
Hurt shoots in for a takedown but doesn't get it.
Kaz Shiroma has stuffed three takedown attempts in the round now. That's going to take a lot out of Big Hurt.
Shiroma tries a switch kick but it misses it's target.
Hurt has a takedown stuffed.
Shiroma scores with a sloppy right hand. Hurt should have avoided that one.
Shiroma swings wildly with a right hand that was never going to find it's target.
Hurt misses with a head kick.
The fighters circling - Shiroma throws out the jab but it was never going to land.
Hurt shoots in for a takedown but Shiroma shows good takedown defense there and keeps this one on the feet.
Hurt shoots for a double leg takedown but Shiroma sprawls well. He's pushed Hurt's face into the mat and manages to get back to his feet relatively easily.
Shiroma misses with a jab and misses with a cross straight after too.
That's two minutes gone in the round.
The crowd are showing their displeasure at the lack of action as loud boos ring out around the arena.
Shiroma lands a really nice looking cross but Hurt seems unphased.
Shiroma throws a one two combo.
A swing and a miss from Shiroma.
Hurt is trying hard to land a takedown here. Shiroma sprawls well and keeps this one on the feet.
Shiroma throws out a powerful jab.
Excellent takedown into side control there by Hurt.
Hurt wants to work for a kimura but he's foiled early by Shiroma, who protects the arm well.
Hurt sitting in side control, looking to soften his opponent up with elbows and hammerfists but Shiroma is avoiding damage well and looking to escape the position.
That's three minutes gone in the round.
Shiroma sneaks a leg under to get back to half guard.
Shiroma manages to escape and get back to his feet!
A punch combination from Shiroma misses.
A swing and a miss from Shiroma.
Hurt shoots in but Shiroma avoids the takedown attempt easily.
Hurt dodges the punch combination from Shiroma.
Shiroma throws a hard body shot but it just misses.
Hurt shoots in for a takedown but Shiroma shows good takedown defense.
A punch combination from Shiroma misses.
That's four minutes gone in the round.
Shiroma lands with a straight right. Hurt didn't see that one coming.
Shiroma swinging wildly here.
Hurt fails with a takedown attempt.
Shiroma misses with a hook. Hurt ducked under it nicely.
Hurt is trying hard to land a takedown here. Shiroma sprawls well and keeps this one on the feet.
Hurt moves in looking to clinch but Shiroma pushes him off.
Shiroma lands a vicious shot with the stealth of a sniper and the strength of a viper. Are vipers that strong? I can think of lots of things that are stronger than a viper - not many rhyme with sniper though.
Shiroma misses with a straight left.
Shiroma blocks a head kick by Hurt.
Hurt tries to close the distance and clinch up against the cage but Shiroma paws at him with a jab and circles away.
And that�s the end of the round � the fighters go back to their corners.
Kaz Shiroma clearly takes that round.
The corners get their ten second warning. Both fighters stand from their stools and stare eachother down, ready to get back to the action.

Shiroma lands a jab. Then a cross. Then finally a nice hook to the body. Good work there by Shiroma.
Hurt on the wrong end of a vicious looking body shot.
Shiroma fakes with the hands and throws a leg kick but Hurt is out of range.
Hurt dodges the punch combination from Shiroma.
Shiroma keeps the fight on the outside.
Hurt closes the distance, clinches up and gets a nice trip takedown into side control. Very smooth.
Hurt swings around for an armbar but Shiroma sees it coming a mile off and turns beautifully into Hurt's guard.
Shiroma pushing down on Hurt's thigh, trying to pass to half guard. He's managed it... Nice work.
Hurt wants to improve his position but Shiroma is controlling well.
It's got to the stage where if one of these guys blows hard enough, the other might fall over.
Shiroma stands up out of the half guard.
That's one minute gone in the round.
Hurt is trying hard to land a takedown here. Shiroma sprawls well and keeps this one on the feet.
Shiroma lands a glancing blow to the side of Hurt's head.
Shiroma is using his height advantage well here, landing a good percentage of his punches.
Hurt moves forwards but Shiroma connects with a nice, crisp jab.
Hurt tries to close the distance and clinch up against the cage but Shiroma paws at him with a jab and circles away.
Hurt shoots in but no luck this time.
Shiroma throws a combination but comes up with nothing but fresh air.
Shiroma misses with a head kick.
Hurt tries to shoot in for a takedown. He's got hold of a leg but Shiroma swivels and escapes.
Kaz Shiroma has stuffed three takedown attempts in the round now. That's going to take a lot out of Big Hurt.
Shiroma fakes high and swings low for a body shot but Hurt manages to avoid it.
Hurt changes levels and looks for a double leg takedown. Shiroma tries to avoid it but Hurt manages to keep hold of a leg and drag Shiroma to the ground. Shiroma escapes though and pops straight back up to his feet.
Shiroma misses with a two punch combination.
That's two minutes gone in the round.
A lull in the action here being met with boos from the crowd.
Shiroma misses with a looping left.
Shiroma throws a nice looking combination but Hurt bobs and weaves to avoid any damage.
Kaz Shiroma is winning the standup battle so far.
Hurt uses decent footwork to sidestep a right hand from Shiroma.
Hurt closes the distance and looks for a trip takedown... aaaand he's got it - Hurt lands in his opponent's guard.
Shiroma pushes Hurt off and scrambles back to his feet.
Shiroma throws a half hearted mid kick.
Hurt tries to land a front kick but Shiroma steps back. That was a bit too telegraphed.
Shiroma works the jab nicely.
That's three minutes gone in the round.
Hurt has a takedown stuffed.
Hurt is trying hard to land a takedown here. Shiroma sprawls well and keeps this one on the feet.
Shiroma misses with a hook.
Hurt with poor footwork there. He got himself in a bit of a tangle, enabling Shiroma to score with a decent uppercut.
Excellent takedown into side control there by Hurt.
Shiroma regains half guard.
Shiroma wants to improve his position but Hurt is controlling well.
Hurt trying to mount his opponent but Shiroma defends it.
That's four minutes gone in the round.
Shiroma is defending against the submission attempts here by Hurt.
Shiroma tries to kick Hurt off but Hurt keeps his base steady and stays in half guard.
Shiroma is looking to control Hurt's leg but it's slowly edging free. Can Shiroma avoid being mounted?
Hurt is stalling here. Shiroma is in no mood to hang around though. He's locked up a kimura from the bottom! Hurt seems to be keeping calm but he's forced to roll out of the hold and Shiroma has ended up in side control on the top. Nice work.
Shiroma tries to stand but Hurt is controlling his head.
And that�s the end of the round � the fighters go back to their corners.
That was a close fourth round but I would say that Kaz Shiroma will probably get the nod.
That's time! Back to the action! The crowd applaud as we get ready to start the final round!

Hurt shoots in for a takedown but Shiroma shows good takedown defense there and keeps this one on the feet.
A punch combination from Shiroma misses.
Hurt tries to close the distance and clinch up against the cage but Shiroma paws at him with a jab and circles away.
Hurt lands with a head kick! That's gotta hurt.
Hurt shoots in but no luck this time.
Hurt has a pretty nasty looking mouse under his right eye.
Shiroma misses with a wild combination.
Shiroma loads up on a big right hand but Hurt slips the punch.
We've had a slow start to the round here - hopefully the action picks up.
Shiroma throws a combination but it was largely blocked by Hurt.
Both of our modern day gladiators look out of it here - an gruelling 5 rounds of action taking it's toll on them, no doubt.
Hurt is looking to clinch but Shiroma is avoiding it.
Shiroma misses with a few strikes there.
That's one minute gone in the round.
Hurt fails to land the takedown.
Kaz Shiroma has stuffed three takedown attempts in the round now. That's going to take a lot out of Big Hurt.
Horrible takedown by Hurt or perhaps it was just good defense by Shiroma which made him look bad.
Shiroma displaying good standup as he scores with a three punch combination.
Shiroma works Hurt's body with a nice hook.
Hurt bobs and weaves and throws out a fast jab that snaps Shiroma's head backwards.
Hurt shoots in and bounces Shiroma off the cage to secure the takedown into guard.
Shiroma has control of Hurt's left arm, preventing Hurt from doing any damage.
That's two minutes gone in the round.
Shiroma is looking to get back to his feet but can't, whilst Hurt is controlling him.
Hurt throws a big right hand that misses.
Shiroma wants to get back to his feet but he's too absorbed in his own little project and Hurt manages to pass to side control.
Shiroma wants to improve his position but Hurt is controlling well.
Hurt decides to return to a standing position.
That's three minutes gone in the round.
Hurt showing good head movement there, avoiding the strikes from Shiroma.
Hurt has a takedown stuffed.
Hurt wants to clinch up but Shiroma keeps it at a distance.
Hurt tries to close the distance and clinch up but Shiroma swats him away and circles back towards the center.
Shiroma lunges in with swinging rights and lefts but Hurt circles away quickly and effectively.
A right-left combo lands from Hurt.
Shiroma throws a two punch combo that lands nicely.
Hurt shoots in for a takedown - he's clinched up with Shiroma but Shiroma pushes him off and we're back to square one.
Shiroma lands a beauty of a right hand that gets the crowd cheering.
That's four minutes gone in the round.
A few boos can be heard. I'm sure they will multiply if the fighters don't pick up the pace.
Shiroma gets caught flat footed, as Hurt shoots in with a quick takedown into guard.
Hurt tries to free his leg and advance position but Shiroma is retaining full guard.
Big Hurt has stepped it up - he knows he needs a finish here!
Shiroma manages to land a sweep and now he's in mount on top!
Hurt slips a leg in and gets back to half guard.
Hurt wants to sweep but Shiroma has passed to side control!
Hurt is trying to get back to half guard.
And that's the end of the fight!
Big Hurt comfortably won the final round on my scorecard.
I think Shiroma has won this one but let's see what the judges have to say. Over to the ring announcer for the scorecards.
Ladies and gentlemen, after 5 rounds of action, we go to the scorecards for a decision.
Judge Steve Smith scores the fight 49:46
Judge William Peck scores the fight 49:46
Judge Elvis Blanc scores the fight 49:46
In favor of your winner, by unanimous decision... Kaz Shiroma!
Kaz Shiroma retains his middleweight title!
|
|
|
|
|
|
|
|
|
|
|
|
|
|
|
|
|
|
|
|
|
|
|
| S |
C
A |
G |
S |
C
B |
G |
|
S |
C |
G |
|
energy
A | B |
|
hype
A | B |
|
pop
A | B |
|
mgr
A | B |
|
FIGHT
RATING
58% |
|
|
|
|
|
|

