|
|
PBP Commentary |
Coming up we have a middleweight MMA rules bout between Ruffin Farley (ranked 0 p4p, 0 weight class) and Birger Gagnum (ranked 0 p4p, 0 weight class). Over to our ring announcer for the fighter introductions!
 |
|
 |
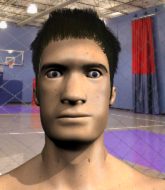
| 170 cm
23
191 lbs
6 - 3 - 0 |
|
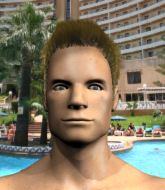
182 cm
22
192 lbs
3 - 3 - 0 |
Abu Dhabi Champ
Counter striker
Experienced |
|
BJJ Purple Belt
Brawler
Very confident |
|
| |
|
Ladies and gentlemen. This fight is 3 rounds, in the middleweight division.
Introducing the fighter to my left, fighting out of the red corner.
With a record of
6 - 3 - 0, fighting out of Amsterdam, Ruffin Farley!
And introducing the fighter to my right, fighting out of the blue corner.
With a record of
3 - 3 - 0, fighting out of Amsterdam, Birger Gagnum!
The judges for this bout are Paul Aken, Radbod Blank and Patrick Alders.

The bell rings for round one and we are underway!
Farley changes levels and looks for a double leg takedown. Gagnum tries to avoid it but Farley manages to keep hold of a leg and drag Gagnum to the ground. Gagnum escapes though and pops straight back up to his feet.
Gagnum tries to close the distance and clinch up against the cage but Farley paws at him with a jab and circles away.
Farley looks for a takedown here. Will he get it? Gagnum is fending him off so far but Farley persists. Nope, Gagnum circles away and we're back to standing.
Gagnum moves in looking to clinch but Farley pushes him off.
Farley tries to score a power double leg takedown but Gagnum sees that one coming and sprawls well. That will dishearten Farley somewhat.
That's three failed takedown attempts in the round for Ruffin Farley. That's going to take a lot out of him.
Gagnum is looking to clinch but Farley is avoiding it.
Gagnum moves in looking to clinch but Farley pushes him off.
Gagnum tries to clinch but Farley moves out of range.
Gagnum tries to close the distance and clinch up but Farley swats him away and circles back towards the center.
We've had a slow start to the round here - hopefully the action picks up.

Gagnum closes the distance and scores a nice trip takedown into half guard. Farley did well to prevent Gagnum getting side control.

Gagnum is working for submissions here but there's nothing on.
Gagnum works his way into full mount!
Farley working to try and regain half guard.

That's one minute gone in the round.
The crowd growing excited in anticipation of a finish here! Right on cue, Gagnum cracks his opponent with a massive right hand that draws loud cheers!
A nice elbow there by Gagnum.
Gagnum is in full mount, looking to secure a guillotine but Farley is surviving well by controlling Gagnum's body position as best he can.
Farley is trying to escape the mount but Gagnum keeps good control and instead manages to take Farley's back.
Gagnum keeps control of the position as Farley tries to break free.
Farley defends a rear naked choke attempt by controlling one of Gagnum's arms.
Gagnum is looking to finish the fight by rear naked choke. Farley knows exactly what he's got planned though, so he's defending well. Maybe a few strikes would soften Farley for a finish.
Farley avoids the strikes from Gagnum.
The ref warns both fighters not to hold the cage as they work up against the meshing.

That's two minutes gone in the round.
Gagnum is hanging on to Farley's back as he tries to escape.
Gagnum has his hand under the chin of his opponent looking for the choke. He's nearly got it! This one could be all over! But no, Farley has freed his hand and lives to survive another� well, another couple of seconds at least!
Farley rolls, trying to escape but Gagnum keeps control of the position.
Gagnum is punishing Farley with strikes - can he finish him?!
Farley is in bad spot here.
Farley showing good submission defense here.
Farley rolls, trying to escape but Gagnum keeps control of the position.
Gagnum patiently working for the choke. Which fighter will keep their nerve here?
Farley rolls and manages to get back to half guard. Nicely done.
Gagnum trying to control the pace.

That's three minutes gone in the round.
Farley looking for submissions off his back.
Farley wants to improve his position but Gagnum is controlling well.
Gagnum trying to mount his opponent but Farley defends it.
Farley is not content to let Gagnum control the position.
The two fighters exchange a few words. I couldn't hear what they were saying but maybe it's more fun if you make it up yourself. Gagnum connects with a nice short shot to Farley's temple.
Gagnum is looking for a kimura here.
Farley looking for submissions from an awkward position here.

That's four minutes gone in the round.
The crowd are getting on the fighters' backs, as the pace has dropped off in the last minute or so.
Farley is looking to sinch up a guillotine here but Gagnum pulls his head out easily.

It looks like we're going to have a standup here. Neither fighter is doing enough on the ground.

Gagnum moves into range and clinches up with Farley.
Gagnum lands with a short head shot on the inside.

Gagnum breaks from the clinch.
Farley circles away from the clinch attempt.
Gagnum lunges in with swinging rights and lefts but Farley circles away quickly and effectively.
Gagnum is looking to take this fight into the clinch.
Gagnum has his takedown stuffed
and Farley decides to take the opportunity to score a takedown. He's landed in Gagnum's guard.
And that�s the end of the round � the fighters go back to their corners.
Birger Gagnum dominated that round.
That's the end of the interval. I'm sure that seemed a lot quicker than a minute for our two fighters! Back to the action.

Gagnum tries to clinch up but Farley circles away and keeps his distance.
Gagnum wants to clinch.
Gagnum fails in his attempt to clinch.
Farley shoots in but doesn't get the takedown
and Gagnum decides to take the opportunity to score a takedown. He's landed in Farley's guard.
The fighters are pressed up against the cage, both looking to find a bit of space to work.
Gagnum sitting in guard, not really doing much.
Gagnum drops back for a leg! It's a sloppy attempt though and Gagnum jumps back into guard quickly, to retain the dominant position.
Gagnum controlling from the guard. I say controlling but really, he's stalling.
Gagnum looking to pass the guard.
That's one minute gone in the round.
Gagnum postures up as if he's going to throw some strikes but drops back for an ankle! Farley is in big trouble! He looks ready to tap! But no, he's escaped and dives on top of Gagnum, into his guard.
Farley drops back, looking for a kneebar! Gagnum looks panicked! The fighters roll across the mat, one looking to finish, one looking to escape. Gagnum looks to have wriggled free... Yes, he's got his leg free and he's dived into side control! Good work there from Gagnum!
Gagnum postures up a little and throws a couple of hammerfists but they don't connect properly.
Gagnum scores with punches from side control.
Farley is looking for a sweep.
That's two minutes gone in the round.
Gagnum working the ground and pound but he's contacting the mat, not the fighter.
Gagnum cracks Farley with a big right hand but Farley just smiles back at him and invites him to have another go.
Gagnum tries to move into full mount but can't pass Farley's legs.
Gagnum trying to control the action but Farley is working from the bottom.
Gagnum tries for an arm triangle. That looks pretty tight to me. Is this one over!?! Possibly, maybe, no Gagnum has let go of the choke. Obviously it wasn't as tight as we thought!
Birger Gagnum has got the better of the ground game so far.
Gagnum is breathing heavily.
Farley is trying to improve his position.
Farley is trying to get back to half guard. He's pushing on Gagnum's leg. He's managed it. Nice work.
Gagnum has freed up his trapped foot and advances to mount.
That's three minutes gone in the round.
Farley is desperately trying to improve his position but Gagnum has a good base and remains in mount.
Gagnum is going oldschool here, as he tries to force Farley to tap using a forearm choke. This isn't 1993 though, so Farley shrugs it off.
The crowd growing excited in anticipation of a finish here! Right on cue, Gagnum cracks his opponent with a massive right hand that draws loud cheers!
Gagnum controlling the position easily from mount.
Gagnum takes Farley's back. Could be looking for a rear naked choke here - either way, Farley is in trouble.
Gagnum is persistently looking for the submission but Farley is defending it well.
Farley showing good submission defense here.
That's four minutes gone in the round.
Farley tries to break free.
Gagnum is working really hard to secure the rear naked choke. Farley defends successfully for a significant amount of time. Both fighters are looking very determined.
Gagnum lands an elbow to the side of the head.
Farley is really stuck here.
Farley is working hard here to advance position.
Gagnum trying to control momentarily.
Farley might be looking to lock onto one of his opponent's long limbs for a submission, whilst we're on the ground.
Farley fending off the submission attempt from Gagnum.
And that�s the end of the round � the fighters go back to their corners.
Birger Gagnum showed his class in that round. I'd imagine he'll take it on all the scorecards.
That's the end of the round. The referee orders the cornermen out of the cage so we can get back down to business. And we move into the final round!

Farley misses with a takedown attempt
and Gagnum counters with a shoot takedown. Farley fights it but they end up in guard.
Gagnum drops back for a leg! It's a sloppy attempt though and Gagnum jumps back into guard quickly, to retain the dominant position.
Gagnum wants to control from the top but Farley keeps moving.
Gagnum avoids a guillotine attempt easily.
Gagnum drops back looking for a heel hook - he quickly realises he's not going to get it but Farley manages to dive on top of him before he can escape and now Gagnum has Farley in his guard.
Farley pressing down on his opponent's thigh, looking to pass guard. Gagnum is keeping the position for now.
Both fighters are breathing heavily.
That's one minute gone in the round.
Gagnum looking for submissions off his back, moving his hips, looking for an opening.
Gagnum has a loose triangle. He'll be looking to tighten that up but Farley can see exactly what he's planning and manages to posture up and free himself.
Farley is looking to work some ground and pound but Gagnum has wrist control.
Farley trying to control but Gagnum is working from the bottom.
Gagnum throws his legs up looking for a submission but Farley uses it to pass to side control.
That's two minutes gone in the round.
Well. There's a bit of a lull in the action here and the crowd are starting to get restless.
Farley has hold of Gagnum's arm. He's looking for a kimura. Gagnum seems comfortable defending it but Farley has shifted his position slighty and is cranking on the arm! Gagnum is real pain and he's forced to tap out! Gagnum is disgusted with himself for not defending it better but Farley couldn't care less - he's delighted!
Ladies and gentlemen, after 2:15 of round 3, we have a winner by way of Submission (Kimura). Ruffin Farley!
|
|
|
|
|
|
|
|
|
|
|
|
|
|
|
|
|
|
|
|
|
|
|
| S |
C
A |
G |
S |
C
B |
G |
|
S |
C |
G |
|
energy
A | B |
|
hype
A | B |
|
pop
A | B |
|
mgr
A | B |
|
FIGHT
RATING
90% |
|
|
|
|
|
|

