|
|
PBP Commentary |
Coming up we have a lightweight MMA rules bout between Minato Hayanusa (ranked 0 p4p, 0 weight class) and Ryan Brookins (ranked 0 p4p, 0 weight class). I'm sure you'll be fascinated to know that I was talking to some pointless Z list celebrity before the fight and he thought that Ryan Brookins was going to win. Let's see if he was right.
 |
|
 |
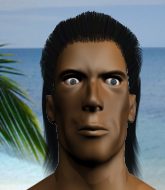
| 173 cm
18
165 lbs
2 - 1 - 0 |
|
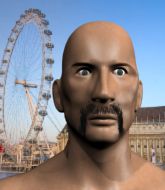
173 cm
18
165 lbs
1 - 1 - 0 |
BJJ Blue Belt
Basic striking
Cuts easily |
|
BJJ White Belt
Decent boxing
Solid chin |
|
| |
|
Ladies and gentlemen. This fight is 3 rounds, in the lightweight division.
Introducing the fighter to my left, fighting out of the red corner.
With a record of
2 - 1 - 0, fighting out of Hilo, Minato Hayanusa!
And introducing the fighter to my right, fighting out of the blue corner.
With a record of
1 - 1 - 0, fighting out of Hilo, Ryan Brookins!
The judges for this bout are , and .

The bell rings for round one and we are underway!

Hayanusa looks for a takedown. He's got it. We're now in half guard.
Hayanusa thows a huge punch but Brookins dodges it nicely.
Brookins wants to improve his position but Hayanusa is controlling well.
Hayanusa is just sitting in half guard, waiting for something to happen.
Hayanusa looks to score some points with some ground and pound.
The ref warns both fighters not to hold the cage as they work up against the meshing.
Brookins is controlling Hayanusa's trapped leg to prevent Hayanusa from advancing to side control.
Hayanusa seems to be taking a bit of a break to think of his next move. He lands a short punch in the meantime.

That's one minute gone in the round.
Hayanusa not doing much here.
Hayanusa wants to control but Brookins is keeping him busy.
Hayanusa slows the pace down in half guard.

Hayanusa wants to work for an arm triangle but Brookins is really keeping half guard well and defending the submission attempt.
Brookins wants to control but Hayanusa is keeping busy.
Hayanusa missing with some ground and pound from the half guard.
Hayanusa keeping composed on the top, looking to control the action.

The referee decides to stand the fighters back up, due to lack of activity on the part of Minato Hayanusa.
Brookins misses with a jab and misses with a cross straight after too.

That's two minutes gone in the round.
The crowd are showing their displeasure at the lack of action as loud boos ring out around the arena.
Brookins looks to score with a combo but nothing lands.
Hayanusa blocks a head kick by Brookins.
Brookins punishes Hayanusa's body with a nice straight punch.
Ryan Brookins is looking to keep the fight on the feet at all costs.
Hayanusa fails with a takedown attempt from distance.
Brookins lands a jab. Then a cross. Then finally a nice hook to the body. Good work there by Brookins.
Brookins lands a jab, followed by a cross and another cross, as Hayanusa backs up against the cage.
Brookins fails to land with the punch combination there - jab, cross, hook, miss, miss, miss.
Minato Hayanusa seems to be the more aggressive standup fighter in this bout.
Hayanusa drops down and drives through with a powerful takedown into guard.
Brookins controls Hayanusa momentarily but Hayanusa frees himself.
Brookins throwing strikes off his back to little effect.
Hayanusa stands up over Brookins, holding his feet. He dives back in and lands a decent shot to the head.
Hayanusa wants to control from the top but Brookins keeps moving.
Hayanusa is breathing heavily.
Hayanusa forces his way into half guard.

That's three minutes gone in the round.
Hayanusa is looking for an arm triangle, whilst trying to pass to side control. Brookins doesn't seem that keen to cooperate though. No luck this time Hayanusa.
Brookins trying to control here.
Hayanusa is controlling the pace.
Brookins is looking to improve his position.

That's four minutes gone in the round.
The crowd are starting to boo a lack of action.
Hayanusa is trying to control the action in half guard but Brookins is working away on the bottom, looking perhaps to get back to full guard.
Hayanusa is trying to work for a kimura. This could be trouble! No, Brookins has managed to free his arm - good work.
The fighters are battling for position here. Brookins manages to regain full guard. Nice work.
Brookins really doesn't want to stay on the ground with Hayanusa. If he can't get it back to his feet, it's only a matter of time before he'll be tapping out.
Brookins is trying to control the position but Hayanusa postures up.
Brookins wants to sweep here but Hayanusa controlling him for the moment.
Hayanusa trying to control but Brookins is working from the bottom.
The referee decides to stand the fighters back up.
Hayanusa tries to move into range but Brookins moves to the side and lands with a nice right hand.
And that�s the end of the round � the fighters go back to their corners.
Minato Hayanusa dominated that round.
The minute break is over - no more time for sponges and pep talks - back to the action!

Hayanusa takes a body punch that cleary hurt but he's trying not to show any weakness.
Hayanusa changes levels and drives through with a really nice takedown into side control. Brookins looks really pissed at himself for not defending that better.
Hayanusa thinks about going for a far side armbar but bails out and retains the dominant position instead.
Hayanusa tries for a kimura. Not really close to a finish though.
Brookins is trying to control Hayanusa's posture but Hayanusa avoids it.
Hayanusa misses with a strike but at least he's keeping busy, looking to cause some damage - that will still help him when it comes to the judges scorecards.
Brookins tries to buck Hayanusa off but Hayanusa is having none of it.
The fighters are pressed up against the cage, both looking to find a bit of space to work.
Both fighters are absolutely exhausted here.
Brookins trying to remain calm as Hayanusa controls from the top position.
Brookins is trying to improve his position.
That's one minute gone in the round.
Hayanusa looking for an arm triangle but it's way too loose to do anything.
Neither fighter is doing enough for the referee's liking and he's decided to stand them back up.
Brookins swinging wildly here.
Brookins fails to land with a series of punches.
Brookins lands an overhand left. A wild punch that just about connected.
Brookins lands a jab. Then a cross. Then finally a nice hook to the body. Good work there by Brookins.
Hayanusa throws a head kick that misses.
Brookins thuds a left hand into Hayanusa's body.
Brookins lands with a good body shot.
Brookins works over Hayanusa's head and body with a nice combination.
Brookins throws a two punch combo that lands nicely.
Hayanusa moves out of range as Brookins throws a body kick.
An inside leg kick from Hayanusa misses.
Brookins moves in looking to clinch but Hayanusa pushes him off.
Brookins misses with a jab and misses with a cross straight after too.
Brookins dips down and scores with a jab to the body.
That's two minutes gone in the round.
Brookins scores to the head and body with a nice combination!
A right-left combo lands from Brookins.
Hayanusa drops his hands and takes a jab to the jaw for his troubles.
Wooooo! Give it up for these two warriors! They are putting on a show!
Brookins swinging wildly here.
Hayanusa takes one on the chin but keeps coming.
Hayanusa is looking to clinch but Brookins is avoiding it.
Brookins lands three nice shots there - that looked like it hurt!
Brookins connects with a lovely right hand, straight down the pipe.
Brookins scores with a three punch combo!
A left and a right from Brookins both land. Nice combination.
A telegraphed takedown attempt from Hayanusa is defended easily by Brookins.
A nice combination there by Brookins.
A lazy left from Brookins finds it's target.
Brookins displaying good standup as he scores with a three punch combination.
A nice combination there by Brookins.
Brookins lets the fists fly and connects with a left straight followed by a right hook.
Hayanusa misses with a double jab
and Brookins counters with a three punch combo that has Hayanusa backing up. Hayanusa nods at Brookins to acknowledge the strikes.

Hayanusa is rocked!
That's three minutes gone in the round.
Brookins digs a good body shot into Hayanusa's ribs.
Brookins looks to score with a combo but nothing lands.
Hayanusa looks like he's developed a pretty tasty lump over his left eye. He'll need to avoid taking much more damage to that.
Brookins throws a head kick that misses.
Brookins checks a leg kick.
Brookins throws a combination. Hayanusa tries to block but a couple of punches get through.

Brookins has managed to clinch.
Hayanusa blocks a knee to the body. He'll have a nicely bruised forearm in the morning.
Brookins has had enough of the clinch but Hayanusa keeps him there for the moment.
Brookins is trying to maintain a safe position but Hayanusa gets an underhook and turns Brookins into the cage.
Hayanusa tries to break free but Brookins pushes him back against the cage.
Brookins is looking to break free of the clinch but Hayanusa has double underhooks.
Hayanusa gets the body lock takedown. After a quick scramble, Brookins regains guard.
Hayanusa trying to control the position from guard on top but Brookins is wriggling around, looking for whatever he can.
Brookins is working an open guard here, looking to improve his position. No doubt that will leave him open to counters but at least he's being more offensive.
That's four minutes gone in the round.
Hayanusa wants to pass the guard but Brookins is keeping the position.
Brookins is looking to stand up but Hayanusa isn't so interested in that idea.
Hayanusa drops back for a leg! It's a sloppy attempt though and Hayanusa jumps back into guard quickly, to retain the dominant position.
Hayanusa wants to control from the top but Brookins keeps moving.
Hayanusa stops Brookins from standing up.
The crowd applaud the fighters efforts here as the round comes to an end.
Neither fighter is doing enough for the referee's liking and he's decided to stand them back up.
Brookins's corner calls for a 1,2 combination and Brookins duly obliges.
Hayanusa fakes an overhand right and shoots for a takedown. Brookins sprawls well initially but Hayanusa persists and gets the takedown into half guard.
Hayanusa seems very keen to just sit and control from half guard but Brookins does not like that idea so much and is remaining active off his back.
Hayanusa is sneakily working for an arm triangle but Brookins sees it coming and defends easily.
And that�s the end of the round � the fighters go back to their corners.
Ryan Brookins showed his class in that round. I'd imagine he'll take it on all the scorecards.
The referee calls time. The cornermen exit stage left and we're back to business. The crowd applaud as we get ready to start the final round!

Brookins ducks low and lands a nice hook to the body of his opponent.
Brookins misses with a double jab.
Minato Hayanusa is looking to throw some combinations by the looks of things.
Brookins looks to score with a combo but nothing lands.
Hayanusa looks for a takedown. He's got it. We're now in half guard.
Hayanusa wants to take a breather but Brookins is having none of it.
Hayanusa looking to pass the half guard. Not this time.
Hayanusa looks over to his corner - he wants some instructions but his corner are not responding.
Brookins is trying to maintain the position but Hayanusa is very close to passing his half guard.
Brookins is refusing to be controlled, as Hayanusa sits in half guard.
Both fighters are breathing heavily.
That's one minute gone in the round.
Hayanusa is pressing down on Brookins's thigh, looking to free his foot. Brookins is holding on for now.
Hayanusa seems very keen to just sit and control from half guard but Brookins does not like that idea so much and is remaining active off his back.
Well, the referee has seen enough. Neither fighter is active enough on the ground so he's stood them back up.
Hayanusa on the wrong end of a vicious looking body shot.
Brookins scores with the left hand. Hayanusa knows he should have avoided that one.
Brookins throws a head kick but Hayanusa moves out of range.
Hayanusa shoots in but Brookins avoids the takedown attempt easily.
Hayanusa ducks right into an uppercut from Brookins.
Brookins throws a nice looking combination but Hayanusa bobs and weaves to avoid any damage.
Brookins closes the distance and lands a one-two.
Brookins lets the fists fly and connects with a left straight followed by a right hook.
Hayanusa showing good head movement there, avoiding the strikes from Brookins.
Brookins stuffs a takedown. It's all about dictating where the fight takes place and Brookins wants it to stay on the feet.
That's two minutes gone in the round.
Brookins scores to the head and body with a nice combination!
Brookins lands three nice shots there - that looked like it hurt!
Brookins moves into range and throws a combination. A nice jab followed by a hook to the body.
Brookins moves into range and throws a combination. A nice jab followed by a hook to the body.
Oh Hayanusa is still all over the place! His legs are completely gone! Will he be able to recover?!!
Brookins changes levels and scores with a jab to the body.
Hayanusa seems to have got his legs back now.
Brookins bobbing and weaving, closes the distance and lands a hook to the side of Hayanusa's head.
Brookins scores with a three punch combo!
Hayanusa tries to clinch but Brookins is having none of it.
Brookins scores with a three punch combo!
Hayanusa avoids the head kick by Brookins.
Brookins lets the fists fly and connects with a left straight followed by a right hook.
The fans in attendance giving it up for the two fighters, who have really let it all hang out in the last minute or so!
Good exchange - Brookins coming out on top.
Brookins throws a series of strikes that have Hayanusa backpedaling.
Brookins throws a good cross that connects.
Brookins misses with a two punch combination.
Ryan Brookins seems to be getting the better of the standup.
Hayanusa shoots for a double leg takedown but Brookins sprawls well. He's pushed Hayanusa's face into the mat and manages to get back to his feet relatively easily.
That's three failed takedown attempts in the round for Minato Hayanusa. That's going to take a lot out of him.
Brookins misses with a two punch combination.
Left hook, right uppercut from Brookins.
A right-left combo lands from Brookins.
That's three minutes gone in the round.
Hayanusa ducks down and throws a hook to the body but Brookins moves away.
Brookins throws a right and a left that both miss.
Brookins slaps away a takedown attempt from Hayanusa, before circling back to the center of the mat.
Brookins tries to clinch there but Hayanusa circles away.
A left and a right from Brookins both land. Nice combination.
Jab, cross, leg kick. Nice combination by Brookins!
Brookins misses with a wild combination.
Brookins avoids a low kick by using good footwork.
Hayanusa looks for a takedown. He's got it. We're now in half guard.
Hayanusa is keen to just control but Brookins is a slippery customer.
Hayanusa missing with the ground and pound from half guard.
Brookins is looking to improve his position.
Hayanusa missing with some ground and pound from the half guard.
That's four minutes gone in the round.
Brookins looks like he's trying to stand up.
Hayanusa content to control rather than advance.
Brookins trying to hold on to Hayanusa's head to control him but Hayanusa postures up.
Hayanusa sitting and controlling from the half guard.
Well, the referee has seen enough. Neither fighter is active enough on the ground so he's stood them back up.
Brookins tries to clinch but Hayanusa moves out of range.
Brookins throws a sloppy head kick and Hayanusa moves out of range easily.
And that's the end of the fight!
Ryan Brookins comfortably won the final round on my scorecard.
I think Brookins has won this one but let's see whether the judges agree with me. Over to the ring announcer for the scorecards.
Ladies and gentlemen, after 3 rounds of action, we go to the scorecards for a decision.
Judge Andi Peters scores the fight 28:29
Judge Gordon Ramsey scores the fight 28:29
Judge Frank Skinner scores the fight 28:29
In favor of your winner, by unanimous decision... Ryan Brookins!
|
|
|
|
|
|
|
|
|
|
|
|
|
|
|
|
|
|
|
|
|
|
|
| S |
C
A |
G |
S |
C
B |
G |
|
S |
C |
G |
|
energy
A | B |
|
hype
A | B |
|
pop
A | B |
|
mgr
A | B |
|
FIGHT
RATING
80% |
|
|
|
|
|
|

