|
|
PBP Commentary |
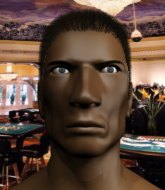
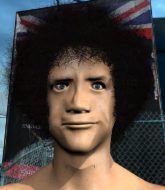
Coming up we have a light heavyweight MMA rules bout between Mark Shaun (ranked 0 p4p, 0 weight class) and Daniel Pauling (ranked 0 p4p, 0 weight class). Shaun's ring entrance music is that housewives' favourite, The Soviettes - "#1 Is Number Two". Daniel Pauling looks lathargic as he enters the arena. Wake up son, you're about to have a fight!
 |
|
 |
| 190 cm
19
212 lbs
0 - 1 - 0 |
|
190 cm
19
191 lbs
1 - 1 - 0 |
BJJ Blue Belt
Brawler
Good chin |
|
BJJ Blue Belt
Basic striking
Granite chin |
|
| |
|
Ladies and gentlemen. This fight is 3 rounds, in the light heavyweight division.
Introducing the fighter to my left, fighting out of the red corner.
With a record of
0 - 1 - 0, fighting out of Sydney, Mark Shaun!
And introducing the fighter to my right, fighting out of the blue corner.
With a record of
1 - 1 - 0, fighting out of Sydney, Daniel Pauling!
The judges for this bout are Damien Edna, Hugh Johnson and Skip Squint.

The bell rings for round one and we are underway!

Excellent takedown into side control there by Shaun.
Shaun has knee on belly and moves into mount.
Pauling is wriggling around trying to escape.
Pauling is persisting with the attempt to improve his position.

Shaun looks like he's working for a submission but he's not found anything just yet.
Shaun in mount throwing good strikes here, bouncing his opponent's head off the canvas.
Shaun trying to control but he's not successful this time.
Shaun prevents Pauling from getting the reversal.
Pauling looks gassed!
Shaun with some aggressive grappling here. He's looking for submissions here, rather than waiting for the opportunity to counter.
Pauling bucks up and manages to get a nice reversal! He's in guard on the top - nicely done!
Shaun looking for submissions off his back, moving his hips, looking for an opening.

That's one minute gone in the round.
Shaun avoiding any damage from the ground and pound.
Pauling trying to control the position from guard on top but Shaun is wriggling around, looking for whatever he can.
Shaun controls Pauling momentarily but Pauling frees himself.
Pauling trying to control but Shaun is working from the bottom.
Pauling tries to free his leg and advance position but Shaun is retaining full guard.
Shaun trying to control the position.
Pauling wants to control from the top but Shaun keeps moving.

It looks like we're going to have a standup here. Neither fight is doing enough on the ground.
Shaun looks to score with a jab to the body but Pauling is just out of range.
Pauling moves into range and lands a nice leg kick.
Shaun shoots in for a takedown - he's clinched up with Pauling but Pauling pushes him off and we're back to square one.
Pauling fails to land with the punch combination there - jab, cross, hook, miss, miss, miss.
Pauling looks to score with a combo but nothing lands.
Shaun fails in his attempt to clinch.

That's two minutes gone in the round.
A few boos can be heard. I'm sure they will multiply if the fighters don't pick up the pace.
Shaun throws a sloppy head kick and Pauling moves out of range easily.
Pauling keeps the fight standing with a nice sprawl.
Shaun shoots in with a takedown attempt and he has Pauling pinned against the cage. Pauling gets the underhooks and manages to circle away.
That's three failed takedown attempts in the round for Mark Shaun. That's going to take a lot out of him.
Shaun shoots in for a takedown and gets it.
Shaun trying to control from half guard but Pauling is working away.
Pauling is looking to sinch up a gullotine here but Shaun pulls his head out easily.
Shaun looks over to his corner - he wants some instructions but his corner are not responding.
Pauling looking to work for a kimura from the bottom.
Shaun lands with an elbow from half guard - that looked like it hurt.
Pauling tries to roll over but Shaun keeps him under control.

That's three minutes gone in the round.
Pauling wants to get back to full guard but Shaun has passed into side control.
Shaun tries to control but Pauling wriggling away.
Pauling is looking to get to half guard.
Shaun manages to capitalize on a mistake by Pauling to take his back!
Pauling wants to control his opponent's hands but Shaun gets his hands free.
Pauling tries to escape the position - he's now mounted. Is that better or worse? Hard to tell!
Pauling is working to get back to half guard.
Pauling wants to control but Shaun is having none of it.
Shaun is in full mount, looking to secure a guillotine but Pauling is surviving well by controlling Shaun's body position as best he can.

That's four minutes gone in the round.
A lull in the action here being met with boos from the crowd.
Pauling bucks up and manages to get a nice reversal! He's in guard on the top - nicely done!
Pauling pushes down on Shaun's leg and manages to get into half guard.
Pauling stops Shaun from getting back to his feet.
The fighters are pressed up against the cage, both looking to find a bit of space to work.
Shaun makes his way to full guard. A much better position for Shaun.
Shaun will have to put a bit more behind his punches if he's going to do any damage from this position.
Pauling is looking to advance position but Shaun has hit a scissor sweep - now he's on top in mount!
Shaun looks like he's working for a submission but he's not found anything just yet.
Pauling keeping his composure momentarily, calmly looking to get back to half guard.
The ref warns both fighters not to hold the cage as they work up against the meshing.
Shaun lands with some vicious ground and pound - can Pauling hang on?
And that�s the end of the round � the fighters go back to their corners.
Mark Shaun dominated that round.
OK. That's time! The bell goes and we're back to the action.

Shaun wants to clinch.

Shaun gets in close and instigates a clinch.
Pauling throws a knee to the head but misses.

Pauling breaks from the clinch.
Shaun tries to close the distance and clinch but Pauling swats him to one side with an open hand palm strike and circles away.
Shaun tries to clinch but is not successful on this occasion.
Shaun shoots in for a takedown. "I don't think so" says Pauling as he avoids it easily.
Pauling instigates a clinch.
Shaun scores with a shoulder strike.
Pauling can't find room to land a body shot as Shaun controls the action.
Pauling stops a takedown attempt from Shaun.
Shaun manages to break the clinch.
Shaun tries to close the distance and clinch up against the cage but Pauling paws at him with a jab and circles away.
Pauling throws a series of punches but Shaun moves out of range.
Both fighters are absolutely exhausted here.
Pauling throws a low kick but his opponent is out of range.
Shaun shoots in for a takedown. "I don't think so" says Pauling as he avoids it easily.
That's three failed takedown attempts in the round for Mark Shaun. That's going to take a lot out of him.
Pauling clinches.
Pauling is looking to break free of the clinch but Shaun has double underhooks.
Pauling lands a right uppercut that snaps the head of Shaun backwards.
Pauling breaks from the clinch.
That's one minute gone in the round.
Pauling misses with a takedown attempt - Shaun sprawls well and throws a nice strike on the way out which just misses.
Pauling throws a combination but comes up with nothing but fresh air.
Pauling has managed to clinch.
Pauling wants to break free but Shaun has control.
Pauling breaks the clinch.
Pauling feints and then dives in with a takedown. That was a long way out but the feint bought him enough time to close the distance and complete the takedown. Now we'll play guard for a bit and see who can get the better of that position.
Pauling pushes down on Shaun's leg and manages to get into half guard.
Pauling is working for a submission of some sort.
Shaun is looking to get full guard. It looks like he might be successful but at the last minute Pauling jumps into side control!
Shaun is looking to regain half guard here but Pauling keeps moving and retains side control.
Pauling thinks about going for a far side armbar but bails out and retains the dominant position instead.
Shaun struggling a bit here.
That's two minutes gone in the round.
Pauling tries for a kimura. Not really close to a finish though.
Shaun is looking to regain half guard here but Pauling keeps moving and retains side control.
Shaun is trying to stand back up. He's worked his way up against the cage but Pauling has just dragged him back down to the mat.

Pauling stands up.
Shaun shoots and misses
and Pauling counters with a driving takedown into guard. Nice work there by Pauling.
Pauling wants to control from the top but Shaun keeps moving.
Pauling pressing down on his opponent's thigh, looking to pass guard. Shaun is keeping the position for now.
Pauling wants to control from the top but Shaun keeps moving.
That's three minutes gone in the round.
Pauling looking to pass the guard.
Pauling controls the pace of the fight for a moment.
Pauling trying to control but Shaun is working from the bottom.
Mark Shaun overall seems to be getting the better of the ground position in the fight so far.
The referee has ruled that neither fighter is active enough on the ground and has stood them back up.
Shaun scores with a nice takedown into half guard. Let's see what he's got on the ground.
Pauling gets back to full guard.
Shaun tries to free his leg and advance position but Pauling is retaining full guard.
Shaun lands a couple of decent looking shots.
Shaun has to be careful here, sitting in the guard of a superior BJJ player.
Pauling looking for a sweep. Not yet Pauling, not yet.
Pauling is trying to control the position but Shaun postures up.
Shaun distracts Pauling with his right hand and drops a big elbow with his other arm.
Shaun stopping the sweep attempt from Pauling.
Shaun stands up from guard. Let's bang!
Shaun will have to do better than that with his takedown attempts.
That's four minutes gone in the round.
Shaun has managed to clinch.
Shaun stalling against the cage.
Pauling wants to strike at distance but he can't break free of the clinch.
Pauling breaks the clinch and we return to the middle of the mat.
Shaun moves into the clinch.
Shaun has double underhooks and is working for a body lock takedown. He's got it. The fighters land in half guard but Pauling regains guard immediately.
The fans in attendance giving it up for the two fighters, who have really let it all hang out in the last minute or so!
Shaun trying to control the position from guard on top but Pauling is wriggling around, looking for whatever he can.
Pauling is edging up against the cage. He's using the cage to get back to his feet. Nice work there - the fighters are clinched.
Shaun tries to jump guard but he falls flat on his backside. Pauling smiles and moves away.
A nice leg kick lands there from Pauling.
The crowd applaud the fighters efforts here as the round comes to an end.
Pauling pivots as if he's going to throw a leg kick but stops half way.
Pauling throws a head kick but Shaun moves out of range.
Daniel Pauling seems to be the more aggressive standup fighter in this bout.
Pauling misses the jab.
Shaun walks into a left hand.
Pauling misses with a low kick.
And that�s the end of the round � the fighters go back to their corners.
Daniel Pauling showed his class in that round. I'd imagine he'll take it on all the scorecards.
That's time! Back to the action! This is the final round!

Pauling takes a jab right on the kisser.
No luck for Shaun with that takedown attempt.
Pauling scores with a jab. Shaun acknowledges it with a nod of the head.
Shaun shoots in with a takedown attempt and he has Pauling pinned against the cage. Pauling gets the underhooks and manages to circle away.
Pauling throws a head kick that misses and slips in the process. He scrambles back to his feet and the fighters circle.
Pauling pulls out of a head kick attempt.
Shaun doesn't succeed with the takedown
and Pauling counters with a nice double leg into half guard.
That's three failed takedown attempts in the round for Mark Shaun. That's going to take a lot out of him.
Pauling wants to control but Shaun is keeping him busy.
Pauling is in a good position here but he's just trying to control... And he's not even managing to do that successfully.
Pauling tries to pass the half guard into mount. Shaun knows what he's doing though and prevents the attempt.
Pauling performing his best blanket impression for a moment.
Shaun won't allow Pauling to pass to mount.
Pauling is looking for a kimura but Shaun is holding onto that half guard position, so it's hard for Pauling to get the leverage.
Both fighters are breathing heavily.
That's one minute gone in the round.
Pauling sitting and controlling from the half guard.
Pauling seems to be looking for submissions.
Shaun looking for submissions from an awkward position here.
Pauling wants to free his trapped foot but Shaun is holding on for dear life with his legs.
Shaun wants to control but Pauling is keeping busy and won't allow it.
Shaun looking for submissions off his back.
Pauling seems very keen to just sit and control from half guard but Shaun does not like that idea so much and is remaining active off his back.
Neither fighter is doing enough for the referee's liking and he's decided to stand them back up.
Shaun throws a looping left and ducks down for a takedown. He's got his arms around Pauling's waist but Pauling gets an underhook and avoids the takedown by throwing Shaun off to one side.
That's two minutes gone in the round.
The crowd are getting on the fighters' backs, as the pace has dropped off in the last minute or so.
Pauling closes the distance and gets a double leg, slamming Shaun to the mat! Shaun manages to get full guard.
Shaun looking to control.
Pauling trying to control the position from guard on top but Shaun is wriggling around, looking for whatever he can.
Shaun seems keen to control rather than go for a submission, at least for now.
Pauling looking to pass the guard.
Shaun looking to hit a scissor sweep but Pauling is one step ahead there.
Pauling is holding a leg here, probably looking for an ankle lock - he drops back and goes for it! Shaun is in trouble! Is it all over??? No! Shaun has escaped and now he's on top!
Shaun wants to control from the top but Pauling keeps moving.
Pauling has his foot on Shaun's thigh. He's trying to push off and get in position for a triangle, I think. Shaun works his way back into a safe position though.
Pauling wants to sweep but no luck.
That's three minutes gone in the round.
Pauling has his foot on Shaun's thigh. He's trying to push off and get in position for a triangle, I think. Shaun works his way back into a safe position though.
Shaun decides he's had enough of playing guard and decides to stand. Come on Pauling, up you get!
Pauling throws a head kick but Shaun moves out of range.
Shaun with a poor takedown
and Pauling counters with a left and a right that stings Shaun.
Pauling throws a good cross that connects.
Pauling shoots in for a takedown and gets it.
Shaun is looking for a sweep. Pauling is wise to his cunning plan and keeps the top position.
Shaun is looking to escape.
Pauling wants to work for an arm triangle but Shaun is really keeping half guard well and defending the submission attempt.
Pauling uses his free foot to push down on Shaun's thigh. Eventually he works his other foot free and he's advanced to mount - this is trouble for Shaun.
Pauling working for a submission but Shaun is keeping him at bay.
The step up in weight doesn't seem to be a problem for Pauling. He's performing admirably here against the bigger man.
Pauling looking to control but Shaun is working nicely, looking to advance position himself.
That's four minutes gone in the round.
Shaun is looking to get to half guard.
Pauling working for a guillotine from mount but Shaun is in no mood to give up.
Pauling stands up from the dominant position, so we're back on the feet.
Shaun shoots for a double leg takedown but Pauling sprawls well. He's pushed Shaun's face into the mat and manages to get back to his feet relatively easily.
Pauling pulls out of a head kick attempt.
Pauling connects with a jab.
Shaun looks to clinch
and Pauling counters with a nice low kick that buckles Shaun's knee momentarily.
The fight moves into the clinch position.
Shaun breaks the clinch and we're back to striking at distance.
Shaun looks for a takedown here. Will he get it? Pauling is fending him off so far but Shaun persists. Nope, Pauling circles away and we're back to standing.
Pauling looking to throw a kick but he's pulled out of it.
A head kick by Pauling misses
and Shaun counters with a three punch combo that has Pauling backing up. Pauling nods at Shaun to acknowledge the strikes.
Shaun doesn't succeed with the takedown
and Pauling counters with a straight right hand.
And that's the end of the fight!
Daniel Pauling comfortably won the final round on my scorecard.
Well Pauling has outworked and out performed his opponent in all aspects of the game today. He was simply too good and the decision should be no more than a formality. Over to the ring announcer for the scorecards.
Ladies and gentlemen, after 3 rounds of action, we go to the scorecards for a decision.
Judge Damien Edna scores the fight 28:29
Judge Hugh Johnson scores the fight 28:29
Judge Skip Squint scores the fight 28:29
In favor of your winner, by unanimous decision... Daniel Pauling!
|
|
|
|
|
|
|
|
|
|
|
|
|
|
|
|
|
|
|
|
|
|
|
| S |
C
A |
G |
S |
C
B |
G |
|
S |
C |
G |
|
energy
A | B |
|
hype
A | B |
|
pop
A | B |
|
mgr
A | B |
|
FIGHT
RATING
74% |
|
|
|
|
|
|
