|
|
PBP Commentary |
Coming up we have a super heavyweight MMA rules bout between Gedo Sake (ranked 0 p4p, 0 weight class) and Smaash Destroy (ranked 0 p4p, 0 weight class). Smaash Destroy has the better chin. Will he look to stand and bang today?
 |
|
 |
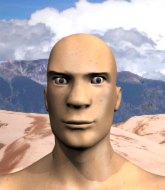
| 220 cm
20
290 lbs
6 - 15 - 0 |
|
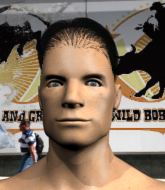
225 cm
24
300 lbs
4 - 4 - 0 |
BJJ Blue Belt
Counter striker
Experienced |
|
BJJ White Belt
Great elbows
Powerful |
|
| |
|
Ladies and gentlemen. This fight is 3 rounds, in the super heavyweight division.
Introducing the fighter to my left, fighting out of the red corner.
With a record of
6 - 15 - 0, fighting out of Rio de Janeiro, Gedo Sake!
And introducing the fighter to my right, fighting out of the blue corner.
With a record of
4 - 4 - 0, fighting out of Rio de Janeiro, Smaash Destroy!
The judges for this bout are Seu Braga, Emerson Jorge and Paulo Santos.

The bell rings for round one and we are underway!
No luck for Sake with that takedown attempt.
Destroy is looking to score with low kicks.
Sake fails with the takedown.
Destroy throws a wild combination but nothing lands.
Destroy shoots in for a takedown. He's persisting with it as Sake sprawls well. Sake wins this battle and keeps the fight standing. Destroy gets slowly back to his feet.
Destroy misses with a takedown
and Sake counters nicely by changing levels and landing a hook to the body.
A head kick by Destroy misses
and Sake counters with a slapping leg kick.

Destroy decides to change it up a bit and drives through with a nice takedown into half guard.
Sake trying to control from the bottom.
Destroy wants to stand but Sake has hold of a leg and an arm, so he's trapped for now.
Destroy looks gassed!
Sake is trying is best to control the position here.
Sake avoiding damage under a succession of punches from Destroy.
Sake is trying to control but can't.
The fighters are pressed up against the cage, both looking to find a bit of space to work.

That's one minute gone in the round.
Destroy stops Sake from getting back to his feet.

Destroy decides he's had enough of the ground and stands up.
Sake is looking to clinch but Destroy is avoiding it.
Sake takes a jab on the nose there. A little bit of blood seems to be coming out. Hopefully that won't affect his breathing.

It looks like Gedo Sake has been cut.
Sake takes a jab on the nose there. A little bit of blood seems to be coming out. Hopefully that won't affect his breathing.
Horrible takedown by Sake or perhaps it was just good defense by Destroy which made him look bad.
That's three failed takedown attempts in the round for Gedo Sake. That's going to take a lot out of him.
Destroy shoots in for a takedown! He's got it and he's managed to land in full mount! That's better than Destroy was expecting from the takedown attempt, I'm sure!
Wooooo! Give it up for these two warriors! They are putting on a show!
Destroy with the ground and pound from mount.
Destroy throwing sloppy strikes, which aren't doing any damage.

Destroy looking to secure an arm triangle but Sake defends it well.

That's two minutes gone in the round.
Sake is in a horrible position here, under a barrage of strikes, he's managing to avoid any damage.
Destroy controlling from mount.
Sake is trying to escape the mount.
Destroy avoids the attempt from Sake to control.
Destroy controlling the pace for now.
Sake is writhing around trying to get back to his feet.
The ref warns both fighters not to hold the cage as they work up against the meshing.

That's three minutes gone in the round.
Destroy throwing shots from mount but they're not landing.
Destroy misses with a head shot.
Destroy working away from the top, dropping strikes.
Destroy is in the full mount, landing strikes.
Sake blocking the ground and pound.
Destroy is working on an americana here. Ooh, that looks pretty nasty! Nope, Sake has managed to escape the submission attempt.
Destroy working away from the top, dropping strikes.
Sake tries to hold on but Destroy postures up.
Sake avoids a series of strikes thrown by Destroy.

That's four minutes gone in the round.
Sake avoids a series of strikes thrown by Destroy.
Destroy working for a submission but Sake is keeping him at bay.
Destroy takes a little breather and maintains the position. The referee will be looking for him to stay active from such a dominant position though.
Sake wants to try and get back to his feet.
Destroy content just to control the position here.
Sake holding onto his opponent's waist for dear life, as Destroy tries to land some strikes to get him to release his grip.
As the round comes to an end the crowd are showing their appreciation for a great round of action.
Destroy working to secure an arm triangle but it's not happening for him just yet.
And that�s the end of the round � the fighters go back to their corners.
Smaash Destroy dominated that round.
The cut man is working on Gedo Sake's cut.
The corners get their ten second warning. Both fighters stand from their stools and stare eachother down, ready to get back to the action.

Destroy darts in and out, connecting with a jab.

Destroy feints and then winds up with a huge right hand that connects perfectly and sends Sake sprawling to the canvas! Sake rolls over backwards and springs off the cage and manages to regain his footing - how acrobatic! Oh, he's still wobbly - can Destroy finish him?!
Sake misses with a looping right.

Destroy fakes with an overhand right and moves in to clinch with Sake, pushing him back against the cage.
Sake trying to control the position but instead, Destroy has worked for underhooks and has pushed Sake into the cage.

Destroy breaks the clinch and we return to the middle of the mat.
Destroy thuds a left hand into Sake's body.
Destroy shoots in from a long way out. He's driving through with the takedown attempt and he eventually gets it, landing in Sake's guard.
The crowd are loving this. Great action here.
Destroy looking to control the position here, rather than advance.
Both fighters are absolutely exhausted here.
Destroy stands up from Sake's guard - Destroy perhaps looking for a knockout.
That's one minute gone in the round.
Destroy clinches.
Destroy stops a takedown attempt from Sake.
Sake has Destroy pressed against the cage, preventing Destroy from circling away and getting back to striking at range.
Sake misses the knee to the body. Nice hip positioning from Destroy.
Destroy breaks the clinch and we return to the middle of the mat.
Sake gets his head snapped back by a nice shot there.
Destroy throws a leg kick
and he gets countered with a snapping leg kick.
Destroy tries to clinch but is not successful on this occasion.
Destroy throws a low kick but Sake avoids it.
Destroy throws a shot to the body.
That's two minutes gone in the round.
Destroy dances in with a quick combination. Sake is being worked over with jabs and crosses. Oooh, a right straight from Destroy snaps Sake's head back. Sake stumbles backwards against the cage. Destroy steps forward and delivers a right cross that connects with Sake's jaw, simultaneously knocking him out and sending his mouthpiece into the crowd! There's a worthy souvenir for the fans. This one is over folks. Sake just didn't come prepared.
Ladies and gentlemen, after 2:08 of round 2, we have a winner by way of KO (Punches). Smaash Destroy!
|
|
|
|
|
|
|
|
|
|
|
|
|
|
|
|
|
|
|
|
|
|
|
| S |
C
A |
G |
S |
C
B |
G |
|
S |
C |
G |
|
energy
A | B |
|
hype
A | B |
|
pop
A | B |
|
mgr
A | B |
|
FIGHT
RATING
79% |
|
|
|
|
|
|

