|
|
PBP Commentary |
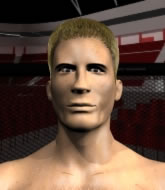
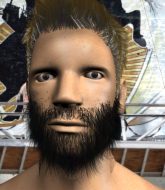
Coming up we have a featherweight MMA rules bout between Dwayne Hicks (ranked 0 p4p, 0 weight class) and Nick Dunsmore (ranked 0 p4p, 0 weight class). Dunsmore has chosen It's Amazing by Kanye West as his entrance music. Man, I cannot wait for this one!
 |
|
 |
| 170 cm
24
153 lbs
6 - 1 - 0 |
|
170 cm
26
155 lbs
11 - 1 - 0 |
Good wrestling
Solid boxing
Very strong |
|
Powerful takedowns
Excellent boxer
Powerful |
|
| |
|
Ladies and gentlemen. This fight is 5 rounds, for the featherweight championship of the world!
Introducing the champion to my left, fighting out of the red corner.
With a record of
6 - 1 - 0, fighting out of Tokyo, Dwayne Hicks!
And introducing the challenger to my right, fighting out of the blue corner.
With a record of
11 - 1 - 0, fighting out of Tokyo, Nick Dunsmore!
The judges for this bout are Yukihiro Shimada, Tatsuya Matsuyama and Kenichi Hosakawa.

The bell rings for round one and we are underway!
Hicks throws a sloppy head kick and Dunsmore moves out of range easily.
A lazy left from Dunsmore finds it's target.

It looks like Dwayne Hicks has been cut.
Hicks pivots as if he's going to throw a leg kick but stops half way.
Dunsmore displays good takedown defense there as he swats away a double leg from Hicks.
Hicks attempts a low kick but it misses it's target.
Hicks throws a chopping leg kick but Dunsmore manages to avoid taking any serious damage.
Hicks with a nice looking leg kick. You could hear that one land in a back row.
Hicks is looking to land body kicks.
Dunsmore tries to score a power double leg takedown but Hicks sees that one coming and sprawls well. That will dishearten Dunsmore somewhat.
Hicks is looking to clinch.

That's one minute gone in the round.
A head kick misses from Hicks.
Hicks misses with a body shot. Nice footwork from Dunsmore.
Hicks throws a sloppy head kick and Dunsmore moves out of range easily.
Dunsmore needs to keep his hands up - Hicks had a free shot at his head there.
Dunsmore checks a leg kick nicely.
Dunsmore misses the shot to the body.
Dunsmore blocks a low kick nicely.
Well, he's not going to score with shots like that. A lazy body kick attempt from Hicks.

That's two minutes gone in the round.
The crowd are getting on the fighters' backs, as the pace has dropped off in the last minute or so.
Hicks throws a hook to the side of Dunsmore's head but Dunsmore sees it coming and ducks under it beautifully.
Hicks throws a low kick but his opponent is out of range.
Hicks stuffs the takedown attempt from Dunsmore. Dunsmore gets slowly back to his feet.
Hicks ducks down and throws a hook to the body but Dunsmore moves away.

Hicks shoots in from a long way out. He's driving through with the takedown attempt and he eventually gets it, landing in Dunsmore's guard.
Dunsmore is controlling Hicks's posture.
Hicks landing with the ground and pound.
Hicks with a flurry of punches that miss.

That's three minutes gone in the round.

Hicks got a little sloppy there for a moment and Dunsmore has worked his way into a loose triangle - can he finish it?! No, Hicks has managed to get both his arms back between Dunsmore's legs - danger averted.
Hicks is sitting in guard, working some ground and pound.
Dunsmore is trying to keep Hicks in close.
The ref warns both fighters not to hold the cage as they work up against the meshing.
Hicks works over Dunsmore with some ground and pound from guard.
Dunsmore is trying to stand up but he's not managed so far.
Dunsmore working the defensive guard well to avoid strikes from Hicks.
Hicks loading up with the ground and pound but he's missing more than he's landing in this flurry.
Hicks postures up and lands a big shot to Dunsmore's brow.
Hicks postures up to throw the ground and pound strikes but they don't connect.
Hicks landing some decent shots from guard.
Hicks postures up in Dunsmore's guard and throws a big left but Dunsmore blocks it.
Hicks works over Dunsmore with some ground and pound from guard.
Dunsmore preventing the ground and pound from doing any damage.

That's four minutes gone in the round.
Hicks trying to land body shots but he keeps hitting the mat.
Dunsmore has his foot on Hicks's thigh. He's trying to push off and get in position for a triangle, I think. Hicks works his way back into a safe position though.
Dunsmore working from the bottom, still in full guard. He's managed to get a loose triangle. Hicks doesn't seem to be doing much to defend here, obviously he feels comfortable in the position. Hicks manages to throw the legs off his shoulder and he's back into guard - no problem.
Hicks thows a big elbow that misses.
Dunsmore pulls Hicks in to control the position.
Dunsmore is trying to hold Hicks in close to prevent damage but Hicks has managed to pass into half guard.
Dunsmore is concentrating on defense, preventing Hicks from advancing position.
Hicks drops an elbow to the side of Dunsmore's head.
Dunsmore keeping his head moving to avoid the ground and pound.
Hicks thumps the canvas. Not on purpose obviously - he just missed Dunsmore's head.
Hicks takes advantage of the dominant position to land a couple of big hammer fists.
Hicks is keeping good posture, landing some ground and pound.
Dunsmore taking some punishment here, with Hicks in his half guard.
Dunsmore is in trouble now - Hicks has advanced to mount!
The fighters are starting to perspire pretty heavily.
Hicks looking to control but Dunsmore is working nicely, looking to advance position himself.
And that�s the end of the round � the fighters go back to their corners.
Dwayne Hicks dominated that round.
The cut man is working on Dwayne Hicks's cut.
The corners get their ten second warning. Both fighters stand from their stools and stare eachother down, ready to get back to the action.

Dunsmore throws a hook but Hicks blocks it.
Hicks fakes with a right hand and throws a good leg kick, right into the thigh. That had to hurt Dunsmore.
Hicks throws a low kick but his opponent is out of range.
Dunsmore looking to land some kicks to the body here.
Dwayne Hicks seems to be the more aggressive standup fighter in this bout.
A big left from Hicks misses.
We've had a slow start to the round here - hopefully the action picks up.
Hicks lands a high kick!
Hicks throws an overhand right that lands on Dunsmore's shoulder, as Dunsmore tries to avoid the shot.
Hicks tries a head kick but it misses.
That's one minute gone in the round.
Dunsmore connects with a hook to the side of his opponent's head.
Hicks misses with a head kick.
Hicks displays some good footwork, moving neatly out of range as Dunsmore throws out the jab.
Dunsmore tries to land a body kick
and Hicks counters with a solid body kick.
Dunsmore moves away from the strike by Hicks.
Hicks misses with a low kick.
Dunsmore slips a jab and a cross from Hicks.
Dunsmore throws a right and a left that both miss.
Dwayne Hicks is looking to throw some combinations by the looks of things.
A lazy body kick from Hicks
and Hicks takes a counter punch right on the button for his troubles.
That's two minutes gone in the round.
Hicks misses with the combination.
Dunsmore ducks down and throws a hook to the body but Hicks moves away.
Dunsmore lands a really nice looking cross but Hicks seems unphased.
Hicks is looking to chop away at Dunsmore's legs.
A leg kick checked by Hicks.
A lazy body kick from Hicks
and Dunsmore counters with a crisp hook to the side of the head.
Hicks tries to close the distance and clinch up against the cage but Dunsmore paws at him with a jab and circles away.
A nice inside leg kick there by Hicks. That's going to slow Dunsmore down.
That's three minutes gone in the round.
Hicks misses with a head kick.
Hicks connects with a single shot there.
Dunsmore fails miserably with a takedown attempt.
Hicks throws a head kick that misses.
Hicks tries a low kick but Dunsmore avoids it.
Hicks tries to move into range but Dunsmore moves to the side and lands with a nice right hand.
A low kick from Hicks is predictable there
and Dunsmore counters with a crisp hook to the side of the head.
Hicks buckles his opponent's knee momentarily with a nice leg kick.
That's four minutes gone in the round.
Good exchange - Hicks coming out on top.
Dunsmore throws a body kick, spinning off balance
and Hicks counters with a shoot takedown. Dunsmore fights it but they end up in guard.
The crowd cheering loudly, showing their appreciation for the quality fight we're seeing here.
Hicks scores with a decent looking elbow strike.
Hicks with a couple of shots to the head there. Not particularly brutal.
Dunsmore utilising some decent striking defenses from the guard, preventing the ground and pound.
Dunsmore wants to get back to his feet but Hicks is in a dominant position and won't allow it.
Hicks wants to get up but he can't break Dunsmore's closed guard. He needs to be careful trying to break the legs open, as he's open to submissions here.
Hicks trying to pass the guard but can't manage it just yet.
Dunsmore has a loose triangle. He'll be looking to tighten that up but Hicks can see exactly what he's planning and manages to posture up and free himself.
The crowd applaud the fighters efforts here as the round comes to an end.
Hicks distracts Dunsmore with his right hand and drops a big elbow with his other arm.
Dunsmore is looking to get back to his feet but can't, whilst Hicks is controlling him.
Hicks trying to control but Dunsmore is working from the bottom.
And that�s the end of the round � the fighters go back to their corners.
Dwayne Hicks dominated that second round.
The cut man is working on Dwayne Hicks's cut.
That's time! Hicks's corner gives him a slap on the ass as he gets ready to fight.

Dunsmore ducks under a wild hook from Hicks.
Dunsmore jabbing away but nothing is landing.
Hicks tries to score with a leg kick but it misses it's target.
Dunsmore throws a head kick but Hicks moves out of range.
Hicks looks frustrated there after his takedown attempt is stuffed easily.
We've had a slow start to the round here - hopefully the action picks up.
Dunsmore wants to clinch.
Hicks throws a hook to the body but it doesn't connect.
Nick Dunsmore seems to be getting the better of the standup.
That's one minute gone in the round.
Hicks throws the kick towards the body but Dunsmore avoids it.
Hicks cracks the inside of Dunsmore's front leg.
Dunsmore throws a hook but Hicks avoids it easily.
Hicks throws a half hearted mid kick.
Hicks with a poor takedown
and Dunsmore counters with a takedown into side control.
A bit of a lull in the action here.
Dunsmore misses with a strike but at least he's keeping busy, looking to cause some damage - that will still help him when it comes to the judges scorecards.
That's two minutes gone in the round.
Dunsmore is trying to land an Americana. He has the arm isolated but Hicks is keeping cool and he's avoided the danger for now.
Dunsmore throwing strikes but missing, from side control.
Hicks is looking to regain half guard here but Dunsmore keeps moving and retains side control.
Sloppy strikes there by Dunsmore.
Dunsmore with the ground and pound but Hicks regains half guard under the barage of strikes.
Dwayne Hicks overall seems to be getting the better of the ground position in the fight so far.
Dunsmore throwing shots but they're hitting the canvas more than the man.
Dunsmore thows a big elbow that misses, also allowing Hicks to regain full guard.
Hicks manages to sweep nicely, so he's now on top. Dunsmore manages to get himself to full guard.
Hicks passes into half guard.
Dunsmore actively working from the bottom here.
Dunsmore takes a big intake of breath there - he's definitely tired.
That's three minutes gone in the round.
Dunsmore trying to control here.
Still in half guard, Hicks seems content to control.
Hicks scores with a couple of good hammerfists.
Dunsmore is refusing to be controlled, as Hicks sits in half guard.
Hicks is keeping good posture, landing some ground and pound.
Hicks trying to control from half guard but Dunsmore is working away.
Dunsmore is looking to regain full guard. Not this time though.
Hicks stops Dunsmore from getting back to his feet.
Dunsmore is looking to regain full guard. Not this time though.
Hicks takes advantage of the dominant position to land a couple of big hammer fists.
That's four minutes gone in the round.
Well. There's a bit of a lull in the action here and the crowd are starting to get restless.
Dunsmore is trying to control but can't.
Dunsmore is doing well to control the position and prevent Hicks from advancing to side control.
Dunsmore is looking to sinch up a guillotine here but Hicks pulls his head out easily.
Hicks is keeping good posture, landing some ground and pound.
Hicks is keen to just control but Dunsmore is a slippery customer.
Dunsmore looking for submissions from an awkward position here.
Dunsmore on the receiving end of some nice ground and pound.
Hicks is pressing down on Dunsmore's thigh, looking to free his foot. Dunsmore is holding on for now.
Dunsmore is trying to stand up here but Hicks is controlling him well.
Dunsmore is not content to let Hicks control the position.
And that�s the end of the round � the fighters go back to their corners.
A close third round but Nick Dunsmore just about did enough to take it.
The cut man is working on Dwayne Hicks's cut.
That's the end of the round. The referee orders the cornermen out of the cage so we can get back down to business.

Hicks tries to work over Dunsmore's front leg with a kick but Dunsmore checks it.
Dunsmore slips a straight right by Hicks.
Hicks tries to clinch but Dunsmore moves out of range.
Hicks shoots in for a takedown and gets it. Oh and he's advanced to full mount straight away.
Dunsmore is writhing around trying to get back to his feet.
Dunsmore might have to switch it up a bit here because his efforts to control Hicks kaven't been going to plan, at least at the current moment in time.
Dunsmore is desperately trying to get back to half guard.
Hicks connects with a couple of good shots from mount.
Both fighters really going for it on the ground here!
Hicks with the ground and pound from mount.
Dunsmore wants to hold on but Hicks pushes him away.
Hicks lands with some vicious ground and pound - can Dunsmore hang on?
Hicks avoids the attempt from Dunsmore to control.
That's one minute gone in the round.
Hicks trying to control but he's not successful this time.
Dunsmore is absolutely dripping with sweat - he looks exhausted.
Hicks controlling the position easily from mount.
Dunsmore wants to control but Hicks is having none of it.
Hicks working the ground and pound effectively.
Dunsmore tries to hold on but Hicks pushes him away.
Hicks with the ground and pound from mount.
Dunsmore taking shots to the head.
Hicks lands a big shot there that rocks Dunsmore but he's holding on and managing to survive for now.
Dunsmore wants to control but Hicks is having none of it.
A nice elbow there by Hicks.
Dunsmore in a bad spot here, taking shots to the head.

Dunsmore is rocked!
That's two minutes gone in the round.
Hicks trying to control but Dunsmore is having none of it.
Dunsmore is still in real trouble! Can Hicks finish him?
Hicks with a couple of short strikes.
Dunsmore tries to hold on but Hicks pushes him away.
Hicks landing shots from mount.
Hicks landing shots from mount.
Hicks lands a big elbow.
Wooooo! Give it up for these two warriors! They are putting on a show!
Dunsmore really trying hard to get back to half guard here.
Hicks can't quite control the action as he would like just now, as Dunsmore is looking to escape.
Dunsmore wants to control but Hicks is having none of it.
Hicks punishing his opponent with strikes.
Hicks fakes a shot to the body and cracks his opponent in the head. Nice ground and pound there!
That's three minutes gone in the round.
Hicks is in the full mount, landing strikes.
Hicks with the ground and pound from mount.
Hicks postures up and throws a couple of big shots that have Dunsmore in real trouble here! The ref calls for Dunsmore to improve his position which he doesn't do, so the referee has no choice but to end the fight due to the strikes!
Ladies and gentlemen, after 3:26 of round 4, we have a winner by way of TKO (Strikes). Dwayne Hicks!
Dwayne Hicks is the new featherweight champion!
|
|
|
|
|
|
|
|
|
|
|
|
|
|
|
|
|
|
|
|
|
|
|
| S |
C
A |
G |
S |
C
B |
G |
|
S |
C |
G |
|
energy
A | B |
|
hype
A | B |
|
pop
A | B |
|
mgr
A | B |
|
FIGHT
RATING
91% |
|
|
|
|
|
|
