|
|
PBP Commentary |
Coming up we have a welterweight MMA rules bout between Papoh Bamoya (ranked 0 p4p, 0 weight class) and Hellson Ballswick (ranked 0 p4p, 0 weight class). Bamoya kept the crowd waiting but all that was forgotten when his ring entrance music started. The incomparable musical genius that is Lupang Hinirang. Over to our ring announcer for the fighter introductions!
 |
|
 |
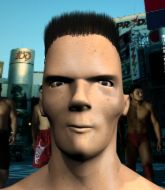
| 182 cm
23
180 lbs
8 - 3 - 0 |
|
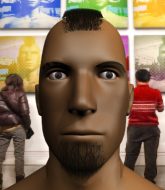
175 cm
25
180 lbs
10 - 7 - 0 |
Decent wrestler
World class MT
KO power |
|
Good wrestler
Excellent boxer
Powerful |
|
| |
|
Ladies and gentlemen. This fight is 3 rounds, in the welterweight division.
Introducing the fighter to my left, fighting out of the red corner.
With a record of
8 - 3 - 0, fighting out of Tokyo, Papoh Bamoya!
And introducing the fighter to my right, fighting out of the blue corner.
With a record of
10 - 7 - 0, fighting out of Tokyo, Hellson Ballswick!
The judges for this bout are Taro Takaoka, Yuuki Gou and Shirou Masuda.

The bell rings for round one and we are underway!
Bamoya displays some good footwork, moving neatly out of range as Ballswick throws out the jab.
Ballswick tries to shoot in for a takedown. He's got hold of a leg but Bamoya swivels and escapes.

Ballswick gets tackled into the cage by Bamoya. Bamoya maintains the clinch.
Ballswick avoids a wild elbow strike from Bamoya.
Bamoya is looking to score with knees to the body. Maybe he'll change it up and go body then head. Ballswick is defending well for now.
Bamoya tries to land knees in the clinch but Ballswick avoids the damage to the body.
Bamoya tries to land a knee to the body but he is off balance and Ballswick avoids it.
Ballswick takes an elbow to the forehead.

It looks like Hellson Ballswick has been cut.
Bamoya stops a takedown attempt from Ballswick.
Bamoya with an attempt at a knee that misses.
Ballswick avoids the elbow strike from Bamoya, against the cage.
Bamoya misses the knee to the body. Nice hip positioning from Ballswick.
Bamoya pushes off and fires off an elbow that misses, before clinching up again, against the cage.
Ballswick wants a takedown.
Papoh Bamoya has stuffed three takedown attempts in the round now. That's going to take a lot out of Hellson Ballswick.
Bamoya tries to land a knee to the head but Ballswick blocks with his arms.
We've had a slow start to the round here - hopefully the action picks up.
Bamoya prevents the takedown attempt.
Ballswick takes a knee right on the jaw!
Ballswick blocks a knee to the body. He'll have a nicely bruised forearm in the morning.
Bamoya throws an elbow that misses.
Bamoya with an attempt at a knee that misses.
Ballswick tries for a takedown but Bamoya manages to get underhooks.
Ballswick managing to block the knees to the body from Bamoya.

That's one minute gone in the round.
Ballswick blocks an elbow strike from Bamoya.
Bamoya trying to land knees to the body.
Bamoya using the Thai plumb to throw knees but Ballswick has his back arched nicely, preventing the strike.
Bamoya tries a knee to the head but Ballswick blocks it.
Ballswick avoids a wild elbow strike from Bamoya.
Ballswick goes for a takedown attempt but Bamoya pushes him away and we're back to fighting at a distance.
Bamoya slips under a jab.
Ballswick looks for a takedown here. Will he get it? Bamoya is fending him off so far but Ballswick persists. Nope, Bamoya circles away and we're back to standing.
Ballswick changes levels and looks for a double leg takedown. Bamoya tries to avoid it but Ballswick manages to keep hold of a leg and drag Bamoya to the ground. Bamoya escapes though and pops straight back up to his feet.
Bamoya slaps away a takedown attempt from Ballswick, before circling back to the center of the mat.
An inside leg kick lands from Bamoya.
Ballswick looks gassed!
Bamoya fakes high and swings low for a body shot but Ballswick manages to avoid it.

That's two minutes gone in the round.
Bamoya explodes with a nice body kick and back out of range. Nice work.
Bamoya lets the fists fly and connects with a left straight followed by a right hook.
This is a great period of action - very entertaining stuff!
Bamoya slips under a jab from Ballswick.
Bamoya is moving around nicely and scores here with a single head shot.
Bamoya throws a combination but it was largely blocked by Ballswick.
Bamoya fails to land with the punch combination there - jab, cross, hook, miss, miss, miss.
Papoh Bamoya is looking to keep the fight on the feet at all costs.
Bamoya staying out of range there.
Bamoya takes a body punch but keeps moving.

Ballswick decides to change it up a bit and drives through with a nice takedown into half guard.
The fighters are pressed up against the cage, both looking to find a bit of space to work.
Bamoya is looking to escape.

Bamoya is defending against the submission attempts here by Ballswick.
Ballswick is working for a submission of some sort.

That's three minutes gone in the round.
Bamoya is looking to improve his position.
Ballswick prevents Bamoya from standing back up.

Bamoya kicks Ballswick off and gets back to his feet.
Ballswick swats away the attempt to clinch by Bamoya.
Ballswick misses with a double jab
and Bamoya makes him pay by landing a thudding low kick.
The fighters circling - Ballswick throws out the jab but it was never going to land.

That's four minutes gone in the round.
Ballswick ducks under a wild hook from Bamoya.
Ballswick takes a swing at Bamoya's ribcage but misses.
Bamoya keeping his hands up high there, blocking the jab from Ballswick.
Bamoya avoids the body shot from Ballswick.
Bamoya finds nothing but air with that leg kick attempt.
Ballswick works the jab nicely.
Bamoya misses with a series of wild punches.
Bamoya tries to clinch but Ballswick is having none of it.
The crowd applaud the fighters efforts here as the round comes to an end.
Bamoya fails with an attempt to clinch.
Bamoya uses good footwork to avoid the strikes from Ballswick.
And that�s the end of the round � the fighters go back to their corners.
Papoh Bamoya dominated that round.
The cut man is working on Hellson Ballswick's cut.
The referee calls time. The cornermen exit stage left and we're back to business.

Ballswick tries to shoot in for a takedown. He's got hold of a leg but Bamoya swivels and escapes.
Ballswick misses with a two punch combination.
Bamoya tries to close the distance and clinch up but Ballswick swats him away and circles back towards the center.
A bone on bone clash there as Ballswick blocks the leg kick.
Ballswick shoots in but doesn't get the takedown

and Bamoya counters with a crisp one two that drops Ballswick! Bamoya thinks about following him to the mat for a moment but instead steps back and waves Ballswick to his feet! Ballswick is in big trouble!

Ballswick is rocked!
Bamoya is the aggressor but that punch slipped nicely by Ballswick.
Ballswick is really struggling to land any decent head shots against his taller opponent.
Ballswick swings and misses with a hook to the body.
Bamoya fails in his attempt to clinch.
Bamoya blocks a jab.
Papoh Bamoya is winning the standup battle so far.
Bamoya uses some good footwork to avoid the body shot by Ballswick.
Bamoya staying out of range there.
A big right from Ballswick misses.
That's one minute gone in the round.
Bamoya throws a body punch but Ballswick moves out of range.
Ballswick takes an uppercut right on the button but keeps his composure.
Ballswick is still on wobbly legs! Can Bamoya finish him?
Ballswick shoots in but no luck this time.
Papoh Bamoya has stuffed three takedown attempts in the round now. That's going to take a lot out of Hellson Ballswick.
Ballswick is breathing heavily.
Bamoya misses with a few strikes there.
Ballswick seems to have recovered his senses.
Bamoya comes forward and lands a shot to the body, then darts back out of range.
Ballswick gets his head snapped back by a nice shot there.
Bamoya scores with a spinning back kick!
Bamoya fails with an attempt to clinch.
Oooooooooooh, not good. A low kick from Bamoya lands where it shouldn't have, right in the... well, you know what he did? He kicked him in the penis. He's injured, injured bad. The referee sends both fighters to their corners and Ballswick has 5 minutes to recover. He's OK now though... a thumbs up from Ballswick and we're back underway with a touch of gloves.
Ballswick scores a takedown into full mount!
The crowd cheering loudly, showing their appreciation for the quality fight we're seeing here.
Bamoya wants to control but Ballswick is having none of it.
That's two minutes gone in the round.
Ballswick can't quite control the action as he would like just now, as Bamoya is looking to escape.
Bamoya wants to hold on but Ballswick pushes him away.
Ballswick looking for a guillotine from mount but Bamoya is having none of it.
Ballswick has hold of Bamoya's left arm, perhaps looking for a submission. The two fighters tussle over control of the isolated limb and Bamoya manages to get his arm back to his side and away from danger.
Bamoya tries to hold on but Ballswick postures up.
Ballswick with some aggressive grappling here. He's looking for submissions here, rather than waiting for the opportunity to counter.
That's three minutes gone in the round.
Bamoya is writhing around trying to get back to his feet.
Bamoya trying desperately to get to his feet.
Ballswick looking to secure an arm triangle but Bamoya defends it well.
Bamoya squirming around on the bottom, looking to escape.
Bamoya is squirming around, avoiding Ballswick's attempts to control the action.
Bamoya wants to hold on but Ballswick pushes him away.
Ballswick has control of Bamoya's right arm, working for a kimura. It's a bit of a token attempt though and Bamoya regains control of the situation pretty easily.
That's four minutes gone in the round.
The crowd are showing their displeasure at the lack of action as loud boos ring out around the arena.
Bamoya stops Ballswick from taking his back. Still, being mounted isn't any better.
Ballswick avoids the attempt from Bamoya to control.
Bamoya can't escape the position.
Ballswick swings around for an armbar but it's a sloppy attempt and Bamoya is now in Ballswick's guard. A big mistake from Ballswick there, giving up the dominant position!
Bamoya postures up.
Bamoya knows he needs to get back to his feet asap. He's simply no match for Ballswick on the ground.
The crowd applaud the fighters efforts here as the round comes to an end.
Bamoya is looking to stand up but Ballswick won't let him.
Ballswick looking for a guillotine here but Bamoya defends easily.
And that�s the end of the round � the fighters go back to their corners.
Papoh Bamoya dominated that second round.
The cut man is working on Hellson Ballswick's cut.
That's the end of the interval. I'm sure that seemed a lot quicker than a minute for our two fighters! Back to the action. This is the final round!

Ballswick shoots for a takedown but Bamoya saw that one coming a mile off and avoided it easily.
Bamoya ducks under an overhand right and circles away with a smile on his face.
Ballswick ducks under a wild hook from Bamoya.
Bamoya throws a body kick that misses.
Bamoya throws a low kick but Ballswick avoids it.
We've had a slow start to the round here - hopefully the action picks up.
Bamoya fails to land with the punch combination there - jab, cross, hook, miss, miss, miss.
Ballswick defending well as Bamoya loads up on a big left hand.
Bamoya misses with a wild combination.
Ballswick misses with a body punch
and Bamoya counters by clinching up.
That's one minute gone in the round.
Ballswick is looking for a takedown up against the cage. Bamoya gets underhooks though and prevents the takedown attempt.
A knee to the head by Bamoya.
Bamoya pushes off and fires off an elbow that misses, before clinching up again, against the cage.
Both fighters are breathing heavily.
Bamoya tries to land a knee to the body but he is off balance and Ballswick avoids it.
Ballswick tries for a takedown but Bamoya manages to get underhooks.
Papoh Bamoya has stuffed three takedown attempts in the round now. That's going to take a lot out of Hellson Ballswick.
Bamoya using the Thai plumb to throw knees but Ballswick has his back arched nicely, preventing the strike.
Ballswick takes an elbow to the temple.
Ballswick blocks an elbow strike from Bamoya.
Bamoya pushes off and fires off an elbow that misses, before clinching up again, against the cage.
Ballswick tries for a takedown. No joy.
Bamoya missing with knees to the body.
Bamoya using the Thai plumb to throw knees but Ballswick has his back arched nicely, preventing the strike.
Ballswick blocks the elbow strike.
Ballswick tries for a takedown but Bamoya manages to get underhooks.
Ballswick managing to block the knees to the body from Bamoya.
Ballswick drops down looking for an ankle pick but Bamoya pulls his leg out and moves away.
Bamoya tries to close the distance and clinch up against the cage but Ballswick paws at him with a jab and circles away.
That's two minutes gone in the round.
My god... these two guys really need to pick up the pace or everyone will leave to go get a beer.
Ballswick scores a trip takedown into side control. Nice.
You can see the frustration on Bamoya's face, being in this tough position on the bottom.
Bamoya is looking to work his way out of this bad position but Ballswick is controlling him well.
Ballswick wants to work for a kimura but he's foiled early by Bamoya, who protects the arm well.
Ballswick is looking for a kimura. He might have it! No, Bamoya has escaped the position, nice work there.
Ballswick tries for an arm triangle. That looks pretty tight to me. Is this one over!?! Possibly, maybe, no Ballswick has let go of the choke. Obviously it wasn't as tight as we thought!
That's three minutes gone in the round.
Bamoya is not content to let Ballswick control the position.
Bamoya is trying to get back to his feet.
Ballswick wants to lay and pray for a moment but Bamoya keeps working.
Bamoya can't do much from the bottom here.
Ballswick tries for a kimura but Bamoya is defending well.
Ballswick thinks about going for a far side armbar but bails out and retains the dominant position instead.
That's four minutes gone in the round.
The crowd are getting on the fighters' backs, as the pace has dropped off in the last minute or so.
Bamoya gets back to half guard.
Bamoya is looking to escape.
Ballswick passes the guard and advances to mount!
Ballswick has hold of Bamoya's left arm, perhaps looking for a submission. The two fighters tussle over control of the isolated limb and Bamoya manages to get his arm back to his side and away from danger.
Ballswick wants to finish this one by submission but Bamoya is holding onto his waist, trying to prevent any attacks from Ballswick.
And that's the end of the fight!
Hellson Ballswick comfortably won the final round on my scorecard.
I think Bamoya has won this one but let's see what the judges have to say. Over to the ring announcer for the scorecards.
Ladies and gentlemen, after 3 rounds of action, we go to the scorecards for a decision.
Judge Taro Takaoka scores the fight 29:28
Judge Yuuki Gou scores the fight 29:28
Judge Shirou Masuda scores the fight 29:28
In favor of your winner, by unanimous decision... Papoh Bamoya!
|
|
|
|
|
|
|
|
|
|
|
|
|
|
|
|
|
|
|
|
|
|
|
| S |
C
A |
G |
S |
C
B |
G |
|
S |
C |
G |
|
energy
A | B |
|
hype
A | B |
|
pop
A | B |
|
mgr
A | B |
|
FIGHT
RATING
59% |
|
|
|
|
|
|
