|
|
PBP Commentary |
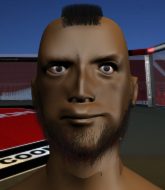
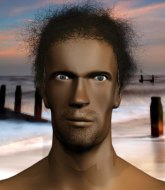
Coming up we have a light heavyweight MMA rules bout between Coulton Maguire (ranked 0 p4p, 0 weight class) and Kenichi Uzomaki (ranked 0 p4p, 0 weight class). Coulton Maguire had a look across the cage there at his opponent. He definitely means business
 |
|
 |
| 189 cm
21
205 lbs
2 - 1 - 0 |
|
190 cm
23
215 lbs
6 - 5 - 0 |
Good wrestling
Basic striking
KO power |
|
BJJ Purple Belt
Counter striker
Granite chin |
|
| |
|
Ladies and gentlemen. This fight is 2 rounds, in the light heavyweight division.
Introducing the fighter to my left, fighting out of the red corner.
With a record of
2 - 1 - 0, fighting out of Tokyo, Coulton Maguire!
And introducing the fighter to my right, fighting out of the blue corner.
With a record of
6 - 5 - 0, fighting out of Tokyo, Kenichi Uzomaki!
The judges for this bout are Ren Mimura, Shigeki Sano and Yasuomi Hirokawa.

The bell rings for round one and we are underway!
Maguire shoots in for a takedown. He's persisting with it as Uzomaki sprawls well. Uzomaki wins this battle and keeps the fight standing. Maguire gets slowly back to his feet.
A punch combination from Maguire misses.
Maguire shoots for a double leg takedown but Uzomaki sprawls well. He's pushed Maguire's face into the mat and manages to get back to his feet relatively easily.
Maguire has a takedown stuffed.
That's three failed takedown attempts in the round for Coulton Maguire. That's going to take a lot out of him.
Maguire shoots in but Uzomaki avoids the takedown attempt easily.
Maguire looks for a takedown but Uzomaki sprawls well.
Uzomaki stuffs the takedown attempt from Maguire. Maguire gets slowly back to his feet.
We've had a slow start to the round here - hopefully the action picks up.
Maguire shoots in but Uzomaki avoids the takedown attempt easily.
Maguire throws a looping left and ducks down for a takedown. He's got his arms around Uzomaki's waist but Uzomaki gets an underhook and avoids the takedown by throwing Maguire off to one side.
Maguire misses with a takedown attempt - Uzomaki sprawls well and throws a nice strike on the way out which just misses.
Uzomaki defends well against a solid takedown attempt from Maguire.

That's one minute gone in the round.
Uzomaki misses with a series of wild punches.

Maguire closes the distance and clinches up, looking for a takedown. He shifts his weight and gets a nice trip into half guard.
Maguire wants to control but Uzomaki is keeping him busy.
Maguire tries to pass to full mount but Uzomaki defends it.
Uzomaki tries to kick Maguire off but Maguire keeps his base steady and stays in half guard.
Maguire thows a wild elbow that connects with the canvas.
Uzomaki is trying to stand up here but Maguire is controlling him well.

Maguire is sneakily working for an arm triangle but Uzomaki sees it coming and defends easily.
Uzomaki tries to kick Maguire off but Maguire keeps his base steady and stays in half guard.
Maguire missing with the ground and pound from half guard.
Maguire is looking for a kimura. It's going to be difficult to finish that from half guard though and Uzomaki defends it well.
Maguire thows a huge punch but Uzomaki dodges it nicely.

That's two minutes gone in the round.
Maguire prevents Uzomaki from improving his position.
Maguire not throwing his punches with enough precision this time.
Uzomaki slips a foot under and gets full guard. Nice work.

Uzomaki pushes Maguire off and gets back to his feet.
Uzomaki leaves Maguire with his face pressed against the mat as he sprawls beautifully, defending against a solid takedown attempt.
Uzomaki slaps away a takedown attempt from Maguire, before circling back to the center of the mat.
Coulton Maguire seems to be the more aggressive standup fighter in this bout.
Maguire looks for a takedown here. Will he get it? Uzomaki is fending him off so far but Maguire persists. Nope, Uzomaki circles away and we're back to standing.

That's three minutes gone in the round.
Maguire shoots for a double leg takedown but Uzomaki sprawls well. He's pushed Maguire's face into the mat and manages to get back to his feet relatively easily.
Uzomaki slaps away a takedown attempt from Maguire, before circling back to the center of the mat.
Maguire looks for a takedown here. Will he get it? Uzomaki is fending him off so far but Maguire persists. Nope, Uzomaki circles away and we're back to standing.
Kenichi Uzomaki is looking to keep the fight on the feet at all costs.
Uzomaki misses with a two punch combination.
No luck with that takedown attempt from Maguire.
Maguire shoots in for a takedown. "I don't think so" says Uzomaki as he avoids it easily.
Maguire is breathing heavily.
Maguire looks for a takedown but Uzomaki sprawls well.
Maguire closes this distance looking for a takedown but Uzomaki circles away.
Maguire tries for a takedown but Uzomaki sees it coming a mile off and avoids it easily.
A head kick from Uzomaki lands but Maguire takes it in his stride.
Maguire shoots in with a takedown attempt and he has Uzomaki pinned against the cage. Uzomaki gets the underhooks and manages to circle away.

That's four minutes gone in the round.
Uzomaki stuffs a takedown. It's all about dictating where the fight takes place and Uzomaki wants it to stay on the feet.
Maguire shoots in looking for a double leg takedown. Uzomaki defends it nicely.
Uzomaki tries to close the distance and clinch up against the cage but Maguire paws at him with a jab and circles away.
Maguire fails miserably with a takedown attempt.

Uzomaki lands a left and a right that send Maguire crashing to the mat, dazed. Uzomaki thinks about following him to the mat but decides to wave him back up to his feet!

It looks like Coulton Maguire has been cut.
Fantastic stuff here - a very entertaining period of action, which has drawn cheers from the crowd.
Maguire shoots in and drives through. Uzomaki sprawls well.
Uzomaki misses with a double jab.
Uzomaki throws a wild combination but nothing lands.
Maguire has a takedown stuffed.

That's five minutes gone in the round.
Oooooh!!! Uzomaki has knocked Maguire down with a huge combo! Uzomaki steps away and waves a wobbly Maguire back to his feet! This one might not go much longer!

Maguire is rocked!
Uzomaki tries to clinch up but Maguire circles away and keeps his distance.
A telegraphed takedown attempt from Maguire is defended easily by Uzomaki.
Nice sprawl there from Uzomaki as Maguire shoots in.

Uzomaki drives through and clinches with Maguire against the cage.
Uzomaki crunches a lovely knee into Maguire's ribcage.

Uzomaki manages to break the clinch.
Maguire shoots in looking for a double leg takedown. Uzomaki defends it nicely.
Uzomaki lands a big right hand and follows it up with an uppercut. Oh and another big punch and a knee - Maguire can't take much more of this! Another big shot to the jaw from Uzomaki and Maguire drops to the floor. Beaten and bloodied - he had enough there. A vicious beatdown by Uzomaki.
Ladies and gentlemen, after 5:56 of round 1, we have a winner by way of TKO (Strikes). Kenichi Uzomaki!
|
|
|
|
|
|
|
|
|
|
|
|
|
|
|
|
|
|
|
|
|
|
|
| S |
C
A |
G |
S |
C
B |
G |
|
S |
C |
G |
|
energy
A | B |
|
hype
A | B |
|
pop
A | B |
|
mgr
A | B |
|
FIGHT
RATING
67% |
|
|
|
|
|
|

