|
|
PBP Commentary |
Coming up we have a bantamweight MMA rules bout between James West (ranked 0 p4p, 0 weight class) and Karl Britz (ranked 0 p4p, 0 weight class). We have two fighters making their debuts here, so let's see who comes out of this one with their first professional victory.
 |
|
 |
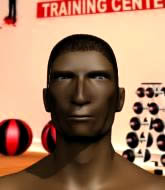
| 159 cm
22
135 lbs
0 - 0 - 0 |
|
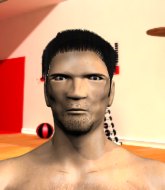
155 cm
22
135 lbs
0 - 0 - 0 |
BJJ Blue Belt
Improved boxing
Good chin |
|
BJJ White Belt
Excellent boxer
Tends to cut |
|
| |
|
Ladies and gentlemen. This fight is 3 rounds, in the bantamweight division.
Introducing the fighter to my left, fighting out of the red corner.
With a record of
0 - 0 - 0, fighting out of Helsinki, James West!
And introducing the fighter to my right, fighting out of the blue corner.
With a record of
0 - 0 - 0, fighting out of Helsinki, Karl Britz!
The judges for this bout are Anni Minnem�ki, Johanna Lukiainen and Marco Blurstr�m.

The bell rings for round one and we are underway!
West takes a swing at Britz's ribcage but misses.
Horrible takedown by Britz or perhaps it was just good defense by West which made him look bad.

Britz shoots in and gets a takedown into half guard. Britz showed some decent athleticism there.
West wants to control but Britz is keeping busy and won't allow it.
West is looking for a sweep. Britz is wise to his cunning plan and keeps the top position.
West blocking the ground and pound attempt from Britz.
Britz is trying to get back to his feet now but his leg is trapped.
West wants to control but Britz is keeping busy.
West wants to improve his position but Britz is controlling well.
Britz prevents West from standing back up.
West is pressing down on Britz's left leg trying to get back to full guard. He's managed it.

West kicks Britz off and gets to his feet.
Britz tries to clinch but West moves out of range.
Britz shoots in for a double leg but West sprawls well. That's going to sap some energy.
Britz doesn't manage to clinch there - West circles away.
West closes the distance and gets a double leg, slamming Britz to the mat! Britz manages to get full guard.
Britz looks gassed!

That's one minute gone in the round.
Britz preventing the ground and pound from doing any damage.
Britz keeping full guard, as West tries to pass.
West stands up from guard. Let's bang!
West takes a step towards his opponent and connects with a left hand, before circling away.
West fails with a rather predictable takedown attempt.
West misses with a wild body shot.
West will need to tighten up his combinations if he doesn't want to gas himself out, swinging at thin air.
West throws a hook but Britz avoids it easily.
Wow, both these guys are really going for it!
West misses with a body shot. Nice footwork from Britz.
Britz cracks West with an open hand slap.
Britz takes a shot to the nose. Hopefully that hasn't broken it.
West rushes in with a sloppy looking punch
and Britz counters with a good right hand that lands right on the jaw.
Britz shoots in with a takedown attempt and he has West pinned against the cage. West gets the underhooks and manages to circle away.
James West has stuffed three takedown attempts in the round now. That's going to take a lot out of Karl Britz.
West throws a looping left and ducks down for a takedown. He's got his arms around Britz's waist but Britz gets an underhook and avoids the takedown by throwing West off to one side.
West tries for a takedown but Britz sees it coming a mile off and avoids it easily.
West swings widly with a right hand
and Britz counters with a nice uppercut.
West takes a big uppercut there. He seems a bit wobbly but no, he's OK.
James West seems to be the more aggressive standup fighter in this bout.

That's two minutes gone in the round.
Nice takedown defense from West. No joy for Britz on that attempt.
West looks for a takedown but Britz sprawls well.
West shoots in for a takedown but Britz shows good takedown defense.
Britz fakes low and throws an overhand right that catches West on the side of the head.
West shoots in for a takedown. "Ole!" shouts Britz as he jumps to the side.
Britz avoids a punch combination nicely.
Britz sizes up West with a pawing jab and scores with a straight right down the middle.
West throws a looping left and ducks down for a takedown. He's got his arms around Britz's waist but Britz gets an underhook and avoids the takedown by throwing West off to one side.
West tries to move into range but Britz moves to the side and lands with a nice right hand.
Britz keeps his opponent at a distance with a nice jab.
West swinging wilding here.
Britz shoots for a takedown but West saw that one coming a mile off and avoided it easily.
Nice sprawl there from Britz as West shoots in.
Britz slips under a jab from West.
Britz throws a nice hook to the body that draws an oooh from the crowd.
Britz throws a head kick but West moves out of range.
Britz pivots as if he's going to throw a leg kick but stops half way.
Britz scores with a jab to the jaw of his opponent.
This is a great period of action - very entertaining stuff!
Britz looking to shoot here. He's gone for it and he's landed a takedown into mount! Oh, that's bad for West!

That's three minutes gone in the round.
Britz looking to control but West is working nicely, looking to advance position himself.
West wants to hold on but Britz pushes him away.
The fighters are pressed up against the cage, both looking to find a bit of space to work.
West is wriggling around trying to escape.
West tries to hold on but Britz pushes him away.
Britz with a couple of short strikes.
West is looking to get to half guard.
Britz really doesn't want to stay on the ground with West. If he can't get it back to his feet, it's only a matter of time before he'll be tapping out.

Britz moves into side control, trying to work for a kimura. That looks painful! Will he finish!!?? No, West has worked his arm free - good work by West!
West is trying to get back to half guard. He's pushing on Britz's leg. He's managed it. Nice work.
West trying to control here.
West moves his hips nicely and gets into full guard.
Britz should think about turning a few of those tyres round his middle into muscle if he wants people to take him seriously as an athlete.

That's four minutes gone in the round.
West is working the butterfly guard. He manages to land a nice scissor sweep and is now in half guard on the top. Nice move.
Britz pushes West off looking to stand but West dives back in and keeps control.
Britz is refusing to be controlled, as West sits in half guard.
Britz gets full guard.
West prevents Britz from getting back to his feet.
Britz tries to land a sweep but no joy.
Britz is trying to stand up but he's not managed so far.
West wants to control from the top but Britz keeps moving.
The crowd applaud the fighters efforts here as the round comes to an end.

It looks like we're going to have a standup here. Neither fight is doing enough on the ground.
A punch combination from West misses.
Britz gets caught flat footed, as West shoots in with a quick takedown into guard.
Britz working a defensive guard but West manages to pass into side control anyway.
And that�s the end of the round � the fighters go back to their corners.
A close round but Karl Britz will probably get the nod.
The fighters get back to their feet, the hooter sounds and we're back to the action!

Britz ducks low and lands a nice hook to the body of his opponent.
Britz drives through with a takedown into guard.
West can't keep his opponent in guard - Britz advances to half guard, no doubt looking to mount.
Britz missing with some ground and pound from the half guard.
Britz tries to stand and escape but West is controlling the position.
Britz is looking to pass West's guard but actually West recovers to full guard.
West manages to land a sweep and now he's in mount on top!
Britz is trying to escape the mount.
Britz is persisting with the attempt to improve his position.
Both fighters are absolutely exhausted here.
West misses with a series of strikes from mount. He'll no doubt be working on his ground and pound when he gets back to the gym.
That's one minute gone in the round.
Britz throwing punches from his back but nothing is landing.
Britz tries to hold on but West postures up.
Britz's corner are shouting for him to stand up but that's bad cornering - how is he meant to stand up when he's mounted? He should be looking to improve his position on the ground before trying to stand back up.
Britz is wriggling around trying to escape.
West working for a submission but Britz is keeping him at bay.
Britz really trying hard to get back to half guard here.
West tries to control but Britz wriggling away.
James West overall seems to be getting the better of the ground position in the fight so far.
West working Britz over with strikes here.

Britz is rocked!

It looks like Karl Britz has been cut.
West controlling from the full mount.
Britz is still in real trouble! Can West finish him?
Britz has left one of his arms exposed and West doesn't need a second invitation. He's isolated it and locked on a tight armbar. Britz screams and taps out, obviously in a lot of pain. Hopefully there isn't permanent damage to that arm.
Ladies and gentlemen, after 2:05 of round 2, we have a winner by way of Submission (Armbar). James West!
|
|
|
|
|
|
|
|
|
|
|
|
|
|
|
|
|
|
|
|
|
|
|
| S |
C
A |
G |
S |
C
B |
G |
|
S |
C |
G |
|
energy
A | B |
|
hype
A | B |
|
pop
A | B |
|
mgr
A | B |
|
FIGHT
RATING
100% |
|
|
|
|
|
|
