|
|
PBP Commentary |
Coming up we have a light heavyweight MMA rules bout between Bison Must See BG (ranked 0 p4p, 0 weight class) and Chuck Liddown (ranked 0 p4p, 0 weight class). Bison Must See BG could well score a knockout today. He has the power to get to Chuck Liddown's chin.
 |
|
 |
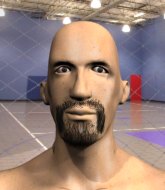
| 200 cm
23
210 lbs
1 - 1 - 0 |
|
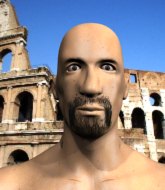
185 cm
25
219 lbs
1 - 0 - 0 |
BJJ Purple Belt
Solid Muay Thai
Good in bed |
|
BJJ White Belt
Excellent boxer
Powerful |
|
| |
|
Ladies and gentlemen. This fight is 3 rounds, in the light heavyweight division.
Introducing the fighter to my left, fighting out of the red corner.
With a record of
1 - 1 - 0, fighting out of Helsinki, Bison Must See BG!
And introducing the fighter to my right, fighting out of the blue corner.
With a record of
1 - 0 - 0, fighting out of Helsinki, Chuck Liddown!
The judges for this bout are Roosa J�rvil�inen, Johanna Lukiainen and Ben Zyskovitsi.

The bell rings for round one and we are underway!
Liddown throws a series of punches but Must See BG moves out of range.
Must See BG uses good footwork to avoid the strikes from Liddown.
Good work by Liddown as he checks the leg kick.
Liddown fakes and then throws a beautiful body shot. Must See BG looks a bit winded and takes a step backwards to take a breath.
Must See BG tries to land a leg kick but Liddown saw it coming and moves away.
Must See BG tries to clinch but is not successful on this occasion.
Liddown misses the jab.
Must See BG fails in his attempt to clinch.
Liddown misses with a jab and misses with a cross straight after too.
Liddown scores with a three punch combo!
Must See BG doesn't manage to clinch there - Liddown circles away.
An inside leg kick from Must See BG misses.
A left and a right from Liddown both land. Nice combination.
Liddown avoids a low kick by using good footwork.
Must See BG tries to score with a low kick but Liddown moves his leg out of the way.
Liddown lands with a straight right. Must See BG didn't see that one coming.
Wooooo! Give it up for these two warriors! They are putting on a show!
Sloppy strikes from Liddown. Those never looked like landing.
Must See BG has his hands up protecting his head but a hook from Liddown finds it's way round the side to connect with Must See BG's head.
Liddown misses with a two punch combination.

That's one minute gone in the round.
Must See BG showing good head movement there, avoiding the strikes from Liddown.
Liddown lands an overhand left. A wild punch that just about connected.

Must See BG is rocked!
Must See BG fakes with a right hand and throws a good leg kick, right into the thigh. That had to hurt Liddown.
Liddown misses with a jab, cross combination.
Must See BG misses with a low kick.
Must See BG tries to clinch but Liddown is having none of it.
Must See BG throws a body kick but he wasn't in range.
Must See BG is looking to clinch.
Liddown swinging wildly here.
Chuck Liddown seems to be the more aggressive standup fighter in this bout.
Must See BG takes a jab on the nose there. A little bit of blood seems to be coming out. Hopefully that won't affect his breathing.
A head kick misses from Must See BG.
Must See BG misses with an uppercut. Liddown saw that one coming.
Must See BG wants to clinch up but Liddown keeps it at a distance.
Liddown scores with a nice looking left hook and follows it up with an uppercut!

That's two minutes gone in the round.
Liddown looks to land a combination but Must See BG avoids it well.
Liddown avoids a kick to the body.
Liddown lets the fists fly and connects with a left straight followed by a right hook.
Liddown throws a right and a left that both miss.
Liddown throws a series of punches but Must See BG moves out of range.
Liddown misses with a jab and misses with a cross straight after too.

Liddown clinches.
A frustrated look appears on Must See BG's face as he tries to break the clinch.
Must See BG tries for a takedown. No joy.
Liddown can't break the clinch.
Must See BG keeps the fight in the clinch, despite Liddown's efforts to push away.
Liddown managing to block the knees to the body from Must See BG.
Must See BG with an attempt at a knee that misses.
Must See BG is breathing heavily.
Must See BG jumps guard but Liddown stands there with Must See BG around his waist. Must See BG gives up and drops back to his feet. We remain in the clinch.
Must See BG tries to land a knee to the head but misses.
Liddown wants to strike at distance but he can't break free of the clinch.
Liddown wants to strike at distance but he can't break free of the clinch.
Liddown has had enough of the clinch and is looking to separate.
Must See BG prevents Liddown from breaking the clinch.
Must See BG with the Thai clinch. He's looking to land a big knee but he's not managed it this time.

Liddown manages to break the clinch.
Liddown scores with a one two! Must See BG had his feet all tangled up there and couldn't avoid the strikes.

That's three minutes gone in the round.
Liddown scores with a hook to the body. Must See BG takes a step back and tries to catch his breath.
Must See BG ducks down and throws a hook to the body but Liddown moves away.
Liddown has managed to clinch.
Liddown has had enough of the clinch but Must See BG keeps him there for the moment.
Must See BG has Liddown pressed against the cage, preventing Liddown from circling away and getting back to striking at range.
Must See BG keeps the fight in the clinch, despite Liddown's efforts to push away.
A frustrated look appears on Liddown's face as he tries to break the clinch.
Liddown has had enough of the clinch and is looking to separate.
Liddown is trying to force a seperation but Must See BG has the dominant position.
Must See BG tries a knee to the head but he's missed.
Liddown's corner calls for him to break the clinch, which he does.
Liddown lands a jab followed by a nice looking cross.
Liddown dips down and scores with a jab to the body.
Liddown looks to land a combination but Must See BG avoids it well.
Must See BG tries to keep at a distance but Liddown has taken the fight into the clinch.
Must See BG tries to take the fight to the ground by pulling guard but can't manage it.
That's three failed takedown attempts in the round for Bison Must See BG. That's going to take a lot out of him.
Liddown breaks the clinch and we return to the middle of the mat.
Liddown misses with a series of wild punches.

That's four minutes gone in the round.
A nice combination there by Liddown.
Must See BG slips a jab and a cross from Liddown.
Liddown works his jab well there, keeping his opponent at a distance.
Fantastic stuff here - a very entertaining period of action, which has drawn cheers from the crowd.
Liddown lands a nice looking body shot.
Liddown rushes Must See BG and pushes him back against the cage in a clinch.
Liddown is trying to force a seperation but Must See BG has the dominant position.
Liddown is trying to break free.
Must See BG tries to pull guard but Liddown holds him up against the cage and eventually Must See BG drops back down to his feet.
Liddown tries to break free but Must See BG pushes him back against the cage.
Liddown's corner calls for him to break the clinch, which he does.
Liddown misses with a jab and misses with a cross straight after too.
Liddown stuns Must See BG with a nice body shot, before stepping back out of range.
As the round comes to an end the crowd are showing their appreciation for a great round of action.
Liddown misses with a jab and misses with a cross straight after too.
A punch combination from Liddown misses.
Liddown rushes forward with a series of wild hooks but Must See BG moves out of range and avoids them all easily.
And that�s the end of the round � the fighters go back to their corners.
Chuck Liddown dominated that round.
The minute break is over - no more time for sponges and pep talks - back to the action!

Liddown dips down and scores with a jab to the body.
Liddown cracks Must See BG with a hook to the jaw. Both fighters smile at eachother and high-five before getting back down to business.
Must See BG is trying hard to land a takedown here. Liddown sprawls well and keeps this one on the feet.
Liddown scores with a sloppy right hand. Must See BG should have avoided that one.
Must See BG tries to clinch
and Liddown counters by moving into the clinch.
Liddown tries to break free but Must See BG pushes him back against the cage.
Must See BG drops down looking for an ankle pick but Liddown pulls his leg out and moves away.
No joy there for Liddown, who threw a few shots but didn't land.
Liddown fails to land with a series of punches.
Liddown throws a combination. Must See BG tries to block but a couple of punches get through.
Oh Must See BG is still all over the place! His legs are completely gone! Will he be able to recover?!!
Both fighters are absolutely exhausted here.
Liddown lunges in with an uppercut that skims his opponent's chin.
Liddown throws a perfectly timed hook that sends Must See BG crashing down! Must See BG tries to stagger back to his feet but Liddown just hammers him until the ref stops the fight! A confused Must See BG asks the ref what just happened. Poor fella.
Ladies and gentlemen, after 0:54 of round 2, we have a winner by way of TKO (Strikes). Chuck Liddown!
|
|
|
|
|
|
|
|
|
|
|
|
|
|
|
|
|
|
|
|
|
|
|
| S |
C
A |
G |
S |
C
B |
G |
|
S |
C |
G |
|
energy
A | B |
|
hype
A | B |
|
pop
A | B |
|
mgr
A | B |
|
FIGHT
RATING
100% |
|
|
|
|
|
|
