|
|
PBP Commentary |
Coming up we have a welterweight MMA rules bout between Hellson Ballswick (ranked 0 p4p, 0 weight class) and Kazushi Rakusaba (ranked 0 p4p, 0 weight class). Rakusaba comes into a darkened arena with his song building. David Bowie - Suffragette City kicks in, the lights come on and the crowd goes wild! What a showman! Rumors backstage are that the fighters have been paid to keep it standing but we know that would never happen in MMA!
 |
|
 |
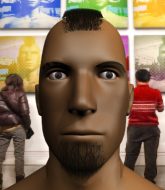
| 175 cm
25
180 lbs
10 - 8 - 0 |
|
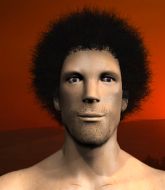
183 cm
27
181 lbs
8 - 5 - 0 |
Good wrestling
Excellent boxer
Very strong |
|
Good wrestler
Basic striking
Granite chin |
|
| |
|
Ladies and gentlemen. This fight is 3 rounds, in the welterweight division.
Introducing the fighter to my left, fighting out of the red corner.
With a record of
10 - 8 - 0, fighting out of Tokyo, Hellson Ballswick!
And introducing the fighter to my right, fighting out of the blue corner.
With a record of
8 - 5 - 0, fighting out of Tokyo, Kazushi Rakusaba!
The judges for this bout are Yukihiro Yamamoto, Hirohito Nitta and Ren Mimura.

The bell rings for round one and we are underway!
A telegraphed right hand from Rakusaba misses the target.
Ballswick avoids a lazy jab quite easily.

Ballswick darts in and lands a nice takedown into half guard.
The fighters are pressed up against the cage, both looking to find a bit of space to work.

Ballswick is looking for a kimura but Rakusaba is holding onto that half guard position, so it's hard for Ballswick to get the leverage.
Ballswick prevents Rakusaba from improving his position.
Ballswick passes the guard and advances to mount!
Ballswick working for a guillotine from mount but Rakusaba is in no mood to give up.
Ballswick looks like he's working for a submission but he's not found anything just yet.

That's one minute gone in the round.
Rakusaba is squirming around, avoiding Ballswick's attempts to control the action.
Rakusaba regains half guard.
Rakusaba is trying to get back to full guard.
Ballswick is looking for a kimura. It's pretty deep but Rakusaba still has the half guard so he's probably OK. Oh, Rakusaba has exploded into a beautiful escape there and after a quick scramble, he's ended up in side control on top! Nice work!
Rakusaba trying to control the position but Ballswick is working away.
The fighters are going at a pretty good pace and they're both starting to sweat now.
Rakusaba lands a decent elbow from side control.

That's two minutes gone in the round.
Ballswick is working hard to escape and get back to his feet. After a battle for position, Rakusaba asserts his dominance and retains side control.
Rakusaba landing a few strikes.
Ballswick regains half guard.
Ballswick has hold of Rakusaba's hands but Rakusaba slips his arm to the side and lands an elbow.
Ballswick is working for an escape here. He's hooked one of Rakusaba's legs and he's managed to sneak out and take Rakusaba's back!
Rakusaba fending off the submission attempt from Ballswick.
Ballswick is staying calm and holding on to the back position, whilst working on a rear naked choke. Rakusaba is defending well though. Ballswick let's go of the attempt for now.
Rakusaba is trying to break free.

That's three minutes gone in the round.
Ballswick looking to break Rakusaba's wrist control so he can sink in the choke. Rakusaba remaining controlled and patient though - he really has to keep calm otherwise Ballswick will wrap this one up with the rear naked choke!
Rakusaba is having to fend off submission attempts from Ballswick, who is looking to sink in the choke. Ballswick doesn't have the hooks in though and Rakusaba manages to reverse position! He's now on top, in his opponent's guard.
Rakusaba wants to control from the top but Ballswick keeps moving.
Rakusaba looking to pass the guard.
Rakusaba slips effortlessly into side control - very nice.
Rakusaba creates a bit of distance and throws down some hard shots.
Ballswick avoids any damage from the ground and pound of Rakusaba.
Ballswick taking a bit of punishment here - Rakusaba scoring with strikes.

That's four minutes gone in the round.
Rakusaba is looking to finish here, going for an Americana. Ballswick knows the correct defense though, so he's OK.
Ballswick is trying to control Rakusaba's posture but Rakusaba avoids it.
Rakusaba fails to land a wild elbow strike.
Ballswick looks to move to half guard but instead Rakusaba has passed into mount! Damn!
Ballswick tries to get back to half guard but can't.
Rakusaba looking to ground and pound his opponent to a finish here.
Rakusaba with a couple of short strikes.
Ballswick is desperately trying to improve his position but Rakusaba has a good base and remains in mount.
Ballswick wants to control but Rakusaba is having none of it.
Ballswick really trying hard to get back to half guard here.
And that�s the end of the round � the fighters go back to their corners.
Kazushi Rakusaba dominated that round.
That's time! Back to the action!

Ballswick avoids the body shot from Rakusaba.
Rakusaba gets his takedown attempt stuffed easily
and Ballswick counters with a right hand to the body.
Rakusaba misses the jab.
Ballswick connects with a good right hand that stumbles Rakusaba. Rakusaba circles away out of range and recomposes himself.
A jab from Ballswick misses.
Ballswick throws a loose over hand right and dives in with a double leg takedown. Rakusaba tries to sprawl but it's too late and the fighters hit the mat. Ballswick is in Rakusaba's guard.
Ballswick pressing down on his opponent's thigh, looking to pass guard. Rakusaba is keeping the position for now.
Rakusaba tries to land a sweep but no joy.
That's one minute gone in the round.
Rakusaba is looking for a triangle but Ballswick pushes his legs off easily.
Ballswick wants to pass the guard but Rakusaba is keeping the position.
Ballswick pushing down on Rakusaba's thigh, trying to pass to half guard. He's managed it... Nice work.
Rakusaba is trying to get back to full guard.
Ballswick is working for a kimura but Rakusaba is defending it quite comfortably.
Ballswick is working for a kimura but Rakusaba is defending it quite comfortably.
That's two minutes gone in the round.
There's not a lot going on here and the crowd are letting the fighters know they're not willing to tolerate a lack of action.
Ballswick is trying to work for a kimura but Rakusaba is defending well.
Ballswick seems very keen to just sit and control from half guard but Rakusaba does not like that idea so much and is remaining active off his back.
Ballswick is looking for submissions but instead, Rakusaba has regained full guard.
Rakusaba controlling the position.
That's three minutes gone in the round.
Rakusaba trying to keep a closed guard but Ballswick is proving a slippery customer.
Ballswick stands up and looks to throw the legs aside to pass to side control. Rakusaba swivels though and keeps the full guard.
Rakusaba wants to control here, rather than go for any submissions from the bottom. At least for now.
The referee wants the fighters to be more active or he's going to reset them on the feet.
Ballswick postures up as if he's going to throw some strikes but drops back for an ankle! Rakusaba is in big trouble! He looks ready to tap! But no, he's escaped and dives on top of Ballswick, into his guard.

Ballswick manages to escape and get back to his feet.
That's four minutes gone in the round.
Ballswick connects with a body shot.
Nice shot lands for Ballswick.
Rakusaba throws a body punch but Ballswick moves out of range.
Ballswick lands a jab to the head.
Rakusaba moves away from the strike by Ballswick.
Ballswick misses with a wild body shot.
Rakusaba throws a hook to the side of Ballswick's head but Ballswick sees it coming and ducks under it beautifully.
Ballswick lands a jab. Then a cross. Then finally a nice hook to the body. Good work there by Ballswick.

It looks like Kazushi Rakusaba has been cut.
Rakusaba shoots in for a takedown and gets it.
Ballswick looking for submissions from an awkward position here.
Ballswick manages to get to full guard.
Ballswick had isolated an arm as going for a kimura. Rakusaba defends it easily.
And that�s the end of the round � the fighters go back to their corners.
Hellson Ballswick dominated that second round.
The cut man is working on Kazushi Rakusaba's cut.
The corners get their ten second warning. Both fighters stand from their stools and stare eachother down, ready to get back to the action. This is the final round!

Ballswick looks to score with a jab to the body but Rakusaba is just out of range.
Rakusaba shoots for a double leg takedown but Ballswick sprawls well. He's pushed Rakusaba's face into the mat and manages to get back to his feet relatively easily.
Ballswick misses with a body shot. Nice footwork from Rakusaba.
Rakusaba uses some good footwork to avoid the body shot by Ballswick.
Rakusaba throws an uppercut from half a mile away. Ballswick sees it coming and avoids it easily.
Rakusaba shoots in and gets a takedown into Ballswick's guard.
Rakusaba works over Ballswick with some ground and pound from guard.
Kazushi Rakusaba has got the better of the ground game so far.
Rakusaba cracks Ballswick with a solid left hand.
Ballswick looking for submissions from the bottom here. Moving his hips around, possibly looking for an armbar.
Ballswick tries to land a sweep but no joy.
Both fighters really going for it on the ground here!
The ref warns both fighters not to hold the cage as they work up against the meshing.
Rakusaba keeps in close for a moment and lands a decent shot to the side of Ballswick's head.
That's one minute gone in the round.
Ballswick has a loose triangle. He'll be looking to tighten that up but Rakusaba can see exactly what he's planning and manages to posture up and free himself.
Both fighters are breathing heavily.
Ballswick looking to sweep here. No luck so far.
Ballswick utilising some decent striking defenses from the guard, preventing the ground and pound.
Ballswick looking for a guillotine here but Rakusaba defends easily.
Ballswick can't keep his opponent in guard - Rakusaba advances to half guard, no doubt looking to mount.
Rakusaba is looking for an arm triangle, whilst trying to pass to side control. Ballswick doesn't seem that keen to cooperate though. No luck this time Rakusaba.
Rakusaba is trying for a guillotine from the top but the pressure isn't in the right place so Ballswick is just riding it out for now. Rakusaba eventually gives up the hold.
That's two minutes gone in the round.
The crowd are showing their displeasure at the lack of action as loud boos ring out around the arena.
Rakusaba is looking for a kimura here.
Rakusaba thumps the canvas. Not on purpose obviously - he just missed Ballswick's head.
Ballswick slips a foot under and gets full guard. Nice work.
Ballswick throwing his legs up looking for a triangle.
Ballswick trying to keep a closed guard but Rakusaba is proving a slippery customer.
That's three minutes gone in the round.
Rakusaba engaging in some classic timewasting tactics.
Ballswick had isolated an arm as going for a kimura. Rakusaba defends it easily.
Rakusaba sneaks a leg through and gets to half guard. That was like a knife through butter how easily he passed Ballswick's guard.
Rakusaba lands with a punch from half guard.
Rakusaba is keen to just control but Ballswick is a slippery customer.
Ballswick is looking to regain full guard. Not this time though.
Rakusaba is keen to just control but Ballswick is a slippery customer.
Rakusaba prevents Ballswick from improving his position.
That's four minutes gone in the round.
Ballswick gets back to full guard.
Rakusaba's corner is telling him to maintain position.
Rakusaba's corner are shouting for him to control the position and he seems happy to oblige.
Ballswick working for a triangle but Rakusaba defends it easily.
Ballswick working for a triangle but Rakusaba defends it easily.
Ballswick is working an open guard here, looking to improve his position. No doubt that will leave him open to counters but at least he's being more offensive.
Rakusaba distracts Ballswick with his right hand and drops a big elbow with his other arm.
And that's the end of the fight!
Kazushi Rakusaba comfortably won the final round on my scorecard.
I think Rakusaba has won this one but let's see whether the judges agree with me. Over to the ring announcer for the scorecards.
Ladies and gentlemen, after 3 rounds of action, we go to the scorecards for a decision.
Judge Yukihiro Yamamoto scores the fight 28:29
Judge Hirohito Nitta scores the fight 28:29
Judge Ren Mimura scores the fight 28:29
In favor of your winner, by unanimous decision... Kazushi Rakusaba!
|
|
|
|
|
|
|
|
|
|
|
|
|
|
|
|
|
|
|
|
|
|
|
| S |
C
A |
G |
S |
C
B |
G |
|
S |
C |
G |
|
energy
A | B |
|
hype
A | B |
|
pop
A | B |
|
mgr
A | B |
|
FIGHT
RATING
58% |
|
|
|
|
|
|
