|
|
PBP Commentary |
Coming up we have a lightweight MMA rules bout between Nate Heywood (ranked 0 p4p, 0 weight class) and Gary Cora (ranked 0 p4p, 0 weight class). Heywood comes into the arena with Go Hard-DJ Khaled blaring out of the sound system. Cora is bouncing up and down as he enters the arena, backed by Hell's Bells - AC/DC. We have two fighters making their debuts here, so let's see who comes out of this one with their first professional victory.
 |
|
 |
| 180 cm
22
164 lbs
0 - 0 - 0 |
|
174 cm
22
160 lbs
0 - 0 - 0 |
Good wrestling
Basic striking
Cuts easily |
|
BJJ Blue Belt
Brawler
Inexperienced |
|
| |
|
Ladies and gentlemen. This fight is 3 rounds, in the lightweight division.
Introducing the fighter to my left, fighting out of the red corner.
With a record of
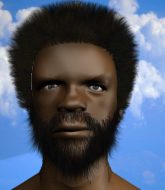
0 - 0 - 0, fighting out of Las Vegas, Nate Heywood!
And introducing the fighter to my right, fighting out of the blue corner.
With a record of
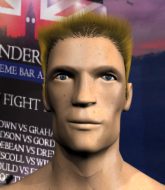
0 - 0 - 0, fighting out of Las Vegas, Gary Cora!
The judges for this bout are Gwen Towbar, Cecil Peabody and Frank Dennis.

The bell rings for round one and we are underway!
Heywood looks for a takedown but Cora sprawls well.
Wow, both these guys are really going for it!

Heywood shoots in and gets a takedown into half guard. Heywood showed some decent athleticism there.
Cora makes his way to full guard. A much better position for Cora.
Cora looking for a sweep. Not yet Cora, not yet.
Cora utilising some decent striking defenses from the guard, preventing the ground and pound.
Cora is trying to control the position from the bottom.
Heywood thows a big elbow that misses.
Cora working a defensive guard here.
Heywood throwing elbows and punches but not connecting, as Cora works some decent striking defense from the bottom.
Heywood connects with a couple of short punches.
Cora controlling Heywood's posture.
Heywood scoring with some ground and pound.
Both fighters really going for it on the ground here!
Heywood keeps in close for a moment and lands a decent shot to the side of Cora's head.

Cora is looking for a triangle but Heywood pushes his legs off easily.

That's one minute gone in the round.
Heywood wants to control from the top but Cora keeps moving.
Cora manages to sweep nicely, so he's now on top. Heywood manages to get himself to full guard.
Heywood wants to hit a switch here but Cora passes into full mount! Oh no, disaster for Heywood there!
Heywood is looking to improve his position but Cora isn't that keen on the idea.
Heywood is working hard here to advance position.
Cora tries to control but Heywood wriggling away.
Cora moves to the back position.
Heywood is really stuck here.
Heywood rolls and manages to get back to half guard. Nicely done.
Heywood is looking to regain full guard. Not this time though.
Heywood misses with some strikes from the bottom.

That's two minutes gone in the round.
Cora seems to be working for a kimura but Heywood defends the submission attempt.
Cora sitting and controlling from the half guard.
Heywood tries to strike from the bottom but it doesn't land.
Heywood missing with punches from the bottom.
Cora controlling the action here.
Heywood is looking to improve his position.
Cora controlling the action here.
Cora prevents Heywood from improving his position.
Cora wants to lay and pray for a moment but Heywood keeps working.
Cora controlling the action here.

That's three minutes gone in the round.
Heywood is looking to regain full guard. Not this time though.
Heywood works his way to full guard. Good work.
Cora looks gassed!
Heywood lands with a heel strike from the guard.
Heywood throws some sloppy strikes off his back.
Cora won't allow Heywood to sweep him here.
Cora trying to control the position from guard on top but Heywood is wriggling around, looking for whatever he can.
Heywood trying to strike off his back.
Cora wants to control from the top but Heywood keeps moving.
Heywood lands a decent shot there.
Cora trying to control but Heywood is working from the bottom.

The ref stands the fighters back up, due to lack of action by Gary Cora.
Heywood closes the distance and looks for a trip takedown... aaaand he's got it - Heywood lands in his opponent's guard.
Cora is trying to control the position but Heywood postures up.
The fighters are pressed up against the cage, both looking to find a bit of space to work.
Heywood passes easily into side control. Nice work.

That's four minutes gone in the round.
Heywood creates a bit of distance and throws down some hard shots.
Cora is sneaking out the side here. He's bucked Heywood off and has taken his back!
Heywood manages to reverse the position and now he's in Cora's guard. Nice work there by Heywood.
Heywood is sitting in guard, working some ground and pound.
Heywood has to be careful here, sitting in the guard of a superior BJJ player.
Cora working from the bottom, still in full guard. He's managed to get a loose triangle. Heywood doesn't seem to be doing much to defend here, obviously he feels comfortable in the position. Heywood manages to throw the legs off his shoulder and he's back into guard - no problem.
Heywood postures up to throw the ground and pound strikes but they don't connect.
Cora controlling Heywood's posture.
Cora tries to land a sweep but no joy.
Cora trying to keep a closed guard but Heywood is proving a slippery customer.
Heywood being controlled here momentarily.
Cora working for a triangle but Heywood defends it easily.
Heywood postures up.
And that�s the end of the round � the fighters go back to their corners.
That was a close round but I would say that Nate Heywood will probably get the nod.
That's the end of the interval. I'm sure that seemed a lot quicker than a minute for our two fighters! Back to the action.

Heywood shoots in but no luck this time.
Heywood has a takedown stuffed.

Cora has managed to clinch.
Cora has hold of one of Heywood's legs. Heywood is fighting the takedown attempt but Cora gets the trip and lands the takedown into guard.
Cora trying to control the position from guard on top but Heywood is wriggling around, looking for whatever he can.
Cora controlling from the top position.
The ref stands the fighters back up, due to lack of action by Gary Cora.
A punch combination from Cora misses.
Cora clinches with his opponent.

Cora breaks the clinch and we return to the middle of the mat.
Heywood shoots in and gets a takedown into half guard. Heywood showed some decent athleticism there.
Heywood looks towards his corner to check for any instructions. The corner give him nothing to work with, so he cracks Cora with a short hammerfist. I guess that's as good as any advice he could get in this position.
Heywood prevents Cora from improving his position.
Cora wants to control but Heywood is keeping busy.
That's one minute gone in the round.
Heywood wants to control but Cora is keeping him busy.
Cora is breathing heavily.
Heywood missing with some ground and pound from the half guard.
Heywood thows a wild elbow that connects with the canvas.
The two fighters exchange a few words. I couldn't hear what they were saying but maybe it's more fun if you make it up yourself. Heywood connects with a nice short shot to Cora's temple.
Nice strikes from Heywood there.
Cora trying to control here.
Cora tries to roll over but Heywood keeps him under control.
Cora regains full guard, whilst avoiding punches from Heywood.
Cora controls Heywood momentarily but Heywood frees himself.
Heywood stands up over Cora, holding his feet. He dives back in and lands a decent shot to the head.
Cora trying to control the position.
Nate Heywood overall seems to be getting the better of the ground position in the fight so far.
Heywood is in close to Cora's body, working some short punches and elbows.
Cora avoiding any damage from the ground and pound.
Heywood postures up.
That's two minutes gone in the round.
Well. There's a bit of a lull in the action here and the crowd are starting to get restless.
Heywood lands a couple of decent looking shots.
Heywood pressing down on his opponent's thigh, looking to pass guard. Cora is keeping the position for now.
The ref warns both fighters not to hold the cage as they both work up against the meshing.
Cora working a defensive guard here.
Heywood scoring with punches to the head and body.
Heywood stands up over Cora, holding his feet. He dives back in and lands a decent shot to the head.
Cora manages to land a sweep and now he's in mount on top!
Heywood bucks up and manages to get a nice reversal! He's in guard on the top - nicely done!
Heywood won't allow Cora to sweep him here.
Heywood missing there with some ground and pound from the guard.
Cora has his hands on Heywood's head, controlling the position.
Heywood working the defensive guard well to avoid strikes from Heywood.
Cora wants to sweep here but Heywood controlling him for the moment.
Cora controls Heywood momentarily but Heywood frees himself.
Heywood won't allow Cora to sweep him here.
That's three minutes gone in the round.
Heywood throws a strike but Cora rolls with it and manages to sweep. Now he's in guard on top.
Heywood keeping moving, preventing Cora from controlling successfully.
Heywood looking to hit a scissor sweep but Cora is one step ahead there.
Heywood throws a couple of weedy looking strikes off his back.
Cora trying to control but Heywood is working from the bottom.
The ref stands the fighters back up, due to lack of action by Gary Cora.
Heywood moves out of range of the leg kick from Cora.
Heywood keeping a good distance there, avoiding the body shot.
Excellent takedown into side control there by Heywood.
Heywood is trying to ground and pound but Cora uses the momentary lack of control by Heywood to regain half guard.
That's four minutes gone in the round.
Heywood stops Cora from getting back to his feet.
Heywood throwing shots but they're hitting the canvas more than the man.
Heywood tries to pass to full mount but Cora defends it.
Cora trying to hold on to Heywood's head to control him but Heywood postures up.
Heywood thumps the canvas. Not on purpose obviously - he just missed Cora's head.
Cora keeping control of the position.
Cora is trying to control but can't.
Cora works his way to full guard. Good work.
Heywood trying to pass the guard but can't manage it just yet.
Heywoodis looking to pass into half guard but Cora pushes him away with his feet and jumps on top - now Cora is in guard.

Cora stands up from Heywood's guard - Cora perhaps looking for a knockout.
Excellent takedown into side control there by Heywood.
Heywood in side control lands a decent elbow.
And that�s the end of the round � the fighters go back to their corners.
Nate Heywood dominated that second round.
The fighters get back to their feet, the hooter sounds and we're back to the action! The crowd applaud as we get ready to start the final round!

Cora tries to clinch there but Heywood circles away.

Cora is rocked!
Heywood is looking for a takedown. Wow, that's a brutal slam - Cora is in big trouble! Heywood is landing strikes from the mount and this one is all over! The ref jumps in to save a confused looking Cora. Poor guy.
Ladies and gentlemen, after 0:08 of round 3, we have a winner by way of TKO (Slam). Nate Heywood!
|
|
|
|
|
|
|
|
|
|
|
|
|
|
|
|
|
|
|
|
|
|
|
| S |
C
A |
G |
S |
C
B |
G |
|
S |
C |
G |
|
energy
A | B |
|
hype
A | B |
|
pop
A | B |
|
mgr
A | B |
|
FIGHT
RATING
100% |
|
|
|
|
|
|

