|
|
PBP Commentary |
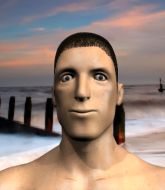
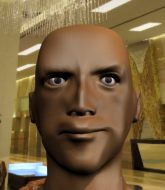
Coming up we have a light heavyweight MMA rules bout between Morgan Brand (ranked 0 p4p, 0 weight class) and John Locke II (ranked 0 p4p, 0 weight class). The key to victory for Morgan Brand has got to be keeping the fight on the feet.
 |
|
 |
| 190 cm
24
215 lbs
4 - 4 - 0 |
|
200 cm
22
200 lbs
4 - 4 - 0 |
BJJ White Belt
Solid Muay Thai
Experienced |
|
BJJ Blue Belt
Brawler
Granite chin |
|
| |
|
Ladies and gentlemen. This fight is 3 rounds, in the light heavyweight division.
Introducing the fighter to my left, fighting out of the red corner.
With a record of
4 - 4 - 0, fighting out of Helsinki, Morgan Brand!
And introducing the fighter to my right, fighting out of the blue corner.
With a record of
4 - 4 - 0, fighting out of Helsinki, John Locke II!
The judges for this bout are Anni Minnem�ki, Johanna Lukiainen and Roosa J�rvil�inen.

The bell rings for round one and we are underway!
Brand tries to close the distance and clinch up but Locke II swats him away and circles back towards the center.
Locke II misses with a half-hearted attempt at a head kick.

Brand gets a clinch.
Locke II wants to get back to striking at distance but Brand won't allow it.
Locke II is trying to force a seperation but Brand has the dominant position.
Locke II being controlled against the cage.
Brand keeps control of Locke II as he tries to wriggle out of the double underhooks.
Locke II wants to break free. God knows he wants to breaaaak freeee.

Brand pushes off and circles away, back to the middle of the mat.
Brand closes the distance looking to clinch
and Locke II counters by moving into the clinch. Good anticipation by Locke II.
Brand with the Thai clinch. He's looking to land a big knee but he's not managed it this time.
Brand gets double underhooks to prevent a takedown attempt from Locke II.
Locke II breaks from the clinch.
Locke II tries to grapple but his opponent circles
and Brand counters with a flying knee. Nice.
Locke II uses some good footwork to avoid the body shot by Brand.
Locke II tries a switch kick but it misses it's target.
Brand looking to take his opponent's legs away with the low kicks.
This has been an exciting period of action!
Locke II clinches.
Brand lands a nice elbow.

That's one minute gone in the round.
Brand comes over the top with an elbow. That landed flush.
Brand lands an elbow just above Locke II 's eye.
Locke II is trying to force a seperation but Brand has the dominant position.
Locke II tries for a takedown. No joy.
Brand lands a knee to the head.
Brand breaks the clinch and we return to the middle of the mat.
Brand tries to clinch up against the cage, rushing in the close the distance. Locke II manages to break the clinch and circles back to the middle of the mat.
Locke II tries to shoot in for a takedown. He's got hold of a leg but Brand swivels and escapes.
Morgan Brand has stuffed three takedown attempts in the round now. That's going to take a lot out of John Locke II.
Locke II looks gassed!
Brand tries to close the distance and clinch up but Locke II swats him away and circles back towards the center.

Locke II scores a trip takedown into side control. Nice.
The fighters are pressed up against the cage, both looking to find a bit of space to work.
Locke II trying to control the position but Brand is working away.
Brand is trying to control Locke II's posture but Locke II avoids it.
Both fighters really going for it on the ground here!
Locke II trying to control the action but Brand is working from the bottom.
Locke II misses with a strike but at least he's keeping busy, looking to cause some damage - that will still help him when it comes to the judges scorecards.

That's two minutes gone in the round.
Brand can't do much from the bottom here.
Locke II trying to control the position but Brand is working away.
Locke II misses with the ground and pound.
Locke II tries to cartwheel into mount but he doesn't manage it.

Locke II has had enough of the ground for now and decides to stand.
Brand throws a head kick that connects with a bit of head and a bit of hand.
Morgan Brand seems to be the more aggressive standup fighter in this bout.
Brand darts in trying to clinch
and Locke II counters into the clinch. Nicely done.
Brand breaks the clinch and we return to the middle of the mat.

That's three minutes gone in the round.
Locke II clinches.
Brand is trying to force a seperation but Locke II has the dominant position.
Locke II is trying to force a seperation but Brand has the dominant position.
Brand utilising his Muay Thai to score with a knee to the body.
Brand dictating the pace here, as the fighters clinch against the cage.
Brand has Locke II pressed against the cage, preventing Locke II from circling away and getting back to striking at range.
Locke II has clasped his hands together around Brand's back... aaand, he's got a takedown into side control. Nicely done.
Locke II cracks Brand with a big elbow.
Locke II landing strikes.
Brand taking a bit of punishment here - Locke II scoring with strikes.
Locke II scoring with punches from side control.
Locke II wants to lay and pray for a moment but Brand keeps working.
Locke II working the body and head with strikes.
Locke II in side control, just content to control the action for now.
Locke II working the ground and pound but he's contacting the mat, not the fighter.

That's four minutes gone in the round.
Locke II throws a knee to the body but it doesn't do much damage.
The ref warns both fighters not to hold the cage as they work up against the meshing.
You can see the frustration on Brand's face, being in this tough position on the bottom.
Sloppy strikes there by Locke II.
Locke II lands a few punches from side control.
This has been an exciting period of action!
Locke II cracks Brand with a big elbow.
The strikes coming from Locke II are missing the target in this wave of attacks.
Locke II cracks Brand with an elbow. That is naaassty.
Brand is not in a great position here, taking some shots.
Locke II scoring with punches and elbows.
As the round comes to an end the crowd are showing their appreciation for a great round of action.
Locke II trying to control the action but Brand is working from the bottom.
Locke II cracks Brand with an elbow. That is naaassty.
And that�s the end of the round � the fighters go back to their corners.
A close round but John Locke II will probably get the nod.
That's time! Brand's corner gives him a slap on the ass as he gets ready to fight.

Locke II throws a series of punches but Brand moves out of range.
Locke II misses with an uppercut.
Locke II misses with a wild combination.
Brand misses the body punch
and Locke II counters with a crisp hook to the side of the head.
Brand wants to clinch
and Locke II counters by moving into the clinch.
Locke II breaks the clinch and we return to the middle of the mat.
Locke II circles away from the clinch attempt
and Locke II moves into the clinch.
Brand trying to stall but Locke II improves his position.
Brand misses with an elbow strike.
Locke II tries for a takedown but Brand manages to get underhooks.
Brand is trying to maintain a safe position but Locke II gets an underhook and turns Brand into the cage.
Locke II gets a nice trip takedown into half guard.
Locke II prevents Brand from improving his position.
Both fighters are absolutely exhausted here.
Brand keeping his head moving to avoid the ground and pound.
Locke II thows a huge punch but Brand dodges it nicely.
That's one minute gone in the round.
Brand desperately trying to maintain half guard.
Brand wants to control but Locke II is keeping busy.
Locke II seems very keen to just sit and control from half guard but Brand does not like that idea so much and is remaining active off his back.

Locke II is trying a forearm choke� I don't think that's going to do much at this level of the game.
Locke II is trying to control the action in half guard but Brand is working away on the bottom, looking perhaps to get back to full guard.
Locke II is pressing down on Brand's thigh, looking to free his foot. Brand is holding on for now.
That's two minutes gone in the round.
A lull in the action here being met with boos from the crowd.
Locke II takes advantage of the dominant position to land a couple of big hammer fists.
Brand has hold of Locke II's hands but Locke II slips his arm to the side and lands an elbow.
Brand wants to improve his position but Locke II is controlling well.
Locke II is keen to just control but Brand is a slippery customer.
Locke II wants to pass to mount but Brand is defending the position.
Locke II is trying to work for a kimura. This could be trouble! No, Brand has managed to free his arm - good work.
Brand is trying to control but can't.
Brand avoiding damage under a succession of punches from Locke II.
The two fighters exchange a few words. I couldn't hear what they were saying but maybe it's more fun if you make it up yourself. Locke II connects with a nice short shot to Brand's temple.
Brand is not content to let Locke II control the position.
That's three minutes gone in the round.
Brand keeping his head moving to avoid the ground and pound.
Locke II throwing shots but Brand is blocking nicely.
Brand on his back here. We all know that wrestlers don't like being on their back so let's see if Brand tries to get out of the position.
Brand is refusing to be controlled, as Locke II sits in half guard.
Locke II winds up and cracks Brand with a swinging punch to the side of the head.
Locke II not throwing his punches with enough precision this time.
Locke II trying to mount his opponent but Brand defends it.
Locke II has the superior BJJ but he's also working some ground strikes into his gameplan.
Brand is trying to maintain the position but Locke II is very close to passing his half guard.
The two fighters exchange a few words. I couldn't hear what they were saying but maybe it's more fun if you make it up yourself. Locke II connects with a nice short shot to Brand's temple.
Brand blocking the ground and pound attempt from Locke II.
Locke II works his foot free and advances to mount.
Locke II looking to finish Brand with some ground and pound. This is bad for Brand!
That's four minutes gone in the round.
Locke II raining down hammerfists from mount.
Locke II is still in mount, landing shots to his trapped opponent. Brand can't stay in a position like this for much longer.
Locke II has his opponent pinned against the cage, landing some nasty ground and pound that is really making a bit of a mess out of Brand's face.
Locke II lands a couple of nice shots there from mount.
A nice elbow there by Locke II.
Locke II looking to finish Brand with some ground and pound. This is bad for Brand!
Brand takes a big shot to the head but keeps on trying to improve his position.

Brand is rocked!
This is a great period of action - very entertaining stuff!
Brand takes a big shot to the dome and his eyes have rolled back in his head! Locke II's killer instinct has kicked in as he finishes the fight with more strikes. Impressive finish.
Ladies and gentlemen, after 4:58 of round 2, we have a winner by way of TKO (Strikes). John Locke II!
|
|
|
|
|
|
|
|
|
|
|
|
|
|
|
|
|
|
|
|
|
|
|
| S |
C
A |
G |
S |
C
B |
G |
|
S |
C |
G |
|
energy
A | B |
|
hype
A | B |
|
pop
A | B |
|
mgr
A | B |
|
FIGHT
RATING
71% |
|
|
|
|
|
|
