|
|
PBP Commentary |
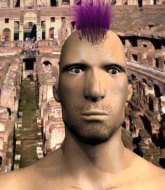
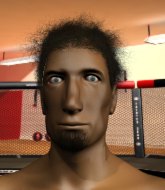
Coming up we have a heavyweight MMA rules bout between Henry Spark (ranked 0 p4p, 0 weight class) and Clark Kent (ranked 0 p4p, 0 weight class). Henry Spark has the better chin. Will he look to stand and bang today?
 |
|
 |
| 186 cm
21
240 lbs
1 - 1 - 0 |
|
190 cm
18
255 lbs
2 - 2 - 0 |
BJJ White Belt
Brawler
KO power |
|
BJJ White Belt
Great elbows
Tends to cut |
|
| |
|
Ladies and gentlemen. This fight is 3 rounds, in the heavyweight division.
Introducing the fighter to my left, fighting out of the red corner.
With a record of
1 - 1 - 0, fighting out of St Petersburg, Henry Spark!
And introducing the fighter to my right, fighting out of the blue corner.
With a record of
2 - 2 - 0, fighting out of St Petersburg, Clark Kent!
The judges for this bout are Fedor Mirinova, Aleksandr Martynov and Dmitry Maklakov.

The bell rings for round one and we are underway!
Kent looks for a takedown here. Will he get it? Spark is fending him off so far but Kent persists. Nope, Spark circles away and we're back to standing.
A punch combination from Spark misses.
Kent throws a jab, cross combination which is slipped

and Spark counters by clinching up.

Spark manages to break the clinch.
Spark shoots in for a takedown - he's clinched up with Kent but Kent pushes him off and we're back to square one.
Horrible takedown by Spark or perhaps it was just good defense by Kent which made him look bad.
Spark swinging wilding here.
Spark moves into the clinch successfully.
Spark breaks from the clinch.
Kent throws a left that rocks Spark and follows with a right that sends him tumbling to the canvas! Kent dives into side control, looking to finish! Can Spark regain composure!

Spark is rocked!
Spark is not content to let Kent control the position.
Oh Spark is still in real trouble! Will he be able to recover?!!
Spark is working hard to escape and get back to his feet. After a battle for position, Kent asserts his dominance and retains side control.
Spark seems to have got his legs back now.

That's one minute gone in the round.
Kent wants to lay and pray for a moment but Spark keeps working.

Spark throws his opponent off and manages to get back to his feet! Nicely done!
Spark shoots for a takedown but Kent saw that one coming a mile off and avoided it easily.
That's three failed takedown attempts in the round for Henry Spark. That's going to take a lot out of him.
Spark is breathing heavily.
Kent tries to clinch but Spark is having none of it.
Spark fails with the takedown.
Spark throws a nice outside leg kick.
Spark shoots in and drives through. Kent sprawls well.
Nice body punch from Kent.
Kent changes levels and looks for a double leg takedown. Spark tries to avoid it but Kent manages to keep hold of a leg and drag Spark to the ground. Spark escapes though and pops straight back up to his feet.
Kent throws a lazy head kick

and Spark counters with a takedown into full mount! That could mean trouble for Kent!
We've seen a great period of action over the last minute or so - credit to both fighters for leaving it all in the cage!
Spark gets to his feet and calls his opponent to stand. Here come the fireworks!
Spark looks to land a combination but Kent avoids it well.
Kent misses with a jab, cross combination.
Spark shoots in for a takedown - he's clinched up with Kent but Kent pushes him off and we're back to square one.
The fight moves into the clinch position.

That's two minutes gone in the round.
Spark breaks from the clinch.
Nice sprawl there from Kent as Spark shoots in.
Kent throws a nice looking combination but Spark bobs and weaves to avoid any damage.
Spark rushes Kent and pushes him back against the cage in a clinch.
Spark gets a nice trip takedown into half guard.
Kent is trying to stand back up but Spark is controlling him
Spark decides to stand and escape the position.
Spark shoots in for a takedown - he's clinched up with Kent but Kent pushes him off and we're back to square one.
Spark moves into the clinch.
Spark breaks from the clinch.
Spark looks frustrated there after his takedown attempt is stuffed easily.
Kent doesn't manage to clinch there - Spark circles away.
Spark clinches up with Kent and pushes him back against the cage.
Kent wants to strike at distance but he can't break free of the clinch.
Spark escapes the clinch and we're back to striking.
Kent throws a nice looking combination but Spark bobs and weaves to avoid any damage.
Kent throws a leg kick but Spark checks it.
Spark misses with a takedown attempt. He shot from a bit too far out.
Spark shoots in and drives through. Kent sprawls well.

That's three minutes gone in the round.
Spark fakes an overhand right and shoots for a takedown. Kent sprawls well initially but Spark persists and gets the takedown into half guard.
Spark stands up and beckons Kent to join him on the feet.
Spark will need to tighten up his combinations if he doesn't want to gas himself out, swinging at thin air.
Kent tries to clinch but is not successful on this occasion.
Spark tries to clinch there but Kent circles away.
A jab-cross combination lands for Kent and sends Spark crashing to the mat! Kent follows him down to the mat - Spark regains half guard but he's not out of trouble yet!
Kent is keen to just control but Spark is a slippery customer.
Spark blocking the ground and pound attempt from Kent.
Kent wants to take a breather but Spark is having none of it.
Kent stops Spark from getting back to his feet.
Kent thows a wild elbow that connects with the canvas.
Spark pushes Kent off and gets back to his feet.
Wooooo! Give it up for these two warriors! They are putting on a show!
Spark shoots for a double leg takedown but Kent sprawls well. He's pushed Spark's face into the mat and manages to get back to his feet relatively easily.
Spark clinches.
Spark breaks the clinch.
Kent wants to clinch up but Spark keeps it at a distance.

That's four minutes gone in the round.
Spark blocks a low kick nicely.
Spark throws a looping left and ducks down for a takedown. He's got his arms around Kent's waist but Kent gets an underhook and avoids the takedown by throwing Spark off to one side.
Kent closes this distance looking for a takedown but Spark circles away.
Kent lands a jab-cross combination.
Kent throws an overhand right from the outside, which connects and sends Spark stumbling backwards into the cage! Spark bounces back off the cage towards Kent, who cracks him with a two punch combination that drops him to his knees! Kent lands two more shots before the referee has chance to intervene - what a finish! Kent celebrates with his corner as the crowd cheer loudly.
Ladies and gentlemen, after 4:19 of round 1, we have a winner by way of TKO (Punches). Clark Kent!
|
|
|
|
|
|
|
|
|
|
|
|
|
|
|
|
|
|
|
|
|
|
|
| S |
C
A |
G |
S |
C
B |
G |
|
S |
C |
G |
|
energy
A | B |
|
hype
A | B |
|
pop
A | B |
|
mgr
A | B |
|
FIGHT
RATING
97% |
|
|
|
|
|
|
