|
|
PBP Commentary |
Coming up we have a welterweight MMA rules bout between Trey Tamura II (ranked 0 p4p, 0 weight class) and Lucian Bute (ranked 0 p4p, 0 weight class). I'm sure you'll be fascinated to know that I was talking to some pointless Z list celebrity before the fight and he thought that Lucian Bute was going to win. Let's see if he was right.
 |
|
 |
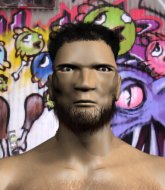
| 178 cm
18
178 lbs
0 - 1 - 0 |
|
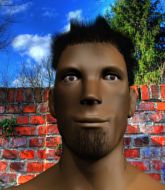
188 cm
18
168 lbs
1 - 4 - 0 |
BJJ White Belt
Improved boxing
KO power |
|
BJJ White Belt
Brawler
Granite chin |
|
| |
|
Ladies and gentlemen. This fight is 3 rounds, in the welterweight division.
Introducing the fighter to my left, fighting out of the red corner.
With a record of
0 - 1 - 0, fighting out of St Petersburg, Trey Tamura II!
And introducing the fighter to my right, fighting out of the blue corner.
With a record of
1 - 4 - 0, fighting out of St Petersburg, Lucian Bute!
The judges for this bout are Konstantin Menshow, Aleksei Zolotukhin and Igor Prikhodko.

The bell rings for round one and we are underway!

Tamura II shoots in from a long way out. He's driving through with the takedown attempt and he eventually gets it, landing in Bute's guard.
Bute managing to control the position.
Tamura II wants to control from the top but Bute keeps moving.
Tamura II pressing down on his opponent's thigh, looking to pass guard. Bute is keeping the position for now.
Bute is trying to control the position but Tamura II postures up.
Tamura II tries to stand but Bute is controlling from the bottom.
Bute keeping full guard, as Tamura II tries to pass.
Bute is working from a closed guard but he's struggling to control his opponent.

The referee has ruled that neither fighter is active enough on the ground and has stood them back up.
Tamura II pulls out of a head kick attempt.
Tamura II throws a body punch but Bute moves out of range.

That's one minute gone in the round.
Tamura II swats away the attempt to clinch by Bute.
Bute lands three nice shots there - that looked like it hurt!
Tamura II misses with a jab and misses with a cross straight after too.
Bute looks for a takedown here. Will he get it? Tamura II is fending him off so far but Bute persists. Nope, Tamura II circles away and we're back to standing.
Tamura II looks frustrated there after his takedown attempt is stuffed easily.
Tamura II changes levels and looks for a double leg takedown. Bute tries to avoid it but Tamura II manages to keep hold of a leg and drag Bute to the ground. Bute escapes though and pops straight back up to his feet.
Bute shoots in from a long way out. He's driving through with the takedown attempt and he eventually gets it, landing in Tamura II's guard.
Bute has decided he wants to stand but the closed guard of Tamura II is proving hard to escape from.
Bute looks gassed!
Tamura II is striking off his back. Bute thinks nothing of it though and passes easily into half guard.
Bute seems very keen to just sit and control from half guard but Tamura II does not like that idea so much and is remaining active off his back.
Well, if Bute is going to just lie there, perhaps we should talk about what we're having for dinner tonight� I'm having a ham and pineapple pizza� Yum. Can't wait.
Bute wants to free his trapped foot but Tamura II is holding on for dear life with his legs.
Tamura II regains full guard. Nicely done.

That's two minutes gone in the round.
Tamura II is looking to get back to his feet but can't, whilst Bute is controlling him.
Tamura II looking to sweep here. No luck so far.
Tamura II is trying to control the position from the bottom.
Tamura II wants to stand and escape but Bute is having none of it.
Tamura II has a closed guard, preventing anything of note from happening. Perhaps he's looking to stall.
Bute tries to free his leg and advance position but Tamura II is retaining full guard.
Tamura II wants to sweep here but Bute controlling him for the moment.
Bute trying to land body shots but he keeps hitting the mat.
The referee decides to stand the fighters back up.
Bute fails with a rather predictable takedown attempt.
The fighters are starting to perspire pretty heavily.
Bute fails in his attempt to clinch.
Bute shoots in and drives through. Tamura II sprawls well.
Trey Tamura II has stuffed three takedown attempts in the round now. That's going to take a lot out of Lucian Bute.

That's three minutes gone in the round.
Bute shoots in for a takedown. "Ole!" shouts Tamura II as he jumps to the side.
Bute swats away the attempt to clinch by Tamura II.
Bute fails with the takedown.
Trey Tamura II seems to be the more aggressive standup fighter in this bout.
Bute throws a nice looking combination but Tamura II bobs and weaves to avoid any damage.
Tamura II looks to score with a jab to the body but Bute is just out of range.
Bute throws a quick head kick that skims the top of Tamura II's head.
Tamura II is looking to score with low kicks.
Tamura II thows a left - swing and a miss!
Tamura II takes a swing at Bute's ribcage but misses.
Tamura II just misses with a punch to the body.
Tamura II shoots in for a takedown - he's clinched up with Bute but Bute pushes him off and we're back to square one.
Tamura II wants to clinch.
Bute fails with the takedown.
Tamura II throws an overhand right that lands on Bute's shoulder, as Bute tries to avoid the shot.

That's four minutes gone in the round.
Tamura II moves in looking to clinch but Bute pushes him off.
Tamura II tries to close the distance and clinch up but Bute swats him away and circles back towards the center.
Bute throws a looping left and ducks down for a takedown. He's got his arms around Tamura II's waist but Tamura II gets an underhook and avoids the takedown by throwing Bute off to one side.
Bute moves away from the strike by Tamura II.
Tamura II thows a body shot but no joy.
Tamura II lands a with a good body shot.
Tamura II fails to land with a series of punches.
Tamura II tries to close the distance and clinch up but Bute swats him away and circles back towards the center.
Bute fails with a takedown attempt.
Tamura II doesn't manage to clinch there - Bute circles away.
Bute misses with a takedown attempt - Tamura II sprawls well and throws a nice strike on the way out which just misses.

Tamura II clinches with his opponent.
Bute gets underhooks to prevent Tamura II's takedown attempt.
Tamura II throws a knee to the head but misses.
Tamura II swings away with an uppercut that misses.

Bute escapes the clinch and we're back to striking.
Bute tries to clinch but Tamura II moves out of range.
Tamura II takes a kick to the side of the head.
And that�s the end of the round � the fighters go back to their corners.
A close round but Lucian Bute will probably get the nod.
That's the end of the round. The referee orders the cornermen out of the cage so we can get back down to business.

Bute shoots in but doesn't get the takedown
and Tamura II counters into the clinch. Nicely done.

It looks like Trey Tamura II has been cut.
Tamura II misses with an elbow over the top.
Bute takes an elbow to the temple.
Bute missing with knees to the body.
Tamura II lands a hook that snaps the head of Bute backwards.
A short uppercut from Tamura II.
Tamura II misses with an elbow over the top.
Tamura II is trying to trip Bute. He has hold of a leg but Bute is hopping around, keeping his balance for the moment. Tamura II persists though and gets the takedown into guard.
Tamura II trying to control but Bute is working from the bottom.
Bute looking for a sweep. Not yet Bute, not yet.
Tamura II thows a big elbow that misses.

Tamura II decides he's had enough of playing guard and decides to stand. Come on Bute, up you get!
Tamura II fails in his attempt to clinch.
Tamura II tries to clinch up
and Bute counters with a leg kick.
Both fighters are absolutely exhausted here.
Bute lands a with a good body shot.
A shot to the body from Tamura II misses
and Bute counters with a takedown into side control.
The fans in attendance giving it up for the two fighters, who have really let it all hang out in the last minute or so!
Bute prevents Tamura II from escaping the position.
Bute works a knee to the body and follows up with a nice elbow to the head.
That's one minute gone in the round.
Bute trying to control the position but Tamura II is working away.
Tamura II throws his opponent off and manages to get back to his feet! Nicely done!
Bute swats away the attempt to clinch by Tamura II.
Nice sprawl there from Tamura II as Bute shoots in.
Bute is pinned up against the cage taking some big shots here. The referee is looking closely deciding whether he should stop the fight.
Tamura II tries to close the distance and clinch up against the cage but Bute paws at him with a jab and circles away.
Tamura II thows a left - swing and a miss!
Bute misses with a takedown attempt. He shot from a bit too far out.
Trey Tamura II has stuffed three takedown attempts in the round now. That's going to take a lot out of Lucian Bute.
Tamura II tries to shoot in for a takedown. He's got hold of a leg but Bute swivels and escapes.
Bute throws a looping left and ducks down for a takedown. He's got his arms around Tamura II's waist but Tamura II gets an underhook and avoids the takedown by throwing Bute off to one side.
Bute avoids the body shot from Tamura II.
Trey Tamura II is looking to throw some combinations by the looks of things.
Bute tries to close the distance and clinch but Tamura II swats him to one side with an open hand palm strike and circles away.
Bute plants his feet and lands a nice head kick!
Bute fails with an attempt to clinch.
Jab, cross, leg kick. Nice combination by Bute!
That's two minutes gone in the round.
Tamura II misses with a body shot.
Bute shoots in for a takedown but Tamura II shows good takedown defense.
Nice takedown defense from Tamura II. No joy for Bute on that attempt.
Nice body punch from Tamura II.
Bute looks frustrated there after his takedown attempt is stuffed easily.
Tamura II tries to clinch but is not successful on this occasion.
Tamura II tries to clinch but is not successful on this occasion.
Tamura II misses with a body shot.
Bute lands with a kick to the ribs.
Bute fails with an attempt to clinch.
Tamura II shoots in for a double leg but Bute sprawls well. That's going to sap some energy.
Tamura II tries to clinch up but Bute circles away and keeps his distance.
Bute throws a looping left and ducks down for a takedown. He's got his arms around Tamura II's waist but Tamura II gets an underhook and avoids the takedown by throwing Bute off to one side.
Tamura II throws a head kick that misses
and Bute counters with an outside leg kick.
Tamura II misses with a jab to the body
and Bute counters with a head kick. That will keep Tamura II thinking before he tries any more sloppy attacks!
Fantastic stuff here - a very entertaining period of action, which has drawn cheers from the crowd.
Tamura II gets in close and instigates a clinch.
Bute tries to pull guard but Tamura II holds him up against the cage and eventually Bute drops back down to his feet.
Tamura II throws a nice elbow but it doesn't land.
A hook to the body from Tamura II.
A shot in the inside from Tamura II.
That's three minutes gone in the round.
Bute tries to throw a body punch but Tamura II avoids it by throwing Bute back against the cage.
Tamura II lands with a light punch inside.
Tamura II lands a right hand that snaps the head of Bute backwards.
Bute is trying to slow down the pace in the clinch, to catch his breath.
Tamura II missing with knees to the body.
Tamura II lands a body punch - he's looking to wear down Bute.
Tamura II throws a blind hook that connects with the side of Butes head.
A shot in the inside from Tamura II.
A shot in the inside from Tamura II.
Tamura II scores with an uppercut up the middle.
Tamura II misses with an elbow over the top.
With the fighters up against the cage, Tamura II throws an elbow but misses.
Bute gets double underhooks to prevent a takedown attempt from Tamura II.
Tamura II lands a nice elbow.
Tamura II leaning his opponent against the cage.
Bute changes levels and goes for a takedown here. Tamura II fights it off and pushes away nicely.
Tamura II shoots in but Bute avoids the takedown attempt easily.
Tamura II is looking to wear down Bute with body shots, infact he's throwing more body shots than head shots at the moment.
A really sloppy takedown attempt there from Bute.
That's four minutes gone in the round.
A lull in the action here being met with boos from the crowd.
Bute misses with a takedown attempt. He shot from a bit too far out.
Tamura II misses with a hook
and Bute counters with a left to the body.
Tamura II instigates a clinch.
Tamura II with the Thai clinch. He's looking to land a big knee but he's not managed it this time.
Bute blocking some punches.
Bute breaks the clinch.
Bute wants to clinch
and Tamura II counters by moving into the clinch. Good anticipation by Tamura II.
Bute has had enough of the clinch but Tamura II keeps him there for the moment.
Tamura II lands with a short punch from the clinch.
Bute avoids the elbow strike from Tamura II, against the cage.
Tamura II lands a body shot.
Tamura II is really struggling to find his range with his punches. Tamura II's reach advantage is clearly causing him problems.
Tamura II tries a knee to the head but Bute blocks it.
Bute fails to pull the fight into his guard.
Tamura II tries to land a knee to the head but misses.
Tamura II tries to land a knee to the head but misses.
Bute wants to push off and get back to the center of the mat but Tamura II has him pressed against the cage.
With the two fighters working up against the cage, Tamura II just misses with a elbow thrown towards Bute's brow.
As the round comes to an end the crowd are showing their appreciation for a great round of action.
Tamura II tries a knee to the head but Bute blocks it.
Bute blocks an elbow strike.
Tamura II creates a bit of distance and throws an elbow that only just misses.
Tamura II softening up his opponent with strikes, against the cage.
Still in the clinch, Tamura II scores with a nice short uppercut.
Bute dodges an elbow strike from Tamura II.
Bute blocks the elbow strike.
And that�s the end of the round � the fighters go back to their corners.
A close second round but Lucian Bute will probably get the nod - 10:9.
The cut man is working on Trey Tamura II's cut.
That's time! Back to the action! Let's hear some noise people - this is the final round!

Tamura II scores a takedown into full mount!
Tamura II avoids the attempt from Bute to control.
Tamura II unloading with bombs!
Tamura II knows he needs to get back to his feet asap. He's simply no match for Bute on the ground.
Tamura II misses with a series of strikes from mount. He'll no doubt be working on his ground and pound when he gets back to the gym.
Bute blocking the ground and pound.
Bute avoids a series of strikes thrown by Tamura II.
Tamura II can't quite control the action as he would like just now, as Bute is looking to escape.
Poor strikes thrown by Tamura II there. More accuracy and less frantic strikes would help!
Tamura II throwing sloppy strikes here. Perhaps if he tightened up his striking from such a dominant position, he'd be able to finish easier.
Bute is in all sorts of trouble here.
Tamura II looking to control but Bute is working nicely, looking to advance position himself.
Tamura II looking to finish with strikes here!
Both fighters are breathing heavily.
Bute is working to get back to half guard.
That's one minute gone in the round.
Tamura II landing shots from mount.
Tamura II trying to control but Bute is having none of it.
Bute is in a horrible position here, under a barrage of strikes, he's managing to avoid any damage.
Tamura II throws an elbow from mount that misses. Lucky escape for Bute because Tamura II loaded up on that one.
Tamura II looking to ground and pound but Bute is blocking nicely.
Tamura II trying to control but he's not successful this time.
Bute wants to hold on but Tamura II pushes him away.
Tamura II unloads with some shots from mount but Bute bucks and avoids them well.
Tamura II sends his fist crashing into the mat - the crowd let out a collective ooooooh. Let's hope he's not broken it!
Tamura II lands a couple of nice shots there from mount.
Poor strikes thrown by Tamura II there. More accuracy and less frantic strikes would help!
Tamura II takes a little breather and maintains the position. The referee will be looking for him to stay active from such a dominant position though.
Bute bucks up and manages to get a nice reversal! He's in guard on the top - nicely done!
That's two minutes gone in the round.
The crowd are getting on the fighters' backs, as the pace has dropped off in the last minute or so.
Tamura II keeping moving, preventing Bute from controlling successfully.
Bute pushing down on Tamura II's thigh, trying to pass to half guard. He's managed it... Nice work.
Tamura II pushes Bute off looking to stand but Bute dives back in and keeps control.
Tamura II has no desire to be mounted, so is trying to control. Bute is working away from the top position though.
Bute escapes and gets back to his feet.
Tamura II shoots in for a takedown. "Ole!" shouts Bute as he jumps to the side.
Tamura II doesn't manage to clinch there - Bute circles away.
Bute uses decent footwork to sidestep a right hand from Tamura II.
Lucian Bute seems to be getting the better of the standup.
Tamura II has closed the distance and engaged Bute in a clinch.
Trey Tamura II has stepped it up - he knows he needs a finish here!
That's three minutes gone in the round.
Bute wants to strike at distance but he can't break free of the clinch.
Bute avoids the elbow strike from Tamura II, against the cage.
Tamura II works for the underhooks and manages to get a trip takedown into guard.
Trey Tamura II overall seems to be getting the better of the ground position in the fight so far.
Tamura II working some ground and pound from guard but it's not doing any damage.
Bute trying to strike from the bottom but really, it's not the best position to be doing that from!
Bute working the defensive guard well to avoid strikes from Tamura II.
Tamura II looking to sit in guard and control but Bute gets the butterfly guard and sweeps. He's now in the guard on the top.
Bute stopping the sweep attempt from Tamura II.
Tamura II keeping moving, preventing Bute from controlling successfully.
Tamura II is trying to stand up but he's not managed so far.
Tamura II is working an open guard here, looking to improve his position. No doubt that will leave him open to counters but at least he's being more offensive.
The referee decides to stand the fighters back up.
Nice takedown defense from Tamura II. No joy for Bute on that attempt.
That's four minutes gone in the round.
Bute fails with a takedown attempt.
Tamura II throws a predictable looking body shot
and Bute counters with a straight punch to the midsection.
Tamura II missing with a left hand there. Bute was out of range so wasted energy throwing that one.
Bute uses some good footwork to avoid the body shot by Tamura II.
Bute doesn't manage to clinch there - Tamura II circles away.
Tamura II darts in trying to clinch
and Bute counters with a solid body kick.
Tamura II stuffs the takedown.
Trey Tamura II has stuffed three takedown attempts in the round now. That's going to take a lot out of Lucian Bute.
Tamura II fails to land the takedown.
Bute keeping a good distance there, avoiding the body shot.
Tamura II misses with a body punch
and Bute counters with a good right hand that lands right on the jaw.
Tamura II scores with a sloppy punch to the body. Not much technique there but it did the business.
Tamura II fails to land with a series of punches.
Tamura II misses with a kick to the body
and Bute counters with a three punch combination, finished off with a leg kick. Nice work.
Tamura II misses with a body shot.
Tamura II misses the body punch
and Bute counters with an outside leg kick.
Bute fails to land the takedown.
Tamura II swings and misses with a hook to the body.
And that's the end of the fight!
That was a close round. You could make an argument for either fighter but I would give it to Trey Tamura II.
I think Bute has won this one but let's see whether the judges agree with me. Over to the ring announcer for the scorecards.
Ladies and gentlemen, after 3 rounds of action, we go to the scorecards for a decision.
Judge Konstantin Menshow scores the fight 28:29
Judge Aleksei Zolotukhin scores the fight 28:29
Judge Igor Prikhodko scores the fight 28:29
In favor of your winner, by unanimous decision... Lucian Bute!
|
|
|
|
|
|
|
|
|
|
|
|
|
|
|
|
|
|
|
|
|
|
|
| S |
C
A |
G |
S |
C
B |
G |
|
S |
C |
G |
|
energy
A | B |
|
hype
A | B |
|
pop
A | B |
|
mgr
A | B |
|
FIGHT
RATING
69% |
|
|
|
|
|
|
