|
|
PBP Commentary |
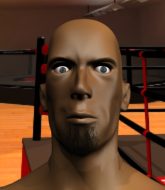
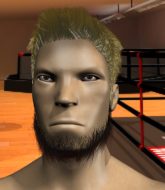
Coming up we have a middleweight MMA rules bout between John Porter (ranked 0 p4p, 0 weight class) and Ian Blaise (ranked 0 p4p, 0 weight class). John Porter looks tired to me. Hopefully he has got enough gas left in the tank to put in a good performance.
 |
|
 |
| 171 cm
18
180 lbs
1 - 1 - 0 |
|
185 cm
22
195 lbs
1 - 0 - 0 |
BJJ Purple Belt
Brawler
Good chin |
|
BJJ White Belt
Solid Muay Thai
Fast |
|
| |
|
Ladies and gentlemen. This fight is 3 rounds, in the middleweight division.
Introducing the fighter to my left, fighting out of the red corner.
With a record of
1 - 1 - 0, fighting out of Las Vegas, John Porter!
And introducing the fighter to my right, fighting out of the blue corner.
With a record of
1 - 0 - 0, fighting out of Las Vegas, Ian Blaise!
The judges for this bout are Cecil Peabody, Robert Twigg and Frank Dennis.

The bell rings for round one and we are underway!
Porter has a nice red mark on his side after a thudding body kick by Blaise.
Porter looks exhausted already! Oh dear, he should have come in in better shape than this!
Blaise fails with an attempt to clinch.
Blaise fails with an attempt to clinch.

Porter shoots in for a takedown and gets it. Oh and he's advanced to full mount straight away.
Blaise tries to hold on but Porter postures up.
Blaise is in a horrible position here, under a barrage of strikes, he's managing to avoid any damage.
Blaise wants to use the cage to get back to his feet here.
Porter has been looking to land a fair amount of strikes on the ground. He might be looking to soften his opponent up in order to work for a submission.
Porter wants to control the pace but Blaise is squirming around nicely.
Blaise is looking to improve his position but Porter isn't that keen on the idea.
The fighters are pressed up against the cage, both looking to find a bit of space to work.
The ref warns both fighters not to hold the cage as they work up against the meshing.
Porter won't let Blaise get back to his feet... He wants to keep the fight where it is for now.

That's one minute gone in the round.
Blaise tries to reverse the position but Porter maintains control.
Porter trying to control but he's not successful this time.
Blaise tries to buck Porter off but he can't manage it.
Blaise wants to control but Porter is having none of it.
Blaise is trying to stand.
Porter avoids the attempt from Blaise to control.
Porter controlling the pace for now.
Blaise is looking to get to half guard.

That's two minutes gone in the round.
The crowd are getting on the fighters' backs, as the pace has dropped off in the last minute or so.
Blaise's corner are shouting for him to stand up but that's bad cornering - how is he meant to stand up when he's mounted? He should be looking to improve his position on the ground before trying to stand back up.
Porter could do with loosing a few pounds - he looks very soft around the mid section, to put it politely.
Blaise working to try and regain half guard.
Porter scoring with some good ground and pound from mount here. Will he manage to finish Blaise?
Blaise is working to get back to half guard.
Porter lands a couple of nice shots there from mount.
Porter trying to control but he's not successful this time.

That's three minutes gone in the round.

Porter has control of Blaise's right arm, working for a kimura. It's a bit of a token attempt though and Blaise regains control of the situation pretty easily.
Blaise is working to get back to half guard.
Blaise really doesn't want to stay on the ground with Porter. If he can't get it back to his feet, it's only a matter of time before he'll be tapping out.
Porter controlling the position easily from mount.
Blaise is trying to get to the cage to help him get back to his feet.
The fighters are starting to get a bit slippery now, which will make submissions a bit more difficult.
Porter controlling his opponent.

That's four minutes gone in the round.
A few boos can be heard. I'm sure they will multiply if the fighters don't pick up the pace.
Blaise is not a happy chappy� he wants out of there.
Blaise is writhing around trying to get back to his feet.
Blaise is working to get back to half guard.
Blaise is persisting with the attempt to improve his position.
You get the feeling that Blaise really doesn't like being in this position too much.
We get told so often about how wrestlers don't like to be on their backs. Let's see if Porter can do anything to dispel that myth.
Porter can't quite control the action as he would like just now, as Blaise is looking to escape.
Blaise can't escape the position.
And that�s the end of the round � the fighters go back to their corners.
That was a close round but I would say that John Porter will probably get the nod.
That's the end of the round. The referee orders the cornermen out of the cage so we can get back down to business.

Blaise lands a kick to the ribs of his opponent. Nice work there - in and out in a flash.
Blaise scores with a nice body kick.
Blaise shoots in for a takedown! He's got it and he's managed to land in full mount! That's better than Blaise was expecting from the takedown attempt, I'm sure!
Blaise content just to control the position here.
Porter is writhing around trying to get back to his feet.
Porter might be looking to lock onto one of his opponent's long limbs for a submission, whilst we're on the ground.
Blaise sitting in mount, just looking to control for the moment.
Blaise avoids the attempt from Porter to control.
Both fighters are absolutely exhausted here.
That's one minute gone in the round.
Blaise sitting in mount, just looking to control for the moment.
Blaise wants to control the pace but Porter is squirming around nicely.
Porter is writhing around trying to get back to his feet.
Blaise looking to control and managing it successfully.
That's two minutes gone in the round.
Well. There's a bit of a lull in the action here and the crowd are starting to get restless.

Despite being in the dominant position, Ian Blaise just isn't active enough and the referee decides to stand the fighters back up.
Blaise looks to land a combination but Porter avoids it well.
Well, he's not going to score with shots like that. A lazy body kick attempt from Blaise.
Porter closes the distance and clinches up with Blaise, looking for a takedown. Porter pushes Blaise against the cage but Blaise circles to the side and manages to break the clinch.
Porter with a lazy takedown attempt
and Blaise counters with an outside leg kick.
Blaise scores with a kick to the body.
The fight stays on the outside here - Blaise looks like he's thinking about clinching though.
Porter looks for a takedown but Blaise sprawls well.
That's three failed takedown attempts in the round for John Porter. That's going to take a lot out of him.
Blaise throws a shot to the body.
Porter drives through with a really nice takedown into side control.
Porter tries to score with some ground and pound. Blaise controls his posture well this time though and the shots don't do any damage.
Porter working the ground and pound.
That's three minutes gone in the round.
Porter wants to control but Blaise is keeping him busy.
Porter tries for an arm triangle. That looks pretty tight to me. Is this one over!?! Possibly, maybe, no Porter has let go of the choke. Obviously it wasn't as tight as we thought!
Porter throws a knee to the body but it doesn't do much damage.
Blaise is trying to control Porter's posture but Porter avoids it.

Porter decides to stand back up. Porter steps back and let's Blaise get back to his feet.
Blaise throws the kick towards the body but Porter avoids it.
Blaise throws the kick towards the body but Porter avoids it.
Porter moves out of range of the body kick from Blaise.
Blaise scores with a kick to the midsection.
Blaise lands a nice leg kick that just misses Porter's sensitive parts.
That's four minutes gone in the round.
Nice body kick from Blaise.
John Porter is looking to throw some combinations by the looks of things.Blaise lands a front kick.
Blaise scoring well with a low kick there.

Blaise gets a clinch.
Blaise prevents Porter from breaking the clinch.
Porter is looking for a takedown up against the cage. Blaise gets underhooks though and prevents the takedown attempt.
Porter wants to break free but Blaise has control.

Blaise breaks the clinch and we're back to striking at distance.
Blaise chopping away at his opponent's legs.
Blaise moves into the clinch successfully.
Blaise breaks from the clinch.
Blaise fails with an attempt to clinch.
Blaise moves into range and lands a nice body kick.
Blaise takes the fight into the clinch.
Blaise breaks the clinch and we return to the middle of the mat.
The crowd are going absolutely nuts as the round comes to an end - what a fantastic round of action!
Blaise thuds a mid kick into his opponent's body. That will wear on Porter if he has to take too many more of those.
Blaise shoots in for a takedown and gets it. Oh and he's advanced to full mount straight away.
Blaise sitting in mount, just looking to control for the moment.
And that�s the end of the round � the fighters go back to their corners.
Ian Blaise showed his class in that round. I'd imagine he'll take it on all the scorecards.
That's the end of the interval. I'm sure that seemed a lot quicker than a minute for our two fighters! Back to the action. This is the final round!

Blaise has closed the distance and engaged Porter in a clinch.
Blaise escapes the clinch and we're back to striking.
Porter is looking to clinch.
Blaise moves into the clinch.
Blaise manages to break the clinch.
Blaise tries to clinch but is not successful on this occasion.
Porter throws a head kick that misses.
Porter on the wrong end of a kick to the body.
Blaise instigates a clinch.
Blaise breaks from the clinch.
Blaise moves into range and clinches up with Porter.
Blaise scores a nice knee to the body.
Porter tries to pull guard but Blaise won't allow it.
Blaise connects with a knee to the head.
Both fighters are breathing heavily.
Blaise breaks the clinch.
A left and a right from Blaise both land. Nice combination.
Porter shoots in for a takedown. "I don't think so" says Blaise as he avoids it easily.
Blaise scores with a kick to the midsection.
Porter has a takedown stuffed.
That's three failed takedown attempts in the round for John Porter. That's going to take a lot out of him.
Blaise misses with a body kick.
That's one minute gone in the round.
Blaise throws a wild body kick that Porter sees coming a mile off.
Blaise pushes Porter away with a front kick.
Blaise lands with a nice body kick.
Ian Blaise seems to be getting the better of the standup.
Blaise throws an overhand right from the outside, which connects and sends Porter stumbling backwards into the cage! Porter bounces back off the cage towards Blaise, who cracks him with a two punch combination that drops him to his knees! Blaise lands two more shots before the referee has chance to intervene - what a finish! Blaise celebrates with his corner as the crowd cheer loudly.
Ladies and gentlemen, after 1:18 of round 3, we have a winner by way of TKO (Punches). Ian Blaise!
|
|
|
|
|
|
|
|
|
|
|
|
|
|
|
|
|
|
|
|
|
|
|
| S |
C
A |
G |
S |
C
B |
G |
|
S |
C |
G |
|
energy
A | B |
|
hype
A | B |
|
pop
A | B |
|
mgr
A | B |
|
FIGHT
RATING
100% |
|
|
|
|
|
|

